Make Crochet Mini Lama free Pattern
Based on the transcript, here’s a unique, SEO-optimized blog post for a beginner-friendly Mini Llama Amigurumi crochet pattern:
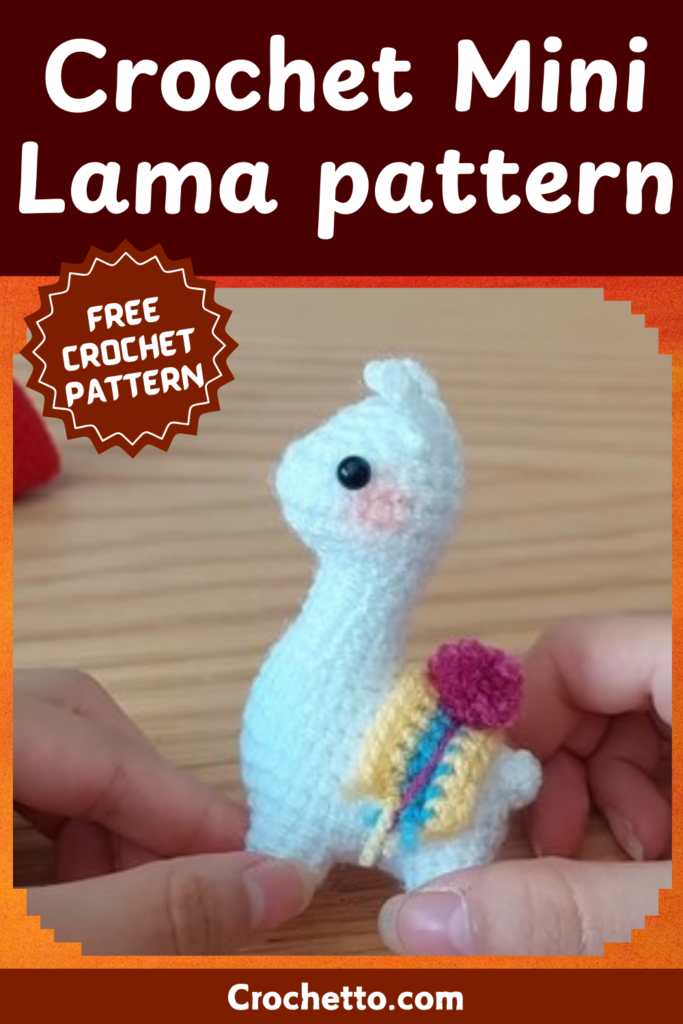
Mini Llama Amigurumi Crochet Pattern – Step-by-Step Guide for Beginners
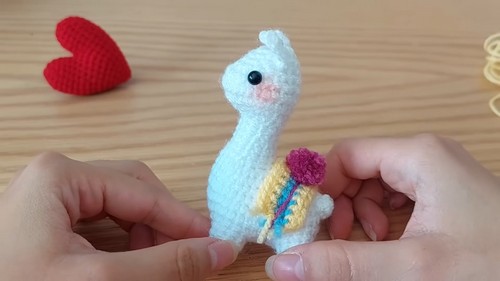
Looking for an adorable and beginner-friendly crochet projewct? This Mini Llama Amigurumi is just what you need! Standing at a cute 8 cm, this tiny llama can be the perfect addition to your keychain or a lovely handmade gift. Follow our step-by-step guide to crochet this charming piece with ease.
What You’ll Need:
Yarn: White or any color of your choice, plus three extra colors for the decorative blanket.
Hook: 3 mm crochet hook.
Eyes: Two 6-mm safety eyes.
Stuffing: For the body and legs.
Blush or pink eyeshadow: For the cheeks.
Yarn needle: For assembly.
Step 1: Crochet the Llama’s Legs
- Start with a Magic Ring: Create a magic ring with three stitches.
- Increase Round: Make an increase in each stitch to reach 6 stitches.
- Shape the Leg: Crochet two stitches, then an increase (repeat twice) to reach 8 stitches.
- Finalize the Leg: Add a round of 8 single crochets. Cut and secure the yarn.
- Repeat: Create four identical legs.
Step 2: Create the Body Base
- Form the Base: Make 9 chains plus one extra for turning.
- Crochet Rows: Work 9 single crochets for three rows.
- Add Corners: Chain one, then crochet along one short side (4 stitches).
- Attach the Legs: Align the legs with the base and crochet 3 single stitches to secure each leg.
Step 3: Build the Body
- Crochet Around: Work evenly around the base and legs, reaching 26 stitches.
- Add Increases: Add 5 increases to reach 40 stitches, then crochet 3 rounds of 40 single crochets.
- Shape the Llama: Gradually decrease stitches to shape the body (down to 16 stitches).
- Stuff the Body: Fill the legs and body with stuffing as you decrease.
Step 4: Crochet the Head
- Start Small: Begin with 12 single crochets and gradually increase to 28 stitches.
- Shape the Head: Work evenly for 28 stitches, then decrease rounds to form a rounded head.
- Stuff and Close: Add stuffing and close the head by pulling the stitches tight with a yarn needle.
Step 5: Make the Ears and Tail
Ears: Chain 4, add an extra chain for turning, and crochet 3 single stitches. Create two identical ears.
Tail: Make a magic ring with 3 stitches, increase to 6 stitches, and finish with one round of single crochets.
Step 6: Decorate the Back
- Create the Blanket: Chain 14 plus one extra for turning. Work 14 single crochets for three rows, alternating colors every two rows.
- Add Tassels: Attach small yarn pieces to the blanket’s edges for decoration.
Step 7: Assemble Your Llama
- Attach the Tail: Sew it to the back of the llama’s body.
- Place the Ears: Position the ears between rows 2 and 3 of the head.
- Add Eyes: Secure the safety eyes between rows 5 and 6 of the head.
- Add Blush: Lightly apply blush or pink eyeshadow to the cheeks for a cute touch.
- Secure the Blanket: Use pins to align the blanket and tie a pom-pom in the center.
Helpful Tips for Beginners
Use Stitch Markers: These will help keep track of your rounds.
Practice the Magic Ring: It’s a foundational skill for most amigurumi projects.
Experiment with Colors: Customize your llama’s blanket for a personal touch!
Final Thoughts
Congratulations! You’ve completed your Mini Llama Amigurumi. This project is perfect for beginners, offering a delightful way to practice basic crochet techniques while crafting something adorable.
Did you enjoy this tutorial? Let us know your thoughts in the comments, and don’t forget to share your creations with us on social media!
For more crochet patterns and inspiration, visit our [Etsy shop] and follow us on Instagram, TikTok, and Facebook. Happy crocheting!
Keywords:
Mini Llama crochet pattern
Beginner-friendly amigurumi
Cute llama crochet tutorial
Let me know if you’d like additional refinements!

