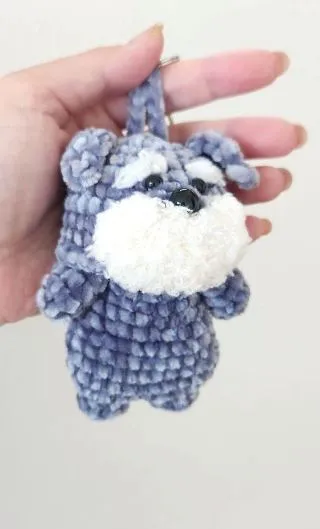
Amigurumi Schnauzer Keychain – Beginner-Friendly Pattern
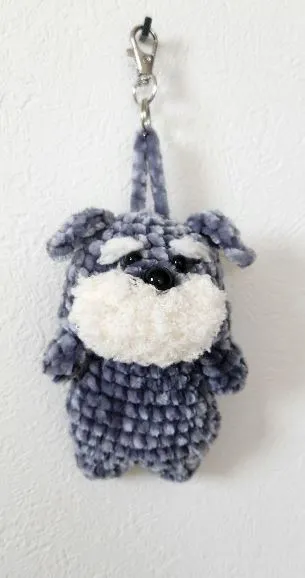
If you’re a crochet lover looking for your next irresistible project, this adorable amigurumi dog keychain is calling your name! With its squishy, plush texture and charming bulldog-inspired face, it’s the perfect blend of cuteness and creativity. This little buddy is made using soft, chunky velvet yarn that gives it an ultra-cozy look and feel — ideal for gifting, decorating your bag, or simply making you smile every time you see it. What sets this amigurumi apart is its delightful expression and well-defined features. From the fluffy white muzzle to the expressive embroidered eyebrows and tiny perky ears, every detail brings this pup to life. The glossy safety eyes and tiny black nose add just the right touch of realism and personality, making it a heart-stealing creation. Best of all? It’s beginner-friendly! The simple shapes and minimal sewing mean you can enjoy a stress-free crochet session while crafting something truly special. This project is a great way to use up leftover yarn and experiment with texture, especially if you’ve been curious about working with velvet yarns. You’ll also pick up handy skills like shaping, working in the round, and attaching features for expressive amigurumi. Whether you’re making it for yourself, as a gift, or even to sell, this little crochet pup is a guaranteed crowd-pleaser. It’s a quick, satisfying project that will leave you feeling accomplished and inspired. Add a keyring or small clip, and you’ve got an adorable, handmade accessory that everyone will ask about. So grab your hook, pick your favorite yarn color, and let’s bring this cuddly companion to life. Trust us — once you make one, you’ll want to crochet an entire litter!
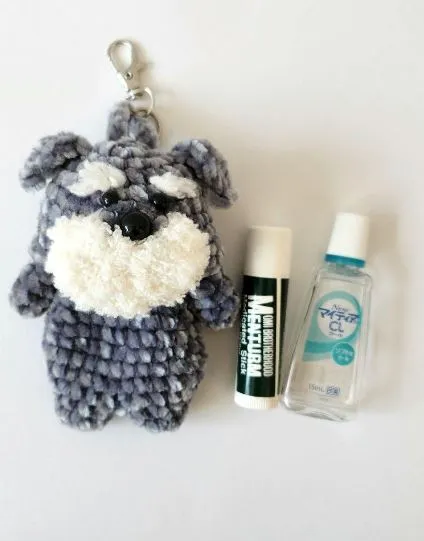
Finished Size: About 3-4 inches tall (without strap), depending on your yarn and hook size.
Materials You’ll Need:
- Grey Yarn: 1 ball of Bulky weight (Category 5) Chenille or Velvet yarn (like Bernat Velvet, Premier Parfait Chunky). This is for the head, body, ears, arms, legs, and strap.
- White/Cream Yarn: Small amount of Bulky or Super Bulky weight (Category 5 or 6) Fuzzy, Boucle, Eyelash, or Faux Fur yarn. This is for the muzzle and eyebrows.
- Crochet Hook: Size 4.0mm or 4.5mm (US size G/6 or 7). Check your yarn label for recommendations, but slightly smaller than suggested can make tighter stitches so stuffing doesn’t show.
- Stuffing: Polyester Fiberfill (like Poly-Fil).
- Safety Eyes: 2 black safety eyes (about 6mm-8mm size). Alternatively: Black embroidery thread/yarn.
- Safety Nose: 1 black safety nose (triangle or oval shape, about 8mm-10mm size). Alternatively: Black embroidery thread/yarn.
- Yarn Needle: A blunt needle with a large eye for sewing pieces together.
- Stitch Marker: To keep track of where your rounds start (a small safety pin or different colored piece of yarn works too!).
- Scissors.
- Keychain: 1 split ring and clasp set.
Abbreviations (Like Secret Codes!):
- st(s): stitch(es) – Every time you make a loop with your hook.
- ch: chain – Make a starting loop, then pull yarn through the loop.
- sl st: slip stitch – Put hook in stitch, pull yarn through stitch AND the loop on your hook (used to join).
- sc: single crochet – Put hook in stitch, pull yarn through (2 loops on hook), pull yarn through BOTH loops. This is the main stitch we use!
- inc: increase – Make 2 sc stitches in the SAME stitch (makes the piece wider).
- dec: decrease (invisible decrease recommended) – Put hook in the FRONT LOOP ONLY of the next stitch, then put hook in the FRONT LOOP ONLY of the following stitch (3 loops on hook). Pull yarn through the first 2 loops, then pull yarn through the last 2 loops (makes the piece smaller).
- MR: Magic Ring – A special way to start crocheting in a circle so there’s no hole in the middle. Ask a grown-up to help you look up a video for “magic ring crochet” if you don’t know how!
- Rnd(s): Round(s) – Going all the way around your circle.
- […] x …: Repeat the instructions inside the brackets the number of times shown.
- (…): The number in parentheses at the end of a round tells you how many stitches you should have in that round. Count them to make sure!
Let’s Start Crocheting!
(Work in continuous rounds. Do not join rounds with a sl st unless told to. Use your stitch marker in the first stitch of each round!)
Head (Use Grey Yarn)
- Rnd 1: Start with 6 sc in a MR (6 sts)
- Rnd 2: Inc in each st around (12 sts)
- Rnd 3: [Sc in next st, inc in next st] x 6 (18 sts)
- Rnd 4: [Sc in next 2 sts, inc in next st] x 6 (24 sts)
- Rnd 5: [Sc in next 3 sts, inc in next st] x 6 (30 sts)
- Rnds 6-10: Sc in each st around (30 sts) – Make 5 rounds plain
- Rnd 11: [Sc in next 3 sts, dec] x 6 (24 sts)
- Rnd 12: [Sc in next 2 sts, dec] x 6 (18 sts)
- Pause here. If using safety eyes/nose, attach them now. Place eyes between Rnds 8 and 9, about 5-6 stitches apart. Place the nose centered below the eyes, maybe around Rnd 10.
- Start stuffing the head firmly. Keep stuffing as you go.
- Rnd 13: [Sc in next st, dec] x 6 (12 sts)
- Rnd 14: Dec in each st around (6 sts)
- Finish stuffing.
- Cut yarn, leaving a long tail. Use yarn needle to weave the tail through the front loops of the final 6 stitches. Pull tight to close the hole. Weave in the end.