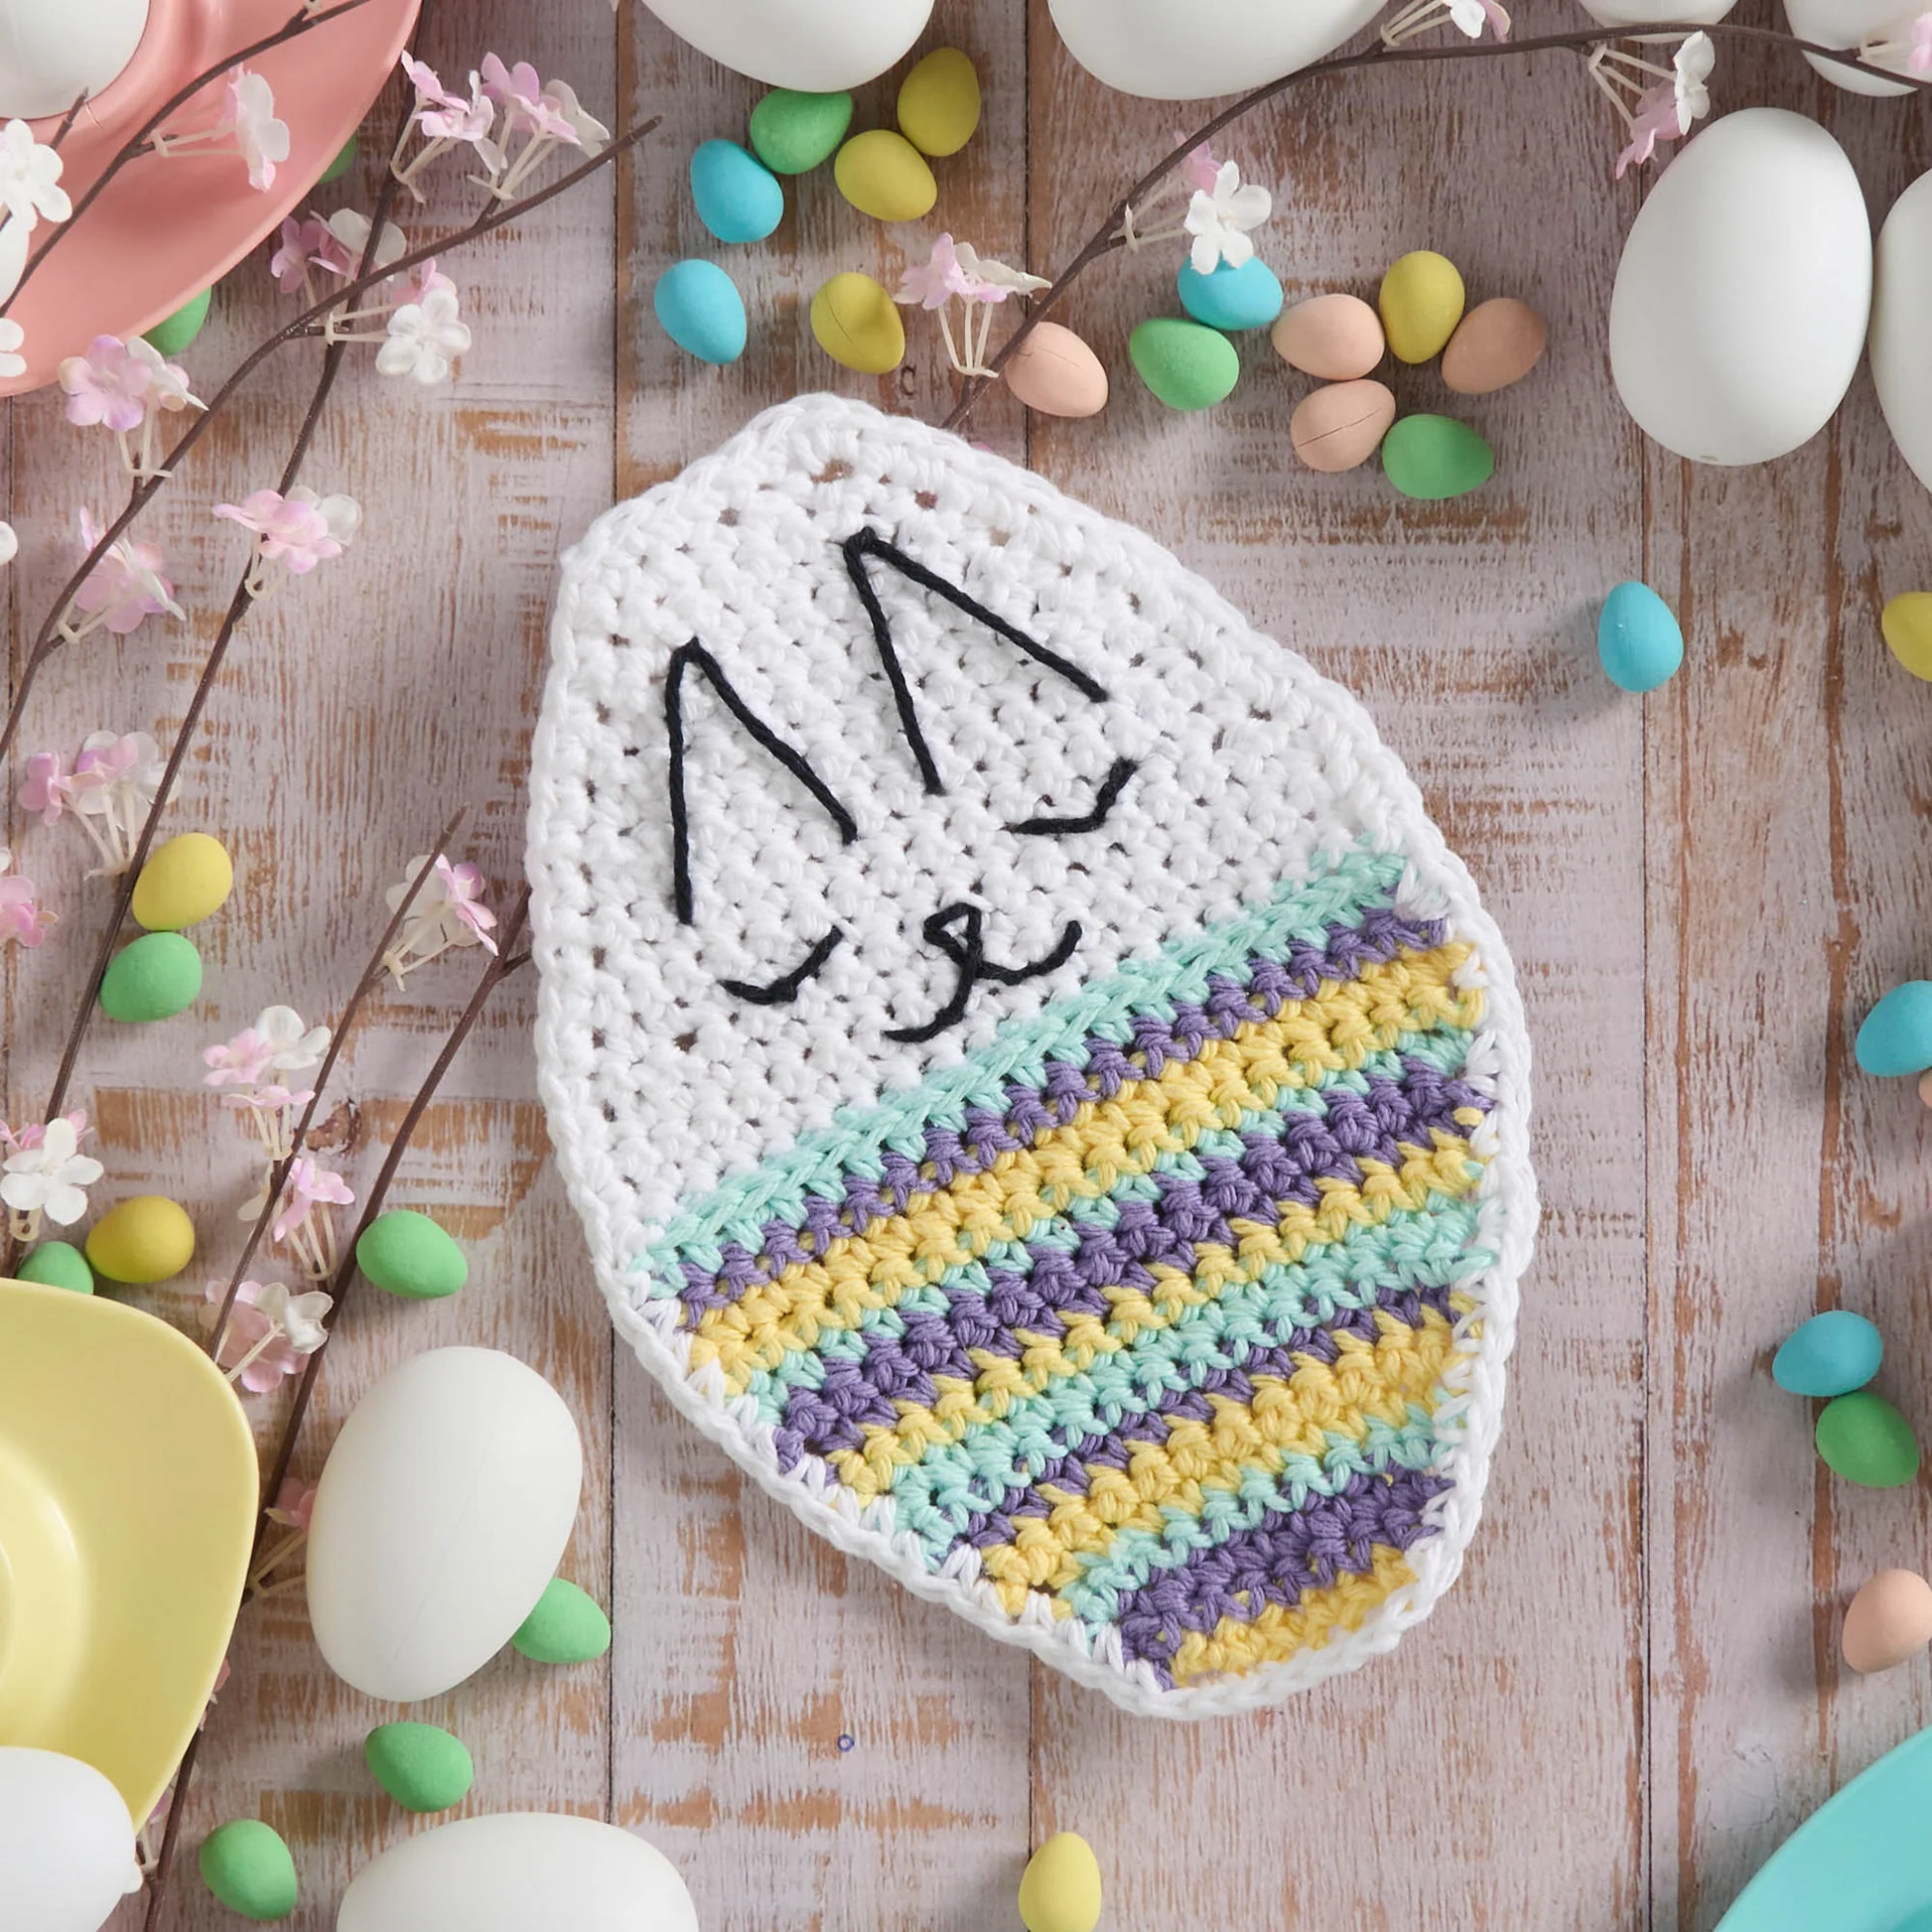
Hop into Spring Cleaning: Free Crochet Egg-cellent Bunny Dishcloth Pattern!
Get ready to add a touch of adorable, handmade charm to your kitchen this spring! Easter is just around the corner, and what better way to celebrate than with a quick, fun, and practical crochet project? We’re thrilled to share the Crochet Egg-cellent Bunny Dishcloth pattern, originally from Yarnspirations, featuring the ever-popular and durable Lily Sugar’n Cream cotton yarn.
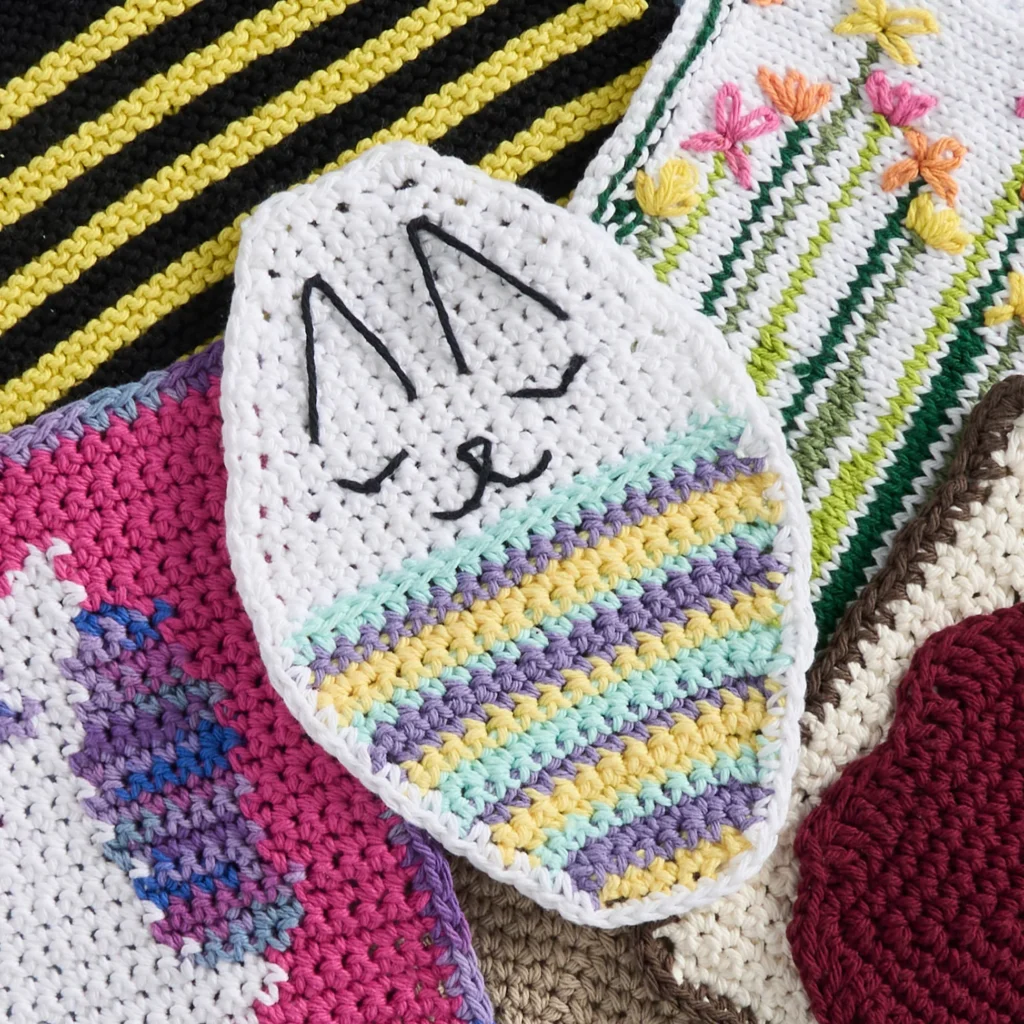
This pattern is perfect for easy-level crocheters and makes a delightful addition to your Easter decor, a thoughtful handmade gift, or simply a cheerful helper for everyday kitchen tasks. Imagine these sweet bunnies hopping around your sink area – they’re almost too cute to use (but don’t worry, they’re designed to be durable!).
This blog post will guide you step-by-step through creating your very own bunny dishcloth. We’ll break down the materials, abbreviations, special stitches, and row-by-row instructions, adding tips and explanations along the way to ensure your crocheting success. Let’s hop to it!
Why You’ll Absolutely Love This Crochet Bunny Dishcloth Pattern
Before we dive into the stitches, let’s talk about why this pattern is a fantastic choice:
- Perfectly Festive: The bunny shape and cheerful stripes scream Spring and Easter!
- Super Easy: Rated as “Easy,” this pattern uses basic stitches like single crochet and simple increases/decreases, making it accessible even for confident beginners.
- Quick Gratification: Dishcloths are relatively small projects, meaning you can whip up one (or a few!) in just an evening or two. Instant crafting satisfaction!
- Practical & Useful: Made with 100% cotton yarn, this dishcloth is absorbent, durable, and machine washable – perfect for actual kitchen use.
- Great Scrap Buster: The striped design is ideal for using up smaller amounts of leftover cotton yarn in coordinating colors.
- Teaches Techniques: You’ll practice increasing (sc2tog), decreasing (sc2tog), changing colors smoothly, and even a neat trick for creating texture by working into the horizontal bar of a half double crochet.
- Giftable Treasure: Handmade dishcloths make wonderful, thoughtful gifts for Easter baskets, hostess gifts, housewarmings, or just because!
- Adorable Decor: Even if you don’t use it for washing up, it looks incredibly cute hanging in the kitchen or as part of an Easter display.
Materials You’ll Need
Gather your supplies! Here’s what the original Yarnspirations pattern calls for:
- Yarn: Lily Sugar’n Cream® The Original™ (Worsted weight, Medium 4; 100% Cotton; 2.5 oz/70.9 g; 120 yds/109 m per ball)
- Main Color (MC): White (00001) – 1 ball or approx. 25 yds/23 m (for the bunny head)
- Contrast A: Hot Purple (01317) – 1 ball or approx. 11 yds/10 m
- Contrast B: Beach Glass (01132) – 1 ball or approx. 11 yds/10 m
- Contrast C: Yellow (00010) – 1 ball or approx. 11 yds/10 m
- Contrast D: Black (00002) – 1 ball or approx. 2 yds/2 m (for embroidery)
- Note: You likely won’t use a full ball of each contrast color, making this great for using up partial skeins!
- Crochet Hook: Size U.S. H/8 (5 mm) or the size needed to obtain the correct gauge.
- Yarn Needle: Susan Bates® yarn needle (or any tapestry needle) for weaving in ends and embroidery.
- Scissors: For cutting yarn.
- (Optional but Recommended): Stitch markers to mark the first or last stitch of a row, especially helpful during shaping.
Understanding Gauge: The Key to Perfect Size
Gauge: 13 single crochet (sc) stitches and 14 rows = 4 inches [10 cm]
Why is gauge important? Gauge refers to the density of your stitches – how many stitches and rows fit into a specific measurement. Matching the pattern’s gauge ensures your finished bunny dishcloth will be the intended size (Approx 10¾” [27.5 cm] long x 6½” [16.5 cm] wide).
- If your gauge is tighter (more stitches/rows per inch), your dishcloth will be smaller.
- If your gauge is looser (fewer stitches/rows per inch), your dishcloth will be larger and might require more yarn.
How to Check Gauge:
- Using your chosen yarn (Lily Sugar’n Cream) and hook (5 mm), chain about 15-16 stitches.
- Work in single crochet back and forth for about 16-18 rows.
- Lay your swatch flat without stretching.
- Measure a 4-inch square section in the middle of the swatch.
- Count the number of stitches across (horizontally) and rows down (vertically) within that 4-inch section.
- Adjust if needed:
- Too many stitches/rows? Your tension is too tight. Try a larger hook (e.g., 5.5 mm).
- Too few stitches/rows? Your tension is too loose. Try a smaller hook (e.g., 4.5 mm).
- Keep adjusting your hook size until your swatch matches the pattern gauge. Taking a few minutes to check gauge saves potential frustration later!
Finished Measurements
Your completed Egg-cellent Bunny Dishcloth should measure approximately:
10¾ inches (27.5 cm) long x 6½ inches (16.5 cm) wide.
Crochet Abbreviations & Special Stitches Explained
This pattern uses standard US crochet terminology. Here’s a breakdown:
- Approx = Approximately
- Beg = Beginning
- Ch = Chain(s) – To make a chain, yarn over hook and pull through the loop on the hook.
- Cont = Continue(ity)
- Hdc = Half Double Crochet – Yarn over, insert hook into stitch, yarn over, pull up a loop (3 loops on hook), yarn over, pull through all 3 loops.
- MC = Main Color (White)
- Pat = Pattern
- Rep = Repeat
- Rnd(s) = Round(s) – Though primarily worked in rows, the border is worked in a round.
- RS = Right Side (the side meant to face outwards)
- Sc = Single Crochet – Insert hook into stitch, yarn over, pull up a loop (2 loops on hook), yarn over, pull through both loops.
- Sc2tog = Single Crochet 2 Together (Decrease) – Insert hook into next stitch, yarn over, pull up a loop (2 loops on hook). Insert hook into the following stitch, yarn over, pull up a loop (3 loops on hook). Yarn over, pull through all 3 loops on hook. This turns two stitches into one.
- Sl st = Slip Stitch – Insert hook into stitch, yarn over, pull through both the stitch and the loop on the hook. Used for joining.
- St(s) = Stitch(es)
- WS = Wrong Side (the side meant to face inwards)
- Yoh = Yarn Over Hook
Special Techniques Explained:
- Changing Color: The pattern notes: “To change color, work to last 2 loops on hook and draw new color through last 2 loops, then proceed in new color.”
- How-to: When working the very last step of the stitch before the color change (e.g., the final yarn over and pull through of a single crochet), stop when you have 2 loops left on your hook. Drop the old color (leave a tail to weave in later). Pick up the new color, yarn over with the new color, and pull it through the 2 loops on your hook to complete the stitch. Now continue crocheting with the new color. This creates a seamless transition.
- Working in the Horizontal Bar of Hdc (Row 18): This creates a nice textured line and helps define the bunny’s head.
- How-to: Look at the back (WS) of the half double crochet stitch from the previous row (Row 17). You’ll see the usual top ‘V’ loops. Just below that ‘V’, on the back side of the stitch, there’s a horizontal strand of yarn. This is the “horizontal bar” or sometimes called the “third loop” of the hdc. For Row 18, you’ll insert your hook under only this horizontal bar to make your single crochet stitches, instead of going under the top ‘V’ loops. The pattern includes a helpful diagram for this.
- Stem Stitch (Embroidery): Used for the bunny’s face and ear details.
- How-to: This is a basic embroidery stitch that creates a solid, slightly raised line. Bring your needle up from the back at the start of your line. Make a small straight stitch forward along the line. Bring the needle up again halfway back along that first stitch, slightly to one side of the stitch. Make another stitch forward, the same length as the first. Repeat, always bringing the needle up halfway back along the previous stitch and slightly to the side. Keep your stitches consistent. The pattern provides a visual diagram.
Important Pattern Notes (Read Before You Start!)
- Turning Chains: The “Ch 1” at the beginning of single crochet rows does not count as a stitch throughout the pattern. Always make your first stitch in the very first stitch of the row unless otherwise specified. The “Ch 2” for the hdc row (Row 17) also does not count as a stitch.
- Stitch Counts: Pay attention to the stitch count given at the end of some rows. It’s a good idea to count your stitches periodically, especially on increase/decrease rows, to ensure you’re on track.
- Color Changes: Follow the color change instructions carefully for neat stripes. Leave tails of about 6 inches when changing colors or fastening off to weave in securely later.
- Right Side/Wrong Side: Keep track of the Right Side (RS) and Wrong Side (WS). The first row is the RS. The stripes will look slightly different on each side. The special texture from Row 18 will be visible on the RS.
The Stripe Pattern Sequence
The bottom, colored portion of the dishcloth follows a specific 17-row stripe pattern. You’ll work the first few rows individually, then follow this sequence:
(Remember: You start with C for Row 1, then A for Row 2, then C for Row 3 as per the initial instructions. The pattern below lists the sequence used for repeats)
- With C: Work 1 row.
- With A: Work 2 rows.
- With B: Work 1 row.
- With C: Work 2 rows.
- With A: Work 1 row.
- With B: Work 2 rows.
- With C: Work 1 row.
- With A: Work 2 rows.
- With B: Work 1 row.
- With C: Work 2 rows.
- With A: Work 1 row.
- With B: Work 1 row.
Total: 17 rows make up one full Stripe Pattern repeat. The pattern instructions will tell you when to start and stop following this sequence.
Crochet Egg-cellent Bunny Dishcloth: Step-by-Step Instructions
Okay, grab your hook and yarn (starting with Contrast C – Yellow), and let’s begin crocheting!
Starting the Base (Increases)
- With Contrast C (Yellow), Ch 6.
- 1st row: (RS). Work 2 sc in the 2nd ch from the hook (this is your first increase). Work 1 sc in each of the next 3 ch. Work 2 sc in the last ch (second increase). Turn. (You should have 7 sc stitches).
- End of Row 1: Join Contrast A (Hot Purple). Break Contrast C, leaving a 6-inch tail.
- 2nd row: (WS). With A, ch 1. Work 2 sc in the first sc. Work 1 sc in each sc across until the last sc. Work 2 sc in the last sc. Turn. (9 sc stitches).
- 3rd row: (RS). With A, ch 1. Work 1 sc in the first sc and in each sc across to the end of the row. Turn. (9 sc stitches).
- End of Row 3: Join Contrast C (Yellow). Break Contrast A, leaving a 6-inch tail.
You have now completed the first 3 rows of the Stripe Pattern.
Continuing the Stripe Pattern (Rows 4-17)
Now, keep following the Stripe Pattern sequence while incorporating the row instructions:
- 4th row: (WS). With C, ch 1. Work 1 sc in the first sc and in each sc across to the end of the row. Turn. (9 sc stitches).
- End of Row 4: Join Contrast B (Beach Glass). Break Contrast C.
- 5th row: (RS). With B, ch 1. Work 2 sc in the first sc. Work 1 sc in each sc across until the last sc. Work 2 sc in the last sc. Turn. (11 sc stitches).
- 6th row: (WS). With B, ch 1. Work 1 sc in the first sc and in each sc across to the end of the row. Turn. (11 sc stitches).
- End of Row 6: Join Contrast C (Yellow). Break Contrast B.
- 7th row: (RS). With C, ch 1. Work 1 sc in the first sc and in each sc across to the end of the row. Turn. (11 sc stitches).
- End of Row 7: Join Contrast A (Hot Purple). Break Contrast C.
- 8th row: (WS). With A, ch 1. Work 2 sc in the first sc. Work 1 sc in each sc across until the last sc. Work 2 sc in the last sc. Turn. (13 sc stitches).
- 9th row: (RS). With A, ch 1. Work 1 sc in the first sc and in each sc across to the end of the row. Turn. (13 sc stitches).
- End of Row 9: Join Contrast B (Beach Glass). Break Contrast A.
- Rows 4 & 5 should repeat rows 2 & 3.
- Row 4 (WS): As row 2. With C, Ch 1. 2 sc in first sc, 1 sc in each sc to last sc, 2 sc in last sc. Turn. (11 sc). Join A. Break C.
- Row 5 (RS): As row 3. With A, Ch 1. 1 sc in each sc across. Turn. (11 sc).
- Row 6 (WS): As row 2. With A, Ch 1. 2 sc in first sc, 1 sc in each sc to last sc, 2 sc in last sc. Turn. (13 sc). Join B. Break A.
- Row 7 (RS): As row 3. With B, Ch 1. 1 sc in each sc across. Turn. (13 sc).
- Row 8 (WS): As row 2. With B, Ch 1. 2 sc in first sc, 1 sc in each sc to last sc, 2 sc in last sc. Turn. (15 sc). Join C. Break B.
- Row 9 (RS): As row 3. With C, Ch 1. 1 sc in each sc across. Turn. (15 sc).
- This interpretation matches the 15 sc count at the end of Row 9 mentioned in the pdf description. Let’s proceed using this interpretation.
- 10th row: (WS). This row acts like Row 2 (increase row). Following the Stripe Pat sequence, the color is A. With A, ch 1. Work 2 sc in the first sc. Work 1 sc in each sc across until the last sc. Work 2 sc in the last sc. Turn. (17 sc stitches).
- 11th and 12th rows: (RS & WS). These rows act like Row 3 (straight rows). Following the Stripe Pat sequence, the color is A for Row 11, then B for Row 12.
- Row 11 (RS): With A, Ch 1. Work 1 sc in each sc across. Turn. (17 sc). Join B. Break A.
- Row 12 (WS): With B, Ch 1. Work 1 sc in each sc across. Turn. (17 sc).
- 13th to 15th rows: (RS, WS, RS). This repeats the pattern of one increase row followed by two straight rows, just like rows 10-12. Following the Stripe Pat sequence, colors are C, C, A.
- Row 13 (RS – Increase Row): With C, ch 1. Work 2 sc in the first sc. Work 1 sc in each sc across until the last sc. Work 2 sc in the last sc. Turn. (19 sc stitches).
- Row 14 (WS – Straight Row): With C, ch 1. Work 1 sc in each sc across. Turn. (19 sc stitches). Join A. Break C.
- Row 15 (RS – Straight Row): With A, ch 1. Work 1 sc in each sc across. Turn. (19 sc stitches).
- 16th row: (WS). This acts like Row 3 (straight row). Following the Stripe Pat sequence, the color is B. With B, ch 1. Work 1 sc in each sc across. Turn. (19 sc stitches).
- End of Row 16: You should still have B attached. Keep it attached for the next row’s start.
- 17th row: (RS – Transition Row). This row uses Half Double Crochet and finishes the Stripe Pattern section. With B, ch 2 (does NOT count as st). Work 1 hdc in the first sc and in each sc across to the end of the row. Turn. (19 hdc stitches).
- End of Row 17: Join Main Color (MC – White). Break Contrast B.
End of Stripe Pattern.
Creating the Bunny Head (Shaping and Texture)
- 18th row: (WS – Special Texture Row). With MC, ch 1. Work 1 sc in the horizontal bar created below the first hdc from Row 17 (see Special Techniques explanation and diagram). *Work 1 sc in the horizontal bar created below each remaining hdc across the row. Rep from * to end of row. Turn. (19 sc stitches worked into the horizontal bars).
- This row creates a defined line separating the bunny head from the body and pushes the top loops of the hdc forward onto the RS.
- 19th to 21st rows: (RS, WS, RS). With MC, ch 1. Work 1 sc in the first sc and in each sc across to the end of the row. Turn. (19 sc stitches). Work 3 rows straight.
- 22nd row: (WS – Decrease Row). With MC, ch 1. Work 1 sc in the first sc. Sc2tog over the next 2 sc. Work 1 sc in each sc across until the last 3 sc. Sc2tog over the next 2 sc. Work 1 sc in the last sc. Turn. (17 sts: 1 sc + 1 sc2tog + 11 sc + 1 sc2tog + 1 sc = 15 sc. Checking PDF: 17 sts total. Let’s re-read: “1 sc in first sc. Sc2tog. 1 sc in each sc to last 3 sc. Sc2tog. 1 sc in last sc.” Ok, 1 + 1 + (19-1-2-3=13) sc + 1 + 1 = 17 sts. Yes, 17 sts).
- 23rd to 34th rows: Now we repeat a sequence of rows to shape the top of the bunny head (the ears area).
- Repeat Rows 21 (straight row) and 22 (decrease row) FIVE more times. (This covers Rows 23-32).
- Then, repeat Row 21 (straight row) one more time. (This is Row 33).
- Then, repeat Row 22 (decrease row) one more time. (This is Row 34).
- Let’s track the stitch count:
- End of Row 22: 17 sts
- End of Row 23 (as Row 21): 17 sts
- End of Row 24 (as Row 22): 15 sts
- End of Row 25 (as Row 21): 15 sts
- End of Row 26 (as Row 22): 13 sts
- End of Row 27 (as Row 21): 13 sts
- End of Row 28 (as Row 22): 11 sts
- End of Row 29 (as Row 21): 11 sts
- End of Row 30 (as Row 22): 9 sts
- End of Row 31 (as Row 21): 9 sts
- End of Row 32 (as Row 22): 7 sts
- End of Row 33 (as Row 21): 7 sts
- End of Row 34 (as Row 22): 5 sts
- At the end of Row 34, you should have 5 stitches remaining.
- 35th row: (RS – Final Decrease Row). This row acts like Row 22. With MC, ch 1. 1 sc in first sc. Sc2tog. 1 sc in next sc. Sc2tog. 1 sc in last sc. Do not turn. (3 sts: 1 + 1 + 1 = 3 sts. Checking PDF: “As 22nd row. Do not turn. 5 sts.” Okay, the pdf text states 35th row is as 22nd row, which starts with 1 sc, sc2tog, sc across, sc2tog, 1 sc. If we start with 5 sts: 1 sc in first. Sc2tog over next 2. Sc2tog over last 2? No, that’s 3 sts. Let’s try 1 sc, sc2tog, 1 sc in last st? No, that’s using 4 sts. How about: 1 sc, sc2tog, sc2tog? No, 3 sts. Maybe the PDF meant “Sc2tog, 1 sc, Sc2tog”? That uses 5 sts and results in 3 sts. Let’s assume the intent is to get down to the narrowest point smoothly.* Based on the chart, Row 35 looks like Sc2tog, 1 sc, Sc2tog. Let’s use that as it matches the final shape/count better.)
- Revised 35th row (Based on chart visual): (RS). With MC, ch 1. Sc2tog over first 2 sts. 1 sc in next st. Sc2tog over last 2 sts. (3 sts). Do not turn.
- Fasten off MC, leaving a 6-inch tail.
Body of the dishcloth is complete!
Adding the Border
The border gives a clean, finished edge to your bunny. You’ll work around the entire outer edge.
- Border 1st rnd: (RS). You should still be at the top center (where you just fastened off) with the RS facing you. Rejoin MC with a sl st or by pulling up a loop in the first st of the last row worked (Row 35).
- Ch 1. Work single crochet stitches evenly around the entire edge of the Dishcloth. Aim for approximately 80 sc stitches in total.
- Tips for working evenly:
- Work 1 sc in each stitch across the top (3 sts).
- Work approximately 1 sc into the end of each row down the sides. You might need to slightly adjust (e.g., 2 sc in an hdc row-end, 1 sc in an sc row-end) to keep it flat. Aim for roughly 35-37 sc down each side.
- Work 1 sc in each stitch across the foundation chain edge (bottom – aim for 6-7 sts, working into the remaining loops of the starting chain).
- The key is to space the stitches so the edge lies flat and doesn’t ruffle (too many stitches) or pull inwards (too few stitches).
- Once you’ve worked all the way around, join with a sl st to the first sc of the round.
- Fasten off MC. Weave in this end securely.
Finishing: Bringing Your Bunny to Life!
This is where the magic happens!
- Weave in Ends: Before embroidering, carefully weave in all those yarn tails from your color changes and fastening off points using your yarn needle. Try to weave them into stitches of the same color on the WS for invisibility.
- Embroider the Face:
- Thread your yarn needle with Contrast D (Black).
- Using the Stem Stitch (refer to Special Stitches and diagram), embroider the bunny’s face onto the MC (White) section.
- Refer to the photo in the pattern for placement:
- Two simple inverted ‘V’ shapes for closed eyes.
- A small ‘Y’ shape below the eyes for the nose and mouth.
- Embroider Ear Details:
- Still using Black yarn and Stem Stitch, embroider two simple vertical lines inside the top shaped ‘ear’ sections, following the lines suggested by the decreases. This defines the inner ears.
- Final Touches: Trim any remaining fuzzy bits. Gently block your dishcloth if desired (wet it, gently squeeze out excess water, lay flat on a towel, shape it, and let air dry) – this can help even out stitches and define the shape, but it’s optional for a dishcloth.
Congratulations! Your Crochet Egg-cellent Bunny Dishcloth is Complete!
You’ve successfully crocheted an adorable and functional piece! Whether it’s brightening up your own kitchen, hopping into an Easter basket, or gifted to a friend, this little bunny is sure to bring smiles.
Tips for Crocheting Success
- Count Your Stitches: Especially on the increase and decrease rows, take a moment to count and ensure you have the number specified.
- Use Stitch Markers: Place a marker in the first or last stitch of the row if you have trouble finding them, particularly when working with white yarn or during the shaping sections.
- Consistent Tension: Try to maintain even tension throughout the project for a uniform look.
- Neat Color Changes: Practice the color change technique on your gauge swatch if you’re unsure. Pull the new color through snugly but not too tight.
- Weave Ends Securely: Since dishcloths get washed, make sure ends are woven back and forth in different directions on the WS to prevent them from popping out.
Customization Ideas
Want to personalize your bunny?
- Color Play: Use different stripe colors! Pastels, brights, or even variegated yarn could look amazing.
- Solid Bunny: Skip the stripes and make the whole body (Rows 1-17) in one color, then switch to white for the head.
- Add a Hanging Loop: After finishing the border, don’t fasten off. Chain 10-12 stitches, then sl st back into the same stitch or the next stitch to create a small loop for hanging.
- Different Faces: Give your bunny open eyes (embroider small circles or use safety eyes before closing the head if making a plushie version – not recommended for a dishcloth though!), or add whiskers.
- Make a Set: Crochet several bunnies in different coordinating colors!
We hope you enjoyed this detailed walkthrough of the Crochet Egg-cellent Bunny Dishcloth pattern. It’s a wonderful project to welcome spring and practice your crochet skills.
Happy Crocheting! Feel free to share photos of your finished bunnies or ask any questions in the comments below!
(Disclaimer: This blog post is an interpretation and detailed explanation based on the Yarnspirations Crochet Egg-cellent Bunny Dishcloth pattern, SCC0512-38165M. All credit for the original design belongs to Yarnspirations.)