Meet Your New Favorite Stitch: The Ultimate Guide to the Crochet Moss Stitch (aka Granite Stitch)
Okay, picture this. You’re scrolling, deep in a Pinterest rabbit hole, and you see it: a crochet blanket with a texture that looks… different. It’s not holey like a granny square, not ribbed like back-loop-only stitches. It’s flat, dense, and has this gorgeous, almost woven look. It looks sophisticated. It looks pro.
And you think, “Okay, that’s some next-level hook magic. Probably involves a complicated 16-row repeat I don’t have the brain cells for.”
Well, what if I told you that chic, elegant fabric was created with one of the easiest stitch combinations in the entire crochet universe?
Meet your new crochet BFF: the Moss Stitch. Also known as the Granite Stitch, the Linen Stitch, and probably a few other aliases it uses to remain mysterious. Whatever you call it, get ready to fall head over hooks in love. This stitch is a total game-changer, and today, we’re doing a deep dive into why it’s so amazing and exactly how you can master it (spoiler: you’ll have it down in about five minutes).
So, Why Is the Moss Stitch Basically a Crochet Superstar?
Seriously, I’m not exaggerating when I say this stitch is one of the most versatile and satisfying stitches out there. It’s the little black dress of your crochet wardrobe—it works for everything.
If you’re not convinced yet, here’s why you’re about to be totally obsessed:
- It’s Deceptively Easy: If you can make a single crochet and a chain stitch, you can make the moss stitch. That’s literally it. It’s a simple two-step dance: single crochet, chain one. Repeat. It’s the perfect “TV project” stitch because the rhythm is so easy to get into, you won’t experience any of those dreaded frogging feels.
- The Drape is Chef’s Kiss: Because the stitch is made of alternating single crochets and chain spaces, it creates a fabric that’s flexible and fluid, not stiff. The drape is incredible, making it perfect for wearables like scarves and blankets that you actually want to wrap yourself in.
- No Gaping Holes: Unlike granny stitches or mesh patterns, the moss stitch creates a solid but not stuffy fabric. It’s dense enough that your toes won’t poke through your blanket, but light enough that it doesn’t feel like a lead weight.
- Clean, Modern Edges: Forget wonky, wavy edges! The moss stitch naturally creates beautifully straight, clean edges on its own. It makes your finished projects look so polished and professional.
- It Makes Color Work a Dream: This stitch is a total show-off when it comes to color. It makes simple stripes look crisp and intentional, and it’s a miracle worker for taming wild, variegated yarns. More on that later!
The Building Blocks: All You Need is SC & CH
The magic of the crochet moss stitch comes down to two of the most basic stitches in the book.
- Single Crochet (sc): The humble workhorse of the crochet world. Insert hook, yarn over, pull up a loop, yarn over, pull through both loops. Done.
- Chain Stitch (ch): The literal foundation of everything we do. Yarn over, pull through.
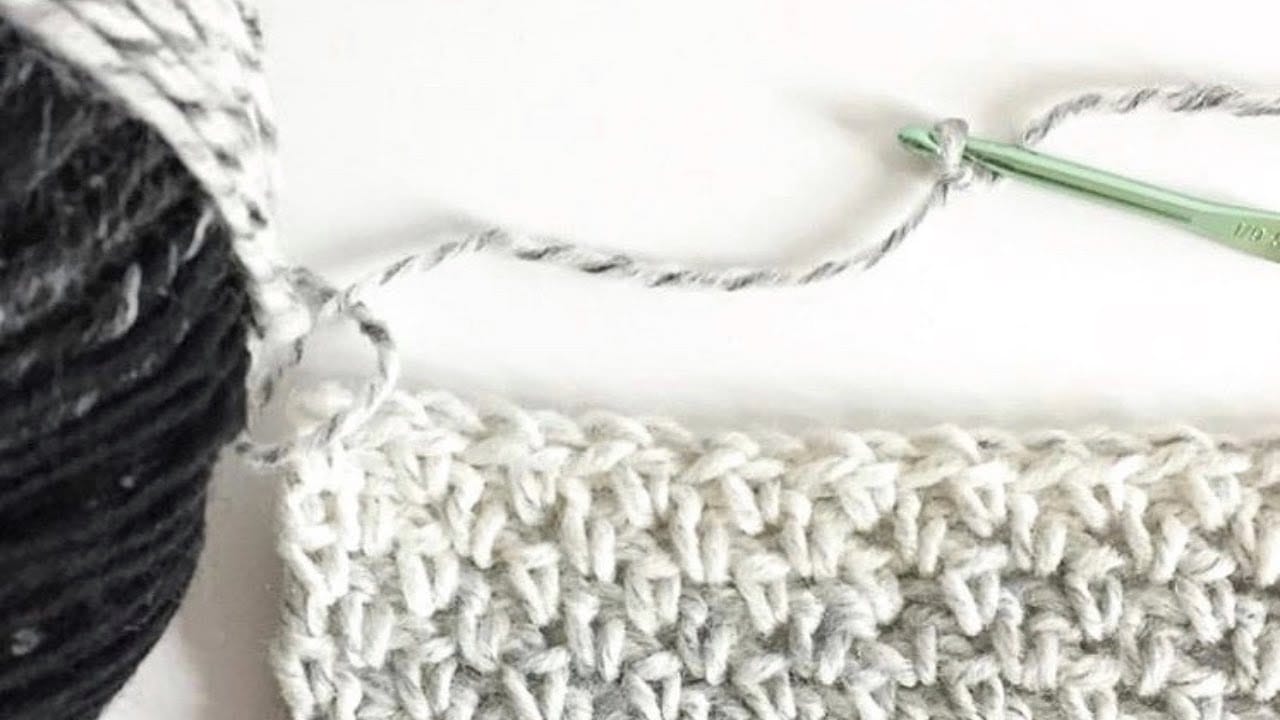
That’s your entire ingredient list. The secret is in how we combine them. Instead of working into the tops of the stitches from the row below, we’re going to be working into the spaces created by the chain stitches. This is what creates that signature interlocking, woven texture.
How to Crochet the Moss Stitch: Your Step-by-Step Guide
Ready for the hook magic to happen? Grab some yarn and your favorite hook. We’ll go through how to work it flat (for things like blankets and scarves) and in the round (for cowls or bags).
Working the Moss Stitch Flat
This is perfect for square or rectangular projects.
The Foundation: You need to start with an even number of chains. This is key for making the stitch count work out perfectly on every row. Let’s chain 20 for our practice swatch.
Row 1:
- Find the 4th chain from your hook. (The loop on your hook doesn’t count!)
- Place one single crochet (sc) in that 4th chain.
- Now the repeat begins: Chain 1, skip the next chain, and place a single crochet (sc) in the chain after that.
- Continue this (ch 1, skip 1 ch, sc in next ch) all the way across your foundation chain.
- You should end with a single crochet in the very last chain.
Your first row is done! It might look a little gappy and weird, but trust the process.
Row 2 (The Magic Repeat Row):
- Chain 2 and turn your work. This chain-2 acts as your first single crochet and your first chain-1 space of the new row.
- Now, look at the row below. See those little chain-1 spaces you created? That’s where you’ll be working from now on.
- Place a single crochet (sc) into the very first chain-1 space from the previous row.
- And here’s your forever repeat: Chain 1, and place a single crochet (sc) into the next chain-1 space.
- Continue doing this (ch 1, sc in next ch-1 space) all the way across.
- You’ll finish the row by placing your last single crochet into the space created by the turning chain from the row below (that chain-4 space you started with in Row 1).
And that’s it! To continue, you just repeat Row 2 over and over again. Chain 2, turn, and then sc, ch 1 into every chain space across. See? I told you it was easy!
Working the Moss Stitch in the Round
Working in the round is just as easy, with one tiny tweak.
The Foundation: Start with an even number of chains. Join with a slip stitch to the first chain to form a circle, being careful not to twist it.
Round 1:
- Chain 2 (this counts as your first sc and ch-1 space).
- Skip the first chain (the one you slip-stitched into), and place a single crochet (sc) in the next chain.
- Continue the repeat: ch 1, skip 1 ch, sc in next ch all the way around your ring.
- To finish the round, chain 1, and slip stitch into the first chain of your starting chain-2 to join.
Round 2 (The Magic Repeat Round):
- Slip stitch into that first chain-1 space.
- Chain 2 (this is your first sc and ch-1 space for this new round).
- Place a single crochet (sc) in the next chain-1 space.
- Continue the repeat: ch 1, sc in next ch-1 space all the way around.
- To finish, chain 1, and slip stitch to the first chain of your starting chain-2.
Repeat Round 2 for as long as your heart desires! This method creates a seamless, beautiful texture perfect for cowls, hats, and baskets.
My Moss Stitch “Aha!” Moment
I have to share a quick story. When I was first really getting into crochet, I felt like I was stuck in a rut. Everything I made was either single crochet, half-double, or double crochet. My projects were fine, but they all had that same classic “crochet” look. I wanted to make something that looked a little more… store-bought. A little more modern.
Then I stumbled upon a pattern for a “granite stitch” washcloth. I almost scrolled past, but the texture in the photo was exactly what I’d been looking for. I learned the stitch in minutes and was completely blown away. It felt like I’d discovered a secret menu item. It was so simple, yet it completely elevated the look of my project. That simple washcloth looked chic! That’s when I realized that sometimes the most impressive results come from the simplest techniques, used in a clever way.
Level Up Your Project: Moss Stitch & Color Play
Okay, this is where the moss stitch really starts to have fun. Its unique structure is a perfect canvas for all kinds of yarn-spirations.
- Crisp Stripes: Changing colors with the moss stitch is a dream. Because you’re working into spaces, the color changes are clean and sharp, without any weird “dashing” you can sometimes get with other stitches. Simply complete your final single crochet of a row, and when you have two loops left on your hook, yarn over with your new color to pull through and finish the stitch. Then chain 2 and turn as usual.
- Taming Variegated Yarn: Do you have a skein of gorgeous, wildly colored yarn that looks amazing in the ball but turns into a chaotic, clown-like mess when you crochet it? The moss stitch is your answer. The short stitches and chain spaces break up the colors beautifully, creating a scattered, confetti-like effect that looks intentional and artistic instead of messy.
If you’re looking for color combo ideas, check out our guide to Creating a Modern Crochet Color Palette.
7 Dreamy Projects for Your New Moss Stitch Obsession
Ready to put your new skill to the test? Here are some perfect projects for the moss stitch.
- The Chicest Washcloths: The perfect first project. The dense texture is gently exfoliating and they work up in no time.
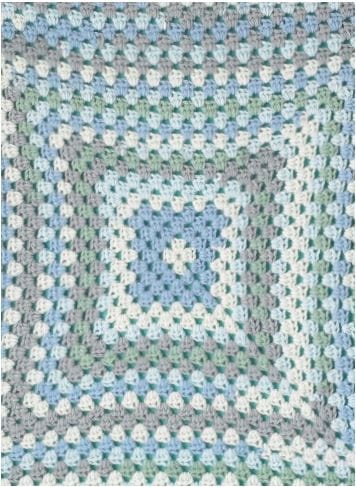
- A Modern Baby Blanket: The solid fabric means no little fingers or toes can get stuck, and the beautiful drape makes it super cuddly.
- The Easiest Scarf Ever: Work the stitch flat until you run out of yarn or patience. The clean edges mean you don’t even need a border. Try our Simple Striped Moss Stitch Scarf pattern!
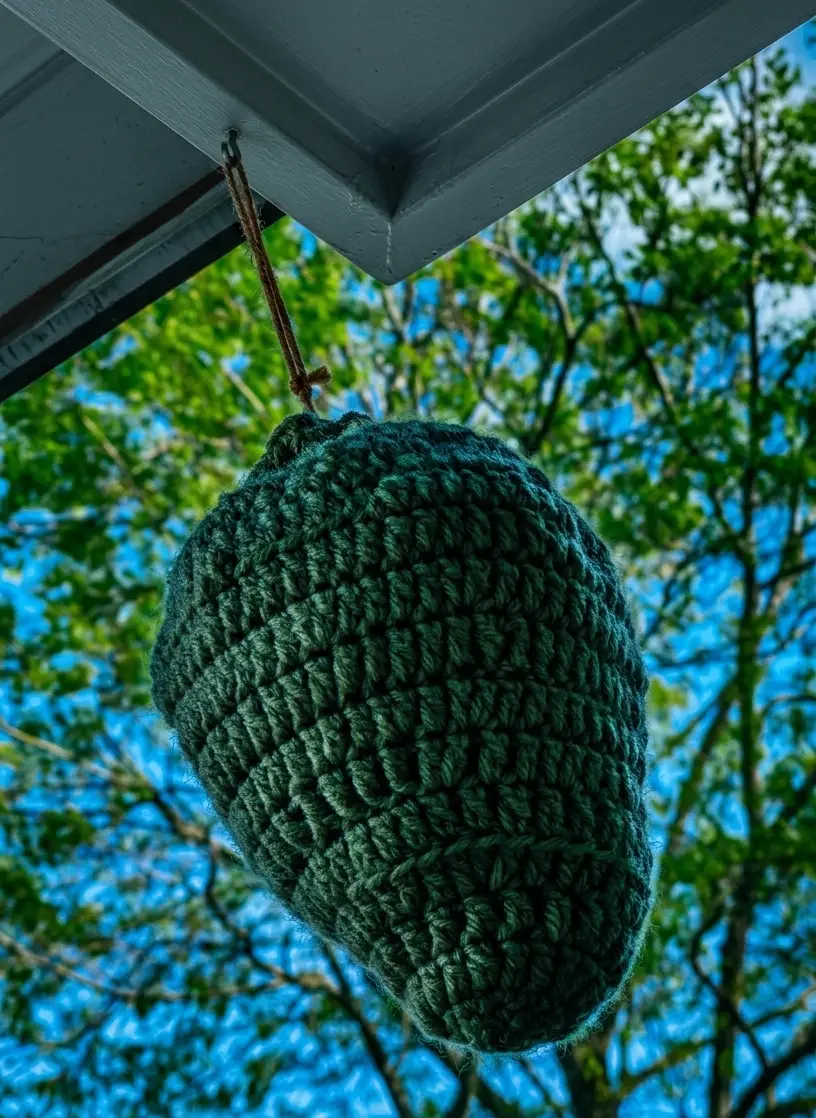
- A Color Block Tote Bag: The stitch is sturdy enough for a bag that won’t stretch out to infinity. This is a great way to use up scraps for a cool, geometric look. Our Color Block Crochet Tote Bag is a great place to start.
- A Cozy Pillow Cover: Give your living room a modern, textured update.
- A Lightweight Cardigan: The drape of this stitch makes it amazing for simple, modern garment construction.
- A Sturdy Placemat: So easy to customize to the exact size of your table, and they look so much more expensive than they are to make!
For more yarn info, see our Ultimate Guide to Yarn Fibers to pick the perfect material for your project.
The crochet moss stitch is proof that you don’t need complicated techniques to create something truly beautiful. It’s a humble, hardworking stitch that delivers stunning results every single time. It’s forgiving, it’s meditative, and it will absolutely become a go-to in your creative toolkit.
So go on, grab a hook and give it a try! I promise you’re about to find your new favorite stitch.
What will you make first with the moss stitch? Drop your ideas in the comments below! I’d love to hear your yarn-spirations.
P.S. For more easy-yet-impressive patterns and clever crochet tips, be sure to sign up for The Thread, our weekly newsletter that’s packed with pure hook magic!