Free Gengar crochet Pattern: Your Spooky Amigurumi Pattern!
Crochet Gengar Amigurumi Pattern: A Spooky Companion!
Introduction
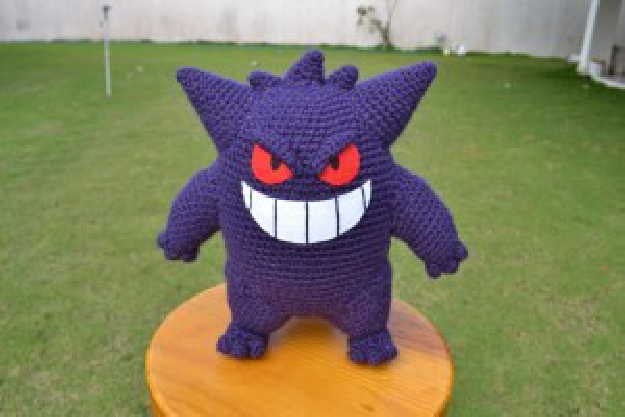
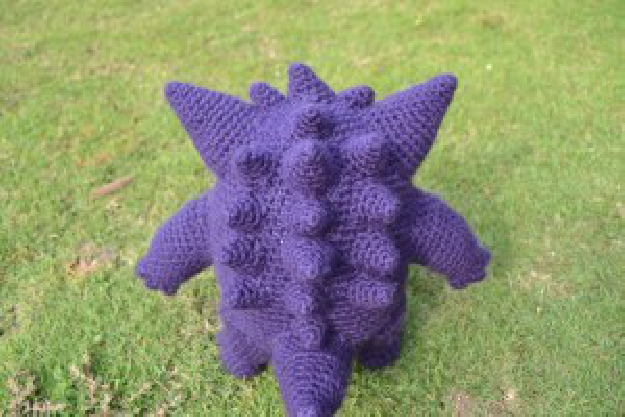
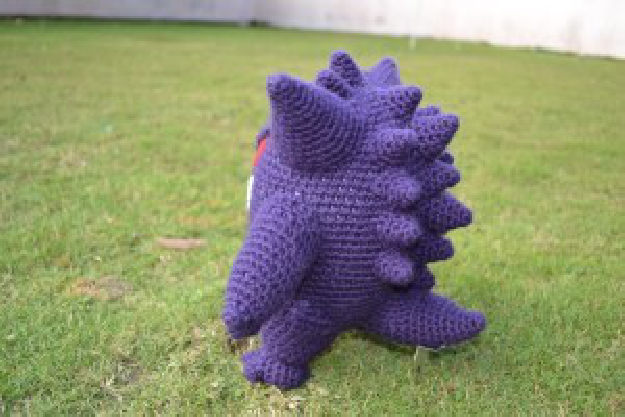
Get ready to add a touch of playful spookiness to your crochet collection! Just in time for Halloween, we’re thrilled to bring you this fantastic Gengar pattern. While this mischievous Pokémon was originally crafted as a special birthday gift, it serendipitously became the perfect project for the season of ghouls and goblins. Creating Gengar was a truly enjoyable experience, especially tackling those iconic back spikes! We loved how he turned out and gained some new skills along the way, doing things we’d never tried before. Now, it’s your turn to bring this adorable ghost-type Pokémon to life with your hook and yarn. Let’s dive into the pattern!
Materials You’ll Need
- Dark purple yarn
- Red and white felt
- Fiberfill / Stuffing
- Black fabric paint
- Brush
- 4 mm crochet hook
- 2.5 mm crochet hook
- Tapestry needle
- Contact adhesive
Important Notes Before You Begin
- All crochet projects are made using continuous rounds.
- Before starting any crochet project, it’s always a great idea to read through the entire pattern. This helps you get a good understanding of the overall construction.
- A tapestry needle will be used to sew the individual pieces together.
- The eyes and mouth details will be created using felt and fabric paint.
Abbreviations Used
- MR: Magic Ring
- sc: Single Crochet
- inc: Increase (make 2 single crochet in one stitch)
- dec: Decrease (single crochet two stitches together)
- hdc: Half Double Crochet
- sl: Slip Stitch
- (): Indicates the stitch count at the end of the round/row.
Gengar Amigurumi Pattern
Body
Round 1: 6 sc in MR (6)
Round 2: 2 sc in each sc (12)
Round 3: sc, inc (18)
Round 4: 2 sc, inc (24)
Round 5: 3 sc, inc (30)
Round 6: 4 sc, inc (36)
Round 7: 5 sc, inc (42)
Round 8: sc in each sc (42)
Round 9: 6 sc, inc (48)
Round 10-11: sc in each sc (48)
Round 12: 7 sc, inc (54)
Round 13-14: sc in each sc (54)
Round 15: 8 sc, inc (60)
Round 16-19: sc in each sc (60)
Round 20: 9 sc, inc (66)
Round 21-25: sc in each sc (66)
Round 26: 9 sc, dec (60)
Round 27-30: sc in each sc (60)
Round 31: 8 sc, dec (54)
Round 32-33: sc in each sc (54)
Round 34: 7 sc, dec (48)
Round 35-36: sc in each sc (48)
Round 37: 6 sc, dec (42)
Round 38: sc in each sc (42)
Round 39: 5 sc, dec (36)
Round 40: 4 sc, dec (30)
Round 41: 3 sc, dec (24)
Round 42: 2 sc, dec (18)
Round 43: sc, dec (12)
Round 44: dec (6)
Finish off.
Big Horns from Head (Make 2)
Round 1: sc 4 in MR (4)
Round 2: sc in each sc (4)
Round 3: inc (8)
Round 4: sc in each sc (8)
Round 5: sc, inc (12)
Round 6: sc in each sc (12)
Round 7: sc 2, inc (16)
Round 8: sc in each sc (16)
Round 9: sc 3, inc (20)
Round 10: sc in each sc (20)
Round 11: sc 4, inc (24)
Round 12: sc in each sc (24)
Round 13: sc 5, inc (28)
Round 14: sc in each sc (28)
Finish off and leave a long tail.
Eyebrow (Make 2 – Use 2.5mm hook)
Round 1: 3 sc in magic ring (3)
Round 2: sc, inc, sc (4)
Round 3: sc, inc, sc, sc (5)
Round 3: sc, sc, inc, sc, sc (6)
Round 4: sc, sc, dec, sc, sc (5)
Round 5: sc, dec, sc, sc (4)
Round 6: sc, dec, sc (3)
Finish off and leave a long tail.
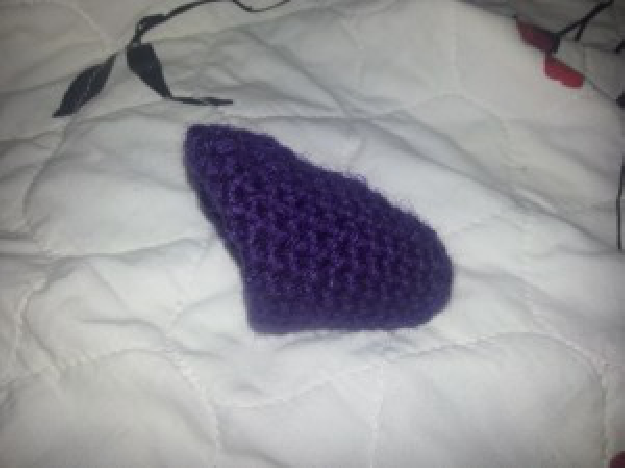
Back Spikes from the Sides (Make 8)
Round 1: sc 4 in MR (4)
Round 2: sc in each sc (4)
Round 3: inc (8)
Round 4: sc in each sc (8)
Round 5: sc, inc (12)
Finish off and leave a long tail.
Back Spikes from the Middle (6 in total)
Crochet 3 spikes like the “Back spikes from the sides” (using the pattern above).
Crochet 3 spikes following this pattern:
- Crochet 2 spikes in this way:
Round 1: sc 4 in MR (4)
Round 2: sc in each sc (4)
Round 3: inc (8)
Round 4: sc in each sc (8)
Round 5: sc, inc (12)
Round 6-7: sc in each sc (12)
Finish off and leave a long tail. - Crochet one spike in this way:
Round 1: sc 4 in MR (4)
Round 2: sc in each sc (4)
Round 3: inc (8)
Round 4: sc in each sc (8)
Finish off and leave a long tail.
Middle Spike from Head (Make 1)
Round 1: sc 4 in MR (4)
Round 2: sc in each sc (4)
Round 3: inc (8)
Round 4: sc in each sc (8)
Round 5: inc 4, sc 4 (12)
Round 6: sc in each sc (12)
Row 7: sc 6 (6)
Row 8: sc 6 (6)
Finish off and leave a long tail.
Medium Middle Spike from Head (Make 1)
Round 1: sc 4 in MR (4)
Round 2: sc in each sc (4)
Round 3: inc (8)
Round 4: sc in each sc (8)
Row 5: sc 4 (4)
Finish off and leave a long tail.
Small Middle Spike from Head (Make 1)
Round 1: sc 4 in MR (4)
Round 2: sc in each sc (4)
Round 3: inc (8)
Row 4: sc 4 (4)
Row 5: sc 4 (4)
Finish off and leave a long tail.
Arms (Make 2)
Round 1: 6 sc in MR (6)
Round 2: 2 sc in each sc (12)
Round 3: inc in next 4, sc in next 8 (16)
Round 4-5: sc in each sc (16)
Round 6: sc 2, inc in next 4, sc 10 (20)
Round 7-11: sc in each sc (20)
Round 12: sc 5, inc in next 4, sc 11 (24)
Round 13: sc in each sc (24)
Round 14: sc, inc, sc 3, inc, dec 4, sc 3, inc, sc 3, inc, sc 2 (24)
Round 15: sl 2, sc 3, hdc 10, sc 3, sl 6 (24)
Round 16: sl 2, sc 3, hdc 10, sc 3, sl 6 (24)
Round 17: sl 2, sc 3, hdc 10, sc 3, sl 6 (24)
Finish off.
Fingers (Make 6 for each hand, 12 total)
Round 1: sc 4 in MR (4)
Round 2: inc (8)
Finish off and leave a long tail.
Legs (Make 2)
Round 1: 6 sc in MR (6)
Round 2: 2 sc in each sc (12)
Round 3: sc, inc (18)
Round 4: sc in each sc (18)
Round 5: sc 4, inc, sc 3, inc, sc 4, inc, sc 3, inc (22)
Round 6: sc 10, inc (24)
Round 7: sc 7, inc (27)
Round 8: sc in each sc (27)
Row 9: sc 3, inc, sc, inc, sc, inc, sc, inc, sc, inc, sc 3 (20)
Row 10: sc 6, inc, sc, inc, sc, inc, sc, inc, sc, inc, 5 (25)
Row 11: sc in each sc (25)
Finish off and leave a long tail.
After finished, you should first sew it to the body and only after that you should fill it with the fiberfill.
Foot (Make 2)
Round 1: 6 sc in mr (6)
Round 2: inc (12)
Round 3: sc 3, inc (15)
Round 4-6: Sc in each Sc (15)
Round 9: sc 3, dec (12)
Round 10: dec (6)
Finish off.
Toes (Make 3 for each foot, 6 total – Use 2.5mm hook)
Round 1: sc 4 in mr (4)
Round 2: inc (8)
Finish off and leave a long tail.
Tail (Make 1)
Round 1: sc 4 in mr (4)
Round 2: sc in each sc (4)
Round 3: inc (8)
Round 4: sc in each sc (8)
Round 5: inc 4, sc 4 (12)
Round 6: sc in each sc (12)
Round 7: sc, inc 6, sc 5 (18)
Round 8-10: sc in each sc (18)
Round 11: sc 6, inc in next 6, sc 6. (24)
Round 12: sc in each sc (24)
Round 13: hdc 5, sl 15, hdc 4 (24)
Round 14: hdc 6, sl 15, hdc 3 (24)
Round 15: hdc 7, sl 15, hdc 2 (24)
Round 16: hdc 8, sl 15, hdc (24)
Row 17: hdc 9 (9)
Row 18: hdc 9 (9)
Finish off and leave a long tail.
Assembly Instructions
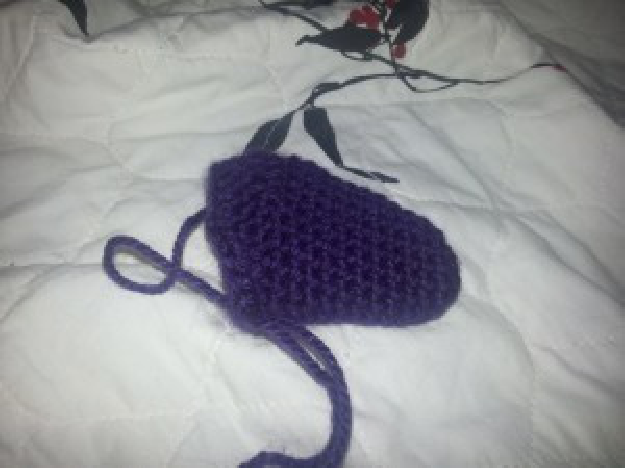
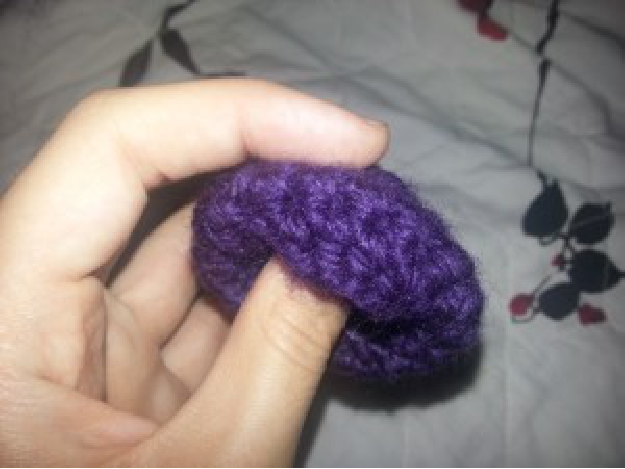
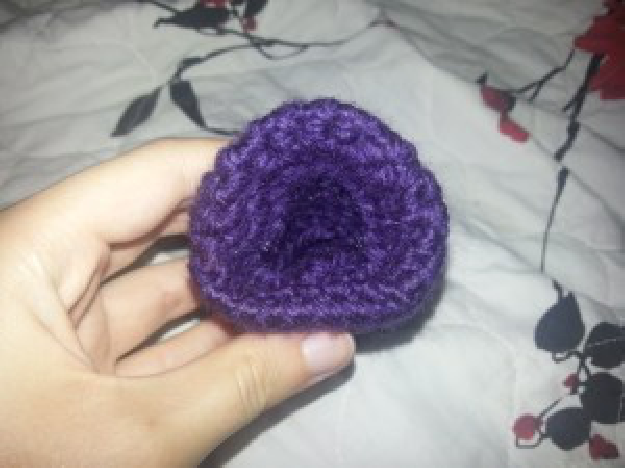
First, carefully sew the two large horns onto Gengar’s head. Next, attach the smaller middle spikes to his head. After that, it’s time to sew the arms to the body. Before attaching them, you’ll need to fold the last rows of the arms to give them the correct angle. To do this, fold the top two rows inwards, the three side rows inwards, and the bottom four rows inwards. Here are some photos to guide you through the folding process:
Once the arms are shaped, sew the fingers to each hand. For the feet, sew them to the legs, and then attach the toes to each foot. Finally, sew the legs (remember to fold the tips) and the tail to the main body.
To complete Gengar’s iconic look, you’ll create his eyes and mouth. We recommend first sketching them on paper and holding them up to his face to get the right size and shape. Once you’re satisfied, cut the felt accordingly. Use the black fabric paint to add his pupils to the white felt eyes. Before gluing the eyes onto his face, pin them in place with adhesive tape, then sew his eyebrows above them. After the eyebrows are secure, you can glue the eyes. Lastly, create his wide, mischievous smile using white felt and black fabric paint for the details, and then glue it to his face.
Conclusion
We hope you enjoyed crafting your very own Gengar amigurumi! This pattern is a fantastic way to celebrate your love for Pokémon and add a unique, handmade touch to your home or give as a special gift. We always love to see your creations! Share your finished Gengar on social media and tag Crochetto, or simply send us a picture. Happy crocheting!
Find Amazing Free Crochet Patterns on Crochetto