Crochet Your Dream Lilac Moonchild Crop Top
Introduction
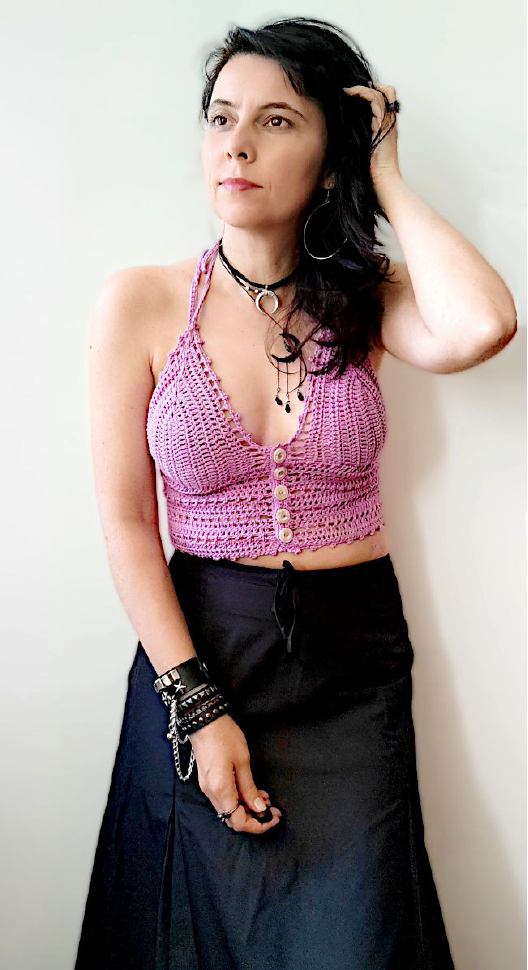
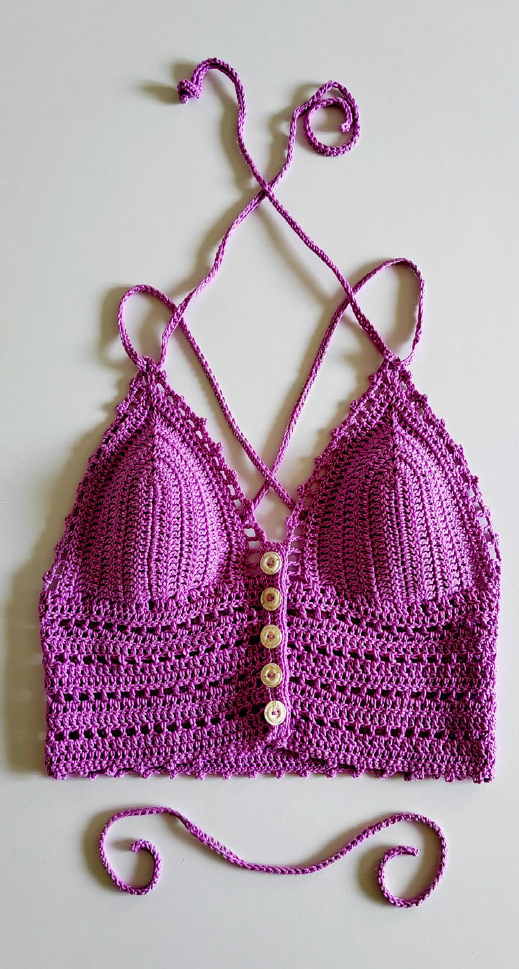
Welcome to a journey of creativity and self-expression with the Lilac Moonchild Crop-Top! Inspired by the delicate lilac bloom and the magic of moonlit nights, this crop-top is designed for those moments when you step into your own light and start becoming who you truly are. It’s more than just a garment; it’s a whisper of lilac blossoms under moonlit skies — a gentle reminder that growth and transformation bloom in the quietest moments. This pattern wraps you in a soft, bohemian embrace, where flowing straps tie like the wind’s own fingers, and each stitch carries a story of becoming. Whether worn under the sun or beneath the stars, it invites you to dance freely in your skin and find your own rhythm of wild, tender strength.
Difficulty Level, Skills, Techniques
To make the Lilac Moonchild Crop-Top, you need skills which are between experienced beginner and lower intermediate. Stitches used for this project are chain, single crochet, half double crochet, and double crochet.
Materials
Yarn
- Lilac cotton yarn (or any color of your choice)
- 1 skein: 50gr = 125m/136yds; 100% Cotton.
- Amount: 100-200gr, depending on your size. I’m size M, and I used about 120gr of yarn.
Hooks & Needles
- 3mm crochet hook
- Yarn needle for weaving in ends
Tension
Worked flat:
18-20dc in 12 rows = 10 x 10cm/4 x 4in
Sizes & Measurements
This tutorial doesn’t propose standard measurements but is rather intended to fit the top according to your own proportions. Therefore, you will be doing some measurements of your body before you start crocheting the top.
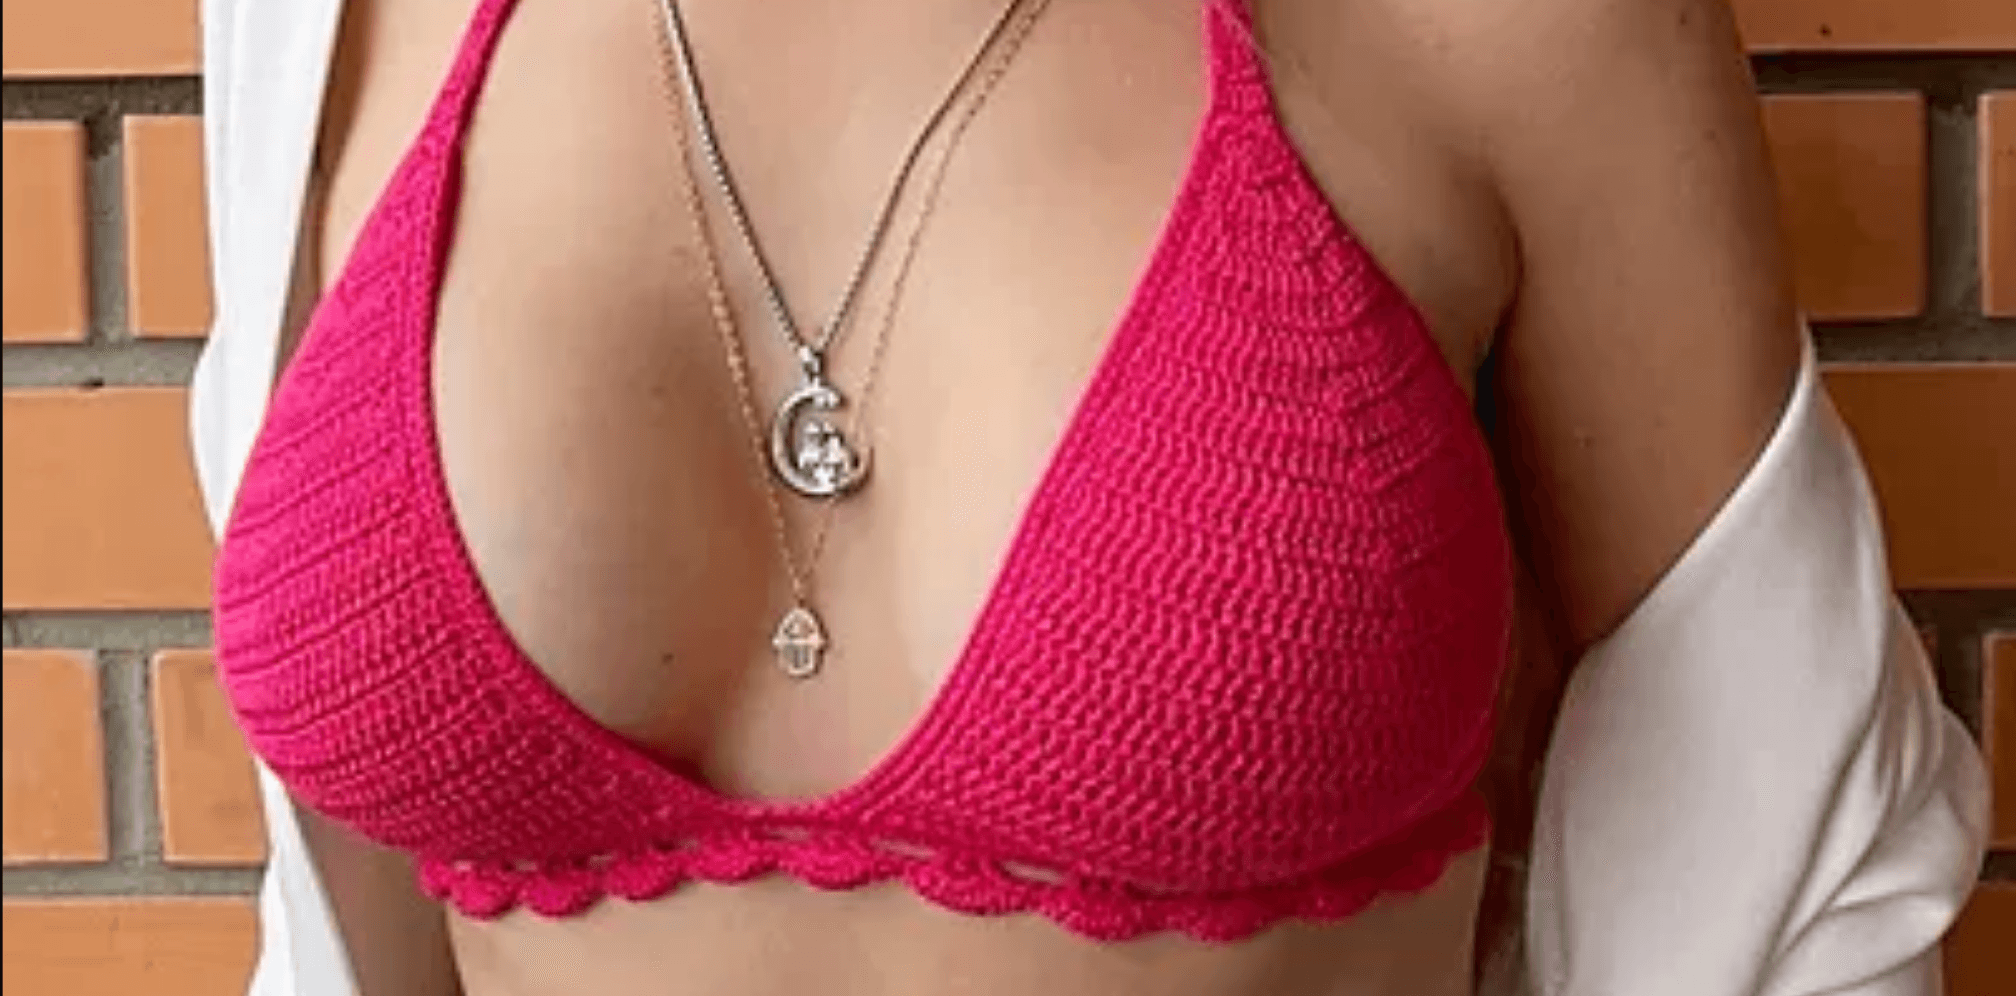
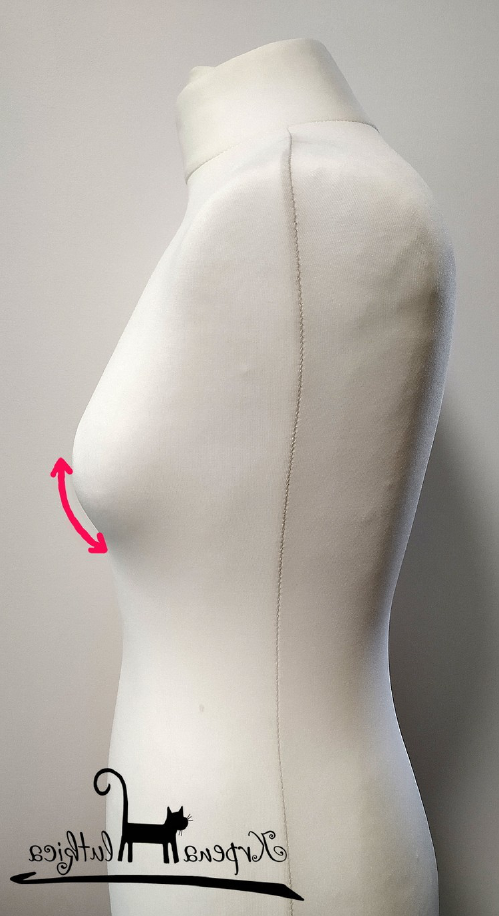
Bust Point To Underbust
To get the right size and shape of the cups, you’ll need to measure bust point to underbust. Look at the photo below, and run the measuring tape from your bust point (the nipple) to the underbust (where your breast ends). Write this measurement down which you will use to crochet a chain of the corresponding length. Depending on your breast size, this number is about 8-15cm/3-6in.
Back Width
Measure the width of your back starting from one armpit to another, all the way across your back. Write down this measurement as well. This will be the length of the chain between the cups.
General Information About the Pattern
- The pattern is written in US terms.
- Although this isn’t a typical standard-size tutorial, there are a couple of differences for standard sizes that I have included in this pattern. Therefore, different size information is given in the format S-M-L-XL-XXL-XXXL.
- Stitch repeats are given in parentheses.
Drawing/Schematic
Below you can see the schematic showing all elements of the Lilac Moonchild Crop-Top.
Diagrams
Diagram 1: Bra Cup
Diagram 1 shows the make of one cup. The start is at the arrow, and after completing the initial chain, you will be working along upper side of the chain, make the corner, and then continue along the bottom side of the chain. Only then do you turn your work. The same diagram is used for bra pads which serve as a kind of lining, to prevent transparency. However, bra pads will have 2 rows less than the cups.
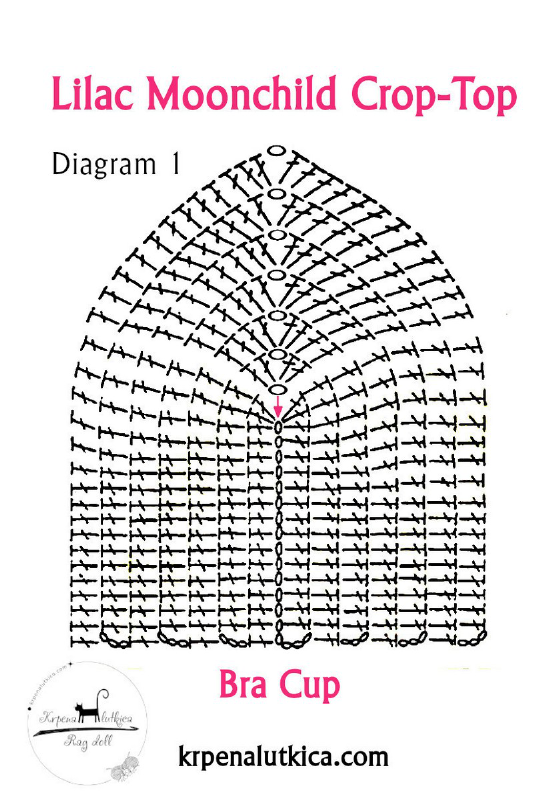
Diagram 2: Underbust Construction
Diagram 2 shows both cups turned upside down, and the underbust part of the top which is done along their bottom sides. The number of chain sts between the cups will depend on your own measurements, as stated above in the section Sizes & Measurements, as well as in further instructions.
Abbreviations
- st(s) – stitch(es)
- rnd – round
- ch – chain
- sl.st – slip stitch
- sc – single crochet
- blo sc – back loop only sc = insert the hook in back loops of every stitch
- dc – double crochet
- picot – ch3, slip stitch in the sc before ch3
Instructions
Right Cup
Start by chaining as many sts as you need to get your bust point to underbust measurement, but make sure you have an odd number of sts. Work in turns, following the Bra Cup diagram above, and written instructions below.
Row 1 – Ch2, dc in 4th st from hook, dc to the last st; in last st:(3dc, ch1, pm, 3dc). Continue working along the other side of the chain – dc to the end of row. Turn.
Row 2 – Ch2, dc in 4th st from hook, dc to the marker; in ch1-sp:(2dc, ch1, 2dc), move marker to ch1-sp. Continue with dc in each st till the end of row. Turn.
Repeat Row 2 until you have a total of 6-7-8-9-10-11 rows, or as many rows as you need to fit your boob in it.
Last row Ch3, (sk1, dc, ch1) repeat to the marker, in ch1-sp:(dc, ch1, dc), remove marker. Continue to the end of row like this: (ch1, sk1, dc). Break yarn, weave in end.
Left Cup
Make the left cup in the same way. When you finish the left cup, DO NOT break yarn, DO NOT TURN.
Underbust
Follow Diagram 2 and written instructions below. Work along the bottom side of the left cup like this:
Row 1 – ch3, 2dc in 1st ch-sp, 2dc under each dc/ch3 of the cup. Next, ch the number of sts that correspond to your Back Width, then continue along the bottom side of the right cup by doing 2dc under each dc/ch3 of the cup, finish with 1dc in the last st. Turn. Count the sts – there should be an uneven number of sts. If you have an even number of sts, add 1 dc in next row.
Row 2 – Ch3, dc in each st to the end of row. Turn.
Row 3 – Ch4, (sk1, dc, ch1)repeat to the end of row, 1dc in the last st. Turn.
Row 4 – Ch3, (1dc in ch-sp, 1dc in next st)repeat to the end of row, turn.
Row 5 – like Row 2.
Repeat rows 3-5 three more times, DO NOT break yarn, turn. Start the edging.
Edging
Note: since at this stage you are holding the top upside down, the left cup is on your right, and the right cup is on the left. I wrote this remark so as not to confuse left and right cups in further text.
Sc in 1st st, picot, (3sc, picot)repeat to the end of row, finish with a picot in the last st (or wherever it may fall). DO NOT turn, continue edging all around the top. When you get almost to the end of the left cup, stop doing the picots and only work sc: counting from the bottom of the left cup, do the last picot in the 5th – 5th 6th 6th 7th-7th ch-sp.
Button Placket
Row 1 – (2sc in next ch-sp)repeat 5-5-6-6-7-7 times, [(2sc under ch3/dc)2x, 2sc in next ch-sp]4x, (2sc under ch3/dc)2x. Turn.
Row 2 – blo sc along the placket, i.e. until there are 3sts left before the first picot, turn.
Row 3 blo sc along the placket, turn.
Repeat Row 3 twice more, break yarn, weave in end.
Button Holes Placket
Attach yarn at the right bottom corner of the top, do a sc in the first st, and work blo sc.
Row 1 3blo sc, (ch3, sk2, 5blo sc)repeat 4-4-5-5-6-6 times, ch3, sk2, 3blo sc, turn.
Row 2 – 3blo sc, (2sc in next ch-sp, 5blo sc)repeat 4-4-5-5-6-6 times, 2sc in next ch-sp, 3blo sc, turn.
Row 3 – blo sc along the placket, break yarn, weave in end.
Straps
Chain 320-320-340-340-360-360 sts and do 1 row of hdc on all sts. Break yarn, weave in end.
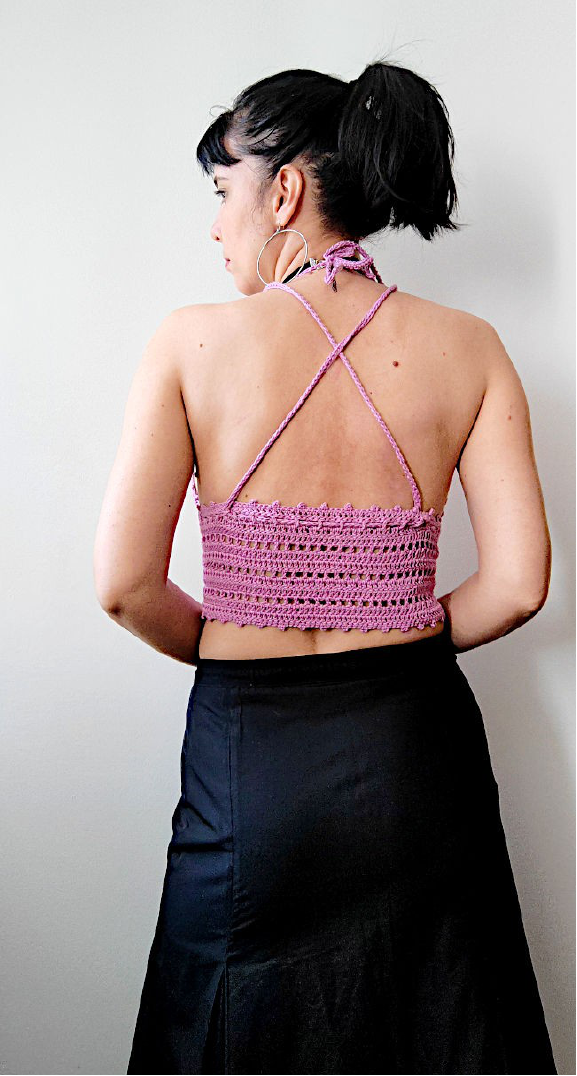
Sew buttons on the left placket. Pull the drawstring through the top like shown in the photo below, and try on the top. Also, take a look at this video clip showing how to pull the straps through the top and tie them around your neck.
Cleavage Drawstring
In case you find the cleavage too deep, you can crochet a drawstring that can be pulled through chain spaces of the cups, above the buttons, and close the cleavage as much as you want. To do that, ch100 and do hdc along the chain. Break yarn, weave in end, and use this drawstring like you would lace up a corset.
Bra Pads
To prevent transparency, some crocheters place manufactured bra pads in tops like this. I tried some of the pads that I found in my local shops but the shape didn’t quite fit my cups; it was too perky and looked a bit unnatural. That’s why I decided to crochet my own bra pads and line the top with them. It is certainly a good idea to reinforce the cups if you don’t feel comfortable wearing it without a bra, especially because crocheted items stretch when putting them on, which results in cups becoming transparent up to a point. On the other hand, if you love being free and without restraints, and you’re not worried whether your breasts will attract attention (which I absolutely respect), you can omit this step.
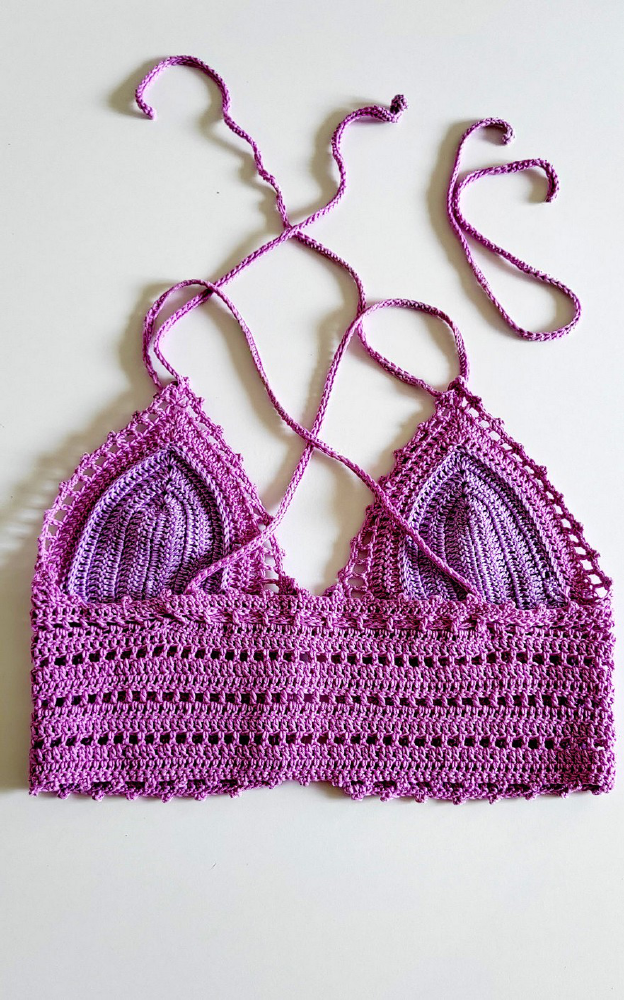
I crocheted 2 additional cups/bra pads with a slightly different shade of lilac (because I’d used up the original yarn), but it turned out perfect for this tutorial; now you are able to see what they look like and how they sit in the cups. For the bra pads I did 2 rows less than for the cups (for example, my size M cups have 7 rows of dc, while the pads have 5). In the next row I attached each pad to the inside of the cups by doing slip stitches all around. And that’s all there is to it.
After inserting these additional bra pads, I noticed a couple of benefits of doing this step.
- Firstly, the cups don’t stretch as much as they did without the pads. The whole top has a more solid structure, while it still remains flexible, especially in the underbust area, but with no tendency to become too loose.
- Secondly, the cups look fuller but natural (and so do my breasts) as if I’m wearing an invisible bra. This characteristic is very important for me because I love the natural look. I’m not really into push-up bras, bikinis, etc, particularly on the beach, and in the summer, when things are supposed to be relaxed, fun, comfy…
- Finally, this additional layer didn’t make the top too heavy or too warm to wear, which, I must admit, did cross my mind. On the contrary. Being made from fine cotton yarn, it feels very cozy and pleasant to the skin, even at 40°C (104°F)!
Final Thought
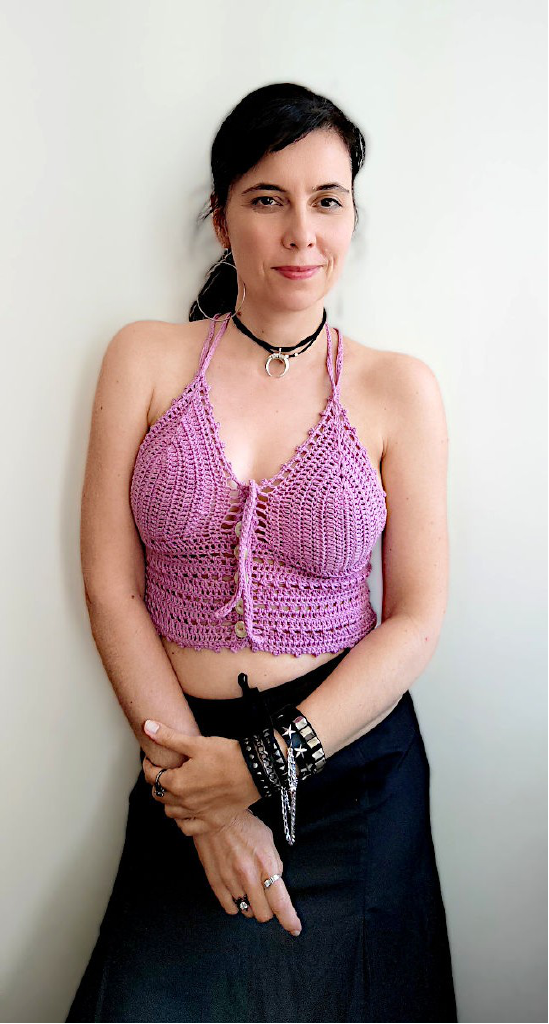
Wear the top with your favorite skirt, shorts, or any other garment of your choice. This, kind of bohemian design, requires some boho jewelry too, so throw on a nice long necklace, a leather bracelet (or your favorite bangles, if you prefer), and some oversized earrings to complete the whole beach style which will release the Lilac Moonchild in you…
On my blog you can take a look at the white Lilac Moonchild top I made as well. Check out why that one, paired up with contrasting embellishments, showcases a whole different style…
Gallery
We hope you’ve enjoyed this pattern for the Lilac Moonchild Crop-Top! We love seeing your creations, so please share your finished pieces with us on social media by tagging @Crochetto. Your beautiful projects inspire our entire community. Happy crocheting, and may your hook always find its rhythm!