OMG, So Cute! Your Axolotl Crochet Pattern Has Arrived
The Ultimate No-Sew Axolotl Crochet Pattern (Beginner-Friendly!)
There’s something undeniably charming about axolotls. With their whimsical gills and sweet smiles, they’ve captured hearts worldwide and have become one of the most sought-after projects in the amigurumi world. If you’ve been dreaming of creating your own adorable aquatic friend without the hassle of sewing on a dozen tiny pieces, you’ve come to the right place! Welcome to the ultimate guide to the axolotl crochet pattern, designed especially for crafters who love a beautiful result with minimal fuss.
This comprehensive, no-sew axolotl crochet pattern is perfect for both confident beginners and seasoned crocheters looking for a quick and satisfying project. We’ll guide you through every step, from choosing the plushest yarn to adding the final, charming details. Forget spending hours sewing on legs and gills; this clever pattern incorporates them as you go! Get ready to hook into a project that’s not only incredibly fun to make but also results in a squishy, lovable plushie perfect for markets, gifts, or as a cheerful desk companion. Let’s dive in and bring this cute creature to life!
Gathering Your Materials for the Perfect Amigurumi Axolotl
Before we begin our crochet adventure, let’s gather all the necessary supplies. Using the right materials is key to creating a soft, cuddly, and durable axolotl plushie. This axolotl crochet pattern is designed for plush yarn, which gives it that wonderfully squishable quality that’s so popular.

Choosing the Best Yarn
The magic of this amigurumi axolotl lies in its softness. To achieve this, I highly recommend using a super bulky (weight 6) or a chunky (weight 5) chenille or blanket yarn. These yarns work up quickly and are incredibly forgiving, making them a fantastic choice for this type of project. You will need two different colors: a main color for the body and a contrasting highlight color for those signature gills and the optional tail frill. A great “chunky yarn axolotl crochet pattern” like this one truly shines with velvety textures.
- Main Body Color (MC): Choose any color you love! Pinks, blues, and teals are popular choices for a classic axolotl look, but don’t be afraid to get creative with purples, yellows, or even a rainbow yarn.
- Highlight Color (HC): Select a color that contrasts nicely with your main choice. This will make the gills pop and add a beautiful decorative touch.
Using a plush yarn not only makes the final product extra soft but also helps to hide any minor imperfections in your stitches, which is a great confidence booster for those newer to amigurumi. This is a very beginner friendly crochet axolotl pattern because of the yarn choice.
Essential Tools and Notions
Aside from your yarn, you’ll need a few other essential tools to complete your axolotl. Having everything ready before you start will ensure a smooth and enjoyable crafting experience.
- Crochet Hook: A 5.0mm (H) hook is generally a great size for chunky weight yarn. The goal is to create tight stitches so the stuffing doesn’t show through. If you notice gaps, don’t hesitate to go down to a 4.5mm hook. [4]
- Safety Eyes: 12mm safety eyes give the axolotl a sweet and soulful expression. Always ensure you attach the washer securely on the inside of the project before you close it up.
- Stitch Marker: Absolutely essential for amigurumi! Since you’ll be working in a continuous spiral, a stitch marker will help you keep track of the beginning of each round.
- Poly-Fil Stuffing: For a firm and well-shaped plushie, you’ll need a good amount of polyester fiberfill.
- Tapestry Needle: A sturdy yarn needle is needed for weaving in the final ends.
- Scissors: A sharp pair of scissors for clean yarn cuts.
The Complete No-Sew Axolotl Crochet Pattern (Step-by-Step)
Here it is—the moment you’ve been waiting for! This detailed, easy-to-follow axolotl crochet pattern will guide you through creating a completely no-sew amigurumi. We will build the entire plushie from the head down to the tail, incorporating the gills and legs as we crochet. This technique is a game-changer and makes for a fast, fun project.
Crochet Abbreviations and Special Stitches
This pattern is written in standard US crochet terms.
- MR: Magic Ring
- SC: Single Crochet
- INC: Increase (work 2 SC in the same stitch)
- DEC: Invisible Decrease (work through the front loops of the next two stitches)
- CH: Chain
- HDC: Half Double Crochet
- Bobble Stitch (for legs): Yarn over, insert hook, pull up a loop, yarn over, pull through two loops. Repeat this process 4 more times in the same stitch until you have six loops on your hook. Yarn over and pull through all six loops to complete the stitch.
The bobble stitch creates the perfect little nubby legs without any sewing, a key feature of this fantastic no-sew axolotl crochet pattern.
Part 1: Crocheting the Head and Gills
Grab your main color (MC) yarn and your 5mm hook to get started.
- Round 1: 6 SC into a MR (6)
- Round 2: INC in each stitch around (12)
- Round 3: [1 SC, INC] repeat 6 times (18)
- Round 4: [2 SC, INC] repeat 6 times (24)
- Round 5: SC in each stitch around (24)
Round 6 (Gills Round): This is the most intricate round. Pay close attention to the color changes. Grab your highlight color (HC).
- In MC, work 4 SC. On the 5th SC, insert hook, pull up a loop, but finish the stitch with your HC.
- First Gill: CH 5. Starting in the second chain from the hook, work 4 SC down the chain. On the final SC, switch back to MC to complete the stitch.
- In MC, SC in the next stitch on the head, switching to HC to complete it.
- Second Gill: Repeat step 2.
- In MC, SC in the next stitch, switching to HC.
- Third Gill: Repeat step 2.
- In MC, SC in the next stitch fully. Now work 9 SC in MC. On the 9th stitch, switch to HC.
- Repeat the process for the three gills on the other side.
- Finish the round with 4 SC in MC. (24 stitches, plus 6 gills)
After this round, you can cut your HC yarn, leaving a small tail to tie off inside with the starting tail of your MR. This is the magic of an integrated axolotl crochet pattern!
Part 2: Forming the Body and Legs
Now, we’ll shape the rest of the head and body. Ensure the gills are pushed forward, out of the way of your stitches.
- Round 7: SC in each stitch around (24)
- Round 8: [2 SC, DEC] repeat 6 times (18)
- Round 9: [1 SC, DEC] repeat 6 times (12)
Pause here to place the eyes and stuff the head. Place the 12mm safety eyes between Rounds 4 and 5, positioning them symmetrically between the gills. Secure the backs firmly. Stuff the head generously with Poly-Fil.
- Round 10: [1 SC, INC] repeat 6 times (18)
- Round 11 (Front Legs): 7 SC, Bobble Stitch in the next stitch, 4 SC, Bobble Stitch in the next stitch, 5 SC. (18)
- Rounds 12-14: SC in each stitch around for 3 rounds. (18)
- Round 15 (Back Legs): 8 SC, Bobble Stitch in the next stitch, 4 SC, Bobble Stitch in the next stitch, 4 SC. (18)
- Round 16: SC in each stitch around (18)
Pause again to stuff the body. It’s crucial to stuff the body firmly now before the opening gets too small.
Part 3: Shaping and Closing the Tail
We’re on the home stretch! Let’s create that cute, tapered tail.
- Round 17: [1 SC, DEC] repeat 6 times (12)
- Round 18: SC in each stitch around (12)
- Round 19: [1 SC, DEC] repeat 4 times (8)
Add more stuffing as needed, using the end of your hook or a pencil to get it down into the tail.
- Round 20: SC in each stitch around (8)
- Round 21: [2 SC, DEC] repeat 2 times (6)
- Round 22: SC in each stitch around (6)
Cut the yarn, leaving a long tail. Using your tapestry needle, weave the tail through the front loops only of the final 6 stitches. Pull tight to cinch the hole closed. Weave in the end securely. Congratulations, you’ve completed this amazing axolotl crochet pattern!
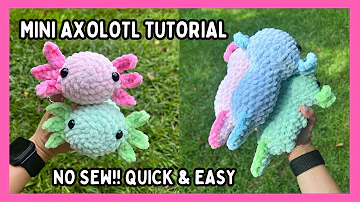
Visual Learner? Watch the Video Tutorial
For those who benefit from seeing the process in action, the video tutorial below provides a step-by-step visual guide to accompany this written axolotl crochet pattern. It’s especially helpful for mastering the gill technique and the bobble stitches!
Pro-Tips for a Perfectly Adorable Crocheted Axolotl
You’ve followed the axolotl crochet pattern, and your little creature is complete! Now, let’s talk about the finishing touches that elevate your project from handmade to professional-looking. These small details make a huge difference.
Getting the Eyes Just Right
Eye placement is critical for personality. The instructions suggest placing them between rounds 4 and 5, but feel free to play around. Placing them closer together can create a cuter, more “kawaii” look, while placing them farther apart might give your axolotl a goofier expression. Before you snap those washers on, take a moment to pin the eyes in place and look at the head from all angles. A unique insight is to slightly indent the eye sockets by pulling the yarn tight when weaving in ends, giving the face more dimension. This advanced amigurumi technique truly enhances this easy axolotl crochet pattern.
The Art of Perfect Stuffing
Stuffing can make or break an amigurumi project. The goal is firm, but not overstuffed to the point of stretching the stitches. Stuff in small clumps to avoid lumps. Pay special attention to the head and neck area to ensure the head doesn’t become wobbly. As you stuff the body and tail, use the end of your crochet hook or a chopstick to push the filling into all the little spaces. A well-stuffed toy will hold its shape beautifully over time. Remember, this axolotl crochet pattern is designed to be cuddly, so a good, even stuffing is paramount.
Adding the Optional Tail Frill
For an extra pop of color and texture, adding a frill to the tail is a fantastic finishing touch. This detail makes your creation stand out and provides another opportunity to use your lovely highlight color. This part of the axolotl crochet pattern adds a professional flair.
- Attach your highlight color (HC) yarn with a slip stitch to the top of the tail, around where the decreases began (roughly Round 19 or 20).
- Work a line of HDC stitches down the top of the tail, placing one stitch into the end of each round.
- Continue down and around the tip of the tail and slightly up the other side for a fuller look.
- When you’re happy with the length, fasten off, leaving a tail.
- Use your tapestry needle to weave in both the starting and ending tails securely into the body.
This frill adds a beautiful, flowing fin detail that truly completes the axolotl’s iconic look. It’s a simple addition that makes this free axolotl crochet pattern even more special.
Customizing Your Axolotl Crochet Pattern
One of the greatest joys of crochet is the ability to make a pattern uniquely your own. This axolotl crochet pattern is a perfect canvas for your creativity. By simply changing up colors, yarn types, or sizes, you can create a whole family of distinct and charming axolotls.
Playing with Colors
The color combinations for your axolotl are virtually endless! While pinks and whites are traditional, axolotls in the wild can be golden, grey, or dark-colored. Don’t feel limited to realistic colors either! Imagine a galaxy-themed axolotl with dark blue, purple, and black yarn, or a pastel rainbow axolotl for a touch of whimsy. You could even make a strawberry-themed one with red and green, or a blueberry axolotl with shades of blue. Using a variegated yarn for the body and a solid color for the gills can also produce stunning, unexpected results. This versatile axolotl crochet pattern encourages you to experiment.
Sizing Up or Down with Different Yarns and Hooks
Want a giant, huggable axolotl or a tiny keychain version? It’s easy to adjust the size by changing your yarn and hook. This axolotl crochet pattern is written for chunky yarn and a 5.0mm hook, but you can:
- Go Bigger: Use a jumbo (weight 7) blanket yarn with a 8.0mm or 9.0mm hook for a super-sized, cuddly pillow. You’ll need larger safety eyes, perhaps 20mm or 24mm.
- Go Smaller: Use a worsted weight (weight 4) acrylic or cotton yarn with a 3.5mm hook for a smaller plushie, perfect for little hands. For a tiny keychain, try DK (weight 3) or even fingering (weight 1) yarn with a 2.25mm hook and use embroidery thread for the eyes instead of safety eyes.
The key is to always use a hook that is a couple of sizes smaller than what the yarn label recommends. This ensures your stitches are tight enough to prevent the stuffing from peeking through, regardless of the scale. Experimenting with size is a fun way to get more use out of this single axolotl crochet pattern.
Quick Takeaways
- No-Sew Construction: This axolotl crochet pattern is designed to be completely no-sew, with gills and legs worked directly into the body.
- Beginner-Friendly: Using simple stitches and plush, chunky yarn, this project is perfect for those new to amigurumi.
- Fast and Fun: The pattern works up quickly, making it a highly satisfying project for market prep or last-minute gifts.
- Customizable: Easily change the look of your axolotl by experimenting with different color combinations and yarn weights.
- Key Stitches: The pattern primarily uses single crochet, increases, decreases, and a special bobble stitch for the legs.
- Essential Materials: You’ll need chunky yarn in two colors, a 5mm hook, 12mm safety eyes, and stuffing.
- Finishing Touches: An optional tail frill can be added for extra detail and a professional look.
Conclusion: Your New Favorite Amigurumi Project
Congratulations on completing your adorable, no-sew axolotl! You’ve successfully navigated the innovative techniques of this axolotl crochet pattern to create a charming plushie without picking up a sewing needle for assembly. This project proves that amigurumi can be both impressive and incredibly efficient. The clever construction of the integrated gills and bobble-stitch legs not only saves time but also results in a durable, seamless toy that’s ready for endless cuddles.
This journey has equipped you with more than just a cute creature; you’ve practiced color changes, special stitches, and the art of shaping and stuffing—all valuable skills in the world of crochet. We hope this axolotl crochet pattern has sparked your imagination and shown you the possibilities for customization. Whether you stick to classic colors or design a whole rainbow of axolotls, each one will be a testament to your creativity and skill. This free axolotl crochet pattern is a fantastic resource for any crafter’s library.
Now that you have this wonderful axolotl crochet pattern in your toolkit, the possibilities are limitless. Will you create a tiny axolotl keychain, a giant cuddly pillow, or a whole family to sell at your next market? Whatever you choose, you’re now ready to spread the joy of these smiling, frilly-gilled wonders.
Frequently Asked Questions (FAQ)
1. What is the best yarn for this axolotl crochet pattern?
For a soft and cuddly result, a super bulky (weight 6) or chunky (weight 5) chenille or blanket yarn is highly recommended. These yarns work up quickly and are very forgiving for beginners.
2. Is this no-sew axolotl crochet pattern suitable for a beginner?
Absolutely! While the gill round involves color changes, the pattern uses basic stitches and the provided video tutorial offers excellent visual guidance. The no-sew aspect makes it less intimidating than traditional amigurumi patterns. [6]
3. How can I make the gills stand up straight?
The gills are designed to pop out naturally. After crocheting them, gently press them flat and away from the head. As you continue to work the subsequent rounds, be sure to crochet *around* them and not catch them in your stitches. The firmness of the stuffing in the head will also help them hold their shape.
4. Can I sell the plushies I make from this axolotl crochet pattern?
This article is a rewrite of a tutorial for educational purposes. For the original creator’s policy on selling finished items, you would need to consult their specific pattern terms, which are often found on their blog or pattern page. Generally, many designers allow small-scale selling with pattern credit.
5. How do I make my amigurumi axolotl bigger or smaller?
You can easily change the size by using different yarn weights and corresponding hook sizes. For a larger plushie, use jumbo yarn and a larger hook. For a mini version, use worsted or DK weight yarn with a smaller hook. Just remember to keep your stitches tight to prevent the stuffing from showing.
Share Your Creation!
We are so excited to see your finished axolotls! What color combination did you choose for your axolotl crochet pattern? Share a photo of your creation in the comments below or on social media! Your unique take could be the inspiration for someone else’s next project. Happy crocheting!
References
- Oombawka Design Crochet – A fantastic resource for free amigurumi patterns and tutorials. [2, 10, 14]
- Loops and Love Crochet – Offers a variety of cute and well-written amigurumi patterns, including another adorable axolotl. [6]
- Sarah Maker – A comprehensive blog that often features roundups of popular patterns, including various styles of the axolotl. [6]
- Easy Crochet – Provides guides and free patterns, often detailing material choices for amigurumi projects. [4]