Crochet Your Own Adorable Zephyr Bunny!
Crochet Your Own Adorable Zephyr Bunny: A Detailed Pattern Guide
Welcome, fellow crafters, to a delightful journey into the world of amigurumi! There’s nothing quite as heartwarming as creating a cuddly companion with your own hands. At Crochetto, we’re passionate about bringing you inspiring and easy-to-follow patterns, and this adorable Zephyr Bunny is no exception. Designed with clarity and precision, this pattern exemplifies high-quality, professional SEO crochet patterns content, ensuring your crafting experience is smooth and enjoyable from start to finish. Get ready to crochet a charming new friend that will bring joy to anyone who holds it!
About Your Zephyr Bunny
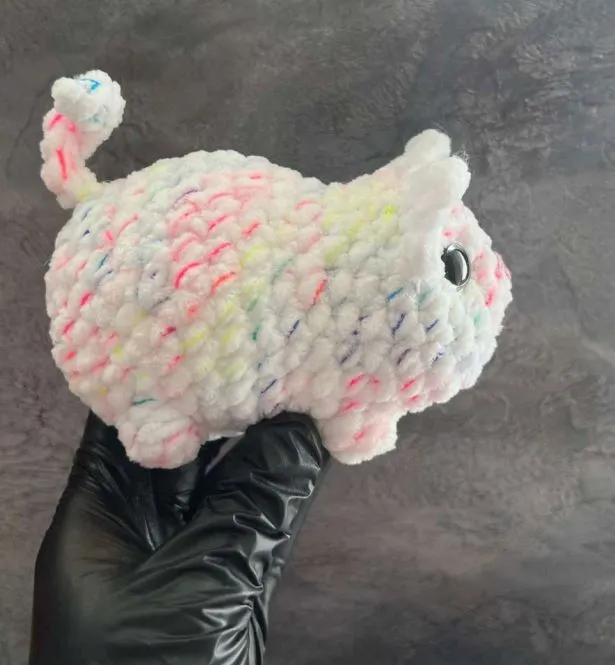
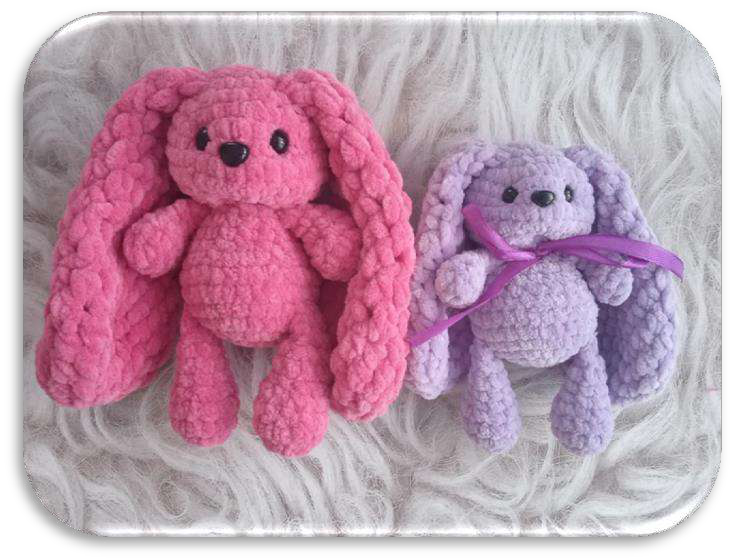
This pattern offers flexibility based on your chosen yarn, allowing you to create bunnies of different sizes.
* **Bunny 15-16 cm:**
* Lavita Velur yarn
* Eyes – 10 mm
* Nose – 10 mm
* **Bunny 11-12 cm:**
* Lavita Mini Velur yarn
* Eyes – 8 mm
* Nose – 8 mm

Essential Abbreviations
To make this pattern easy to follow, here are the abbreviations you’ll encounter:
* **MR:** magic ring
* **SC:** single crochet
* **INC:** increase (2 sc in one stitch)
* **DEC:** decrease (crochet 2 sc together into one stitch)
* **HDC:** half double crochet
* **( … ):** number of stitches in the row
* **( … )*X times:** repeat the action in parentheses X times
Materials You’ll Need
Gather these materials to start your Zephyr Bunny:
* Plush yarn (choose your favorite color!)
* Crochet hook (select according to your yarn’s recommendation)
* Safety eyes and nose (choose the appropriate size for your bunny)
* Holofiber or any other preferred stuffing/filler
* Tapestry needle for plush yarn
* Scissors
* Stitch marker for marking the beginning of the row
_Original pattern author unknown, partially altered and supplemented by @katrinabelikova_
Getting Started: The Crochet Pattern Instructions
Follow these detailed instructions to create each part of your adorable Zephyr Bunny. Remember to keep track of your rows with a stitch marker!
Arms (Make 2)

1. 6 sc in MR
2. 3 inc, 3 sc (9)
3. 9 sc
4. 9 sc
5. 3 dec, 3 sc (6)
6. 6 sc
Fold in half, crochet through both layers 3 sc.
Legs (Make 2)

1. 6 sc in MR
2. 6 inc (12)
3. 6 sc, inc, 5 sc (13)
4. 13 sc
5. (sc, dec)*4, sc (9)
6. 4 sc, dec, 3 sc (8)
7. 8 sc
8. 8 sc
Stuff the bottom of the leg lightly.
9. 4 dec
Fold in half, crochet through both layers 2 sc.
Body

1. 6 sc in MR
2. 6 inc (12)
3. (sc, inc)*6 (18)
4. (2 sc, inc)*6 (24)
In the next row, crochet in the legs.
5. 4 sc, 2 sc with leg, 9 sc, 2 sc with leg, 7 sc (24)
6. (3 sc, inc)*6 (30)
7. 30 sc
8. (3 sc, dec)*6 (24)
9. (2 sc, dec)*6 (18)
10. 18 sc
11. 18 sc
In the next row, crochet in the arms.
12. sc, dec, sc with arm, dec with arm, (sc, dec)*2, sc with arm, dec with arm, sc, dec (12)
Fasten off, cut the yarn, leave a tail for sewing.
Head

1. 6 sc in MR
2. 6 inc (12)
3. (sc, inc)*6 (18)
4. (2 sc, inc)*6 (24)
5. 5 sc, (inc, sc)*2, place an additional marker (this will be the center of the muzzle), (inc, sc)*2, (5 sc, inc)*2 (30)
6. 30 sc
7. 30 sc
8. 30 sc
9. 30 sc
10. (3 sc, dec)*6 (24)
11. (2 sc, dec)*6 (18)
12. (sc, dec)*6 (12)
Insert eyes between rows 6 and 7 (counting from the top of the head, the additional marker should be in the middle of the eyes).
Insert nose between rows 5 and 6 (counting from the top of the head).
Muzzle Sculpting (Tensioning)
This technique adds definition to your bunny’s face.
* Insert needle, leave a tail 5-7 cm.
* Follow this sequence for stitch placement: 1-3-4-2-1-5-6-2.
* Cut the thread, pull both tails to create the indentation, tie the tails securely, and hide the ends.
Ears (Make 2)

Crochet with hook #5. All rows are hdc.
1. 6 hdc in MR
2. 6 inc (12)
3. (1 hdc, inc)*6 (18)
4. 18 hdc
5. 18 hdc
6. (dec, 7 hdc)*2 (16)
7. 16 hdc
8. (dec, 6 hdc)*2 (14)
9. 14 hdc
10. (dec, 5 hdc)*2 (12)
11. 12 hdc
12. (dec, 4 hdc)*2 (10)
13. 10 hdc
14. (dec, 3 hdc)*2 (8)
15. 8 hdc
Fold in half, crochet through both layers 4 sc.
Assembly and Finishing Touches
Once all your pieces are crocheted, it’s time to bring your Zephyr Bunny to life! Carefully stuff all parts, if not already done, ensuring a firm but squishy finish. Sew the head to the body, then attach the ears to the top of the head. Add any final embellishments like a small ribbon or embroidered details to personalize your new friend.
We hope you’ve enjoyed creating this charming Zephyr Bunny! Crafting these delightful amigurumi creatures is a truly rewarding experience, and we love being a part of your creative journey. Share your finished bunny with us on social media using #CrochettoPatterns – we can’t wait to see your unique creations!