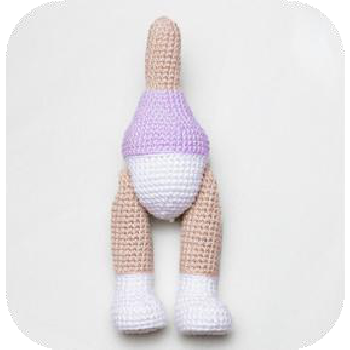
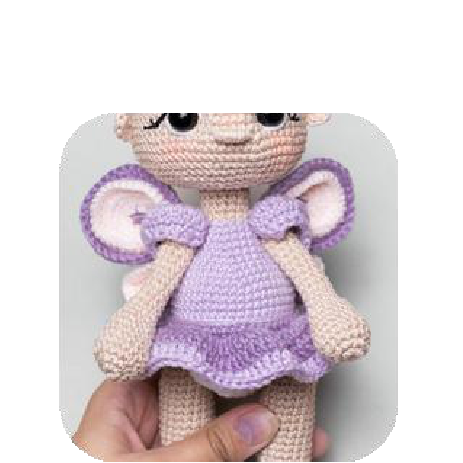
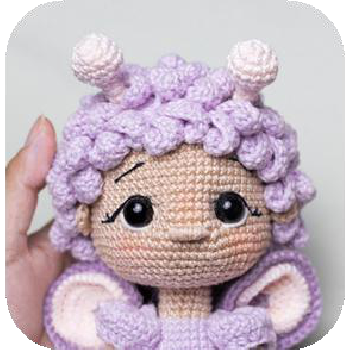
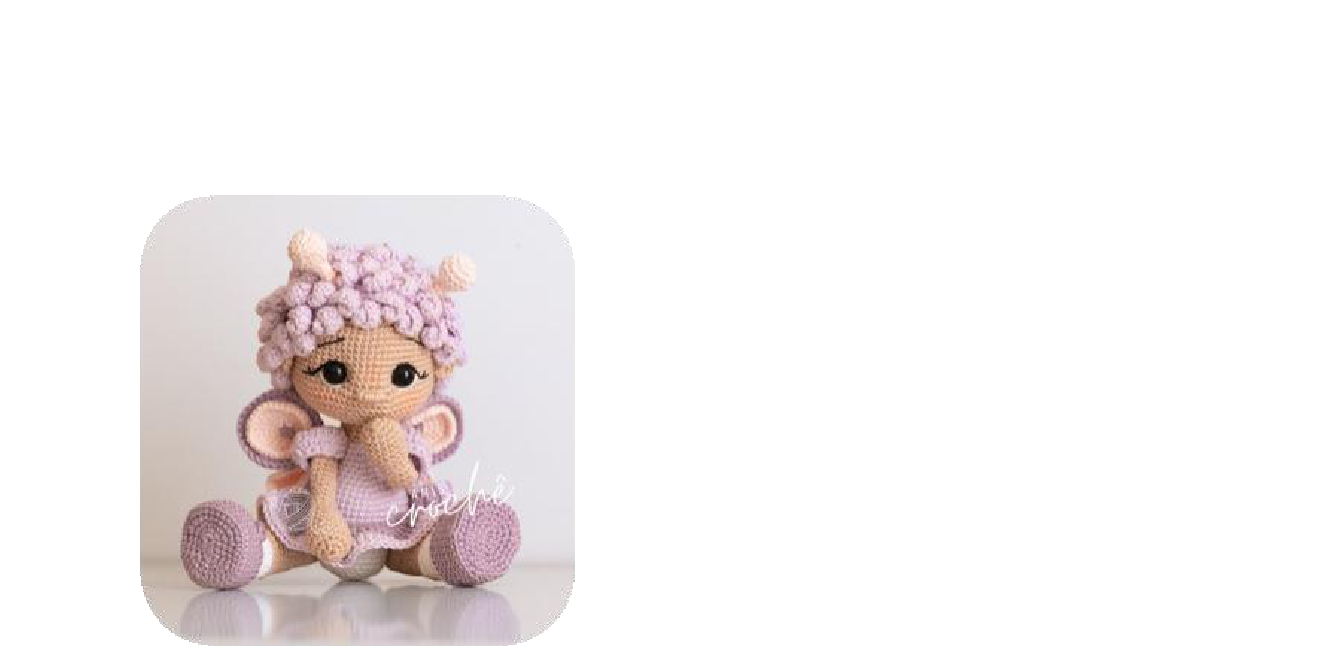
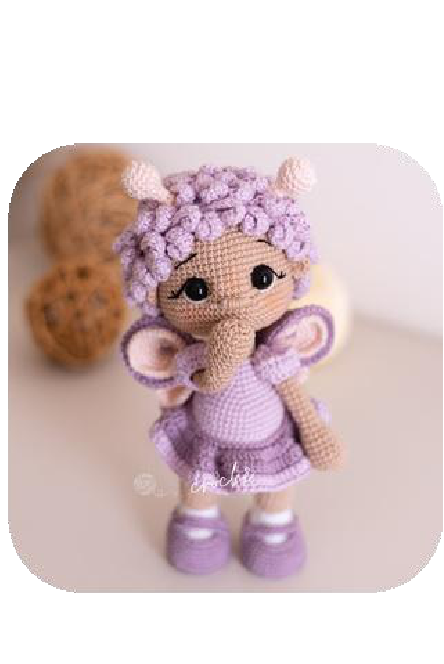
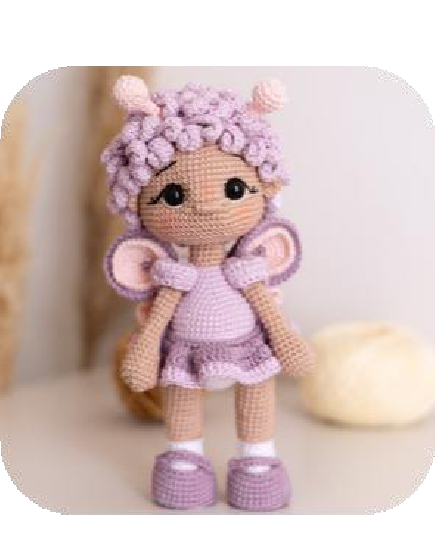
Crochet Lizzie: Your Enchanting Butterfly Doll.
Welcome, fellow crafters, to Crochetto! We are absolutely thrilled to present Lizzie, an enchanting butterfly doll that will flutter her way right into your heart. This pattern is designed to guide you through every stitch, helping you create a beautiful, whimsical companion. Whether you’re an experienced crocheter or looking for your next joyful project, you’ll find this an engaging and rewarding experience. Get ready to dive into the delightful world of amigurumi with these professional SEO crochet patterns!
Abbreviations
- MR: Magic Ring
- Sc: Single crochet
- Sl st: Slip stitch
- Inc: Increase
- Hdc inc: Half double crochet increase
- Dc inc: Double crochet increase
- Tr inc: Treble crochet increase
- Dtr inc: Double treble crochet increase
- Dec: Decrease
- Hdc: Half double crochet
- Dc: Double crochet
- Tr: Treble crochet
- Ch: Chain
- FoL: Work in front loop only
- BoL: Work in back loop only
Materials Used
- Amigurumis yarn (Círculo) – lilac color (6006), light pink color (3148), beige color (7605), white color (8001), purple color (6802)
- Cléa yarn (Círculo) – black color (8990)
- Hook 2mm
- Safety eyes 12mm
- Stuffing
- Glue
- Blush
- Sewing needle, pins, scissors, stitch marker
- Finished doll size: 25cm tall
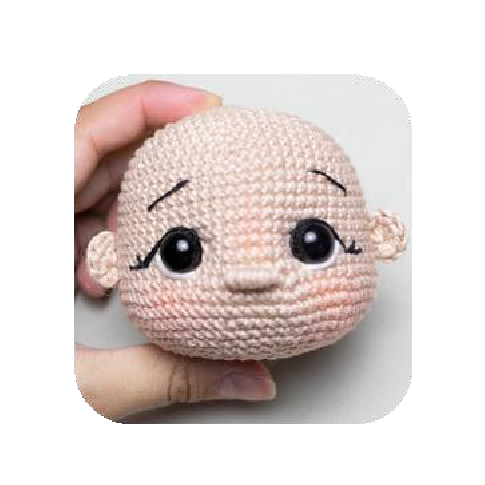
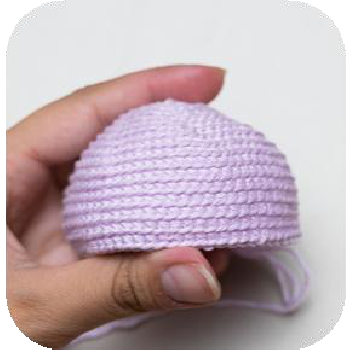
Head
Using beige yarn:
- 6sc in MR (6)
- 6inc (12)
- (sc, inc) 6 times (18)
- (2sc, inc) 6 times (24)
- (3sc, inc) 6 times (30)
- (4sc, inc) 6 times (36)
- (5sc, inc) 6 times (42)
- (6sc, inc) 6 times (48)
- (7sc, inc) 6 times (54)
- (8sc, inc) 6 times (60)
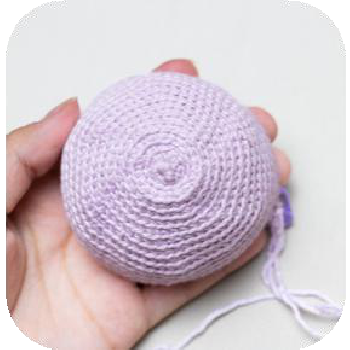
- Rows 11-20: 60sc (10 rows)
- Row 21: 15sc, (inc, 5sc) 5 times, inc, 14sc (66)
- Rows 22-23: 66sc (2 rows)
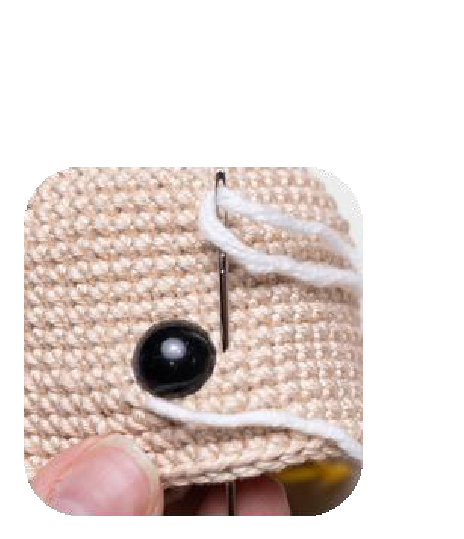
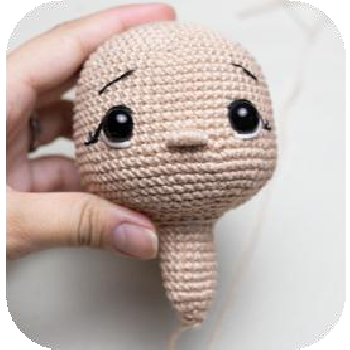
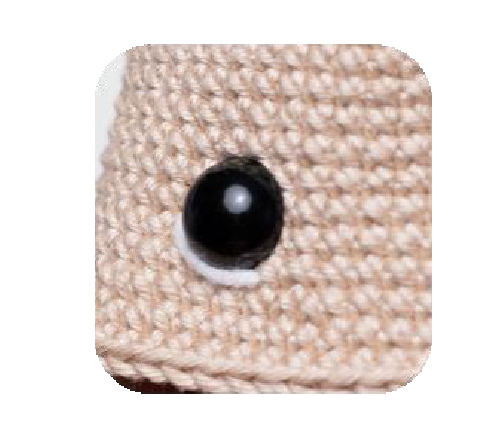
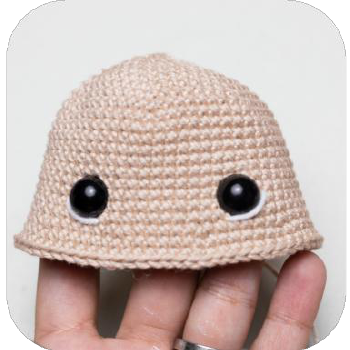
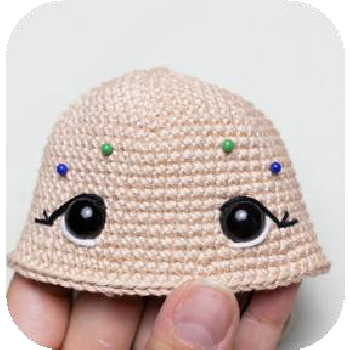
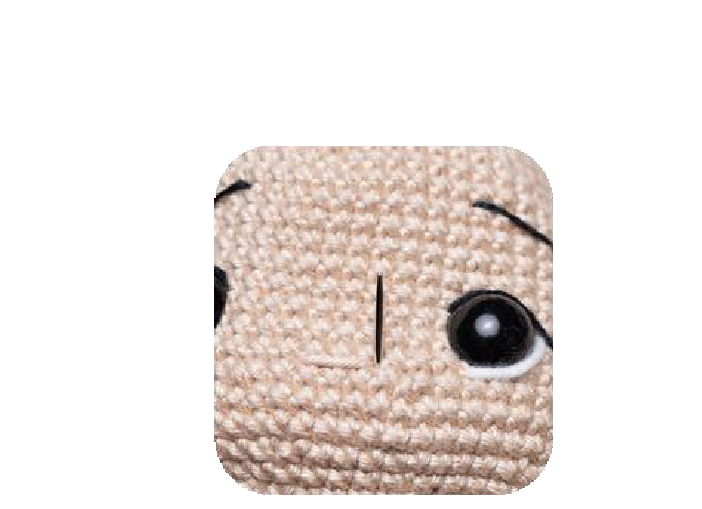
Insert safety eyes between rows 18 and 19. To do this, mark the first and last increases in row 20. From these, count 9 stitches towards the center of the face. These will be the eye placement.
- Row 24: (9sc, dec) 6 times (60)
- Row 25: 4sc, dec, (8sc, dec) 5 times, 4sc (54)
- Row 26: (7sc, dec) 6 times (48)
- Row 27: 3sc, dec, (6sc, dec) 5 times, 3sc (42)
- Row 28: (5sc, dec) 6 times (36)
- Row 29: 2sc, dec, (4sc, dec) 5 times, 2sc (30)
- Row 30: (3sc, dec) 6 times (24)
- Row 31: sc, dec, (2sc, dec) 5 times, sc (18)
- Row 32: BoL (18sc) (1 row)
- Rows 33-40: 18sc (8 rows)
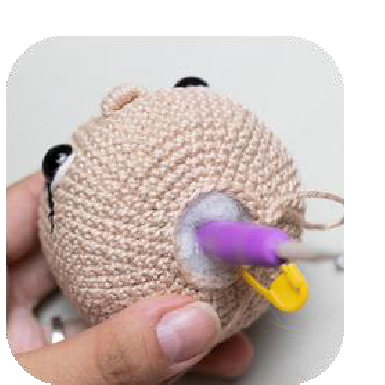
Continue stuffing the head firmly as you go.
- Row 41: (sc, dec) 6 times (12)
- Row 42: 6dec (6)
Fasten off and cinch the opening. Place the neck inside the head.
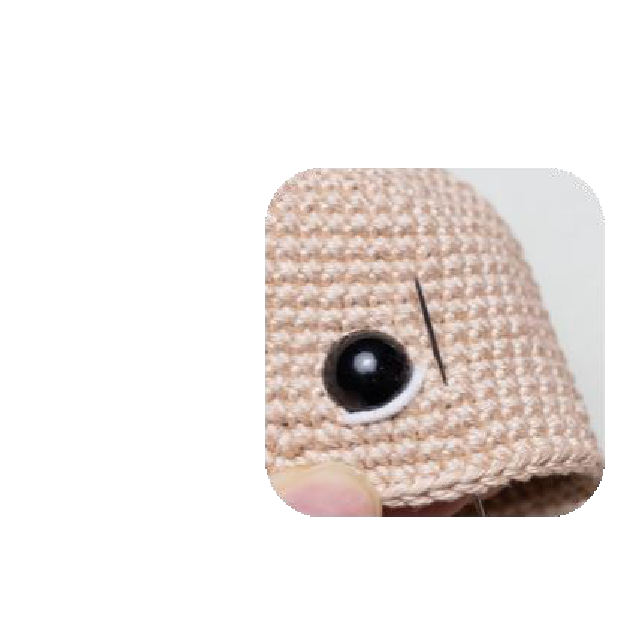
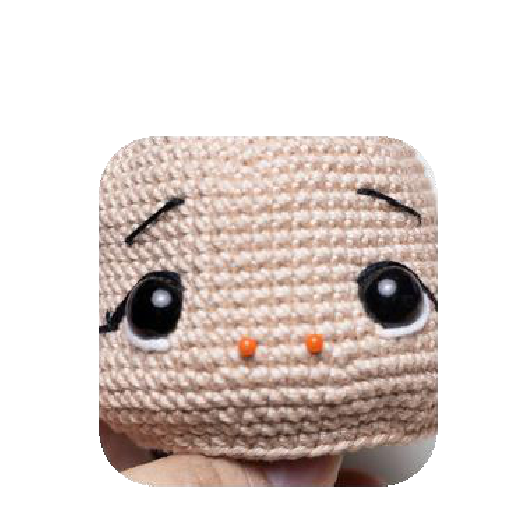
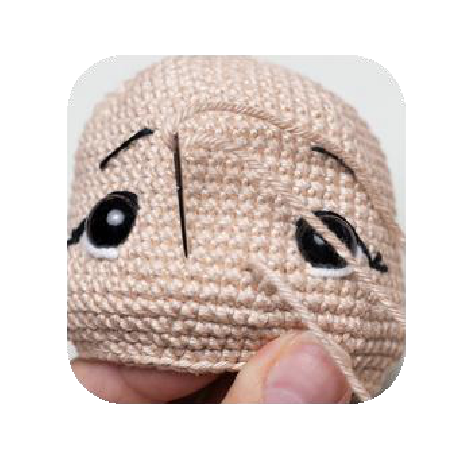
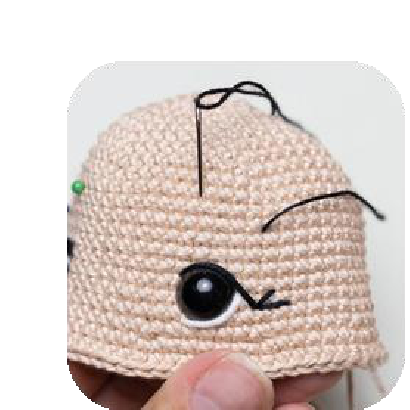
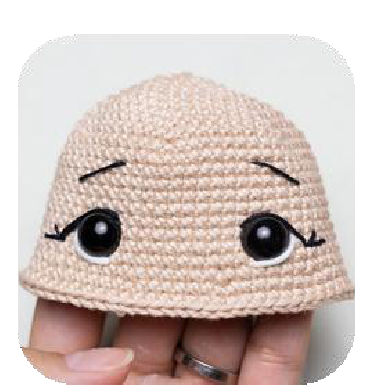
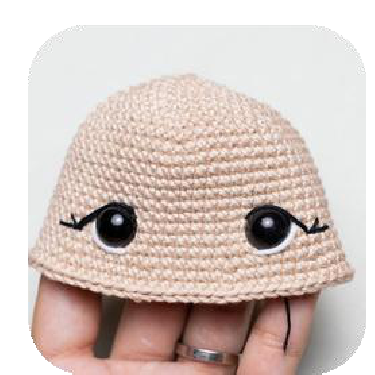
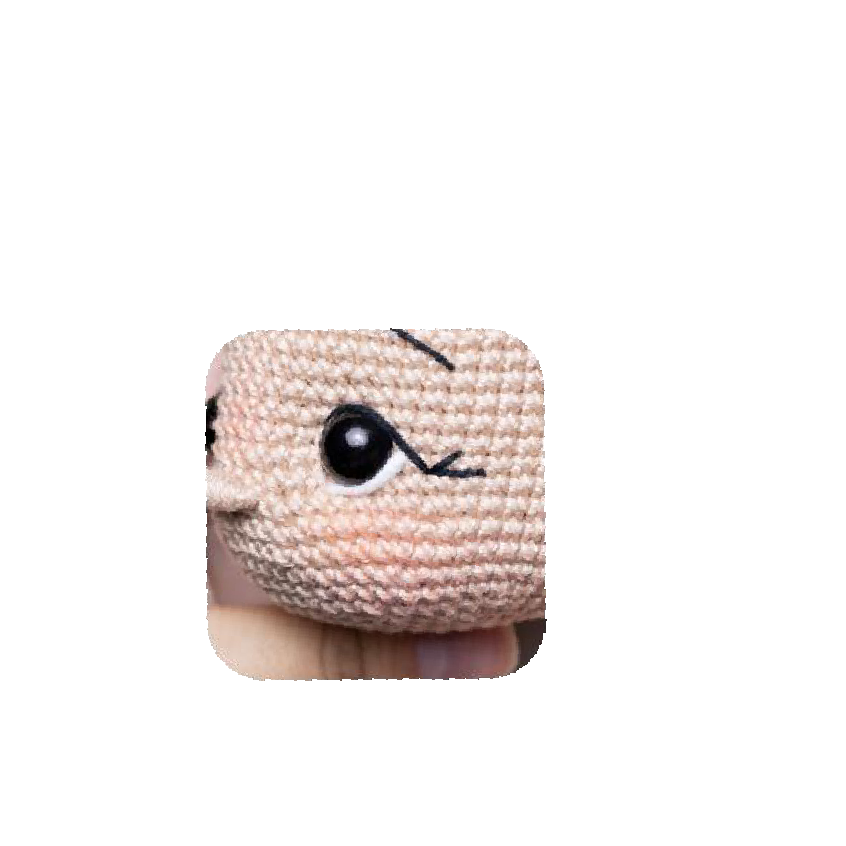
Embroider the whites of the eyes with white thread.

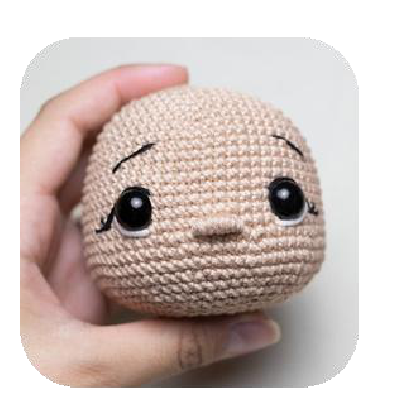

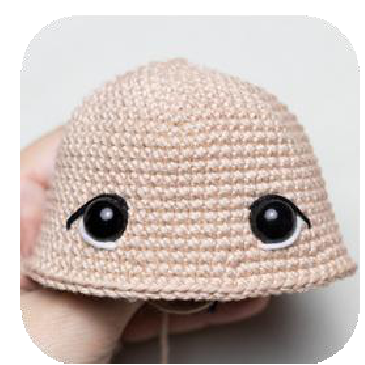

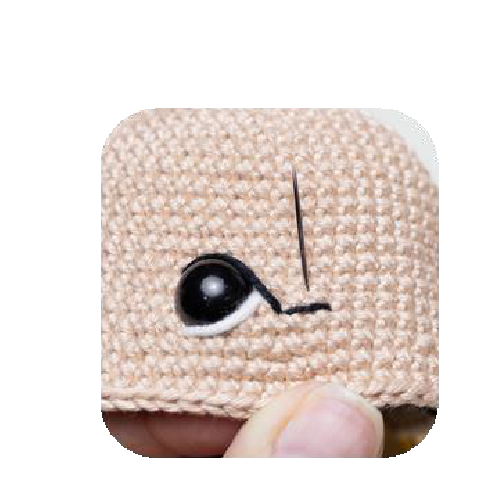


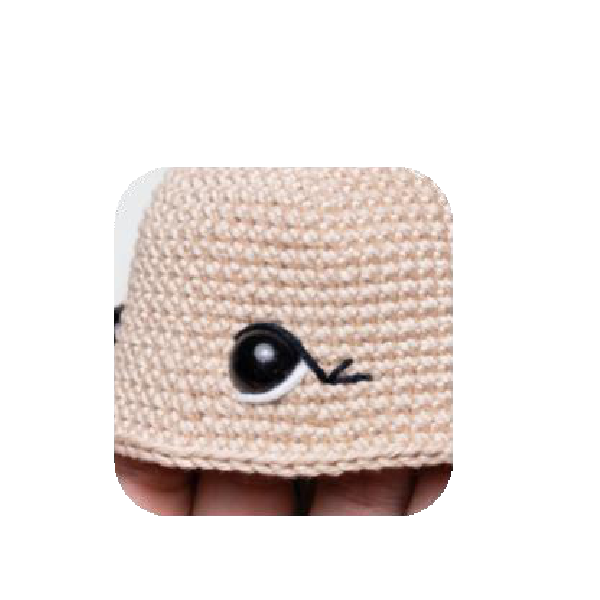
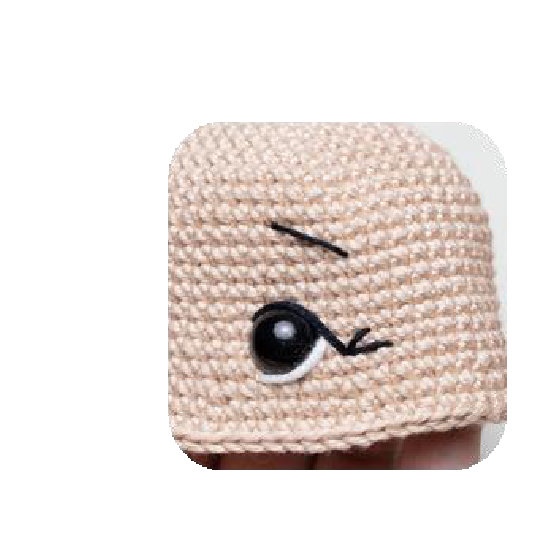
Embroider the eyelashes with black thread.
Mark the points for the eyebrows and embroider with black thread.
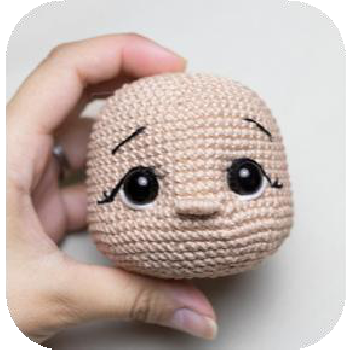
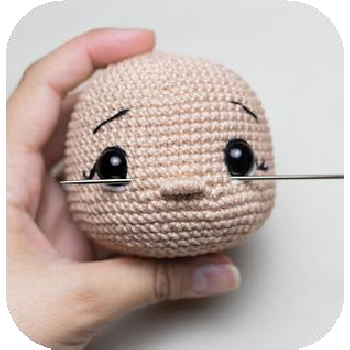
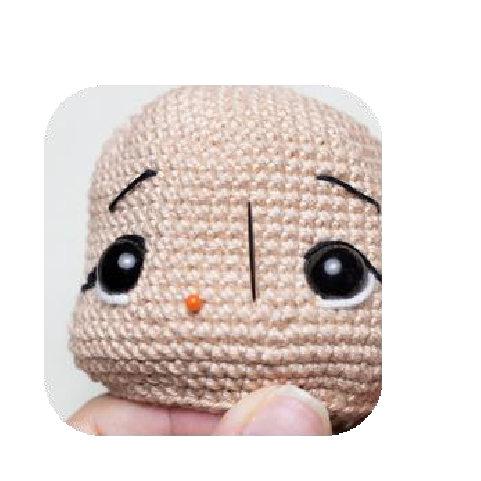
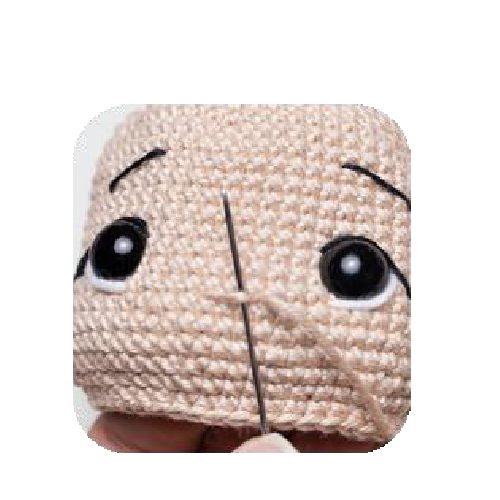
Embroider the nose with beige thread.
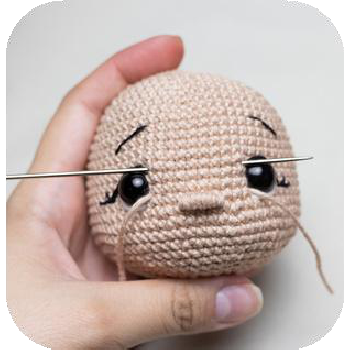
Cinch the eyes.
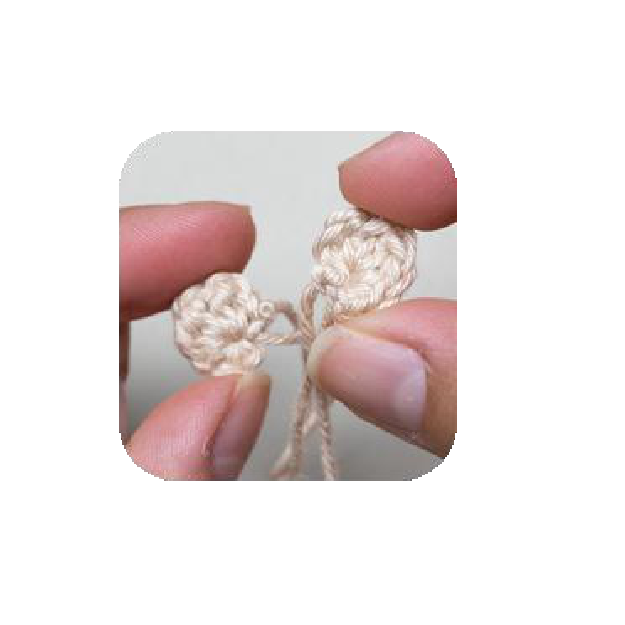
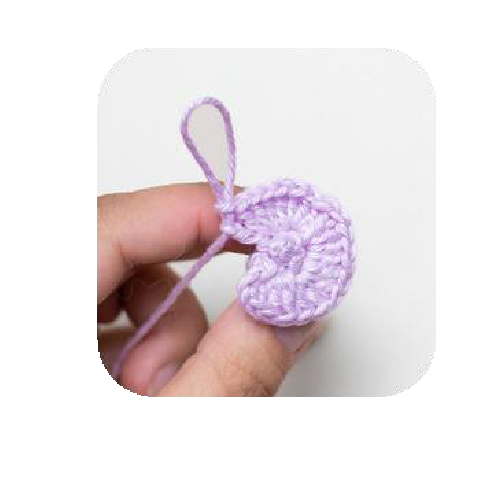
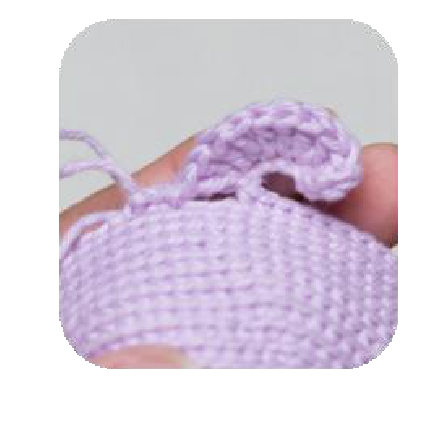
Ears (Make 2)
Using beige yarn:
In MR: 2sc, hdc, 2dc, 2ch, sl st
Fasten off. Cinch MR. Leave a long tail.
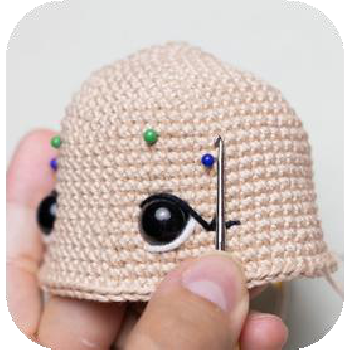
Sew the ears to the head between rows 17-19, 8 stitches away from the eye.
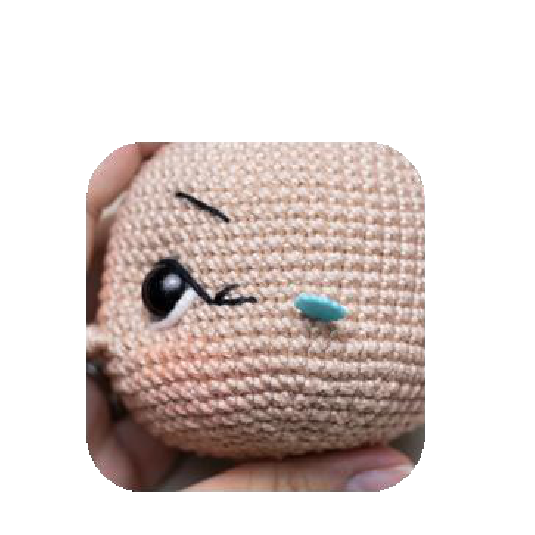

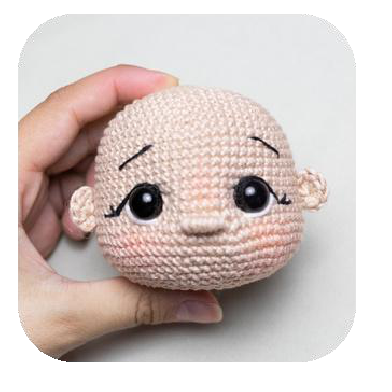
Apply blush to the cheeks.
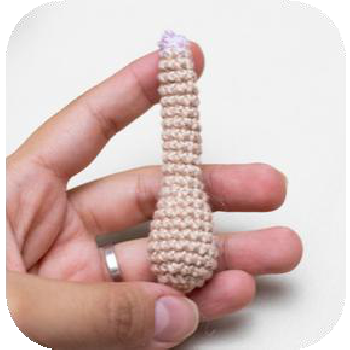
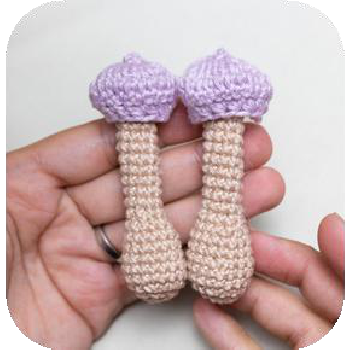
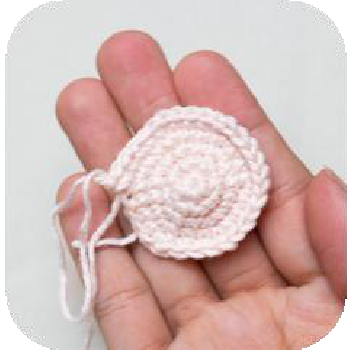
Legs (Make 2)
Using white yarn:
- Chain 5, starting from 2nd chain from hook: 3sc, 3sc in last chain, on the other side of the chain: 2sc, inc (10)
- Inc, 2sc, 3inc, 2sc, 2inc (16)
- (inc, inc, 2sc) 4 times (24)
- 3sc, inc, 2sc, 2inc, 6sc, 2inc, 2sc, inc, 5sc (30)
- BoL (30sc) (1 row)
- Rows 6-8: 30sc (3 rows)
- Row 9: 11sc, 3dec, 13sc (27)
- Row 10: 9sc, 3dec, 12sc (24)
- Row 11: 6sc, 6dec, 6sc (18)
- Rows 12-14: 18sc (3 rows)
Change to beige yarn.
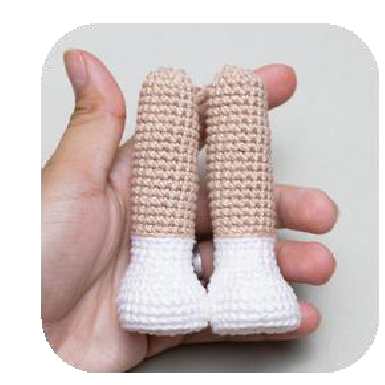
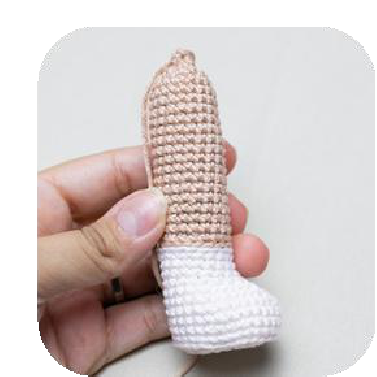
- Rows 15-31: 18sc (17 rows)
- Row 32: (sc, dec) 6 times (12)
- Row 33: 6dec (6)
Fasten off. Cinch the opening.
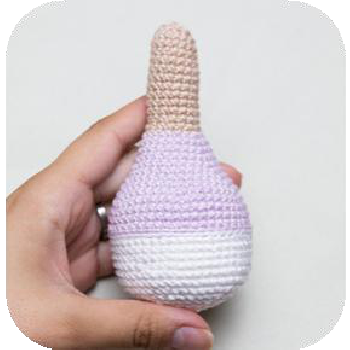
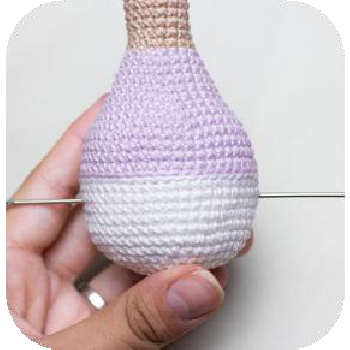
Body
Using beige yarn:
- 6sc in MR (6)
- 6inc (12)
- (3sc, inc) 3 times (15)
- Rows 4-13: 15sc (10 rows)
- Row 15: (4sc, inc) 3 times (18)
Change to lilac yarn.
- Row 16: (2sc, inc) 6 times (24)
- Row 17: 24sc (1 row)
- Row 18: (7sc, inc) 3 times (27)
- Row 19: 27sc (1 row)
- Row 20: (8sc, inc) 3 times (30)
- Row 21: (9sc, inc) 3 times (33)
- Row 22: (10sc, inc) 3 times (36)
- Row 23: (5sc, inc) 6 times (42)
- Row 24: (6sc, inc) 6 times (48)
- Rows 25-28: 48sc (4 rows)
Change to white yarn.
- Rows 29-34: 48sc (6 rows)
- Row 35: (6sc, dec) 6 times (42)
- Row 36: (5sc, dec) 6 times (36)
- Row 37: (4sc, dec) 6 times (30)
- Row 38: (3sc, dec) 6 times (24)
- Row 39: (2sc, dec) 6 times (18)
- Row 40: (sc, dec) 6 times (12)
- Row 41: 6dec (6)
Fasten off. Cinch the opening. Attach the legs to the body using thread jointing.
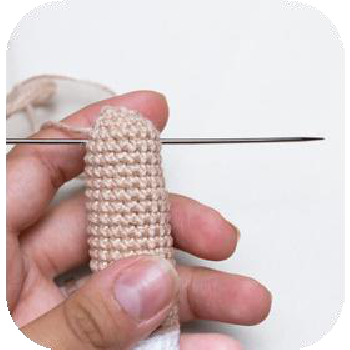
Arms (Make 2)
Using beige yarn:
- 6sc in MR
- 6inc (12)
- (sc, inc) 6 times (18)
- Rows 4-5: 18sc (2 rows)
- Row 6: (4sc, dec) 3 times (15)
- Rows 7-8: 15sc (2 rows)
- Row 9: (3sc, dec) 3 times (12)
- Row 10: (2sc, dec) 3 times (9)
Stuff lightly.
- Rows 11-22: 9sc (12 rows)
Change to lilac yarn.
- Row 23: (sc, dec) 3 times (6)
- Row 24: BoL (6sc) (1 row)
Fasten off. Cinch the opening.
Sleeves
Join lilac yarn to the front loops of row 23 of the arm. Skip one stitch.
- (4dc in 1 stitch) 5 times (20)
- 20dc (1 row)
- 10hdc dec (10)
Attach the arms to the body using thread jointing.
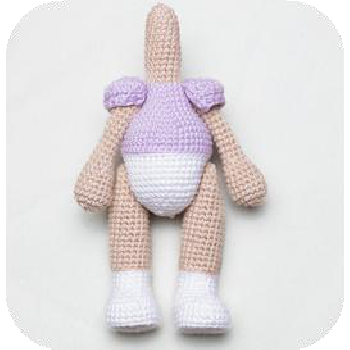
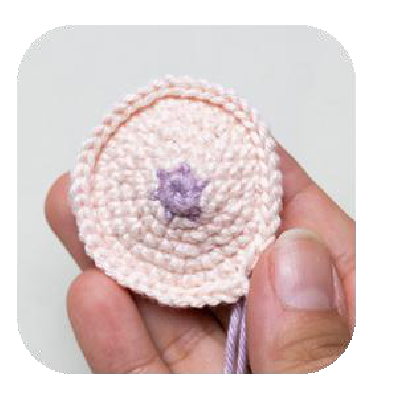
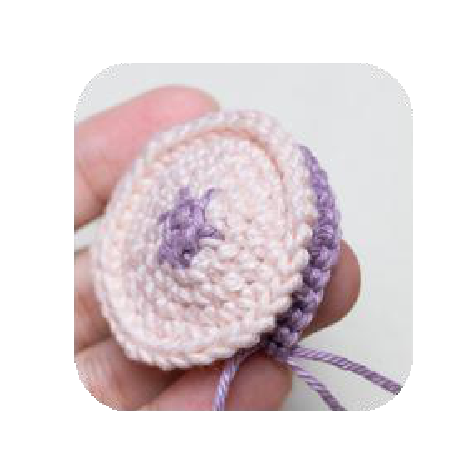
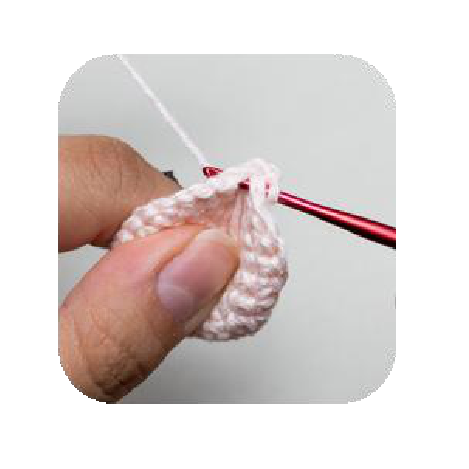
Wings (Make 2)
Part 1
Using purple yarn:
- 6sc in MR
Change to light pink yarn.
- BoL (6inc) (12)
- (sc, inc) 6 times (18)
- sc, inc, (2sc, inc) 5 times, sc (24)
- (3sc, inc) 6 times (30)
- 2sc, inc, (4sc, inc) 5 times, 2sc (36)
- FoL (5sc, inc) 6 times (42)
Fasten off.
Part 2
Using purple yarn:
- 6sc in MR
- 6inc (12)
- (sc, inc) 6 times (18)
- sc, inc, (2sc, inc) 5 times, sc (24)
- (3sc, inc) 6 times (30)
- (4sc, inc) 6 times (36)

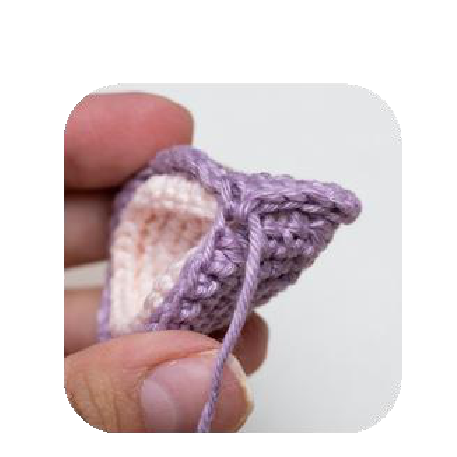
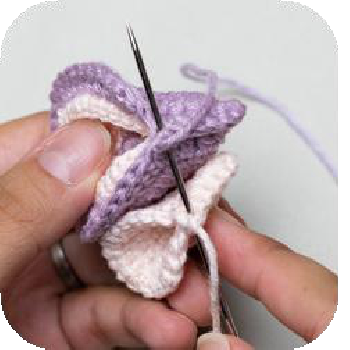
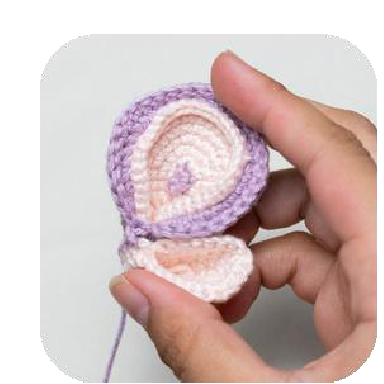
Fold together with Part 1 and crochet through the stitches of both pieces.
- 5hdc, hdc inc, 6dc, dc inc, (5tr, tr inc) 2 times, 5dc, dc inc, 5hdc, hdc inc (42)
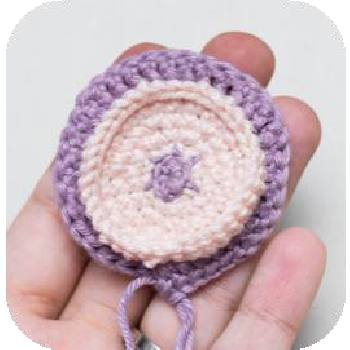
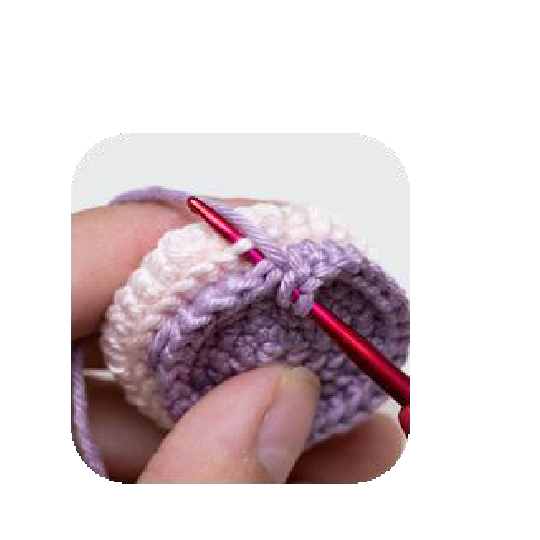
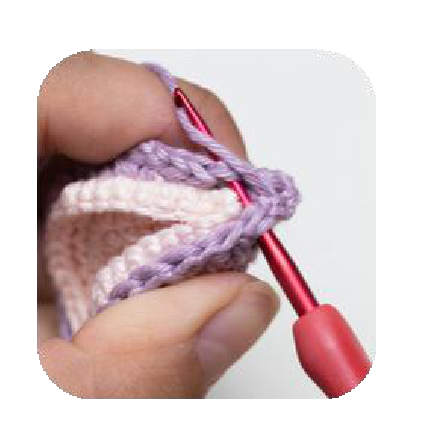
Fasten off. Leave a long tail for sewing.
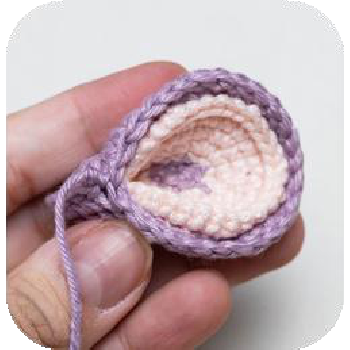
Part 3
Using light pink yarn:
- 6sc in MR
- 6inc (12)
- (sc, inc) 6 times (18)
- sc, inc, (2sc, inc) 5 times, sc (24)
- (3sc, inc) 6 times (30)
Fold in half and crochet 6sc.
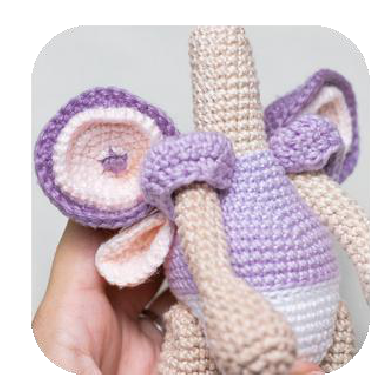
Sew the two parts together. Then sew the wings to the body at the back
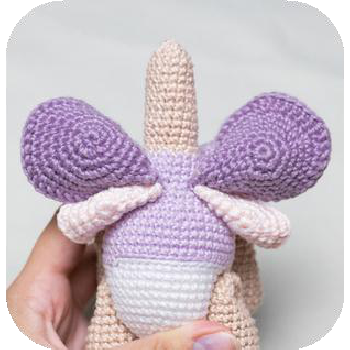

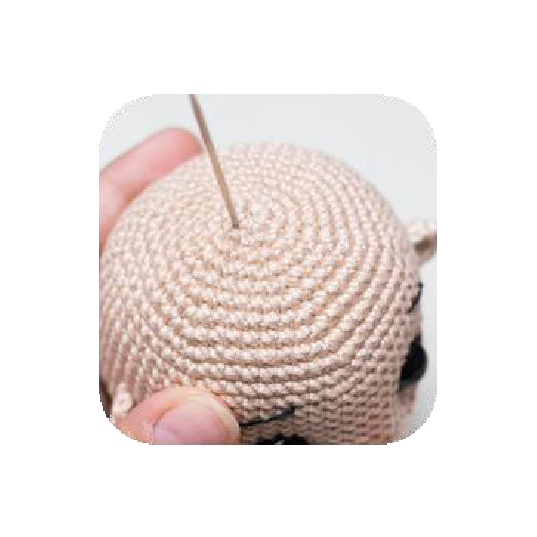
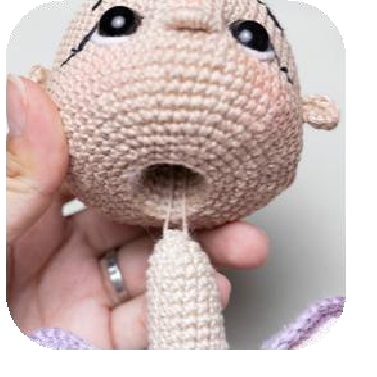
Thread a needle with beige yarn through the neck. Then guide it through the head from bottom to top. Place the neck into the head. Secure. Optionally, sew the head to the neck.

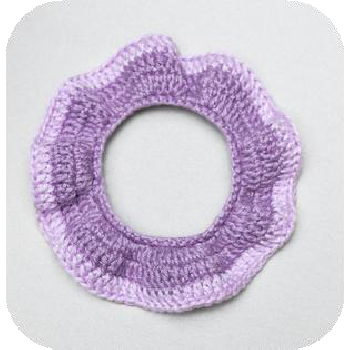
Skirt
Using purple yarn:
- Chain 50, sl st into the first chain, 50sc (1 row)
- FoL (3dc in 1 stitch, dc) 25 times (100)
- 100dc (1 row)
Change to lilac yarn.
- 100dc (1 row)
Fasten off.
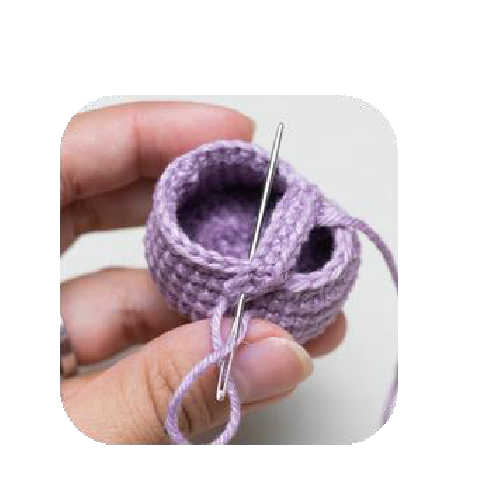
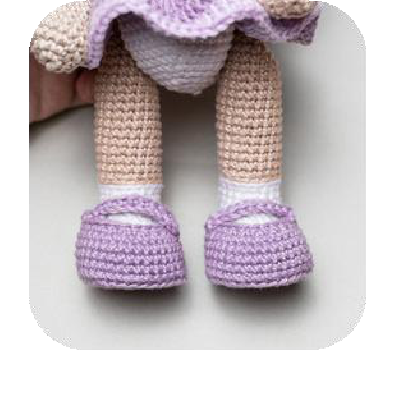
Shoes (Make 2)
Using purple yarn:
- Chain 5, starting from 2nd chain from hook: 3sc, 3sc in last chain, on the other side of the chain: 2sc, inc (10)
- Inc, 2sc, 3inc, 2sc, 2inc (16)
- (inc, inc, 2sc) 4 times (24)
- 3sc, inc, 2sc, 2inc, 6sc, 2inc, 2sc, inc, 5sc (30)
- 4sc, inc, 2sc, 2inc, 10sc, 2inc, 2sc, inc, 6sc (36)
- BoL (36sc) (1 row)
- Rows 7-10: 36sc (4 rows)
- Row 11: 11sc, 6dec, 13sc (30)
Strap
Join purple yarn to the side of the shoe, in the middle.
- Chain 11, starting from 2nd chain from hook: 10sc (10)
Fasten off. Sew to the opposite side of the shoe.

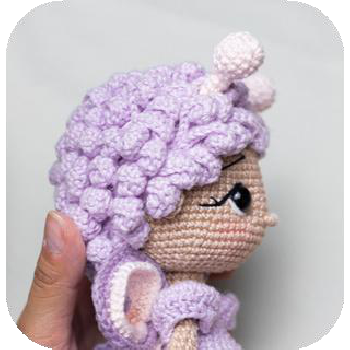
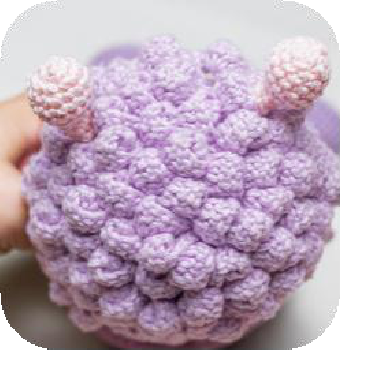
Hair
Using lilac yarn:
- 6sc in MR
- BoL 6inc (12)
- BoL (sc, inc) 6 times (18)
- BoL (2sc, inc) 6 times (24)
- BoL (3sc, inc) 6 times (30)
- BoL (4sc, inc) 6 times (36)
- BoL (5sc, inc) 6 times (42)
- BoL (6sc, inc) 6 times (48)
- BoL (7sc, inc) 6 times (54)
- BoL (8sc, inc) 6 times (60)
- BoL (9sc, inc) 6 times (66)
- Rows 12-19: BoL 66sc (8 rows)
Next, crochet the strands:
- Ch 7, starting from 3rd ch from hook: (2dc in next ch) 5 times, sl st into the 3rd ch [of the current chain], ch 1, sl st into the 2nd ch [of the current chain].
- Ch 7, starting from 3rd ch from hook: (2dc in next ch) 5 times, sl st into the 3rd ch [of the current chain], ch 5, sl st into the 6th ch [of the current chain].
- Ch 7, starting from 3rd ch from hook: (2dc in next ch) 5 times, sl st into the 3rd ch [of the current chain], ch 4, sl st into the 6th ch [of the current chain].
- Ch 7, starting from 3rd ch from hook: (2dc in next ch) 5 times, sl st into the 3rd ch [of the current chain], ch 3, sl st into the 4th ch [of the current chain].
In this way, crochet along all front loops [of the hair cap].

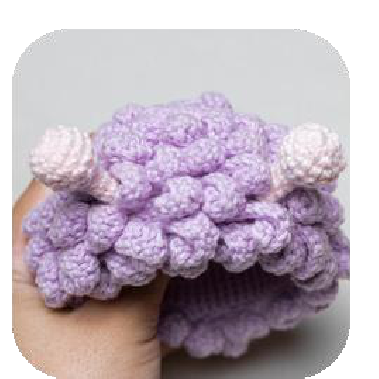
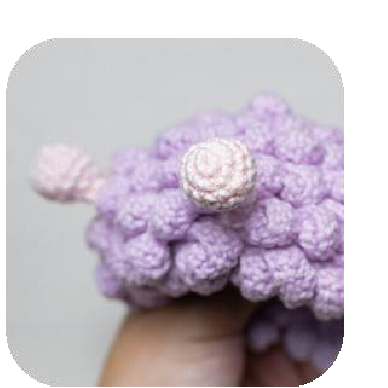
Antennas (Make 2)
Using light pink yarn:
- 6sc in MR
- 6inc (12)
- (3sc, inc) 3 times (15)
- Rows 4-5: 15sc (2 rows)
- Row 6: (3sc, dec) 3 times (12)
- Row 7: 6dec (6)
Stuff lightly.
- FoL (6sc) (1 row)
- Rows 9-11: 6sc (3 rows)
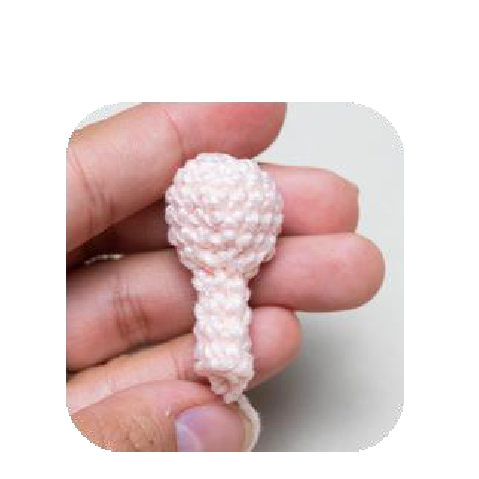
Sew to the hair cap 2-3 rows from the edge. The distance between them is 5cm. Then sew or glue the hair cap to the head.
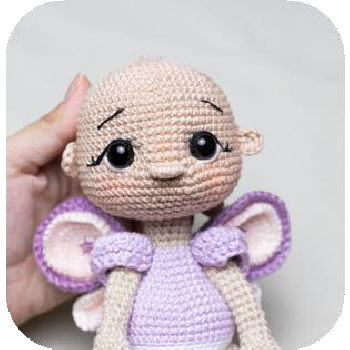
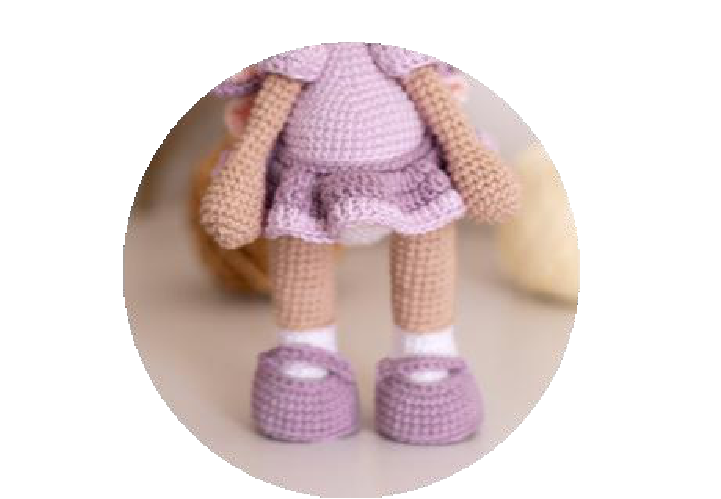
And there you have it – your very own Lizzie the Butterfly Doll! We hope you enjoyed creating this adorable amigurumi. We love seeing your unique touches and personal flair on our patterns, so please share your finished Lizzie with us on social media using #CrochettoLizzie. Happy crocheting!