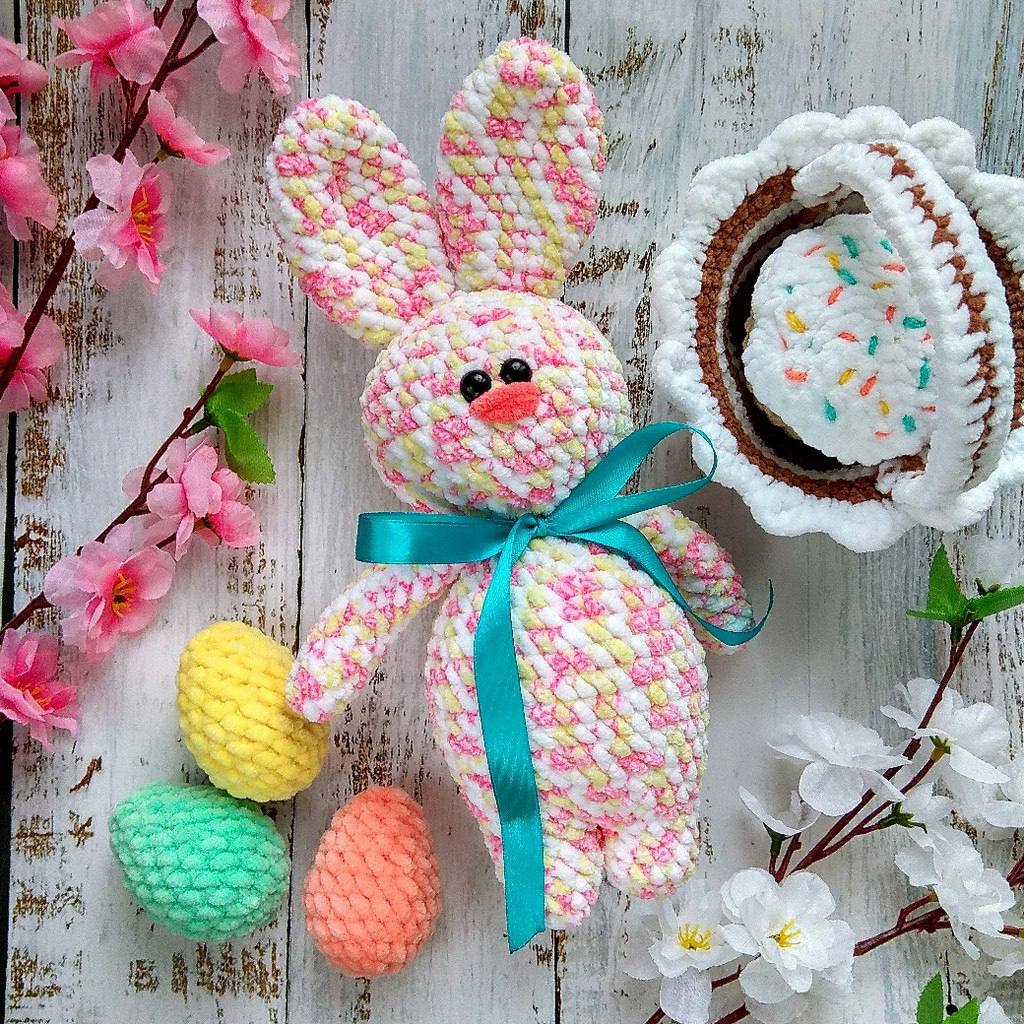
Make Your Own Adorable Freckle Bunny!
Get ready to crochet the cutest little companion with this easy-to-follow pattern for “Freckle Bunny”! This adorable plushie is perfect for beginners and experienced crocheters alike, working up quickly with soft yarn. Let’s gather our supplies and get started!
Materials You’ll Need
- 1 skein of Himalaya Dolphin Baby Colors yarn (or similar bulky chenille yarn)
- 9mm safety eyes
- Filler – synthetic stuffing (polyester fiberfill)
- Strong thread for sewing parts (e.g., upholstery thread or embroidery floss)
- Thread matching the main yarn color for embroidering the nose
- Crochet hook (recommended size for your chosen yarn, usually 4.0mm-5.0mm for Himalaya Dolphin Baby)
- Stitch marker
- Tapestry needle
- Scissors
Abbreviations
- Ch – Chain stitch
- Sc – Single crochet
- Inc – Increase (2 sc in one stitch)
- Dec – Decrease (sc2tog – single crochet 2 together)
- * – Indicates number of repetitions
- ( ) – Total stitches in the round
- BLO – Back Loop Only
Let’s Start Crocheting!
Body (Start with the Legs)
Legs (Make 2)
We’ll start by crocheting two separate legs.
- Round 1: Make 2 Ch, then 6 sc into the second Ch from the hook. (6 stitches)
- Round 2: 6 Inc (crochet 2 sc into each stitch around). (12 stitches)
- Round 3: 12 sc into the back loop only (BLO). (12 stitches)
- Rounds 4-7: 12 sc (single crochet in each stitch around for 4 rounds). (12 stitches)
Important: After crocheting the first leg, cut the yarn and fasten off. When you finish the second leg, DO NOT cut the yarn, as we will use it to join the legs and continue with the body.
Joining Legs and Body
Now, we’ll connect the two legs and begin forming the main body.
- Round 8: From the second leg, crochet 12 sc along the first leg, then 12 sc along the second leg. Place a stitch marker here to mark the beginning of your rounds. (24 stitches)
- Round 9: (3 sc, Inc) * 6 times. (30 stitches)
- Round 10: (4 sc, Inc) * 6 times. (36 stitches)
- Round 11: 36 sc. (36 stitches)
- Round 12: (5 sc, Inc) * 6 times. (42 stitches)
- Rounds 13-16: 42 sc (single crochet in each stitch around for 4 rounds). (42 stitches)
- Round 17: (5 sc, Dec) * 6 times. (36 stitches)
- Round 18: 36 sc. (36 stitches)
- Round 19: (4 sc, Dec) * 6 times. (30 stitches)
- Round 20: 30 sc. (30 stitches)
- Round 21: (3 sc, Dec) * 6 times. (24 stitches)
- Rounds 22-23: 24 sc (single crochet in each stitch around for 2 rounds). (24 stitches)
- Round 24: (2 sc, Dec) * 6 times. (18 stitches)
- Round 25: (1 sc, Dec) * 6 times. (12 stitches)
Stuffing: Firmly stuff the body with your chosen filler. Make sure it’s evenly distributed and firm enough to hold its shape.
DO NOT cut the yarn! We will continue directly into crocheting the head from here.
Head
Continuing from the body, we’ll now shape the head.
- Round 26: 12 Inc (crochet 2 sc into each stitch around). (24 stitches)
- Round 27: (3 sc, Inc) * 6 times. (30 stitches)
- Round 28: (4 sc, Inc) * 6 times. (36 stitches)
- Round 29: (5 sc, Inc) * 6 times. (42 stitches)
- Rounds 30-34: 42 sc (single crochet in each stitch around for 5 rounds). (42 stitches)
Eye Placement: Insert the 9mm safety eyes between rows 33 and 34. The distance between them should be one stitch. Secure the washers firmly from the inside.
- Round 35: (5 sc, Dec) * 6 times. (36 stitches)
- Round 36: (4 sc, Dec) * 6 times. (30 stitches)
- Round 37: (3 sc, Dec) * 6 times. (24 stitches)
- Round 38: (2 sc, Dec) * 6 times. (18 stitches)
- Round 39: (1 sc, Dec) * 6 times. (12 stitches)
- Round 40: 6 Dec (decrease 2 stitches together around). (6 stitches)
Finishing the Head: Cinch the remaining opening closed with your tapestry needle, weaving the yarn tail through the front loops of the last 6 stitches and pulling tight. Secure and hide the yarn tail inside the head.
Arms (Make 2)
- Round 1: Make 2 Ch, then 6 sc into the second Ch from the hook. (6 stitches)
- Round 2: (1 sc, Inc) * 3 times. (9 stitches)
- Rounds 3-11: 9 sc (single crochet in each stitch around for 9 rounds). (9 stitches)
- Round 12: (1 sc, Dec) * 3 times. (6 stitches)
- Round 13: 6 sc. (6 stitches)
Stuffing and Closing Arms: Stuff approximately 1/3 of the arm with filler, focusing on the bottom part. Fold the opening in half and crochet 3 sc across both layers to close the arm. Cut yarn, leaving a long tail for sewing, and fasten off.
Crochet the second arm similarly.
Ears (Make 2)
- Round 1: Make 2 Ch, then 6 sc into the second Ch from the hook. (6 stitches)
- Round 2: 6 Inc. (12 stitches)
- Round 3: (5 sc, Inc) * 2 times. (14 stitches)
- Round 4: (6 sc, Inc) * 2 times. (16 stitches)
- Round 5: (7 sc, Inc) * 2 times. (18 stitches)
- Rounds 6-10: 18 sc (single crochet in each stitch around for 5 rounds). (18 stitches)
- Round 11: (7 sc, Dec) * 2 times. (16 stitches)
- Round 12: (6 sc, Dec) * 2 times. (14 stitches)
- Round 13: (5 sc, Dec) * 2 times. (12 stitches)
- Round 14: (4 sc, Dec) * 2 times. (10 stitches)
Finishing Ears: Cut the yarn, leaving a long tail for sewing. Fasten off and hide the yarn. Leave the ears unstuffed.
Tail
- Round 1: Make 2 Ch, then 6 sc into the second Ch from the hook. (6 stitches)
- Round 2: (1 sc, Inc) * 3 times. (9 stitches)
- Round 3: 9 sc. (9 stitches)
Finishing Tail: Cut the yarn, leaving a long tail for sewing. Fasten off.
Finishing Touches
Now it’s time to bring your Freckle Bunny to life by attaching all the parts!
- Ears: Sew the ears to the top of the head, positioning them symmetrically and folding them slightly if desired for a more playful look.
- Arms: Sew the arms to the sides of the body, just below the neck, ensuring they are securely attached.
- Tail: Sew the tail to the back of the body, centered and near the bottom.
- Nose: Using your matching yarn color and a tapestry needle, embroider a small triangular or V-shaped nose onto the bunny’s face, usually centered between the eyes.
And there you have it! Your very own adorable Freckle Bunny is complete. We hope you enjoyed crocheting this pattern.