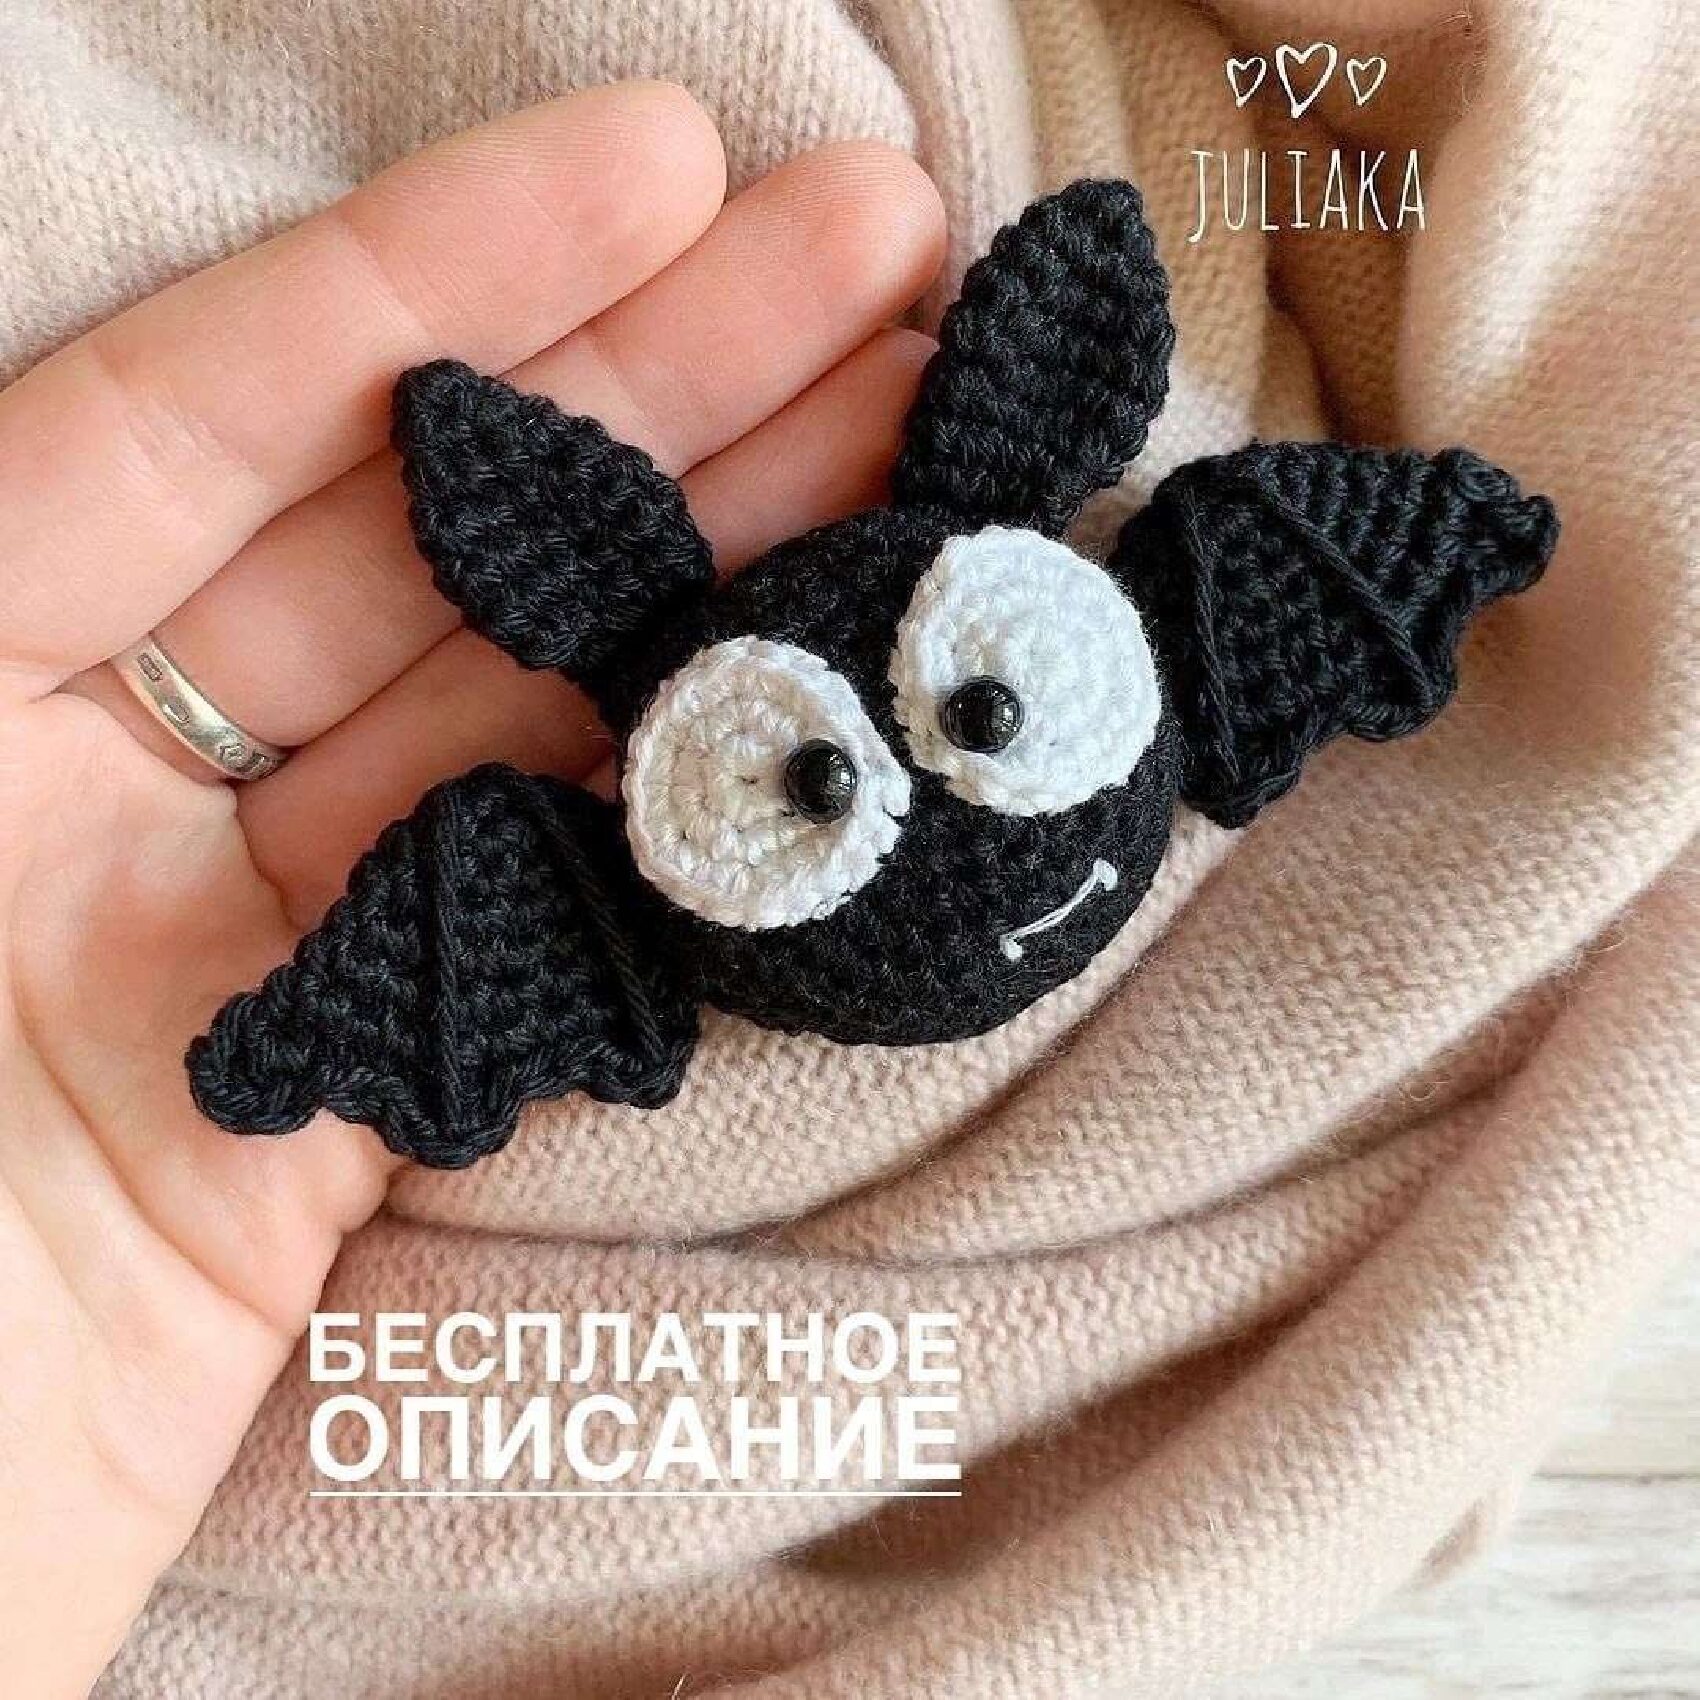
Free Juliaka Amigurumi Crochet Toy Pattern
Materials You’ll Need:
- Yarn: 100% cotton yarn. The original pattern uses RICO design Essential Cotton DK (130m, 50g), but any DK weight cotton yarn will work.
- Hook: 2.00 mm crochet hook (or size suitable for your yarn to get a tight fabric).
- Stuffing: Polyester fiberfill for stuffing your toy.
- Safety Eyes or Beads: 6 mm for the eyes.
- Needle: A tapestry needle for sewing parts together and weaving in ends.
- Pins: Sewing pins to hold parts in place before sewing.
- Brooch Base: If you want to make Juliaka into a brooch.
Abbreviations:
- MR: Magic Ring (also known as Amigurumi Ring)
- CH: Chain Stitch
- SC: Single Crochet
- HDC: Half Double Crochet
- DC: Double Crochet
- INC: Increase (2 single crochets in one stitch)
- DEC: Decrease (single crochet 2 stitches together)
- SL ST: Slip Stitch
- *: Repeat the part in asterisks
Important Note: This pattern is crocheted in a continuous spiral, so you won’t join rounds with a slip stitch unless specified.
Crochet Pattern Description:
1. Eyes (White Part) – Make 2
- R1: Start with 6 SC in a magic ring (6 stitches)
- R2: 6 INC (12 stitches)
- R3: *1 SC, INC* repeat 6 times, then SL ST to finish the round (18 stitches)
Fasten off, leaving a long tail for sewing later. Set these aside.
2. Head-Body
Upper Part
- R1: 6 SC in a magic ring (6 stitches)
- R2: 6 INC (12 stitches)
- R3: *1 SC, INC* repeat 6 times (18 stitches)
- R4: *2 SC, INC* repeat 6 times (24 stitches)
- R5: *3 SC, INC* repeat 6 times (30 stitches)
- R6: *4 SC, INC* repeat 6 times (36 stitches)
- R7-8: SC in each stitch around for 2 rounds (36 stitches per round). Finish with a SL ST.
Fasten off and leave a tail for sewing. This is the front part of the head. Now is a good time to insert your 6mm safety eyes onto this piece. Then, using the tails from the white eye parts you made earlier, sew them around the safety eyes.
Back Part
- R1: 6 SC in a magic ring (6 stitches)
- R2: 6 INC (12 stitches)
- R3: *1 SC, INC* repeat 6 times (18 stitches)
- R4: *2 SC, INC* repeat 6 times (24 stitches)
- R5: *3 SC, INC* repeat 6 times (30 stitches)
- R6: *4 SC, INC* repeat 6 times, then SL ST to finish the round (36 stitches)
Do NOT fasten off! You will now sew this back part to the upper part you just made. Using the long tail from the upper part, or a new piece of yarn if needed, carefully sew the two 36-stitch edges together. Make sure to stuff the piece firmly as you sew, before closing it completely.
3. Ears – Make 2
- R1: 4 SC in a magic ring (4 stitches)
- R2: *1 SC, INC* repeat 2 times (6 stitches)
- R3: *1 SC, INC* repeat 3 times (9 stitches)
- R4: *2 SC, INC* repeat 3 times (12 stitches)
- R5-6: SC in each stitch around for 2 rounds (12 stitches per round)
- R7: *2 SC, DEC* repeat 3 times (9 stitches)
- R8: SC in each stitch around (9 stitches)
Fold the ear flat and crochet the two edges together with 4 SC stitches across the top opening. Fasten off and leave a long tail for sewing. Pin and sew the ears to the top of Juliaka’s head, positioning them as desired.
4. Wings – Make 2
- R1: 6 SC in a magic ring (6 stitches)
- R2: 6 INC (12 stitches)
- R3: SC in each stitch around (12 stitches)
- R4: *1 SC, INC* repeat 6 times (18 stitches)
- R5: SC in each stitch around (18 stitches)
- R6: *2 SC, INC* repeat 6 times (24 stitches)
- R7: *3 SC, INC* repeat 6 times (30 stitches)
Now, we’ll create the scalloped edge for the wings. Fold the wing flat and crochet through both layers to join the two edges with the following stitches:
- CH 2
- (1 DC, 1 HDC) in the next stitch
- 3 SL ST
- (1 HDC, 1 DC, 1 HDC) in the next stitch
- 3 SL ST
- (1 HDC, 1 DC, 1 HDC) in the next stitch
- 3 SL ST
- (1 HDC, 1 DC, 1 HDC) in the next stitch
- SL ST to finish.
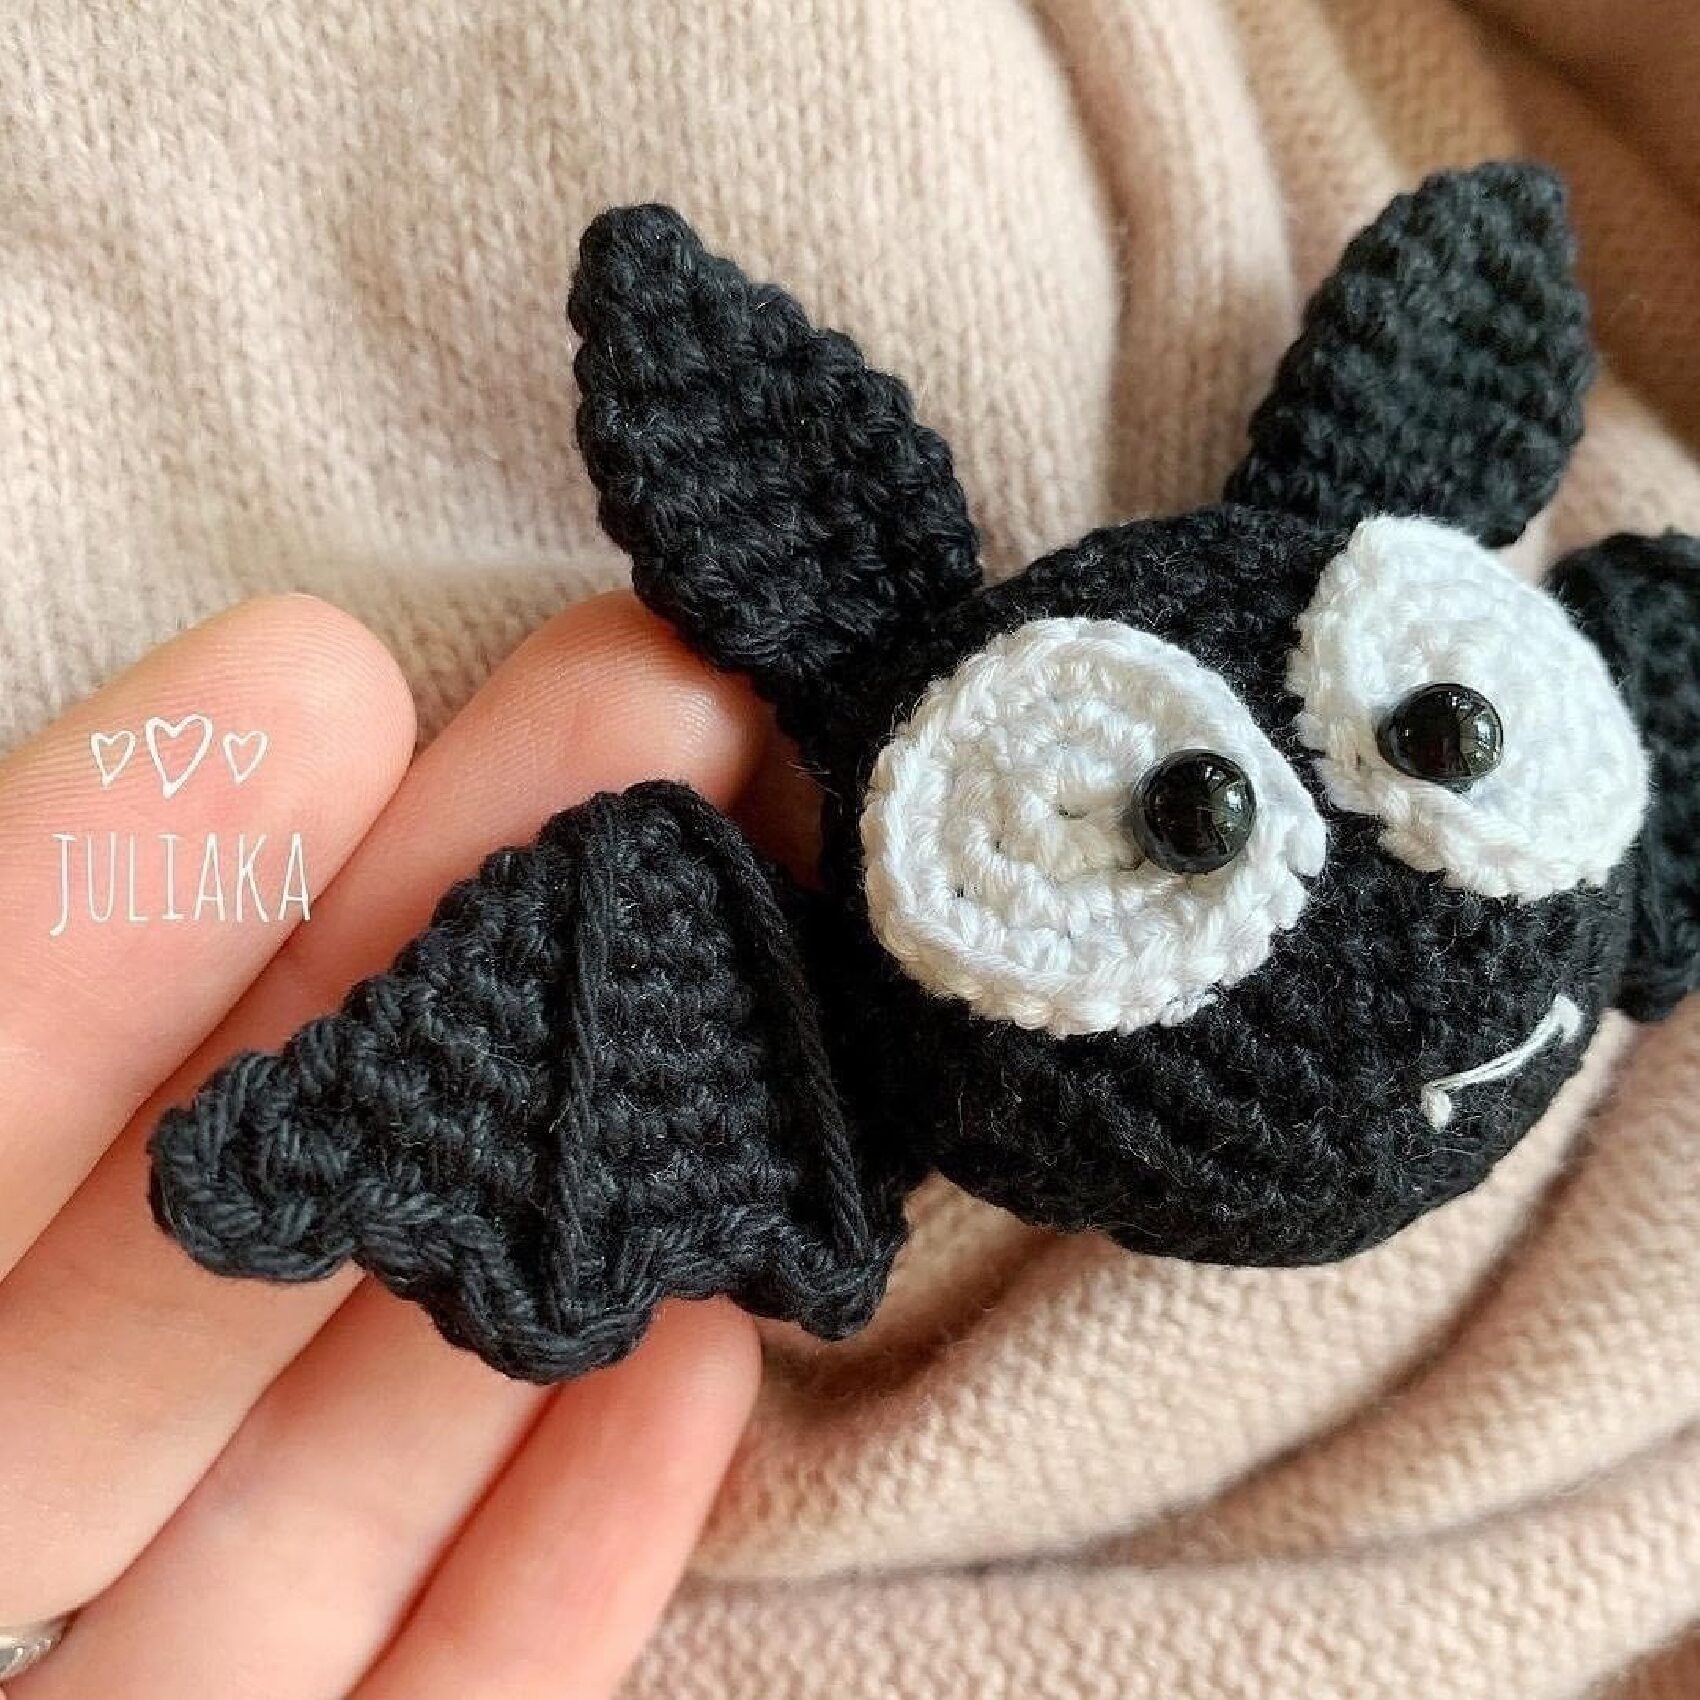
Fasten off and leave a long tail for sewing. Using black yarn and a needle, embroider small “fingers” or lines onto the wings to give them definition, as shown in the example picture. Finally, pin and sew the wings to the back of Juliaka’s body.
Enjoy your new crocheted Juliaka toy!