Ice Cream Charm Amigurumi Crochet Pattern
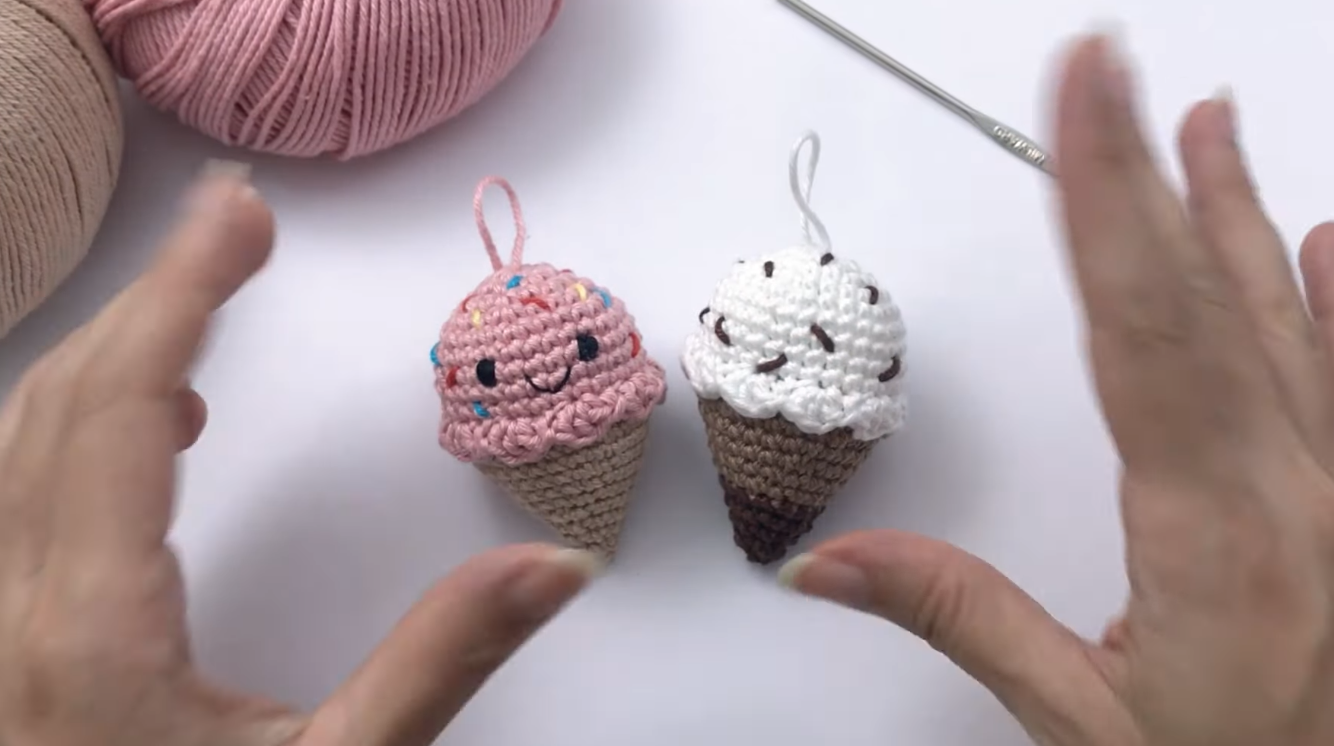
Who can resist an adorable ice cream charm made through the art of amigurumi? These cute, handcrafted pieces have captivated hearts worldwide and offer a whimsical take on the classic ice cream cone. Let’s dive into the process and stitch our way to sweet success.
Materials Needed for Ice Cream Amigurumi
Before diving into the crochet process, it’s crucial to gather all the necessary materials. Here’s what you’ll need to bring your ice cream charm to life.
Yarn Selection
The choice of yarn can significantly affect the look and feel of your finished charm. Opt for a 100% cotton yarn to ensure your charm has structure and character. Colors like vanilla cream, strawberry pink, and mint green can make your project pop. If you’re looking for inspiration, StringyDingDing has some delightful suggestions.

Photo by Castorly Stock
Crochet Hook Size
Using the right crochet hook is crucial for this project. A size B/1 (2.25 mm) or C/2 (2.75 mm) hook is ideal when working with lightweight yarn, helping you achieve the neat, tight stitches needed for amigurumi’s characteristic look.
Additional Tools
Besides yarn and hooks, you might consider optional tools like stitch markers to keep track of your rows, and polyester fiberfill for giving your ice cream its plush form. If you want your ice cream to have a face, add safety eyes for that extra charm.
Step-by-Step Crochet Instructions
The magic begins when you start crocheting each part of your ice cream charm. Here’s a simple guide to help you along.
Creating the Ice Cream Scoop
Starting with a magic ring, make single crochet stitches to form a circle. Increase your rounds to add fullness to your scoop, adjusting colors as desired to simulate swirls or toppings. Regularly check the size and density to maintain consistency throughout.
Making the Cone
For the cone, you’ll want to use a basic triangular pattern to give it that classic cone shape. Employ back-loop-only stitches for texture, mimicking the waffle effect. Gradually decrease your stitches to close the cone, ensuring it stands up to scrutiny and delight.
Assembly of Ice Cream Charm
Finally, attach the scoop to the cone using a slip stitch or whip stitch, making sure it’s securely fastened. At this stage, a bit of personal creativity can be added—like tassels or beads for sprinkles.
Helpful Video Tutorials
For those who learn best through visual instructions, engaging with video tutorials can be tremendously beneficial.
Youtube Tutorial Links
These videos offer step-by-step visual aids, perfect for aligning your project with professional standards.
Tips and Tricks
Crafting the perfect amigurumi comes with learning some tricks of the trade. Here’s how to avoid common pitfalls.
Common Mistakes to Avoid
It’s easy to pull too tight on the yarn—keep your tension balanced to prevent distorting the charm’s shape. Using beginner crochet tips can also guide you in mastering your technique.
Maintaining Amigurumi Projects
Amigurumi charms can be precious keepsakes. To ensure your ice cream charm stays in top condition, wash gently with lukewarm water and mild soap. Let it air dry to maintain its form.
Conclusion
Making an ice cream charm through amigurumi combines skill and creativity, resulting in a delightful, handmade treasure. With each stitch, you add a personal touch that’s a testament to patience and artistry. Don’t forget to share your finished projects with friends and fellow crafters—who knows, you might inspire someone else to pick up a crochet hook!

