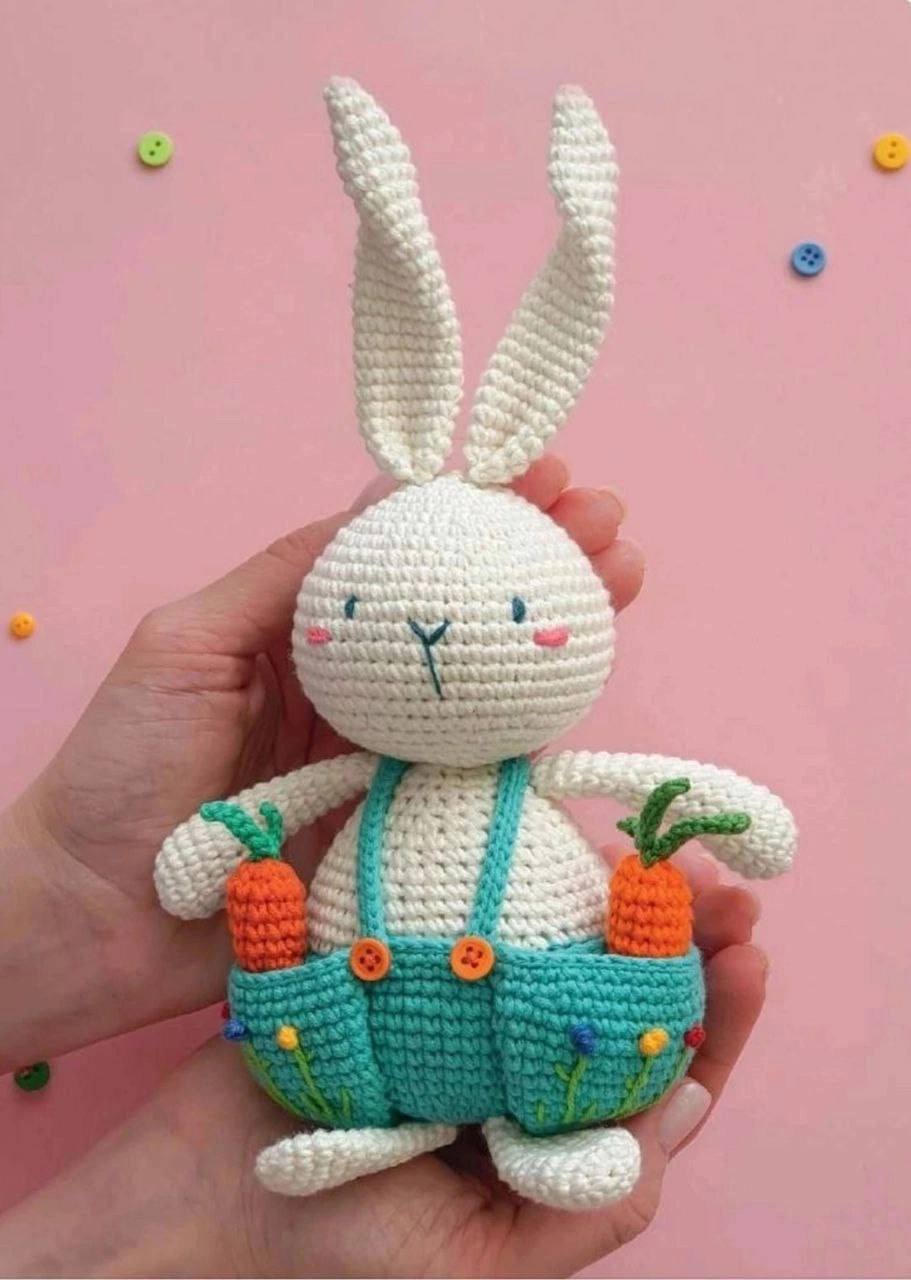
Adorable Oliver The Bunny Crochet Pattern
Materials
- Yarn:
- YarnArt IDEAL (100% cotton / 50 g, 170 m): One skein of white for the bunny.
- Gazzal Jeans (58% cotton, 42% polyacrylic, 170 m / 50 g):
- One skein of turquoise for the pants, pockets, and suspenders.
- A little orange and green for the carrots.
- A little green, yellow, red, pink, dark green, and blue for the bunny’s embroidery.
- Hook 1.75 mm
- Needle for sewing parts
- Scissors
- Toy filler (polyester fiberfill)
- Stitch Marker
- Small buttons with a diameter of 6-7 mm — 4 pcs.
- Pins
Size
Height: 14 cm (without ears)
With ears: 22 cm
If crocheted with similar yarn and hook size.
Difficulty Level
** (Intermediate)
Abbreviations (US Terms)
- MR: Magic Ring
- sc: Single Crochet
- inc: Increase (2 sc in one stitch)
- dec: Decrease (single crochet two together)
- sl st: Slip Stitch
- ch: Chain
- sts: Stitches
- BLO: Back Loops Only
Important Note: This pattern is worked in continuous rounds unless otherwise stated. Use a stitch marker to keep track of your first stitch in each round.
How to Crochet Oliver
Head
Crochet with white yarn.
- Row 1: 6 sc in MR (6 sts)
- Row 2: 6 inc (12 sts)
- Row 3: (sc, inc) x 6 (18 sts)
- Row 4: sc, (inc, 2 sc) x 5, inc, sc (24 sts)
- Row 5: 24 sc
- Row 6: (3 sc, inc) x 6 (30 sts)
- Row 7: 2 sc, (inc, 4 sc) x 5, inc, 2 sc (36 sts)
- Row 8: (5 sc, inc) x 6 (42 sts)
- Row 9: 3 sc, (inc, 6 sc) x 5, inc, 3 sc (48 sts)
- Row 10: (7 sc, inc) x 6 (54 sts)
- Rows 11-17: 54 sc (7 rows)
- Row 18: (7 sc, dec) x 6 (48 sts)
- Row 19: 3 sc, (dec, 6 sc) x 5, dec, 3 sc (42 sts)
- Row 20: (5 sc, dec) x 6 (36 sts)
- Row 21: 2 sc, (dec, 4 sc) x 5, dec, 2 sc (30 sts)
Start gradually adding filler to the head as you crochet. It should be firm but not overstuffed yet.
- Row 22: (3 sc, dec) x 6 (24 sts)
- Row 23: sc, (dec, 2 sc) x 5, dec, sc (18 sts)
- Row 24: (sc, dec) x 6 (12 sts)
- Row 25: 6 dec (6 sts)
Stuff the head completely; it should be firm.
Cut the thread, leaving a tail about 15 cm long. Using a needle, weave the tail through the front loops of the remaining 6 stitches and pull tight to close the hole. Secure and hide the thread inside the head.

Keep your stitches even for a smooth finish!
Torso
Start crocheting the pants with turquoise yarn.
- Row 1: 6 sc in MR (6 sts)
- Row 2: 6 inc (12 sts)
- Row 3: (sc, inc) x 6 (18 sts)
- Row 4: sc, (inc, 2 sc) x 5, inc, sc (24 sts)
- Row 5: (3 sc, inc) x 6 (30 sts)
- Row 6: 2 sc, (inc, 4 sc) x 5, inc, 2 sc (36 sts)
- Row 7: (5 sc, inc) x 6 (42 sts)
- Row 8: 3 sc, (inc, 6 sc) x 5, inc, 3 sc (48 sts)
- Row 9: (7 sc, inc) x 6 (54 sts)
- Rows 10-15: 54 sc (6 rows)
Change yarn to white. Cut the turquoise thread.
- Row 16: (Crochet into the BLO) (7 sc, dec) x 6 (48 sts)
- Row 17: 48 sc
- Row 18: 7 sc, (dec, 14 sc) x 2, dec, 7 sc (45 sts)
- Row 19: (13 sc, dec) x 3 (42 sts)
- Row 20: 6 sc, (dec, 12 sc) x 2, dec, 6 sc (39 sts)
- Row 21: (11 sc, dec) x 3 (36 sts)
- Row 22: 5 sc, (dec, 10 sc) x 2, dec, 5 sc (33 sts)
Start gradually adding filler to the torso as you crochet.
- Row 23: (9 sc, dec) x 3 (30 sts)
- Row 24: 4 sc, (dec, 8 sc) x 2, dec, 4 sc (27 sts)
- Row 25: (7 sc, dec) x 3 (24 sts)
- Row 26: 3 sc, (dec, 6 sc) x 2, dec, 3 sc (21 sts)
- Row 27: (5 sc, dec) x 3 (18 sts)
- Row 28: (sc, dec) x 6 (12 sts)
Stuff the torso completely; it should be firm.
Sl st to finish. Cut the thread, leaving a long tail for sewing.

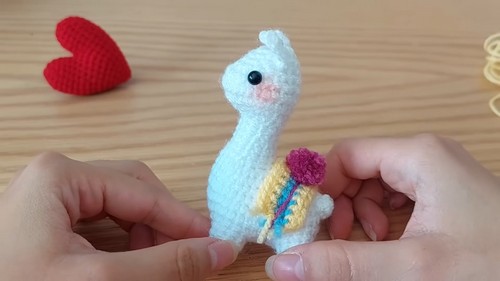
The torso with its distinct color sections.
Pockets (Make 2)
Crochet with turquoise yarn. Pockets do not need to be stuffed.
- Row 1: 6 sc in MR (6 sts)
- Row 2: 6 inc (12 sts)
- Row 3: (sc, inc) x 6 (18 sts)
- Row 4: sc, (inc, 2 sc) x 5, inc, sc (24 sts)
- Row 5: (3 sc, inc) x 6 (30 sts)
- Row 6: 2 sc, (inc, 4 sc) x 5, inc, 2 sc (36 sts)
- Row 7: (5 sc, inc) x 6 (42 sts)
- Row 8: 3 sc, (inc, 6 sc) x 5, inc, 3 sc (48 sts)
- Row 9: (7 sc, inc) x 6 (54 sts)
- Rows 10-15: 54 sc (6 rows)
Sl st, cut, and hide the thread on the wrong side.
Front Paws (Make 2)
Crochet with white yarn.
- Row 1: 6 sc in MR (6 sts)
- Row 2: 6 inc (12 sts)
- Row 3: (3 sc, inc) x 3 (15 sts)
- Row 4: 15 sc
- Row 5: dec, 13 sc (14 sts)
- Row 6: dec, 12 sc (13 sts)
- Row 7: dec, 9 sc, dec (11 sts)
- Row 8: sc, dec, 6 sc, dec (9 sts)
- Rows 9-16: 9 sc (8 rows)
- Row 17: (sc, dec) x 3 (6 sts)
Stuff the paw up to Row 11.
Sl st and cut the thread, leaving a tail 15 cm long for sewing.
Back Paws (Make 2)
Crochet with white yarn. The paws do not need to be stuffed.
- Row 1: 6 sc in MR (6 sts)
- Row 2: 6 inc (12 sts)
- Row 3: (sc, inc) x 6 (18 sts)
- Row 4: 18 sc
- Row 5: (4 sc, dec) x 3 (15 sts)
- Rows 6-7: 15 sc (2 rows)
- Row 8: (3 sc, dec) x 3 (12 sts)
- Rows 9-11: 12 sc (2 rows)
- Row 12: (2 sc, dec) x 3 (9 sts)
- Rows 13-14: 9 sc (2 rows)
- Row 15: (sc, dec) x 3 (6 sts)
Cut the thread, leaving a tail 15 cm long. Using a needle, weave the tail through the front loops of the remaining 6 stitches and pull tight to close the hole. Secure and hide the thread inside the paw.
Ears (Make 2)
Crochet with white yarn. Ears do not need to be stuffed.
- Row 1: 4 sc in MR (4 sts)
- Row 2: (sc, inc) x 2 (6 sts)
- Row 3: (2 sc, inc) x 2 (8 sts)
- Row 4: (3 sc, inc) x 2 (10 sts)
- Row 5: (4 sc, inc) x 2 (12 sts)
- Row 6: (5 sc, inc) x 2 (14 sts)
- Rows 7-23: 14 sc (17 rows)
- Row 24: (5 sc, dec) x 2 (12 sts)
Sl st and cut the thread, leaving a tail 15 cm long for sewing.
Tail
Crochet with white yarn.
- Row 1: 6 sc in MR (6 sts)
- Row 2: 6 inc (12 sts)
- Rows 3-4: 12 sc (2 rows)
- Row 5: 6 dec (6 sts)
Stuff the tail firmly.
Cut the thread, leaving a tail 15 cm long. Using a needle, weave the tail through the front loops of the remaining 6 stitches and pull tight to close the hole. Secure and hide the thread inside the tail.

All the small pieces ready for assembly.
Suspenders (Make 2)
Crochet with turquoise yarn.
- Chain 35.
- Starting from the second chain from the hook: 33 sl st.
- In the last chain, work 3 sc.
- Do not turn the piece. Continue crocheting along the opposite side of the initial chain: 32 sl st.
- In the last chain (same as where you made 3 sc), work 2 sc (Total: 70 sts).
Cut the thread, leaving a tail 15 cm long for sewing.

All your crocheted components and tools laid out, ready for assembly!
Assembly and Decoration
- Join Pockets to Pants Return to Row 15 of the pants (the turquoise part). Attach turquoise yarn to the front loop of a stitch.
- Row 1 (Working into front loops): 10 sc into the front loops of the pants (See photo 1).
 Photos 1 & 2: Attaching the turquoise yarn to the pants and preparing to join the first pocket.
- Join the first pocket with a sl st to the pants (See photo 2).
- Work 36 sc along the first pocket.
- Skip 17 stitches of the pants and join the pocket to the pants with a sl st into the front loop of the pants (See photo 3).
Photos 3-8: Steps for aligning and attaching both pockets to the pants.- Work 9 sc into the front loop of the pants (See photo 4).
- Join the second pocket with a sl st (See photo 5).
- Work 36 sc along the second pocket (Total: 94 sts).
- Row 2: (dec, 6 sc, dec) along the pants (See photo 6), (dec, 33 sc, dec) along the first pocket, (dec, 6 sc, dec) along the pants, (dec, 33 sc, dec) along the second pocket (Total: 86 sts).
- Row 3: 86 sl st (Total: 86 sts) (See photos 7-8).
Photos 9-12: Sewing the pockets securely to the body and showing the finished look. - Sew Head to Body Sew the head to the body. When sewing, ensure the body is stuffed tightly and evenly, without noticeable lumps or gaps (See photo 13). Photos 13-18: Attaching the head, limbs, ears, and tail, and showing the finished overalls.
- Sew Front Paws Sew the front paws to the body between rows 26-27.
- Sew Back Paws Sew the back paws with white yarn to the pants (See photo 14 in the image above).
- Attach Ears Fold the ears (See photo 15 in the image above) and sew them to the head between rows 1 and 4, at a distance of 1-2 stitches apart.
- Sew Tail Sew the tail with white yarn to the center of the pants between rows 5-8 (See photo 16 in the image above).
- Attach Suspenders Secure the suspenders on the belly and back between the pockets with pins, then sew them in place (See photos 17 & 18 in the image above). Decorate the pants with buttons.
- Embroider Face
- Embroider the eyes with dark green yarn between rows 11-13 of the head, at a distance of 9 stitches apart.
- Embroider the nose in the center between the eyes.
- Embroider Cheeks Embroider the cheeks under the eyes with pink yarn (See photo 19). Photos 19-21: Adding charming details with embroidery for cheeks and pocket decorations.
- Decorate Pockets Decorate the pockets with flowers. Use green yarn to embroider the stems (See photo 20), then use multicolored yarn to embroider colorful flowers with French knots (See photo 21). You can also decorate the pockets however you like!
 Photos 1 & 2: Attaching the turquoise yarn to the pants and preparing to join the first pocket.
 Photos 3-8: Steps for aligning and attaching both pockets to the pants.
 Photos 9-12: Sewing the pockets securely to the body and showing the finished look.
 Photos 13-18: Attaching the head, limbs, ears, and tail, and showing the finished overalls.
 Photos 19-21: Adding charming details with embroidery for cheeks and pocket decorations.
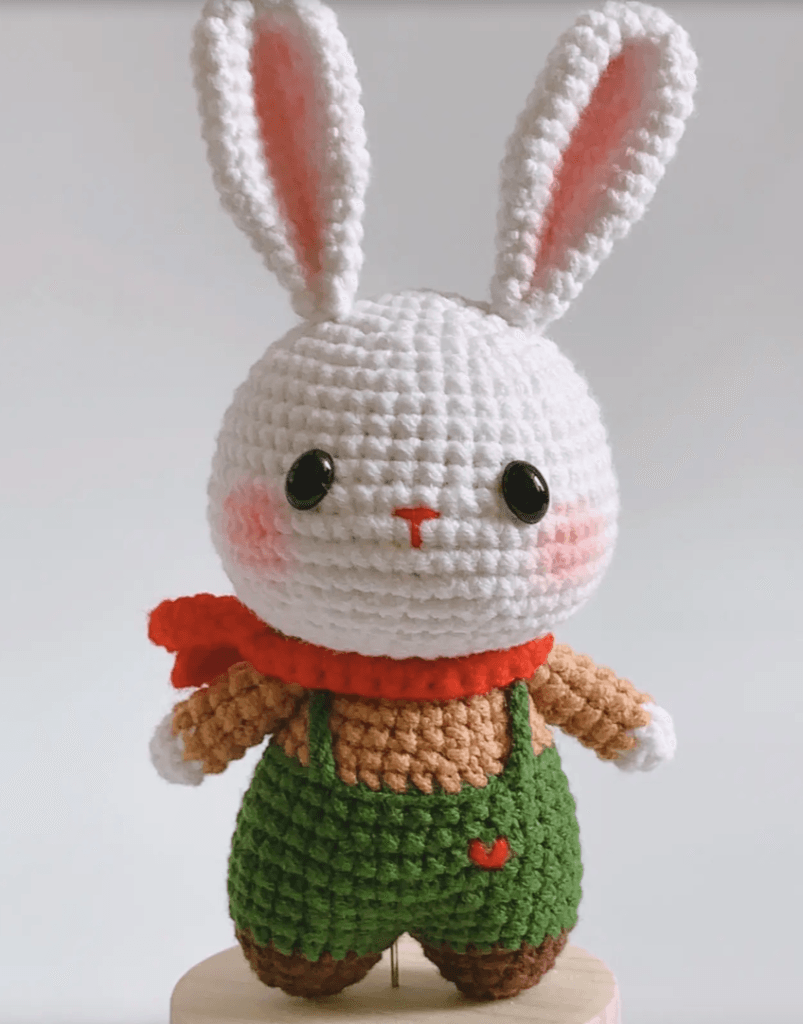
Oliver is almost complete, just needs his carrots!
Carrots
Large Carrot
Crochet with orange yarn. Stuff the part as you go.
- Row 1: 4 sc in MR (4 sts)
- Row 2: (sc, inc) x 2 (6 sts)
- Row 3: (2 sc, inc) x 2 (8 sts)
- Row 4: 8 sc
- Row 5: (3 sc, inc) x 2 (10 sts)
- Row 6: 10 sc
- Row 7: (4 sc, inc) x 2 (12 sts)
- Rows 8-12: 12 sc (5 rows)
- Row 13: 6 dec (6 sts)
Cut the thread, leaving a tail 15 cm long. Using a needle, weave the tail through the front loops of the remaining 6 stitches and pull tight to close the hole. Secure and hide the thread inside the carrot.
Leaves for the Large Carrot
Crochet with green yarn.
- Chain 9. Starting from the second chain from the hook: 8 sl st along the chain.
- Then chain 8. Starting from the second chain from the hook, crochet 7 sl st along the chain.
- Again chain 5. Starting from the second chain from the hook, crochet 4 sl st along the chain. (You now have 3 leaves).
- Cut the thread, leaving a tail 15 cm long for sewing.
- Sew the leaves onto the carrot (See photo 22).
Small Carrot
Crochet with orange yarn. Stuff the part as you go.
- Row 1: 4 sc in MR (4 sts)
- Row 2: (sc, inc) x 2 (6 sts)
- Row 3: 6 sc
- Row 4: (2 sc, inc) x 2 (8 sts)
- Row 5: 8 sc
- Row 6: (3 sc, inc) x 2 (10 sts)
- Row 7: 10 sc
- Row 8: (4 sc, inc) x 2 (12 sts)
- Rows 9-10: 12 sc (2 rows)
- Row 11: 6 dec (6 sts)
Cut the thread, leaving a tail 15 cm long. Using a needle, weave the tail through the front loops of the remaining 6 stitches and pull tight to close the hole. Secure and hide the thread inside the carrot.
Leaves for the Small Carrot
Crochet with green yarn.
- Chain 7. Starting from the second chain from the hook: 6 sl st along the chain.
- Again chain 5. Starting from the second chain from the hook, crochet 4 sl st along the chain. (You now have 2 leaves).
- Cut the thread, leaving a tail 15 cm long for sewing.
- Sew the leaves onto the carrot.

Photo 22: Your finished large and small carrots, perfect for Oliver’s pockets!
Congratulations on making your very own Oliver the Bunny!