Benedict and Bertie free crochet pattern
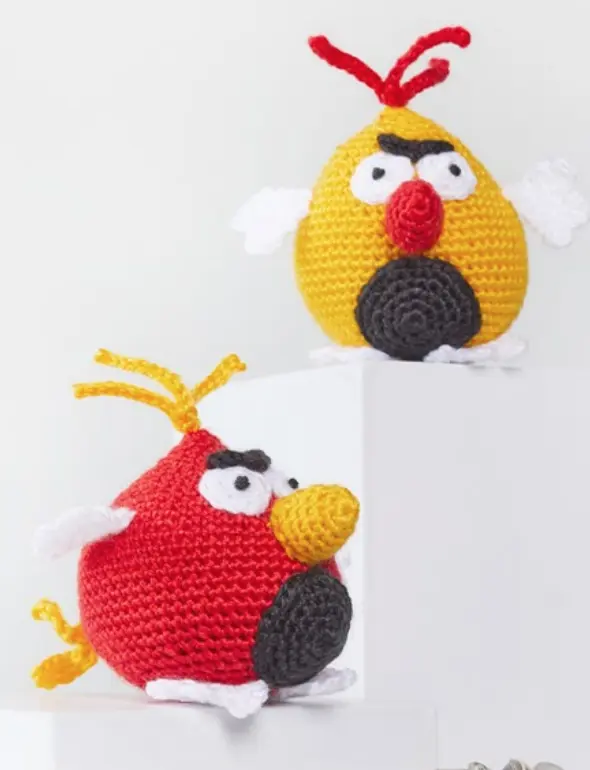
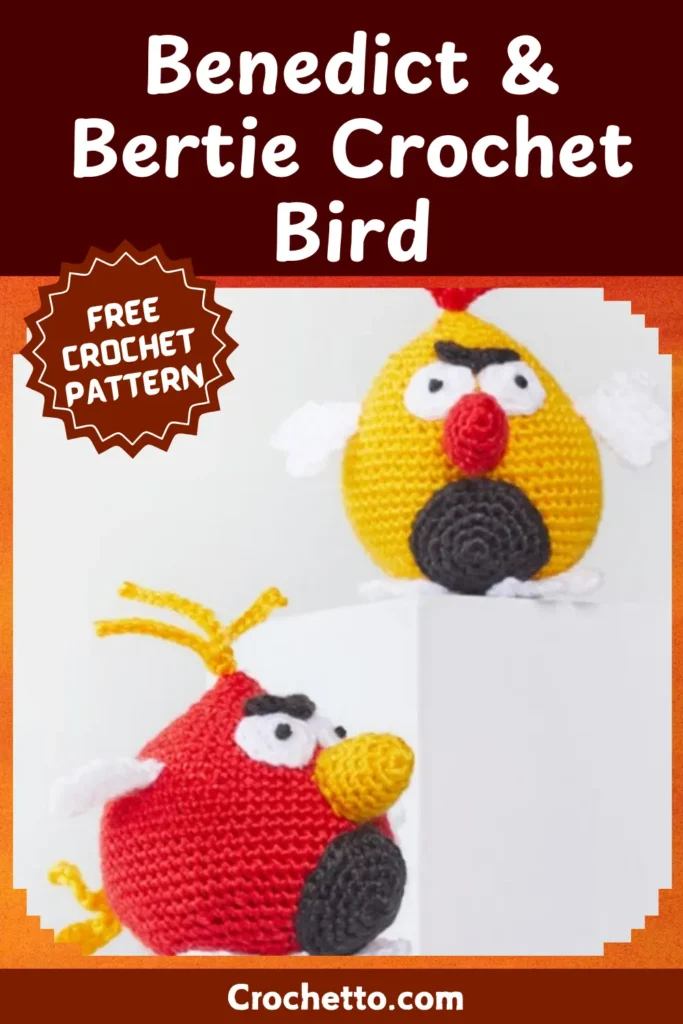
Are you ready to bring a touch of whimsy to your crochet projects? Meet Benedict and Bertie, two adorable bird companions perfect for a fun, quick craft! Whether you’re a beginner or a seasoned crocheter, this guide will walk you through creating these delightful birds step by step.
Grab your hook, and let’s get started!
What You’ll Need
Before we dive into the pattern, here’s your materials checklist:
- RED HEART® Amigurumi yarn (1 ball – colorway 9212 Bird)
- Crochet Hook: 3.5 mm [US E-4]
- Stuffing and a yarn needle
Quick Tips Before You Begin
- Separate the Yarn Colors:
Gently push the yarn’s center to pop out the core and divide each color section. This makes the process much easier and prevents tangling!- White = A
- Yellow = B
- Red = C
- Black = D
- Pick Your Colorway:
Choose between these two designs:- Colorway #1: Body/head in yellow (B), beak, tail, and head feathers in red (C).
- Colorway #2: Body/head in red (C), beak, tail, and head feathers in yellow (B).
- The project involves 12 pieces: body/head, beak, tail, head feathers, eyes, eyebrow, belly, and four wings/feet.
Pattern: Step by Step
Body/Head
Start by crocheting the main part of your bird:
- Round 1: Chain 3, slip stitch to form a ring, and single crochet 8 stitches into the ring.
- Work in continuous rounds (spirals), increasing as instructed in the pattern to shape the body.
- Rounds 15–21: Single crochet in each stitch to create the height of the bird.
- Round 28: Begin to decrease, stuffing the body as you go to achieve the desired firmness.
- Finish by threading the tail through the final stitches to close the opening.
Pro Tip: Use a stitch marker to keep track of your rounds—it’s a lifesaver!
Beak, Tail, and Feathers
Switch to the second color in your chosen colorway for these parts.
- Beak: Work 6 rounds of single crochet, lightly stuffing it for shape.
- Tail: Add a playful touch by incorporating double crochet stitches.
- Head Feathers: Chain 11 for each feather strand and attach them in sets of three.
Details: Eyes, Eyebrow, and Belly
Make these small pieces to bring your bird’s personality to life:
- Eyes: Create two small circles using white yarn (A), and add a black embroidered pupil for a cute expression.
- Eyebrow: Add character by crocheting a simple chain and stitching it above the eyes.
- Belly: Crochet a slightly larger circle in black (D) to add detail to the bird’s underside.
Wings and Feet
Make four identical pieces using white yarn (A). These will serve as both the wings and feet of your bird.
Finishing Touches
Once all the pieces are ready, it’s time to assemble!
Follow this order for best results:
- Attach the head feathers to the top.
- Sew on the eyes, eyebrow, and beak.
- Add the belly and tail.
- Secure the wings to the sides and the feet to the bottom.
Weave in any loose ends, and you’re done!

