Cat Amigurumi: free Pattern to Crochet a Stretching Cat
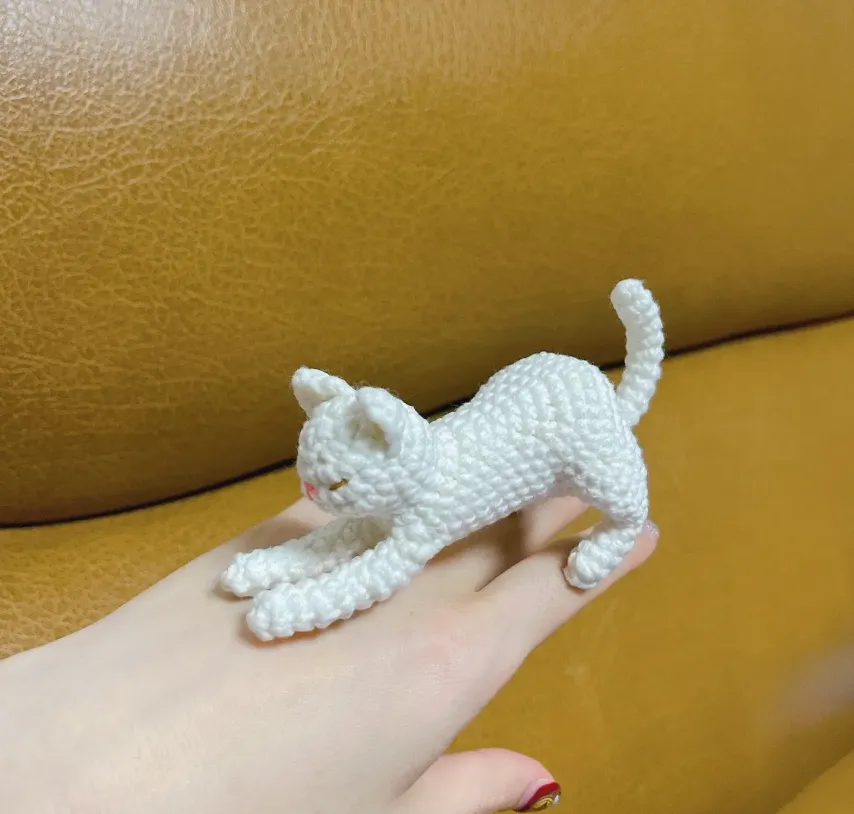
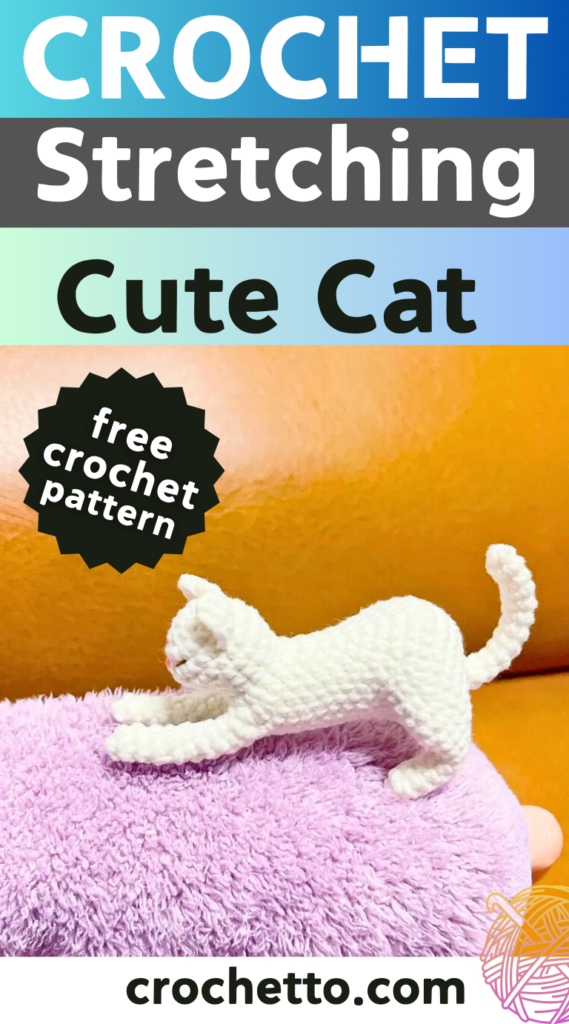
Imagine a charming little cat frozen mid-stretch, its playful pose adding a touch of whimsy to your desk, shelf, or even as a gift for your favorite cat lover. This crochet project combines creativity and technique to bring this stretching feline to life! Let’s dive into this step-by-step tutorial to crochet your very own Stretching Cat Amigurumi.
Materials Needed
To get started, gather these supplies:
- Four-ply cotton yarn in cream white, Use this yarn from the phntake brand
- Crochet hook: size recommended for your yarn, typically 2.5 mm–3.5 mm for amigurumi
- Yarn needle
- Shaping wire (for the legs and tail)
- Stuffing (like polyfill)
- Scissors
Pattern Instructions
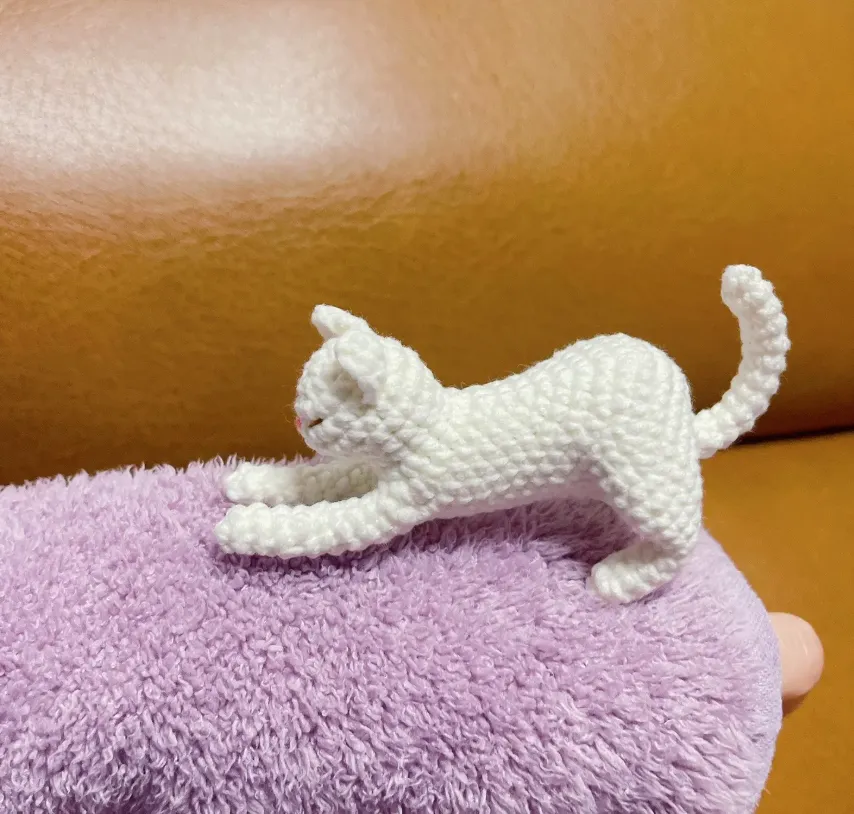
Main Body
The body forms the core of the cat’s pose. We’ll start at the base and work up to the head.
- Round 1 (R1): Start with a magic ring, crochet 6 single crochets (sc) into the ring.
- Round 2 (R2): Make 6 increases (2 sc in each stitch) for a total of 12 stitches.
- Round 3 (R3): Crochet 2 increases, 1 sc, 1 increase, 4 sc, 1 increase, 1 sc, and 2 increases.
- Round 4 (R4): Work 2 sets of (2 sc, 1 increase), 6 sc, 1 increase, 2 sc, 1 increase, and finish with 2 sc.
- Round 5 (R5): Continue with 1 sc, 1 sc, 1 increase, 3 sc, 1 increase, 6 sc, 1 increase, 3 sc, 1 increase, and 2 sc.
Keep crocheting according to the pattern provided above, following the increases and single crochets to form the body’s shape. By Round 12, you’ll crochet the base for the front legs by skipping 8 stitches.
Front Legs
After marking the loop where the front legs will attach, we’ll crochet each one separately.
- Round 1: Crochet 3 sc, 1 increase, 2 sc, and 1 sc.
- Round 2: Crochet 1 sc, 2 sc, 1 increase, and 3 sc.
- Round 3: Work 1 sc, 1 sc, 1 increase, 2 sc, and 1 sc.
Continue the rounds until you’ve formed a complete leg. Once finished, stuff the leg with cotton and insert shaping wire to allow the leg to bend slightly for that perfect stretching pose.
Continue the Main Body
Once the front legs are done, continue crocheting the body (Rounds 18–25). Follow the increases and single crochets to shape the body and prepare for the tail and back legs.
At Round 25, skip 19 stitches on either side to separate the tail and back legs
Tail
The tail is crocheted as a continuous tube for about 12 rounds. Once complete, fasten off, insert the shaping wire, and sew it to the body.
Back Legs
The back legs help complete the stretching pose and balance the body.
- Round 1: Crochet 1 sc, 2 sc, 1 increase, 2 sc, and 1 sc.
- Round 2: Crochet 3 sc, 1 increase, 2 sc, and 1 sc.
- Round 3: Crochet 1 sc, 1 sc, 2 increases, 1 sc, and 1 sc.
Repeat the rounds, shaping the leg and stuffing it with cotton. Insert shaping wire, and sew the legs securely to the body. Be sure to close any gaps between the legs and tail.
Ears
The finishing touch is the cat’s adorable little ears.
- Start with a magic ring and crochet 3 sc.
- Chain 1, turn the piece, crochet an increase in the first stitch, and 1 sc.
- Chain 1, crochet around the edge, 1 sc, and an increase.
Fasten off, leaving a long tail for sewing. Attach the ears to the head, adjusting their position for the perfect feline expression.
Assembly and Finishing Touches
- Once all the pieces are complete, sew the front and back legs, tail, and ears securely to the body.
- Insert any remaining stuffing to create a smooth shape.
- Adjust the shaping wire in the legs and tail to perfect the stretching pose.
Tips for Success
- Use stitch markers to keep track of your rounds, especially in the early stages.
- Don’t overstuff the legs or tail; keep them flexible to pose the cat naturally.
- Experiment with yarn colors to match your favorite feline or create a whimsical, colorful cat.
Your Finished Stretching Cat
Now you’ve got a delightful crochet stretching cat to display or gift! With its playful pose and charming design, this amigurumi project is sure to bring joy to anyone who sees it.
Happy crocheting, and don’t forget to share your finished masterpiece!

