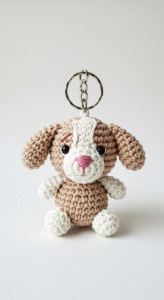
Craft Your Adorable Beginner Amigurumi!
Craft Your Own Adorable Amigurumi Toy: A Beginner-Friendly Crochet Pattern!
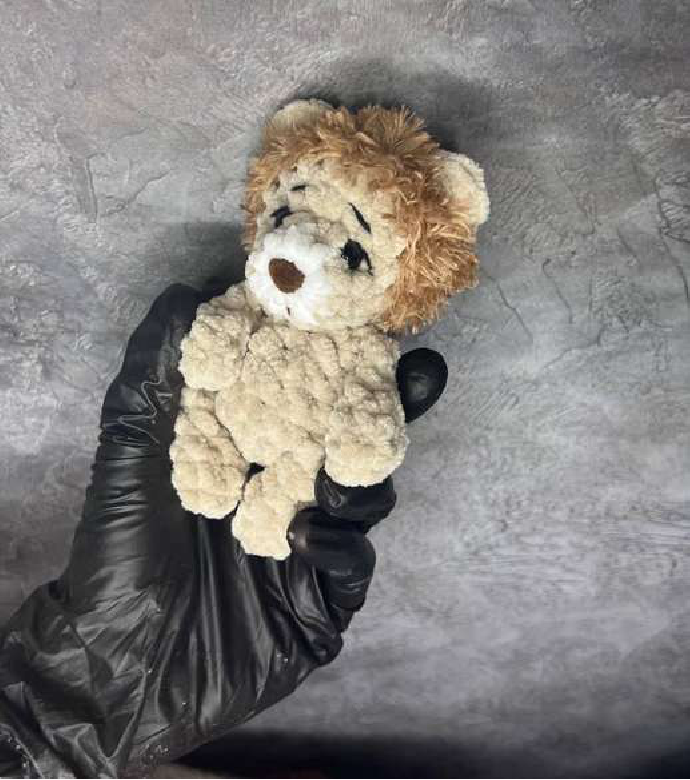
Welcome to Crochetto, your go-to source for delightful crochet patterns content! Today, we’re thrilled to share an enchanting amigurumi pattern that will guide you in creating a charming little plush toy. This project is perfect for crocheters looking for a quick and rewarding make, resulting in a cuddly companion that’s just 10cm tall. Dive into the world of amigurumi with clear, step-by-step instructions designed to make your crafting journey a joy!
Materials You’ll Need
- Any plush yarn (choose your favorite color!)
- Crochet Hook: 4mm
- Tapestry Needle
- Scissors
- Safety Eyes: 8mm
- Safety Nose: 11mm
- Stuffing (polyester fiberfill works great)
Abbreviations Used in This Pattern
To make this crochet patterns content easy to follow, here are the standard abbreviations we’ll be using:
- SC: Single Crochet
- MR: Amigurumi Ring (Magic Ring)
- INC: Increase (make two single crochets in one stitch)
- SL ST: Slip Stitch
- CH: Chain Stitch
- DEC: Decrease (single crochet two stitches together)
- HDC: Half Double Crochet
The Pattern
Legs (Make 2)
Remember not to stuff the legs.
- 4 MR
- (inc, sc) x 2 (6)
- 6 sc (3 rows)
- 6 sc (3 rows)
- 6 sc (3 rows)
- (dec, sc) x 2 (4)
Fold in half and crochet 2 sc together.
Arms (Make 2)
Remember not to stuff the arms.
- 4 MR
- (inc, sc) x 2 (6)
- (dec, sc) x 2 (4)
- 4 sc (2 rows)
- 4 sc (2 rows)
Fold in half and crochet 2 sc together.
Body
- 8 MR
- 4 sc, 4 inc (12)
- 2 sc (with leg), 4 sc, 2 sc (with leg), 4 sc (12)
- 8 sc, 2 dec (10)
- 10 sc
- 1 sc, 2 sc (with arm), 3 sc, 2 sc (with arm), 2 sc (10)
- 5 dec
Head
- 8 MR
- 4 inc, 4 sc (12)
- (sc, inc) x 4, 4 sc (16)
- 16 sc
- Change yarn for mane! 16 sc
- 16 sc
- (2 sc, dec) x 4 (12)
- 6 dec
Ears (Make 2)
2 ch, 4 hdc in 2nd ch from hook.
Facial Features Placement
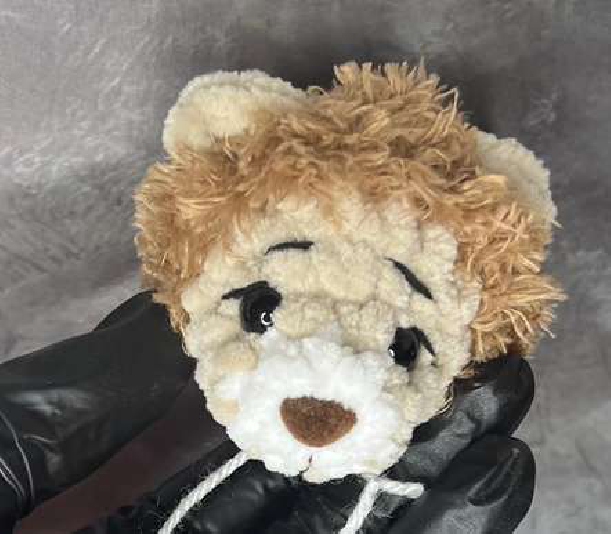
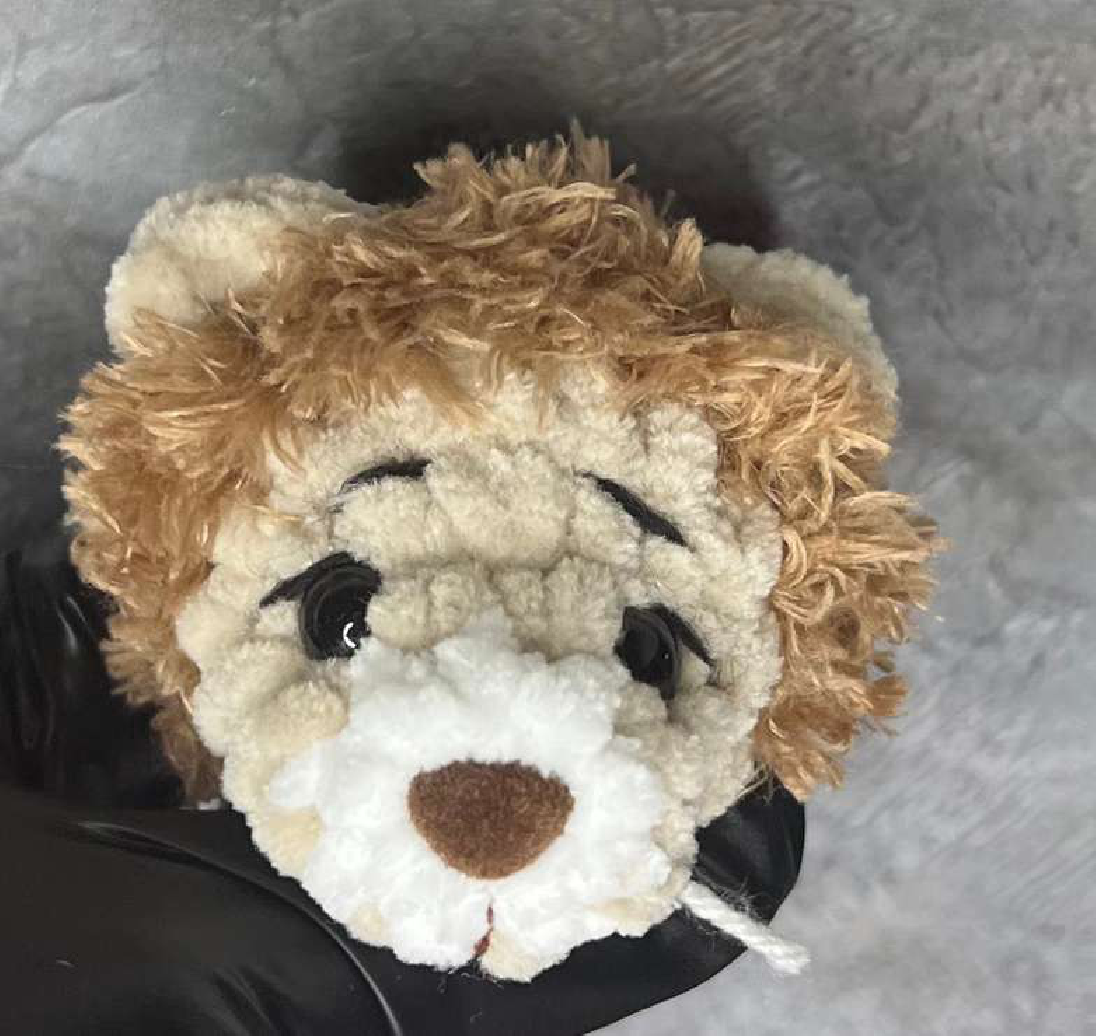
- Ears: Place between Rows 4-5 of the head.
- Eyes: Insert safety eyes on Row 2, after the 1st and 3rd increases (ensuring 2 increases are between the eyes).
- Nose: Place the safety nose in the center of the Amigurumi Ring (MR) of the head.
Sculpting Your Amigurumi
Don’t forget the sculpting to give your toy a lovely defined face! Standard sculpting techniques can be used. You can also add a horizontal sculpted line above the eyes for more character, as illustrated in the photo.
You’re all done! We hope you enjoyed creating this adorable amigurumi toy using our detailed crochet patterns content. We love seeing your finished projects, so be sure to share your creations on social media and tag Crochetto! Your next favorite pattern is just around the corner, waiting for your hooks to bring it to life. Happy crocheting!