
Crochet a Beautiful Rose: Step-by-Step Tutorial for Beginners
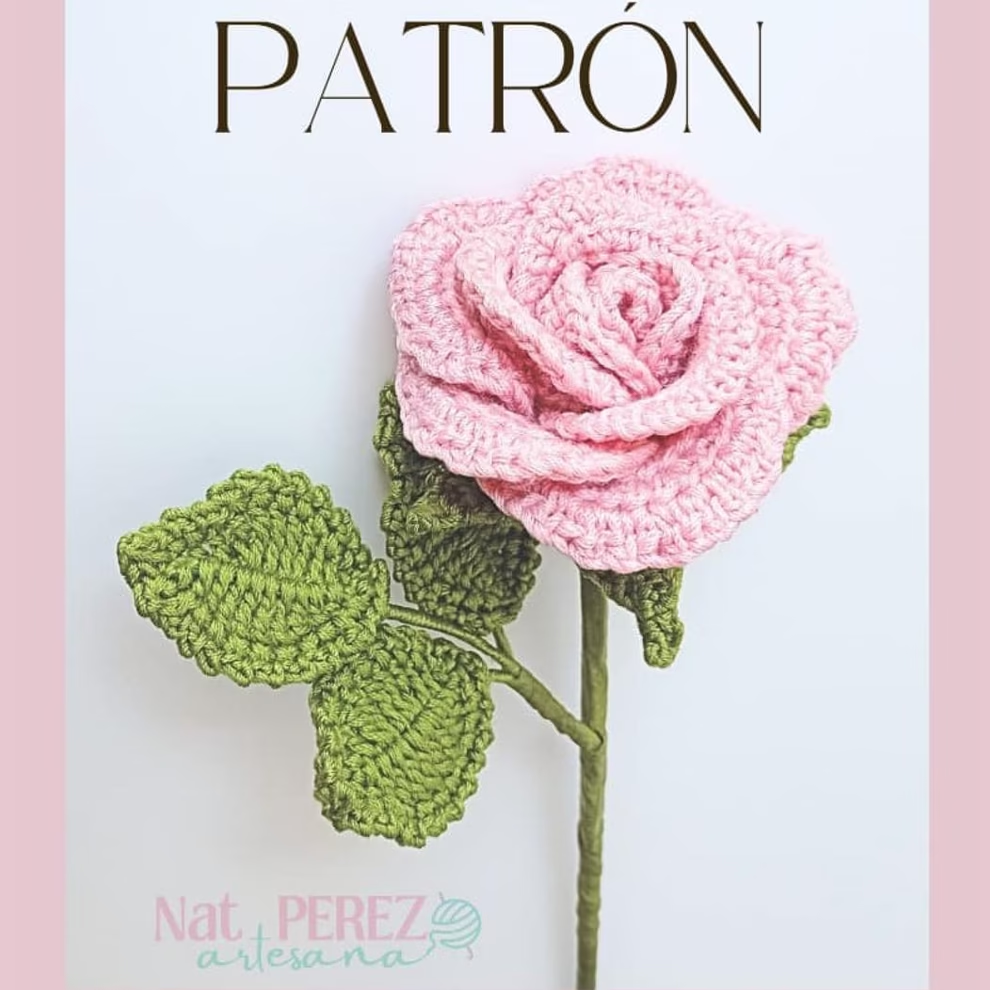
Hello, crocheters! 🧶❤️ In this tutorial, you’ll learn how to crochet a stunning rose that’s perfect for decorating, gifting, or enhancing your crochet projects. 🌹✨ This design is both quick and simple, making it ideal for beginners and experienced crocheters alike.
Get your crochet hook and favorite yarn ready—let’s create this beautiful flower together! 🌺✨
Materials:
- Light gauge acrylic yarn in these colors:
- Rosewood
- Leaf green
- Hook of the smallest gauge recommended for the thread
- Florist tape in leaf green
- Plain, green-lined florist wire
- Stainless steel wire
- Pliers for wire handling and cutting
- Scissors
- Round marker (or scraps of thread)
- Wool needle
- Candle or lighter (for acrylic yarn)
- Pins
- Hair spray (fixing spray)
- Glue (preferably hot silicone and gun)
Abbreviations:
- cad – chain
- pto – point
- pr – slip stitch
- sc – single crochet or slip stitch
- aum – increase (2 stitches in the same stitch)
- mp – half double crochet
- pa – double crochet
- pad – double crochet
- dis – decrease
- bl – back loop only
- shd – front loop only
- cc – color change
- 3cdg – crochet in the third chain from the hook
- ( ) – repeat the content in parentheses
Design Structure: This rose design is composed of 6 parts:
- Center (1 piece)
- Small petal (2 pieces)
- Medium petal (3 pieces)
- Large petal (5 pieces)
- Chalice
- Leaves (3 pieces)
Instructions:
1. Center Part
- R1: am, 3ch, 10dc, sl st in first st (10).
- R2: 2 ch, sp, 5 inc sc, sl st in first st (20).
- R3: ch, 6 sc, (sc, inc)x4, 6 sc, sl st in 1st st (24).
2. Small Petal
- R1: am, 3ch, 10dc, sl st in first st (10).
- R2: 2 ch, sp, 5 inc sc, sl st in first st (20).
- R3: ch, 6 sc, (sc, ch)x3, 6 sc, sl st in first st (20).
3. Medium Petal
- R1: am, 3ch, 10dc, sl st in first st (10).
- R2: 2 ch, 5 inc sc, sl st in first st (20).
- R3: ch, sp, (4 sc, inc sc)x10, sl st in first st (30).
- R4: ch, sp, 2 dec, 4 sc, (4 sc, ch)x4, 4 sc, dec, 2 sc, sl st in 1st st (28).
4. Large Petal
- R1: am, 3ch, 10dc, sl st in first st (10).
- R2: 2 ch, 5 inc sc, sl st in first st (20).
- R3: ch, sp, (2 sc, dec, 4 sc, sc, ch, sc inc, ch, sc inc, ch, sc inc, ch, ch3chg)x3, sc, ch, sc inc, ch, sc, dec, 2 sc, sl st in first st (33).
5. Chalice
- R1: am, 3 ch, 10 dc, sl st in first st (10).
- R2: 3 ch, 10 inc dc, sl st in first st (20).
- R3: ch, 10 sc, (4 sc, dis)x5 (15).
- F1: ch, 4 sc, ch, turn (4).
- F2: sc, 2 inc, 2 sc, turn (5).
- F3: 4 sc, ch, turn (5).
- F4: sc, 2 dec, sc, ch, turn (3).
- F5: sc, ch, turn (2).
- F6: sc, ch, turn (2). Cut and repeat until you have 5 sheets.
6. Leaf
- R1: ch 10, 2cdg sc, sc, dc, pad inc, pad, pad inc, dc, sc, sc, pr in 1st st.
- R2: ch, (sc, 2 ch)x11, sl st in 1st st.
What is Tissue Blocking? Blocking is a crochet technique that helps fabric hold its final shape, removing twists and ensuring the piece maintains structure. This method enhances the definition and realism of petals and leaves.
Methods for Blocking Petals and Leaves:
- Heat Blocking (for acrylic yarns)
- Ideal for acrylic yarns due to their heat reaction.
- Pass the petal or leaf quickly over a flame (e.g., candle or lighter) without direct contact. Repeat this on both sides.
- Caution: Avoid placing the fabric too close to the flame to prevent burning or melting.
- Blocking with Setting Liquid
- Specialized liquids or DIY mixtures like diluted white glue or liquid starch can be used.
- A simpler alternative is hair spray, sprayed lightly over the petals or leaves.
- Pin the pieces into the desired shape on a flat surface or blocking mat, then allow them to dry fully before removing the pins.
Choosing the Best Method:
- For acrylic yarn: Heat blocking is faster and highly effective.
- For cotton or other materials: Setting fluid blocking is recommended. Both methods help petals and leaves keep their shape and appear more realistic.
Assembly:
- Fold the center and glue the tip of the straw.
- Attach small petals to the sides of the center.
- Add medium petals around the small ones.
- Surround the outer edges with large petals.
- Join the leaves in a group of three.
- Cover the stem with trim thread.
video tutorial
Congratulations! 🎉 Your crochet rose is now complete. What did you think of this tutorial? Share your thoughts in the comments and tag the creator when sharing your beautiful creations on social media!