Crochet Adorable Miniature Sneakers: Free Pattern!
Materials
This detailed pattern will guide you through crocheting a miniature pair of sneakers or boots. Follow the instructions carefully for best results.
Yarn and Hook:
- Fine weight yarn in Blue (main color)
- Fine weight yarn in White (accent color)
- Crochet Hook: Appropriate size for your chosen yarn (typically very small for miniature work, ensuring tight stitches).
Abbreviations:
- ch: chain
- sc: single crochet
- inc: increase (2 single crochets in the same stitch)
- dec: decrease (single crochet 2 stitches together)
- sl st: slip stitch
- FLO: front loop only
- BLO: back loop only
- st(s): stitch(es)
General Notes
- The pattern uses standard US crochet terms.
- Each round begins with a chain (ch) for height and concludes with a slip stitch (sl st) to join the round.
- Strive for consistent tension throughout your work to ensure a neat and symmetrical finished product.
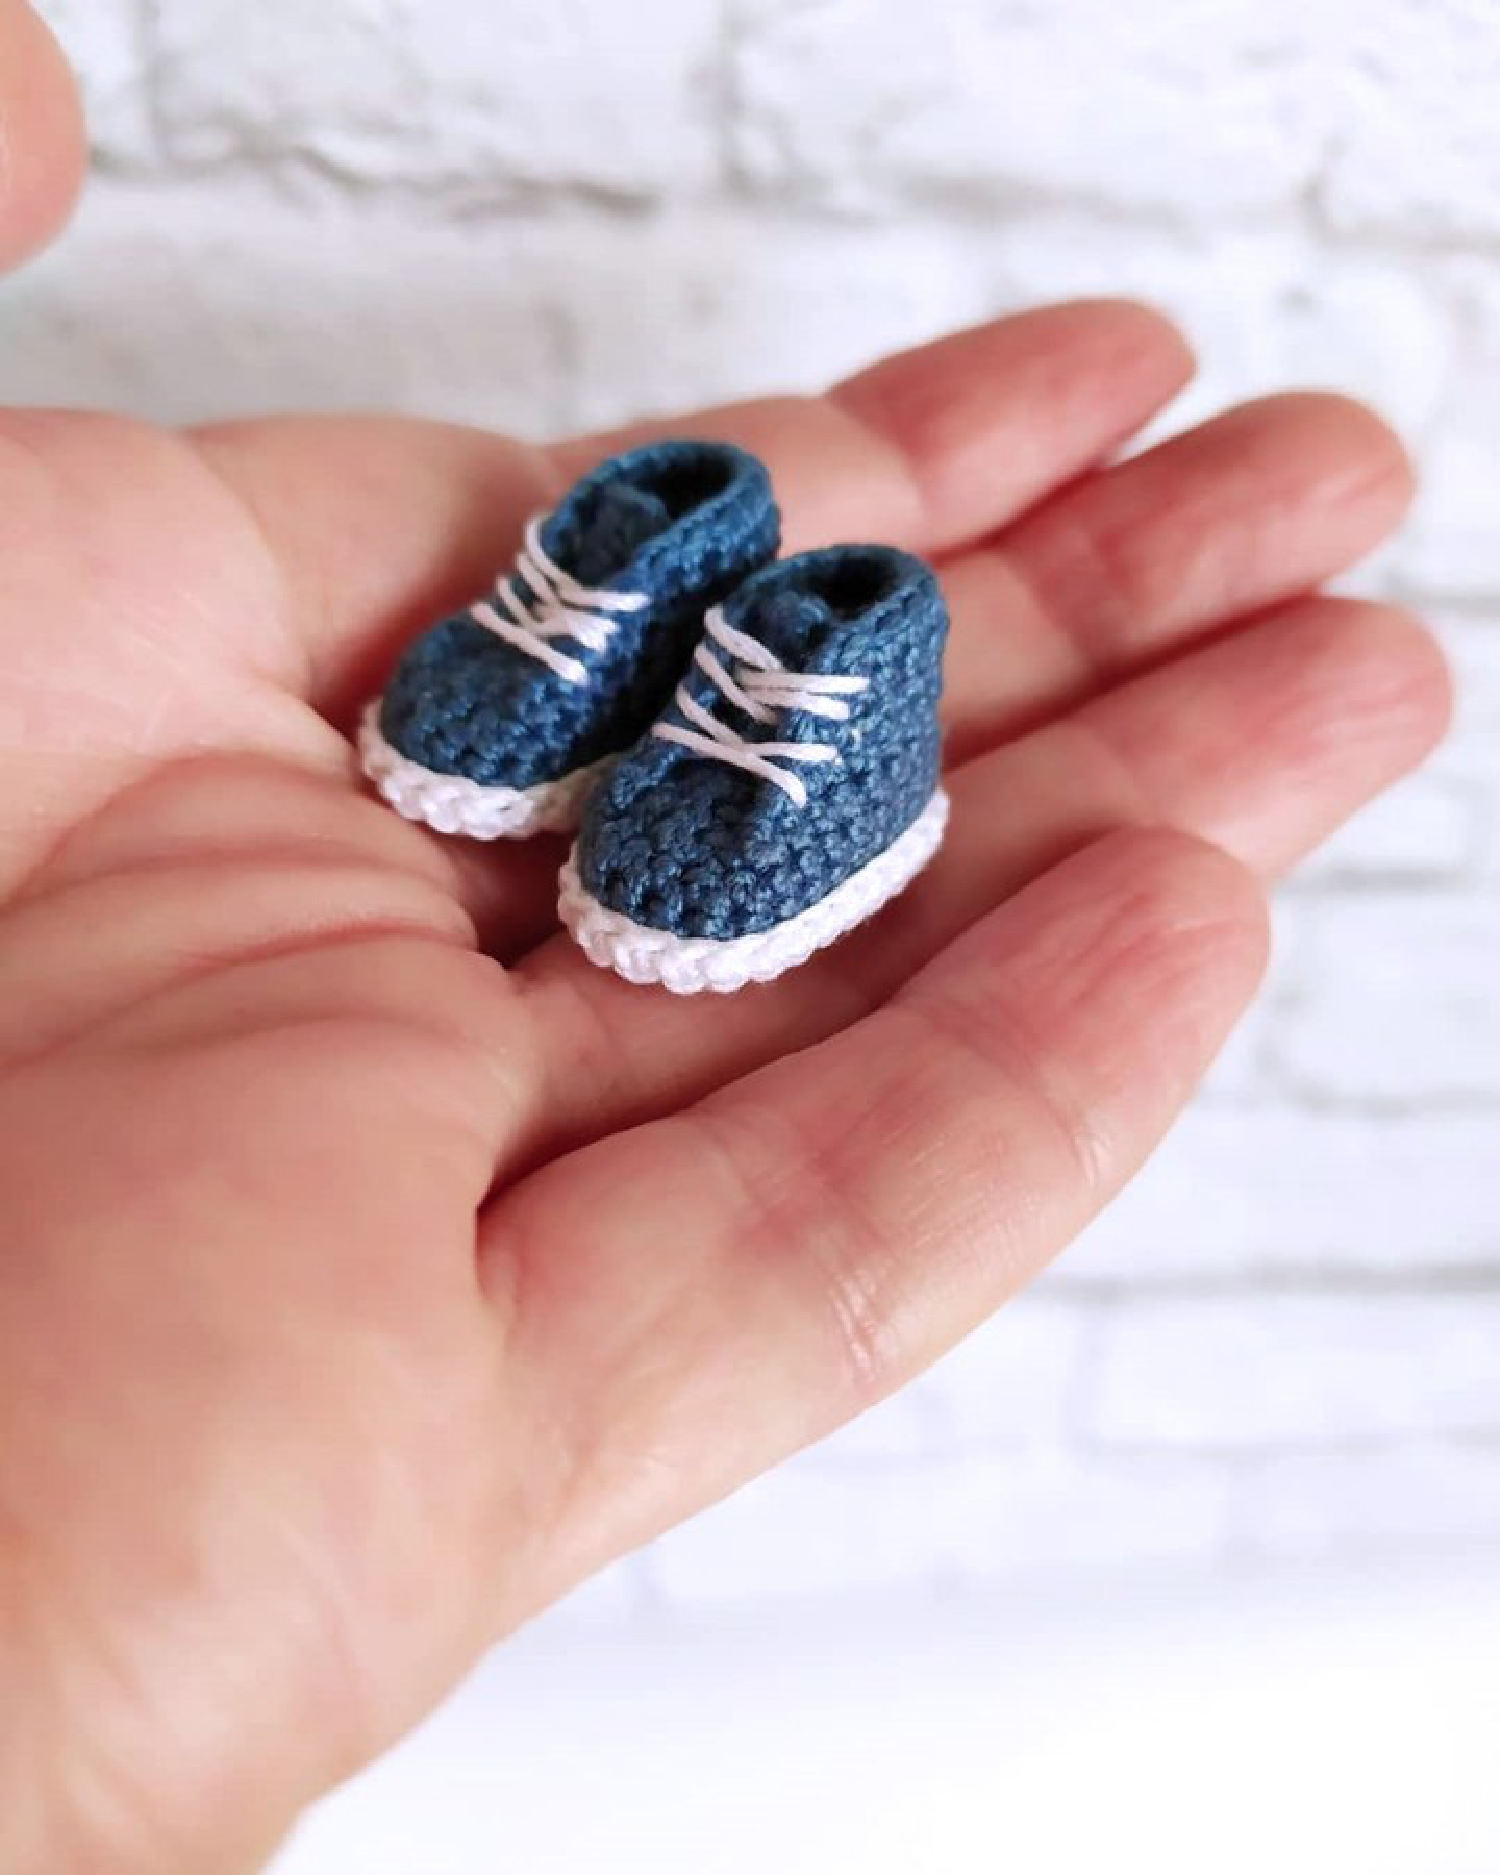
Here is an example of the finished miniature sneakers/boots:

Pattern Instructions
I. Sole (White Yarn)
Begin by creating the foundational sole of the sneaker using your white yarn. This will form the base upon which the rest of the shoe is built.
Round 1: Chain 8.
- Starting in the 2nd ch from the hook: Work 6 sc.
- In the very last chain stitch: Work 5 sc into this single stitch. This creates the rounded end of the sole.
- Now, working on the other side of your starting chain (along the bottom edge): Work 6 sc.
- In the very first chain you made (the stitch where your initial 6 sc started): Work 3 sc into this single stitch. This completes the curve at the opposite end.
- Join with a sl st to the first sc of the round. (You should now have a total of 20 sc stitches forming an oval shape).
Round 2: Ch 1.
- Work 6 sc.
- Work 5 inc (this means placing 2 single crochets into each of the next 5 stitches, effectively increasing your stitch count by 5).
- Work 6 sc.
- Work 3 inc (placing 2 single crochets into each of the next 3 stitches, increasing your stitch count by 3).
- Join with a sl st to the first sc of the round. (You should now have a total of 28 sc stitches).

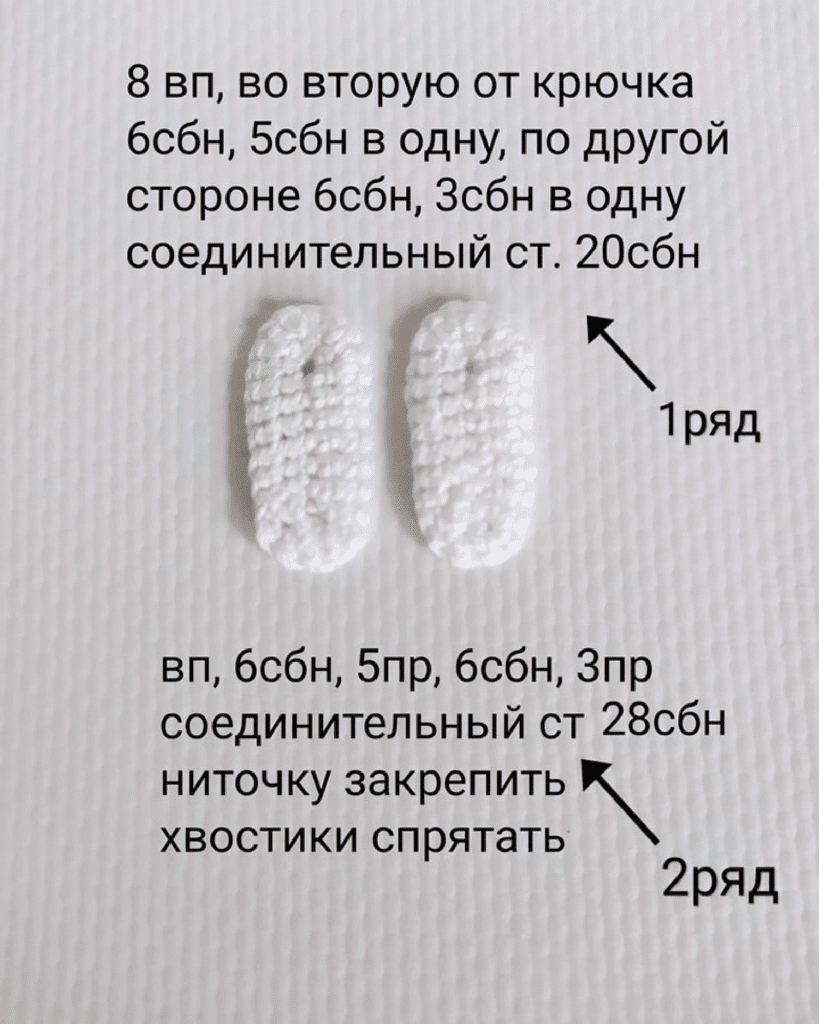
Fasten off your white yarn securely and weave in any loose ends.
II. Shoe Upper (Blue Yarn)
Now, we will transition to the blue yarn to create the main body of the shoe. Pay close attention to the loop instructions to achieve the desired shape.
Note: Start crocheting from the back center of the sole you just completed. This ensures the seam will be at the back of the finished sneaker.
- Round 1: Ch 1. Work 28 sc into the front loops only (FLO) of the previous white sole round. This technique creates a defined edge for the sole and helps the upper stand upright. Join with a sl st. (Total: 28 sc).

- Round 2: Ch 1. Work 28 sc (through both loops as normal). Join with a sl st. (Total: 28 sc).
- Round 3: Ch 1. Work 28 sc (through both loops as normal). Join with a sl st. (Total: 28 sc).
- Round 4: Ch 1.
- Work 10 sc.
- Perform (dec, 1 sc) three times. This creates the tapering for the toe box of the sneaker.
- Work 10 sc.
- Join with a sl st to the first sc of the round. (Total: 25 sc).


Fasten off your blue yarn and weave in any remaining ends.
III. Tongue (Blue Yarn)
The tongue adds a characteristic detail to the sneaker. It is worked in rows and attached to the front center of the shoe upper.
- Locate the front center of the shoe upper, specifically where the decreases were made in Round 4 of the Shoe Upper section.
- Chain 4.
- Rows 1-5: Work 5 rows of single crochet. Each row should consist of 4 sc stitches. To start each row, ch 1, then turn your work before making your sc stitches. This ensures the tongue maintains its flat, rectangular shape.
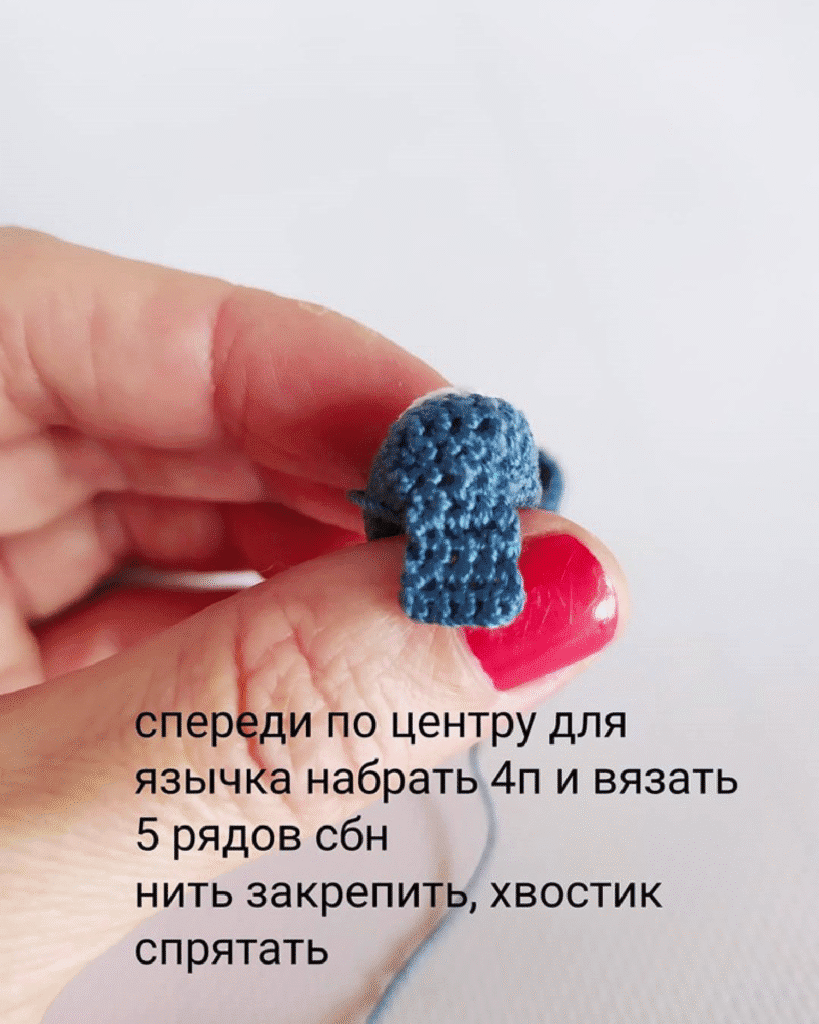
Fasten off your blue yarn and weave in ends.
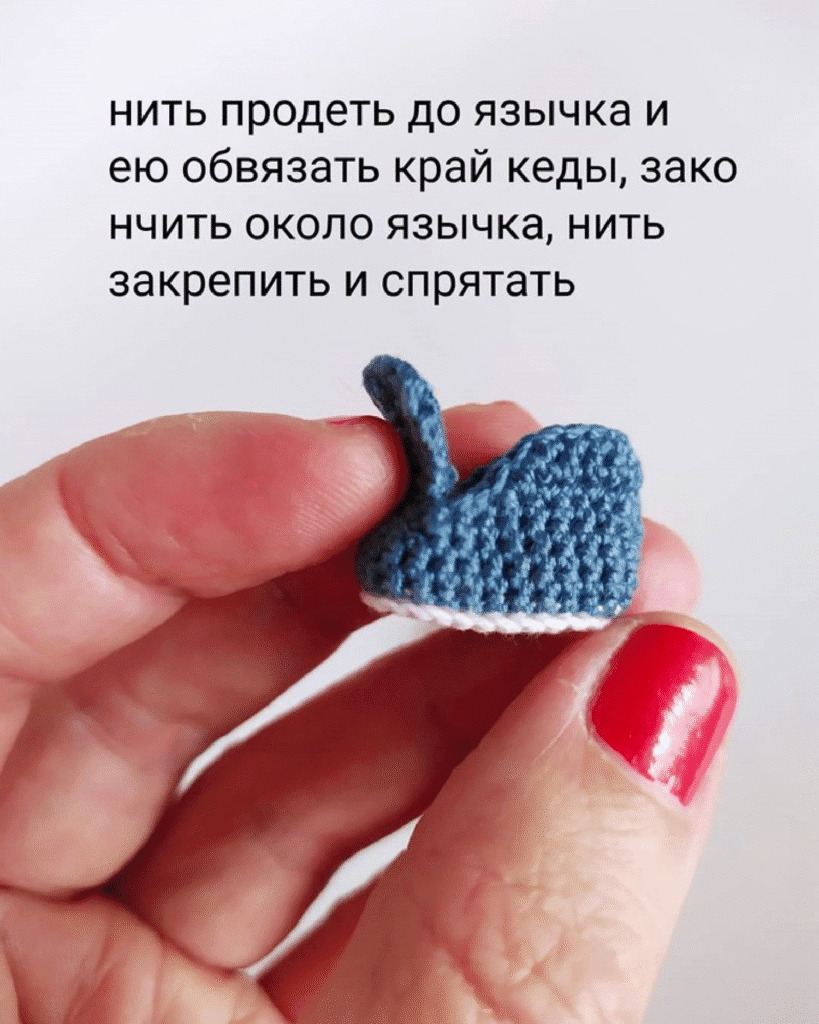
IV. Collar/Ankle Opening (Blue Yarn)
This section forms the opening where the foot would enter, creating the ankle collar of the boot or sneaker.
- Attach blue yarn to the shoe upper. Identify the stitch two stitches away from the tongue on one side (this will be your starting point).
- Row 1: Ch 1. Work 17 sc, stopping exactly two stitches before reaching the tongue on the other side. Turn your work. (Total: 17 sc).
- Row 2: Ch 1. Perform a decrease (dec) at the beginning of the row, then work single crochets in the remaining stitches across, and finish with another decrease (dec) at the end of the row. Turn your work. (Total: 15 sc).
- Row 3: Ch 1. Perform a decrease (dec) at the beginning of the row, then work single crochets in the remaining stitches across, and finish with another decrease (dec) at the end of the row. Turn your work. (Total: 13 sc).


Fasten off, leaving a long tail for sewing.
Now, using the long tail you left or a new strand of yarn, single crochet around the entire top opening of the sneaker. This includes going around the edges of the tongue and the collar you just created. This step provides a neat and finished edge to the opening. Secure the yarn and carefully hide the tail within the stitches.
V. Shoelaces (White Yarn)
The shoelaces add a crucial realistic detail to your miniature sneakers.
- Chain a length of stitches using white yarn that is sufficient to thread through your desired “eyelets” and tie a small bow. You may need to experiment to find the perfect length for your miniature size.
- Carefully thread the shoelaces through the top of the shoe, mimicking the lacing pattern of real sneakers. Refer to the provided photo for guidance on the desired lacing style.
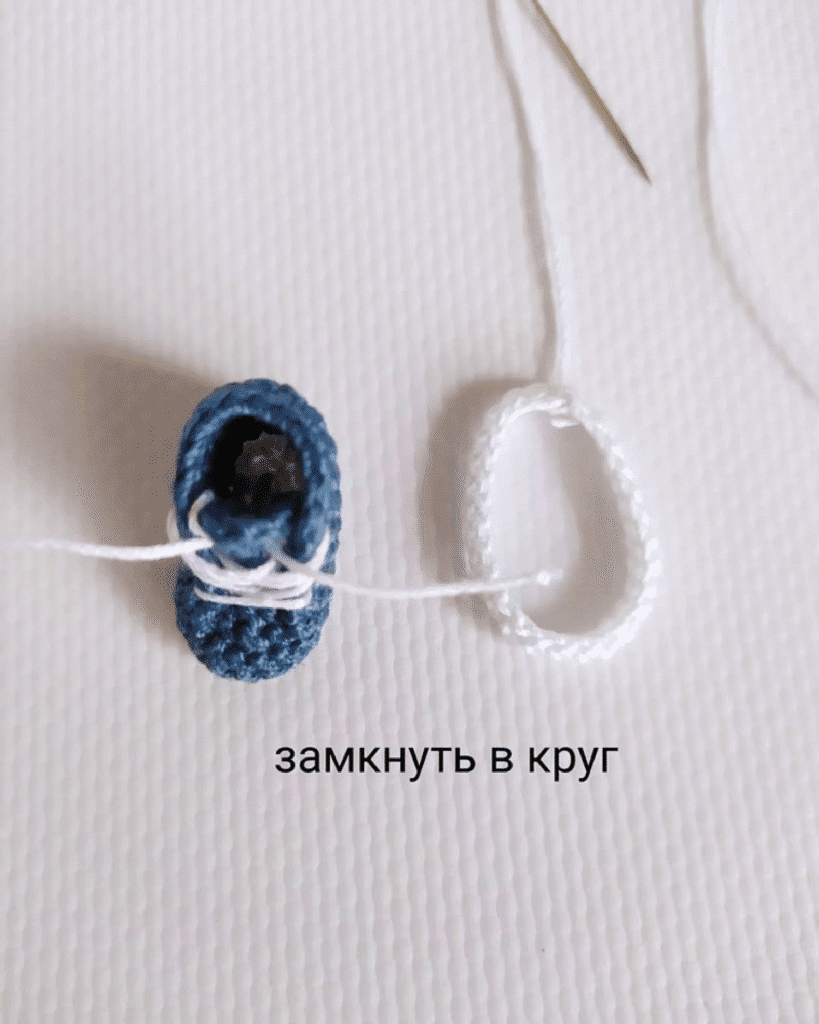
VI. Attaching the White Border/Trim (White Yarn)
This final detail provides a clean, contrasting border around the base of the shoe, enhancing its appearance.
- Make the Border Strip: Chain 30. Starting in the 2nd ch from the hook, work 29 sc. This will create a long, thin strip.
- Fit and Join: Wrap this newly made white strip around the very base of the blue shoe upper to ensure it fits snugly. Join the two ends of the strip to form a continuous circle. You can achieve this by using a slip stitch or by sewing the ends together with a small seam.
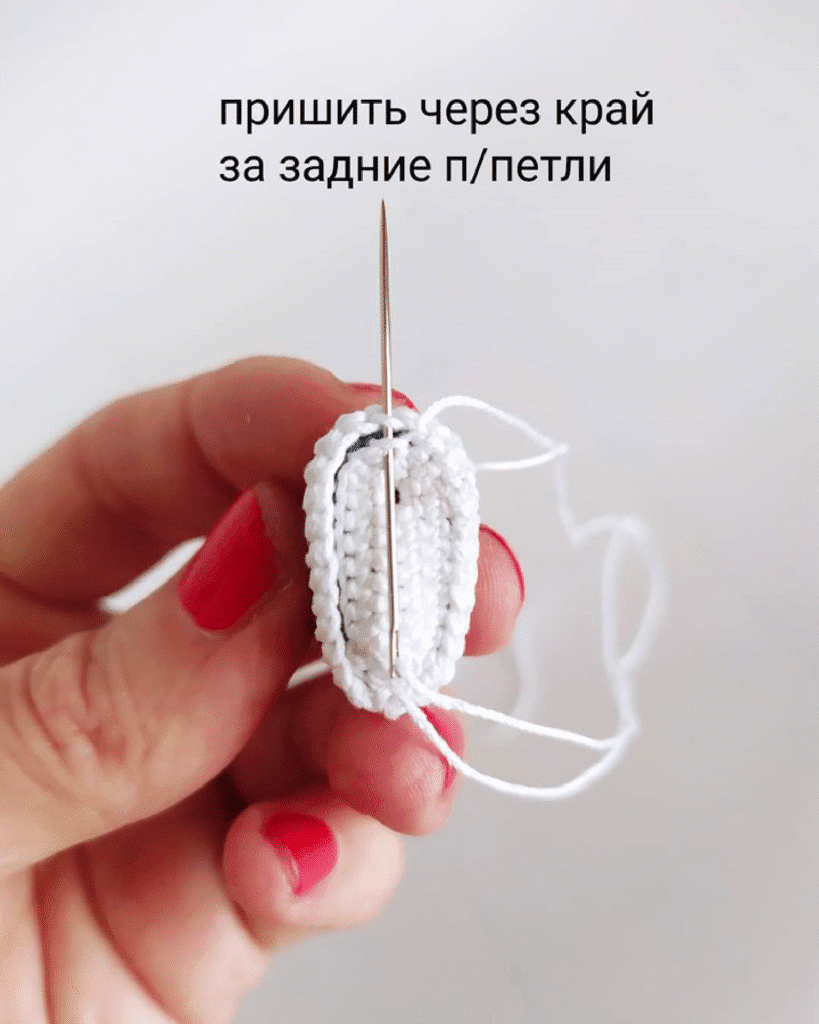
- Sew to Shoe: Using a tapestry needle and the remaining yarn tail (or a new strand of white yarn if needed), carefully sew this white border to the base of the blue shoe upper. For a clean finish, sew through the edge of the white strip and into the back loops only (BLO) of the blue shoe’s base. This method helps the white trim stand out and gives a professional look.


Finished!
Your miniature sneakers/boots are now complete! Take pride in your detailed work.

For more patterns and inspiration, be sure to visit @zontik_lena on Instagram: https://www.instagram.com/zontik_lena/