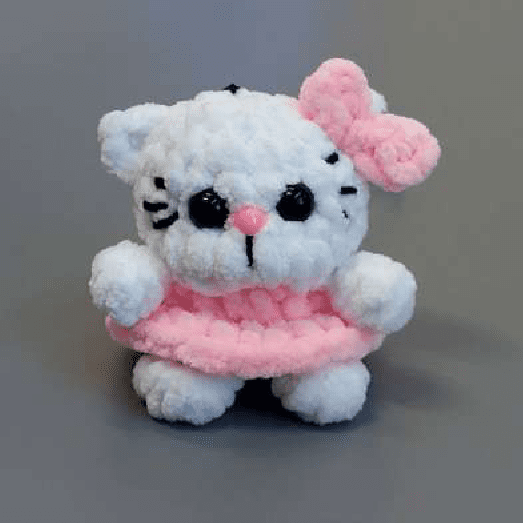
Crochet An Adorable Kitten Amigurumi Keychain!
Materials
Kitten Keychain / Amigurumi
Author: Galina Burlakova
Materials Used:
- Plush yarn 100g/120m in two colors (e.g., white and pink)
- Crochet hook suitable for your tension (Author used a 3.75mm Clover hook)
- Stuffing
- Needle
- Stitch Marker
- Safety eyes 10mm
- Safety nose 6x8mm
- Black thread for facial embroidery
Abbreviations:
- MR (КА) – Magic Ring (Amigurumi Ring)
- SC (СБН) – Single Crochet
- INC (ПР) – Increase (2 SC in one stitch)
- DEC (УБ) – Decrease (Single crochet 2 together)
- CH (ВП) – Chain
- SL ST (СС) – Slip Stitch
- HDC (ПСН) – Half Double Crochet
- DC (ССН) – Double Crochet
- BO (Ш) – Bobble (3 or 4 DC in one stitch with a common top)
- BLO (ЗСП) – Back Loop Only
- FLO (ПСП) – Front Loop Only
General Notes:
- Stuff the piece as you go.
- Insert safety eyes between rows 8 and 9, 4 stitches apart.
Body-Head
Work in continuous rounds unless otherwise specified.
Row 1: 8 SC in a MR (8 stitches) – Work in white yarn.
Row 2: (INC, leg, INC, leg, INC, tail) (16 stitches) – Switch to pink yarn for the next row.
- Leg (make 2): Chain 3. Starting from the 2nd chain from the hook, work 4 BO, then 1 SL ST and 1 SL ST into the base stitch where you chained from.
- Tail: Chain 6. Starting from the 2nd chain from the hook, work 5 SL ST, then 1 SL ST into the base stitch where you chained from.
Row 3: 16 SC (16 stitches) – Work this row in BLO.
Row 4: 16 SC (16 stitches)
Row 5: (2 SC, DEC, 2 SC, arm, DEC, 2 SC, DEC, arm, 2 SC, DEC) (12 stitches)
- After this row, switch to white yarn for the next row. Cut the pink yarn.
- Arm (make 2): Work in white yarn. Chain 4. Starting from the 2nd chain from the hook, work 3 BO, then 2 SL ST and 1 SL ST into the base stitch where you chained from.
Row 6: 12 INC (24 stitches)
Row 7-8: 24 SC (24 stitches)
Row 9: (2 SC, DEC) x 6 (18 stitches)
Row 10: (1 SC, DEC) x 6 (12 stitches)
Row 11: 6 DEC (6 stitches)
Fasten off and close the opening.
The main body of your kitten should now be formed, ready for the next steps.
Ears (Worked from both sides)
Left Ear:
- Attach yarn between rows 8 and 9.
- In the next stitch (between rows 9 and 10), work: 1 SC, 1 DC, 1 SC, 1 SL ST.
- Fasten off and cut the yarn.
Right Ear:
- Attach yarn similarly to the left, between rows 9 and 10.
- In the next stitch (between rows 8 and 9), work: 1 SC, 1 DC, 1 SC, 1 SL ST.
- Fasten off and cut the yarn.
Skirt
- Attach yarn at Row 4.
- Working in FLO (Front Loop Only), repeat (1 HDC, 1 HDC INC) 8 times.
Bow
- Chain 3.
- From the 3rd chain from the hook, work 1 HDC, 1 SL ST.
- Chain 3 again.
- From the 3rd chain from the hook, work 1 HDC, 1 SL ST.
- SL ST into the same stitch where you made the first HDC.
- Cut the yarn, leaving a long tail. Wrap the long tail a couple of times around the center of the bow, then tie it securely with the other yarn end. Attach the bow to the ear.
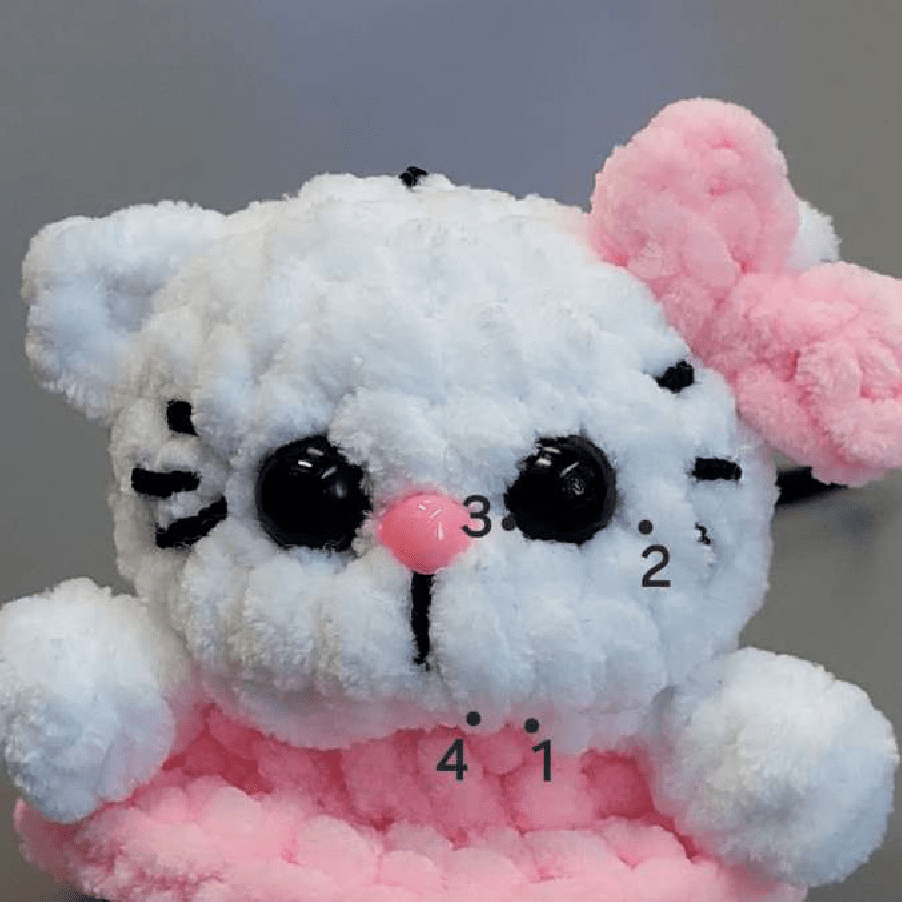
Facial Indentation (Cheek Sculpting)
(Refer to photo for placement)
- Insert the needle from point 1 (bottom of the muzzle).
- Exit at point 2 (next to an eye).
- Insert the needle at point 3 (next to the other eye).
- Exit at point 4 (bottom of the muzzle, same as point 1).
- Pull the thread gently to create an indentation, then tie off the ends. Repeat for the second eye.
Muzzle Embroidery
- Embroider 3 black lines near each eye.
- Embroider a small horizontal line under the nose.
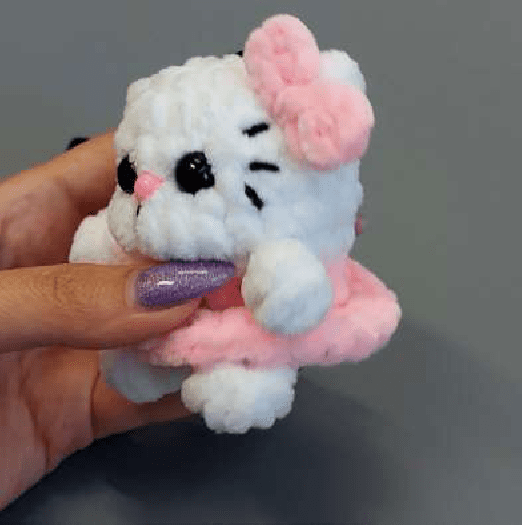
Your kitten is ready!