
Crochet Mini Batman: Free Pattern!
Crochet Your Own Mini Batman Amigurumi: Free Pattern!
Get your hooks ready, superhero fans! Today, we’re diving into a fun and quick project to create an adorable, pocket-sized Batman amigurumi. This little guy is perfect for gifting, decorating your workspace, or hanging from your keys. With his tiny fangs and iconic suit, he’s sure to bring a smile to anyone’s face. Let’s get started!

Materials
- Yarn: Plush yarn (e.g., Himalaya Dolphin Baby, YarnArt Dolce) with a density of 120m/100g. You’ll need Black, Grey, Yellow, and a small amount of Flesh/Beige and White.
- Hook: 3.75 mm crochet hook
- Other: Polyester fiberfill for stuffing, a yarn needle, and a stitch marker.
Abbreviations (US Terms)
- sc: single crochet
- inc: increase (2 sc in one stitch)
- dec: decrease (sc 2 stitches together)
- ch: chain stitch
- sl st: slip stitch
- dc: double crochet
- blo: back loop only
- Bobble (Leg): Work 3 dc together into the same stitch.
- Bobble (Arm): Work 2 dc together into the same stitch.
The original pattern used a slightly different bobble; this has been adapted for clarity. The key is to create a small ‘foot’ or ‘hand’ shape.
Head and Body (Worked as one piece)
We’ll start from the bottom and work our way up. Use a stitch marker to keep track of the beginning of each round.
Start with Grey yarn.
R1: Make 8 sc in an amigurumi ring (magic circle). (8)
R2: (inc) x 3.
Now, make the first leg: Switch to Black yarn. Ch 3. Starting from the 2nd ch from the hook, make a Bobble (3 dc together in the same stitch). Ch 1 to secure. Cut the yarn, switch back to Grey yarn and sl st into the base stitch to secure the leg.
Continue with Grey yarn: (inc) x 2.
Make the second leg (repeat the process above with Black yarn).
Finish the round with (inc) x 3 in the remaining stitches. (16)

R3: In Grey yarn, 16 sc around. (16)
R4: Switch to Yellow yarn for the belt. 16 sc around. (16)
R5: Switch back to Grey yarn. 2 sc, dec, 2 sc.
Make the first arm: Switch to Black yarn. Ch 4. Starting from the 2nd ch from the hook, make 2 sl st down the chain. Sl st into the base to secure.
Continue with Grey yarn: dec, 2 sc, dec.
Make the second arm (repeat the process above with Black yarn).
Finish the round with 2 sc, dec. (12)

R6: Switch to Black yarn for the rest of the head. (sc, inc) x 6. (18)
R7: 8 sc in Black, 4 sc in Flesh/Beige (for the mouth area), 6 sc in Black. (18)
R8: Continue with Black yarn only. 8 sc, then work 4 sc in the back loops only (blo) of the flesh-colored stitches, 6 sc. (18)
R9: (sc, dec) x 6. (12)
Start stuffing the body and head firmly.
R10: (dec) x 6. (6)
Cut the yarn, leaving a long tail. Use your yarn needle to weave the tail through the front loops of the final 6 stitches and pull tight to close the hole. Weave in the end.
Ears (Make 2)
The ears are crocheted directly onto the top of the head.
- Attach Black yarn to a stitch on the top of the head where you want an ear to be.
- Ch 3.
- Starting in the second chain from the hook, make 2 sl st down the chain.
- Sl st back into the same stitch where you attached the yarn.
- Fasten off and weave in the end. Repeat for the second ear.
Finishing Touches
This is where your little hero comes to life!
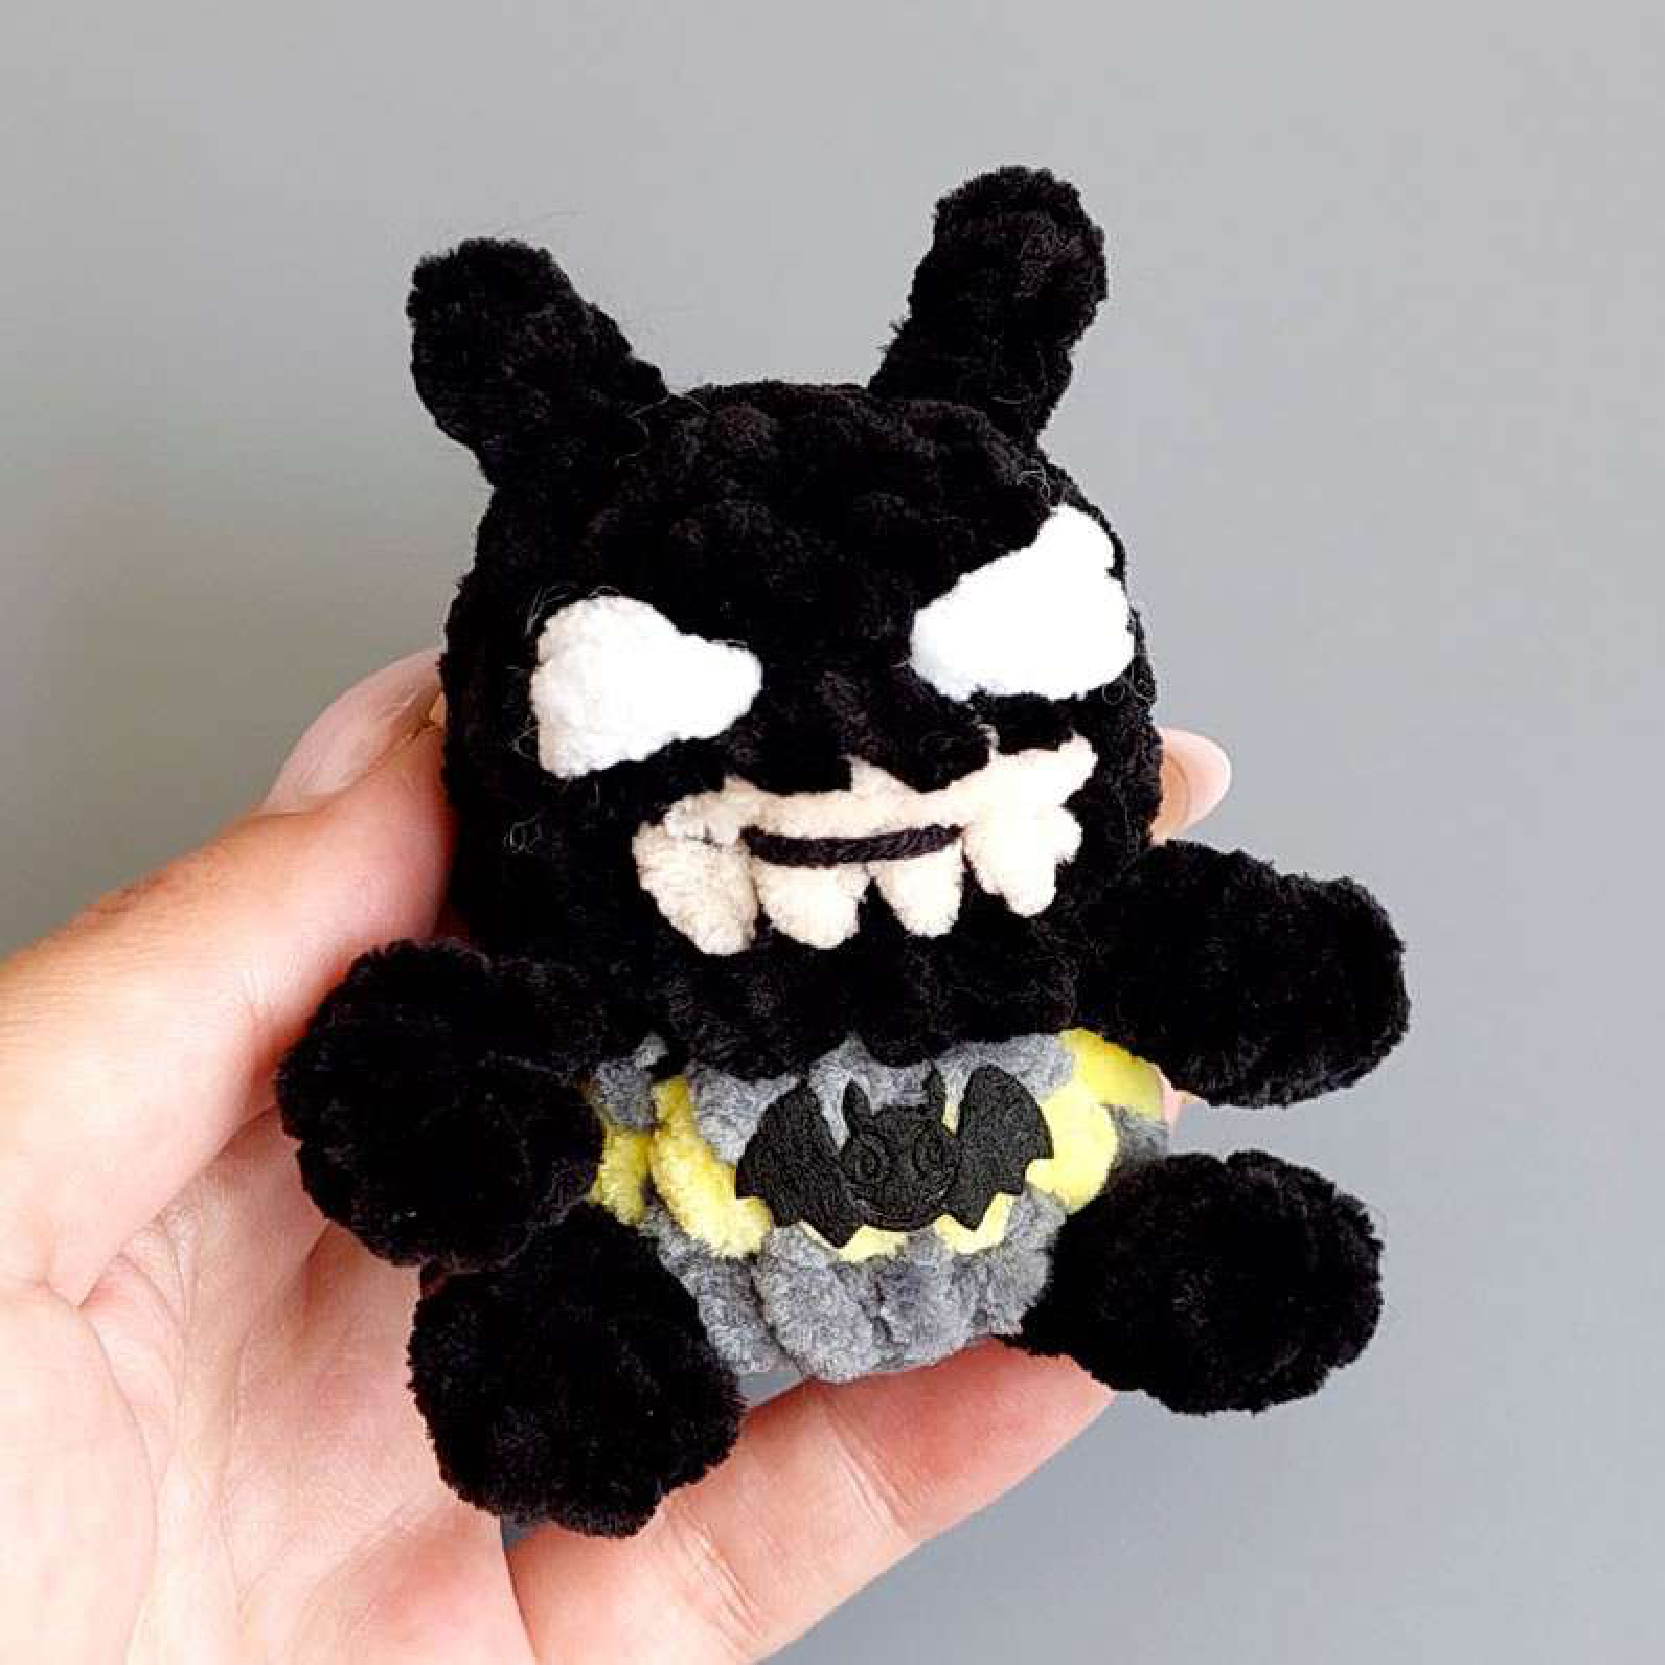
- Eyes: Using white yarn and a needle, embroider the eyes. Three simple vertical stitches for each eye, as shown in the photo, works perfectly.
- Mouth & Fangs: With black yarn, embroider a small mouth over the flesh-colored section. You can add tiny fangs with white yarn.
- Bat Symbol: You can either embroider a small bat symbol onto the yellow belt with black yarn or cut one from a small piece of black felt and glue it on.

And you’re done! You’ve crocheted your very own miniature Dark Knight. We hope you enjoyed this pattern and would love to see your creations!
Original pattern design by Galina Burlakova.
You can find more of her work here: https://vk.com/plyushevoe_schastye
“`