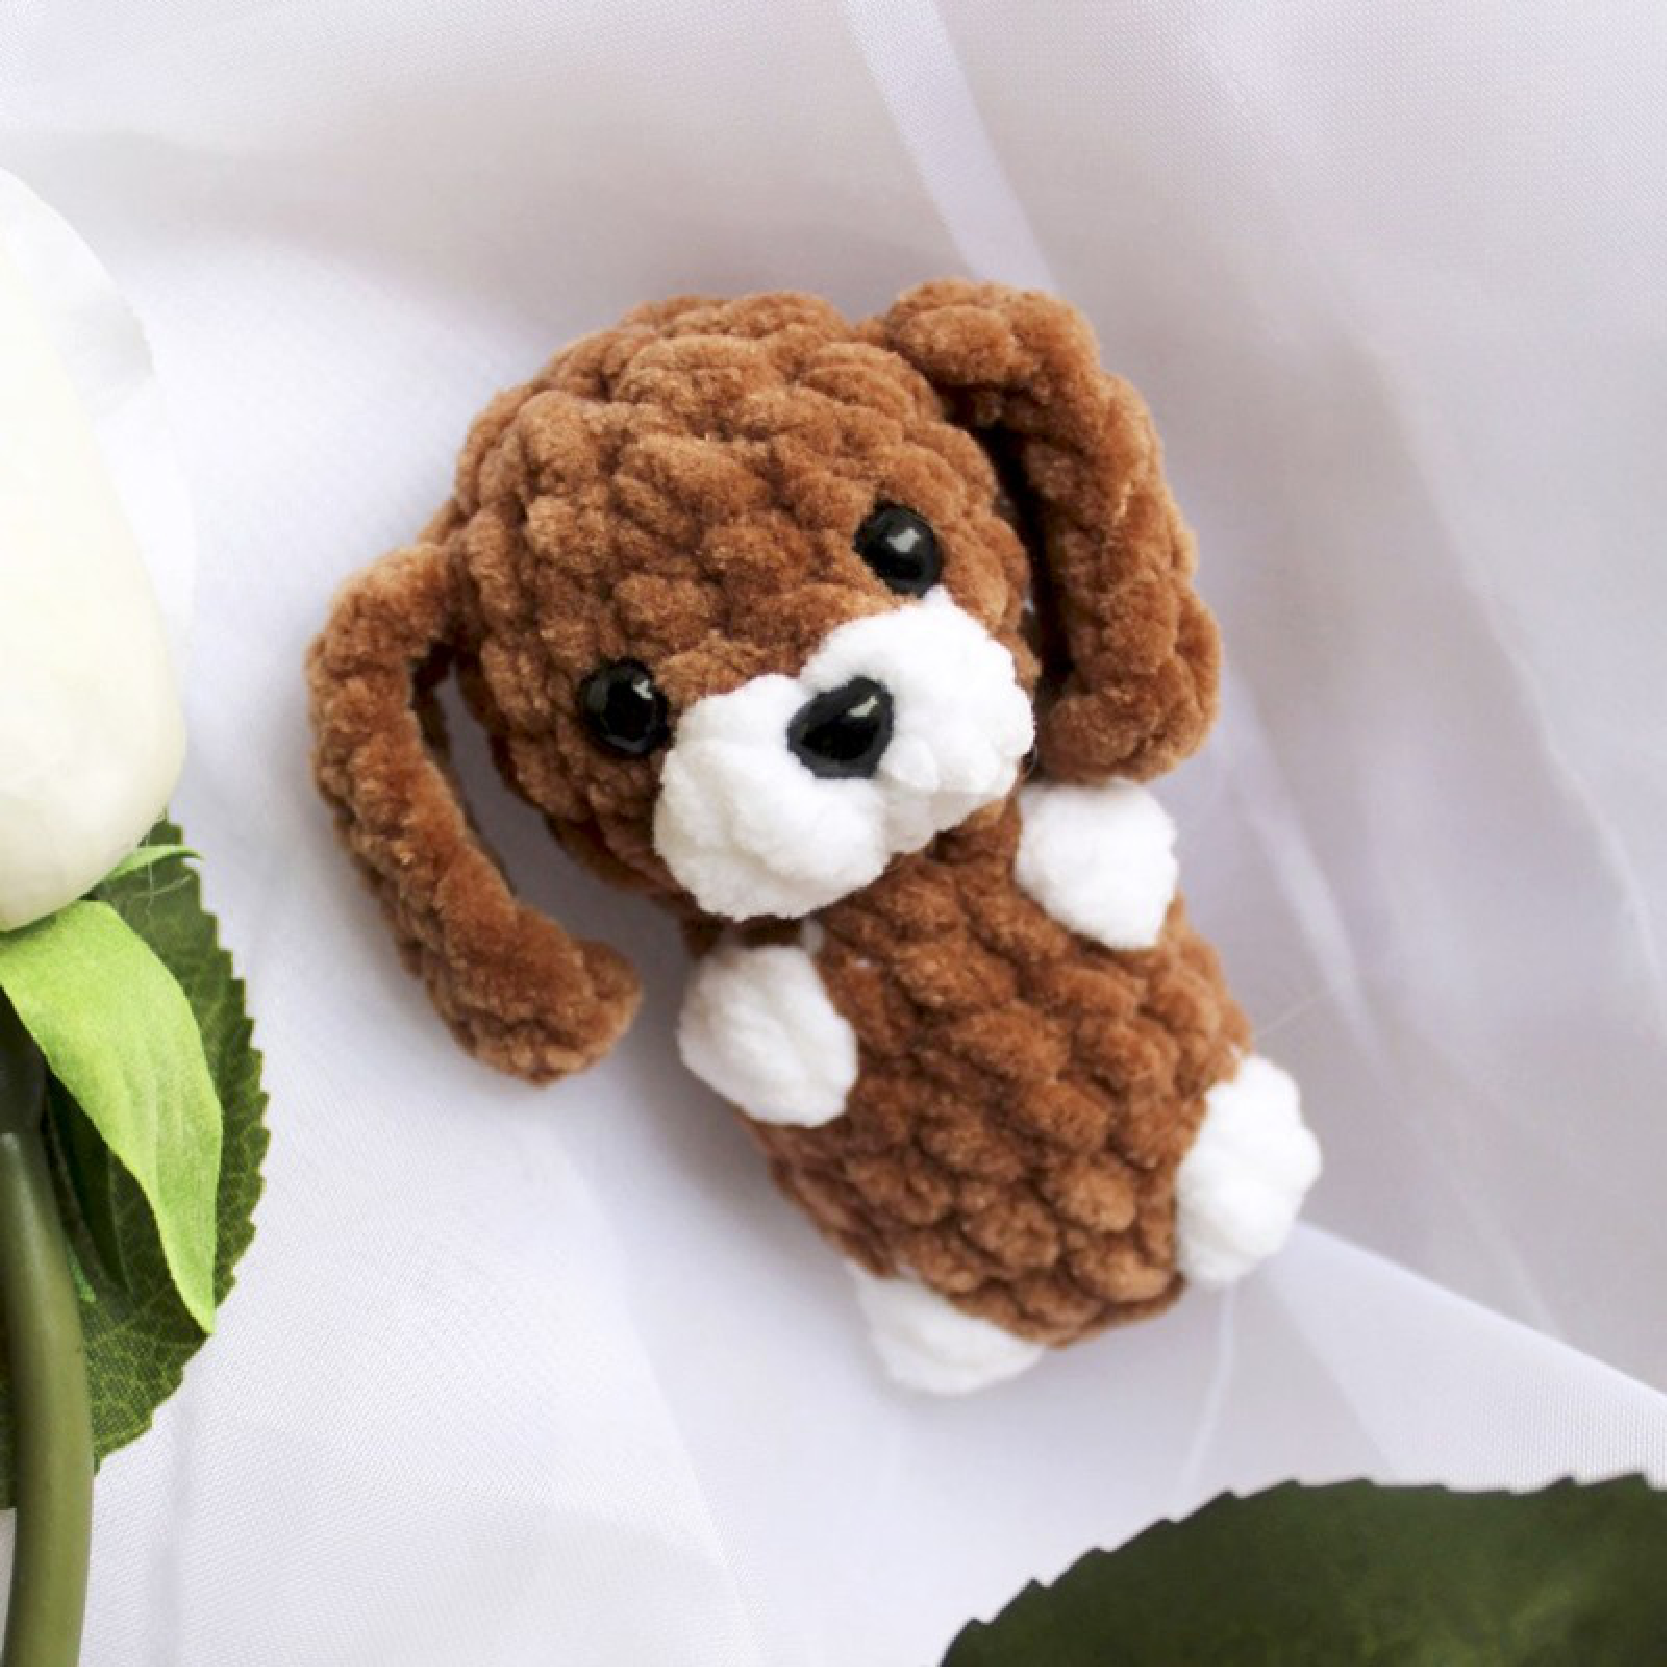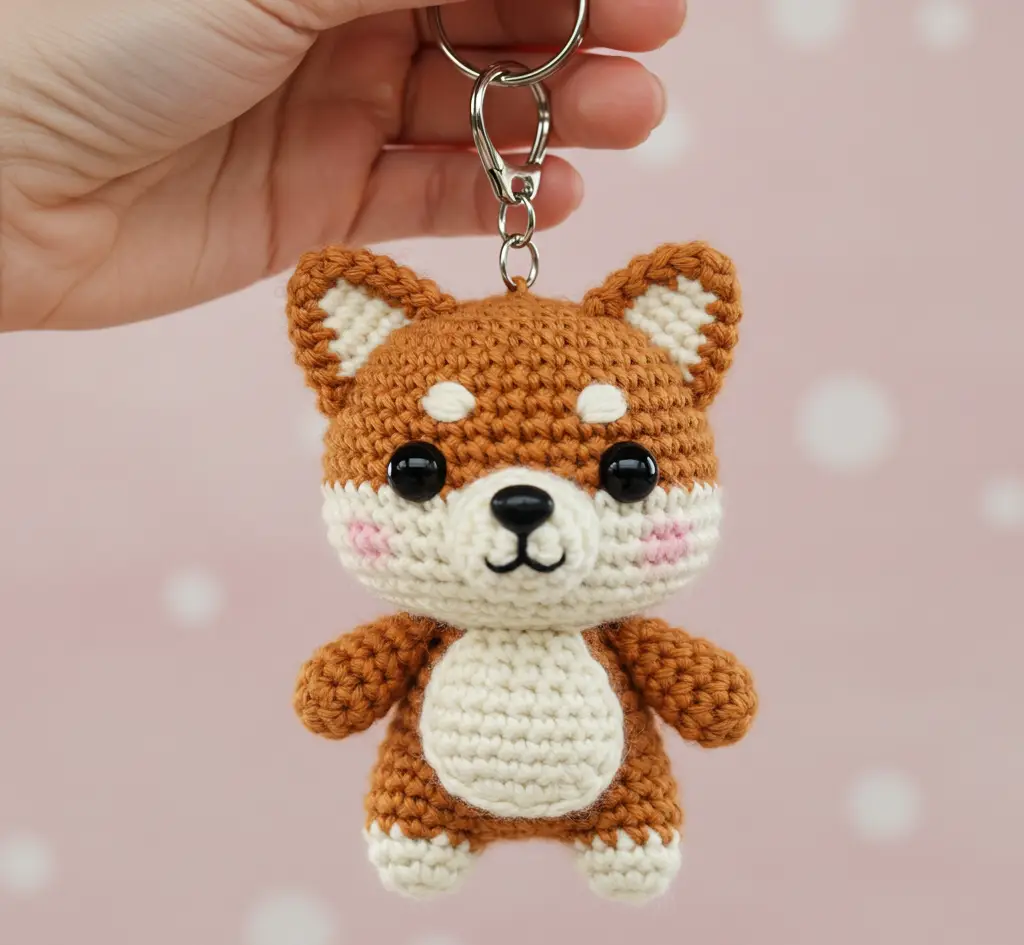
Crochet Shiba Inu Keychain Pattern
This pattern will guide you through creating a cute Shiba Inu puppy keychain.
Skill Level: Intermediate

Finished Size: Approximately 3-4 inches tall (depending on yarn and hook size)

Materials:
- Yarn: Worsted weight yarn in the following colors:
- Orange/Rust (Main body color)
- Cream/White (Muzzle, chest, paws, ear tips)
- Black (Nose, mouth embroidery)
- Crochet Hook: Size 3.5mm (E/4) or appropriate size for your yarn.
- Safety Eyes: 6mm or 8mm black safety eyes (2)
- Stuffing: Polyester fiberfill
- Yarn Needle: For sewing pieces together and embroidery
- Stitch Marker: To mark the beginning of rounds
- Scissors
- Pink Felt or Embroidery Floss: For cheek blush (optional)
- Keychain Ring with Chain
Abbreviations (US Terms):
- MR: Magic Ring
- sc: Single Crochet
- inc: Increase (2 sc in the same stitch)
- dec: Decrease (sc 2 stitches together)
- st(s): Stitch(es)
- sl st: Slip Stitch
- ch: Chain
- BLO: Back Loop Only
- FLO: Front Loop Only
- Rnd(s): Round(s)
- FO: Fasten Off
- ( ): Repeat instructions within parentheses as directed
Pattern:
Head:
- (Start with Orange/Rust yarn)
- Rnd 1: 6 sc in MR (6)
- Rnd 2: Inc in each st around (12)
- Rnd 3: (Sc 1, inc) x 6 (18)
- Rnd 4: (Sc 2, inc) x 6 (24)
- Rnd 5: (Sc 3, inc) x 6 (30)
- Rnd 6: (Sc 4, inc) x 6 (36)
- Rnd 7: (Sc 5, inc) x 6 (42)
- Rnds 8-13: Sc in each st around (42) – 6 rounds
- Change to Cream/White yarn for the muzzle area.
- Rnd 14: Sc 12 in Orange, sc 6 in Cream, sc 6 in Orange, sc 6 in Cream, sc 12 in Orange (42)
- Carry the unused color along the back of your work, crocheting over it to keep it neat.
- Rnd 15: Sc 11 in Orange, sc 8 in Cream, sc 4 in Orange, sc 8 in Cream, sc 11 in Orange (42)
- Rnd 16: Sc 10 in Orange, sc 22 in Cream, sc 10 in Orange (42)
- Insert safety eyes between Rnds 13 and 14, approximately 7-8 stitches apart, centered on the cream muzzle section.
- Rnd 17: (Sc 5, dec) x 6 (36) – Continue with Orange for the rest of the head, you can cut the cream yarn, leaving a tail to weave in.
- Rnd 18: (Sc 4, dec) x 6 (30)
- Rnd 19: (Sc 3, dec) x 6 (24)
- Rnd 20: (Sc 2, dec) x 6 (18)
- Begin stuffing the head firmly. Continue stuffing as you go.
- Rnd 21: (Sc 1, dec) x 6 (12)
- Rnd 22: Dec x 6 (6)
- FO, leaving a long tail. Weave the tail through the front loops of the remaining 6 stitches and pull tight to close the hole. Weave in the end.
Ears (Make 2):
- (Start with Orange/Rust yarn)
- Rnd 1: 4 sc in MR (4)
- Rnd 2: (Sc 1, inc) x 2 (6)
- Rnd 3: (Sc 2, inc) x 2 (8)
- Rnd 4: (Sc 3, inc) x 2 (10)
- Rnd 5: Sc in each st around (10)
- Change to Cream/White yarn for the inner ear.
- Rnd 6: Sc in each st around (10)
- FO, leaving a long tail for sewing. Do not stuff the ears. Flatten them.
Body:
- (Start with Orange/Rust yarn)
- Rnd 1: 6 sc in MR (6)
- Rnd 2: Inc in each st around (12)
- Rnd 3: (Sc 1, inc) x 6 (18)
- Rnd 4: (Sc 2, inc) x 6 (24)
- Rnd 5: (Sc 3, inc) x 6 (30)
- Rnds 6-8: Sc in each st around (30) – 3 rounds
- Change to Cream/White yarn for the chest patch.
- Rnd 9: Sc 6 in Cream, sc 24 in Orange (30)
- Rnd 10: Sc 8 in Cream, sc 22 in Orange (30)
- Rnd 11: Sc 8 in Cream, sc 22 in Orange (30)
- Cut Cream yarn, leaving a tail to weave in. Continue with Orange.
- Rnd 12: (Sc 3, dec) x 6 (24)
- Rnd 13: Sc in each st around (24)
- Rnd 14: (Sc 2, dec) x 6 (18)
- Begin stuffing the body firmly. Continue stuffing as you go.
- Rnd 15: (Sc 1, dec) x 6 (12)
- Rnd 16: Dec x 6 (6)
- FO, leaving a long tail for sewing to the head.
Legs (Make 2):
- (Start with Cream/White yarn)
- Rnd 1: 5 sc in MR (5)
- Rnd 2: Inc in each st around (10)
- Rnd 3: Sc in each st around (10)
- Change to Orange/Rust yarn.
- Rnds 4-6: Sc in each st around (10) – 3 rounds
- FO, leaving a long tail for sewing. Stuff lightly.
Arms (Make 2):
- (Start with Cream/White yarn)
- Rnd 1: 4 sc in MR (4)
- Rnd 2: Inc in each st around (8)
- Rnd 3: Sc in each st around (8)
- Change to Orange/Rust yarn.
- Rnds 4-5: Sc in each st around (8) – 2 rounds
- FO, leaving a long tail for sewing. Stuff lightly only at the paw end.
Tail:
- (Start with Orange/Rust yarn)
- Rnd 1: 4 sc in MR (4)
- Rnd 2: (Sc 1, inc) x 2 (6)
- Rnd 3: Sc in each st around (6)
- Change to Cream/White yarn for the tip.
- Rnd 4: Sc in each st around (6)
- Rnd 5: (Sc 1, dec) x 2 (4)
- FO, leaving a long tail for sewing. Stuff very lightly or not at all.
Assembly:
- Sew Head to Body: Use the long tail from the body to sew the opening of the body to the base of the head (around Rnd 21-22 of the head). Ensure it’s centered.
- Sew Ears to Head: Position the ears on top of the head, slightly towards the back, around Rnds 5-10 from the top. The cream/white part should face forward. Sew them securely.
- Sew Legs to Body: Attach the legs to the bottom front of the body, positioning them so the puppy can sit.
- Sew Arms to Body: Attach the arms to the sides of the body, just below where the head joins the body.
- Sew Tail to Body: Attach the tail to the back of the body, centered, so it curls upwards slightly.
- Embroider Face Details:
- Nose: Using black yarn and a yarn needle, embroider a small triangular or rounded nose onto the center of the cream muzzle area.
- Mouth: Using black yarn, embroider a small “w” shape or a simple line for the mouth below the nose.
- Eyebrows/Accents (Optional): You can add small white or cream stitches above the eyes for expression, as seen in the picture.
- Cheek Blush (Optional):
- Cut two small circles or ovals from pink felt and glue them onto the cheeks.
- Alternatively, use pink embroidery floss to lightly embroider a blush.
- Attach Keychain: Securely sew or attach the keychain ring and chain to the top center of the head. Make sure it’s very sturdy.
- Weave in all remaining ends.
Tips:
- Stuffing: Stuff firmly for a good shape, but don’t overstuff, or the stitches will stretch too much.
- Counting Stitches: Use a stitch marker to keep track of your rounds, especially when working in a spiral.
- Color Changes: When changing colors, complete the last yarn over of the stitch before the color change with the new color for a cleaner transition.
- Symmetry: Take your time when attaching pieces to ensure they are symmetrical. Pin pieces in place before sewing to check the placement.
- Tension: Try to maintain consistent tension throughout your work for an even fabric.
Enjoy making your Shiba Inu keychain!