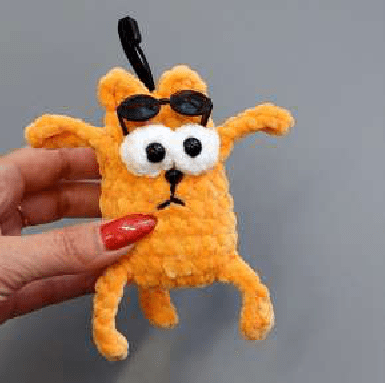
Crochet Simon the Cat: Free Master Class!
Materials
To crochet your very own Simon the Cat, you will need the following materials:
Plush Yarn: Approximately 100g (120m) in your preferred color for the main body. A small amount of white yarn is also required for embroidering the eyes.
Stuffing/Filler: High-quality polyester fiberfill or similar stuffing material to give your cat its shape.
Safety Eyes: Two 8mm safety eyes for character definition.
Safety Nose: One 6x8mm safety nose to complete the facial features.
Stitch Marker: To keep track of your rounds, especially when working in continuous spirals.
Tapestry Needle: For weaving in ends and sewing on parts if needed.
Crochet Hook: A hook size appropriate for your chosen yarn and tension. The original author used a 3.75mm Clover hook.
Abbreviations
Understanding these abbreviations will help you follow the pattern effortlessly:
KA (Amigurumi Ring / Magic Ring): A technique to start crocheting in the round, creating a tight center hole.
SC (Single Crochet): A basic crochet stitch.
INC (Increase): Crochet 2 single crochet stitches into the same stitch to add stitches to your round.
DEC (Decrease): Single crochet 2 stitches together to reduce the number of stitches in your round.
HDC (Half Double Crochet): A stitch taller than a single crochet but shorter than a double crochet.
CH (Chain Stitch): A foundation stitch used to create a starting chain or add height.
SL ST (Slip Stitch): Used to join stitches or move across stitches without adding height.
DC (Double Crochet): A taller crochet stitch.
SHELL (Shell Stitch / Cluster): In this pattern, it refers to 4 double crochet stitches worked into one stitch with a common top (a form of cluster stitch), used here for the eyes.
Body-Head
This pattern is worked in a continuous spiral unless otherwise stated. Use a stitch marker to mark the beginning of each round.
Foundation Row (Starting Chain):
Begin by chaining a few stitches (e.g., 3-4 chains) to establish a foundation, then work into the 2nd chain from the hook as follows:
1. Row 1: From the 2nd chain from the hook, work: 1 INC, 2 SC, 2 INC in one stitch, 2 SC, 1 INC. You should have a total of 10 stitches.
2. Row 2 (First Paw and Body Shaping):
Work 1 INC in the first stitch.
To crochet the first paw: CH 6. Starting from the 2nd chain from the hook, work 2 HDC in one stitch. Then, along the remaining chain stitches, work 4 SL ST. Finish by working 1 SL ST into the base stitch of your main body piece to attach the paw.
Continue on the main body: Work 1 INC, 2 SC, 1 INC.
To crochet the second paw (integrated into the body): In the next single stitch on your main body piece, work the following sequence: 1 SC, then CH 6. Starting from the 2nd chain from the hook, work 2 HDC in one stitch. Then, along the remaining chain stitches, work 4 SL ST. Finish by working 1 SL ST into the base stitch (the stitch where you started the paw chain) to integrate the paw. After the paw is complete, work 1 SC into the same base stitch where you started the paw sequence.
Continue on the main body: Work 2 INC, 2 SC.
(Note: The original text offers an alternative here: “If making without bells (2 SHELL if with bells)”. For Simon the Cat, continue with the standard 2 INC as follows).
Work 2 INC.
You should now have a total of 20 stitches for this round.
3. Row 3 (Tail Insertion):
Work 16 SC.
To crochet the tail: CH 8. Starting from the 3rd chain from the hook, work 2 HDC in one stitch. Then, along the remaining chain stitches, work 5 SC. (The tail is now formed and hangs from your work).
Continue on the main body: Work 4 SC.
You should maintain a total of 20 stitches for this round.
4. Rows 4 – 6: Work 20 SC in each of these three rows. You will have 20 stitches at the end of each round.
5. Row 7: Work (3 SC, 1 DEC) and repeat this sequence 4 times around. You should have 16 stitches.
6. Row 8 (Upper Paw Insertion):
Work 2 SC.
To crochet the first upper paw: CH 6. Starting from the 2nd chain from the hook, work 2 HDC in one stitch. Then, along the remaining chain stitches, work 4 SL ST. Finish by working 1 SL ST into the base stitch of your main body piece.
Continue on the main body: Work 7 SC.
To crochet the second upper paw: CH 6. Starting from the 2nd chain from the hook, work 2 HDC in one stitch. Then, along the remaining chain stitches, work 4 SL ST. Finish by working 1 SL ST into the base stitch of your main body piece.
Continue on the main body: Work 7 SC.
You should maintain a total of 16 stitches for this round.
(Note: The instructions for the upper paws seem to imply they are crocheted as you go, similar to the lower paws, but the stitch count seems off if both are added to the 16 SC. Given the next round’s stitch count, these might be decorative elements or integrated differently than the previous paws. The original text only lists 7 SC and then “Second paw: 7 SC.” which is a bit ambiguous for attaching the second upper paw. For clarity and adherence to the stated stitch count, assume the upper paws are created as free-hanging elements from the specified stitches, similar to the first paw and tail. If the instruction “Second paw: 7 SC” is to be taken literally, it means the second paw is crocheted after the 7 SC, and then another 7 SC is worked, but this would increase the stitch count substantially or imply skipped stitches. Given the simplicity, the most straightforward interpretation is that the 7 SC are after the first upper paw, then the second upper paw is made, and the remaining stitches are worked. To maintain the 16 stitches, the 7 SC for the second paw would be part of the main body, similar to the first paw’s placement relative to the count.) Let’s re-interpret “Second paw: 7 SC” as meaning after making the second paw, you continue with 7 SC. This would be: 2 SC, [Upper Paw 1], 7 SC, [Upper Paw 2], 7 SC. This would exceed 16 stitches if the paws are integrated.
Revised Row 8 Interpretation: The most common way for such instructions to keep stitch count is: 2 SC, crochet the upper paw (attach at this point), 7 SC, crochet the second upper paw (attach at this point), finish the round. This assumes the second 7 SC is a typo or refers to completing the round. Let’s assume the 7 SC is the stitch count between the first upper paw and where the second upper paw is attached. So: 2 SC, [crochet Upper Paw 1 and attach it], 7 SC, [crochet Upper Paw 2 and attach it]. You will maintain your 16 stitches.
7. Row 9 (Eyes):
Work 4 SC.
Using white yarn, work 1 SHELL stitch (4 DC with a common top) into the next stitch for the first eye.
Work 1 SC.
Using white yarn, work 1 SHELL stitch into the next stitch for the second eye.
Work 9 SC.
You should maintain a total of 16 stitches for this round.
8. Row 10: Work (2 SC, 1 DEC) and repeat this sequence 4 times around. You should have 12 stitches.
Stuff the body and head firmly.
Make 3 offset stitches (work 3 SC beyond the end of the round to shift the starting point).
Fold the piece in half, aligning the stitches.
Now, working through both sides of the folded piece to create the top of the head/ears:
9. Row 11 (Head/Ears Shaping):
Work 1 SC, then 1 CH.
In the next stitch, work (1 DC, 1 CH, 1 SC) all into the same stitch.
Work 2 SL ST.
In the next stitch, work (1 SC, 1 CH, 1 DC, 1 CH) all into the same stitch.
Work 1 SC.
You should end with 6 stitches across the top. Cut yarn and fasten off, leaving a tail for weaving.
Finishing
Eyes and Nose: Carefully glue the 8mm safety eyes and the 6x8mm safety nose into place on the face, positioning them symmetrically between the crocheted white shell eyes.
Mouth: Using a tapestry needle and a small piece of black yarn or embroidery floss, embroider Simon’s characteristic mischievous mouth below the nose.
Upper Paws: Using a tapestry needle and yarn tail, securely sew the two upper paws to the top sides of the body, near the base of the head, ensuring they are evenly spaced.
Your adorable Simon the Cat is now ready to bring plush happiness to its new home!