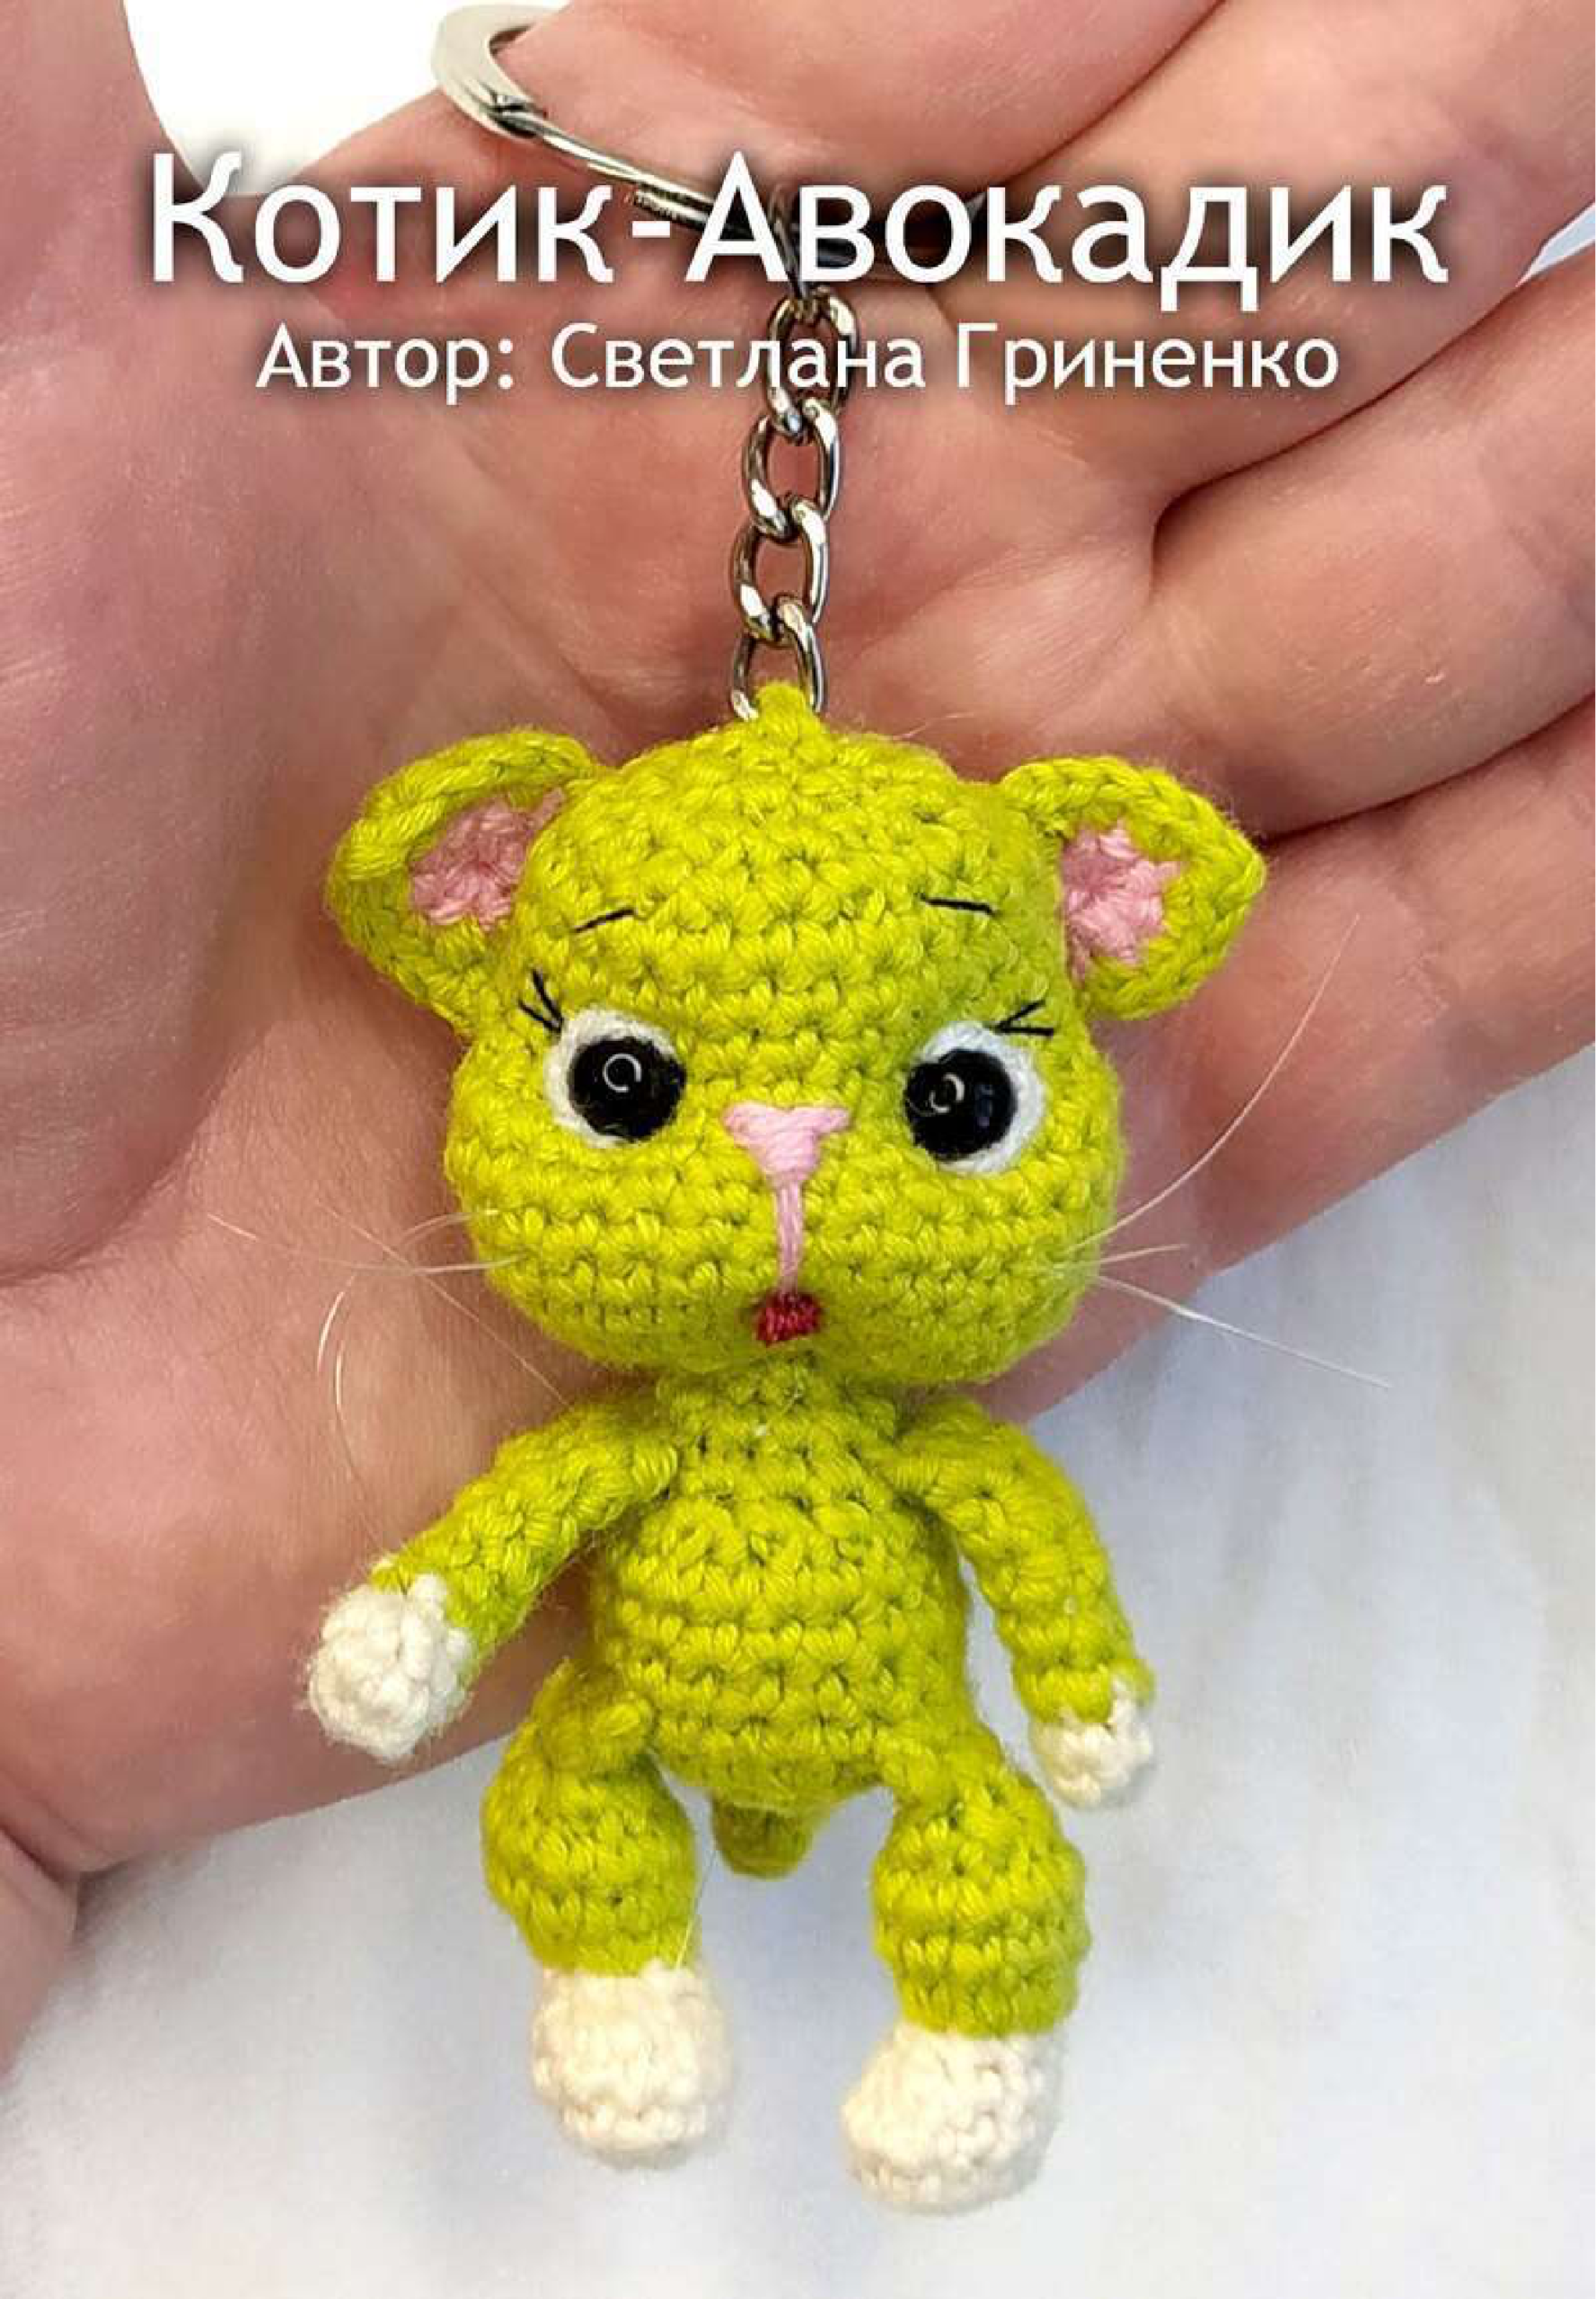
Crochet The Cutest Avocado Cat Amigurumi!
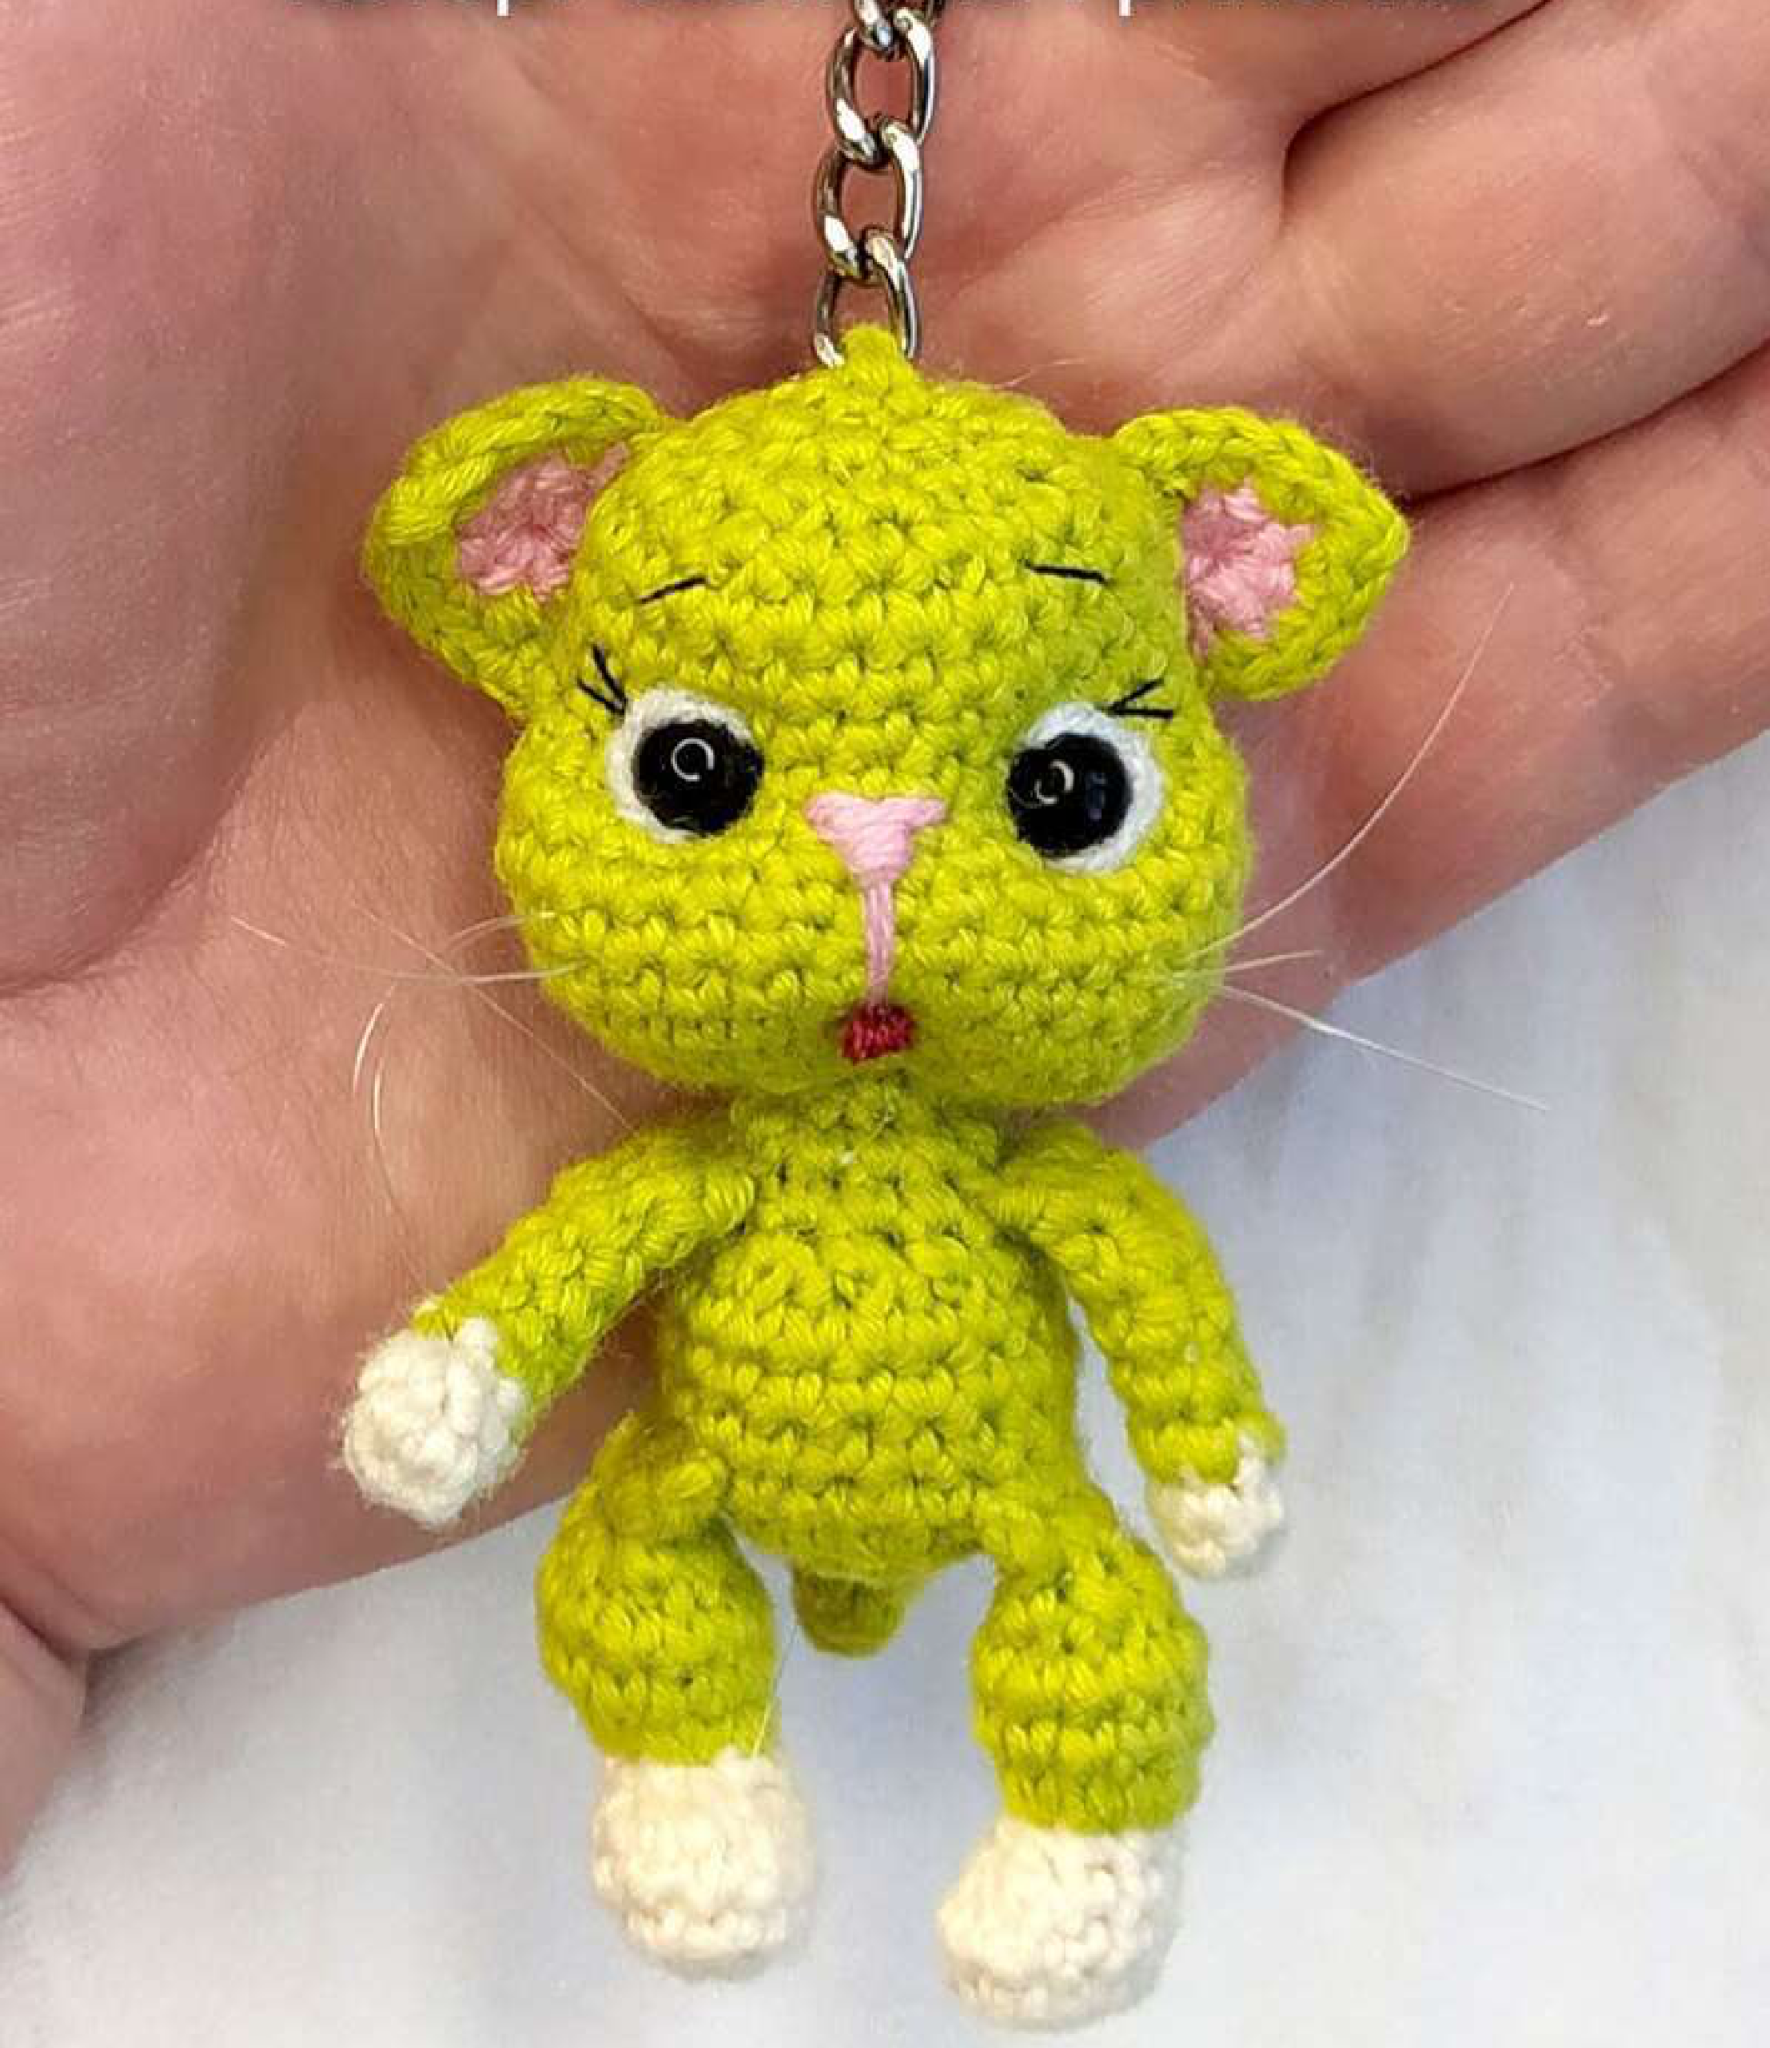
Get ready to crochet the cutest little Avocado Cat with this easy-to-follow pattern by Svetlana Grinenko! This charming amigurumi combines the cuteness of a cat with the fun shape of an avocado, making it a perfect project for any cat lover or avocado enthusiast. Let’s get started on creating your very own “Kotik Avokadik”!
Materials You’ll Need
- Light Milky Yarn: For the paws.
- Pistachio-Colored Yarn: For the upper paws, part of the body, head, and outer ears.
- Green Yarn: For the lower paws, tail, and main body.
- Pink Yarn: For the inner ears.
- Crochet Hook: Suggested size 2.0mm – 2.5mm, or appropriate for your chosen yarn to create tight, no-gap stitches.
- Safety Eyes: 6mm – 8mm recommended, choose based on your preference for expression.
- Fiberfill Stuffing: For filling the body and head.
- Tapestry Needle: For sewing, weaving in ends, and facial tightening.
- Stitch Markers: Essential for keeping track of your rounds.
- Scissors: For cutting yarn.
- Pins: For holding pieces in place before sewing and marking facial features.
- Black Sewing Thread: A single strand for embroidering eyebrows and eyelashes.
- Mouline Thread: 3 strands for embroidering the nose and tongue.
Abbreviations
- MR: Magic Ring
- ch: Chain
- sc: Single Crochet
- inc: Increase (crochet 2 single crochet stitches in one stitch)
- dec: Decrease (single crochet two stitches together)
- dbl dec: Double Decrease (single crochet three stitches together)
- HDC: Half Double Crochet
- sl st: Slip Stitch
- () * X: Repeat the instructions in parentheses X times
- (X): Indicates the total number of stitches at the end of the round/row
Let’s Get Crocheting!
Upper Paws (Make 2)
Start with light milky yarn.
- Chain 3. Starting from the 2nd chain from your hook, crochet 1 sc, then 3 sc into the very last chain. Continue working on the other side of the chain, crochet 1 inc (6 stitches).
- Sc in each of the 6 stitches around (6).
Now, switch to pistachio-colored yarn. Cut off the light milky yarn.
- Sc in each of the 6 stitches around (6).
- Sc in each of the 6 stitches around (6).
- 2 sc, 2 HDC, 2 sc (6).
- 2 sc, 2 HDC, 2 sc (6).
- Sc in each of the 6 stitches around (6).
Important: Do not stuff the upper paws.
Fold each paw in half and crochet 3 sc through both edges to close the opening. Fasten off and weave in the yarn tail securely.
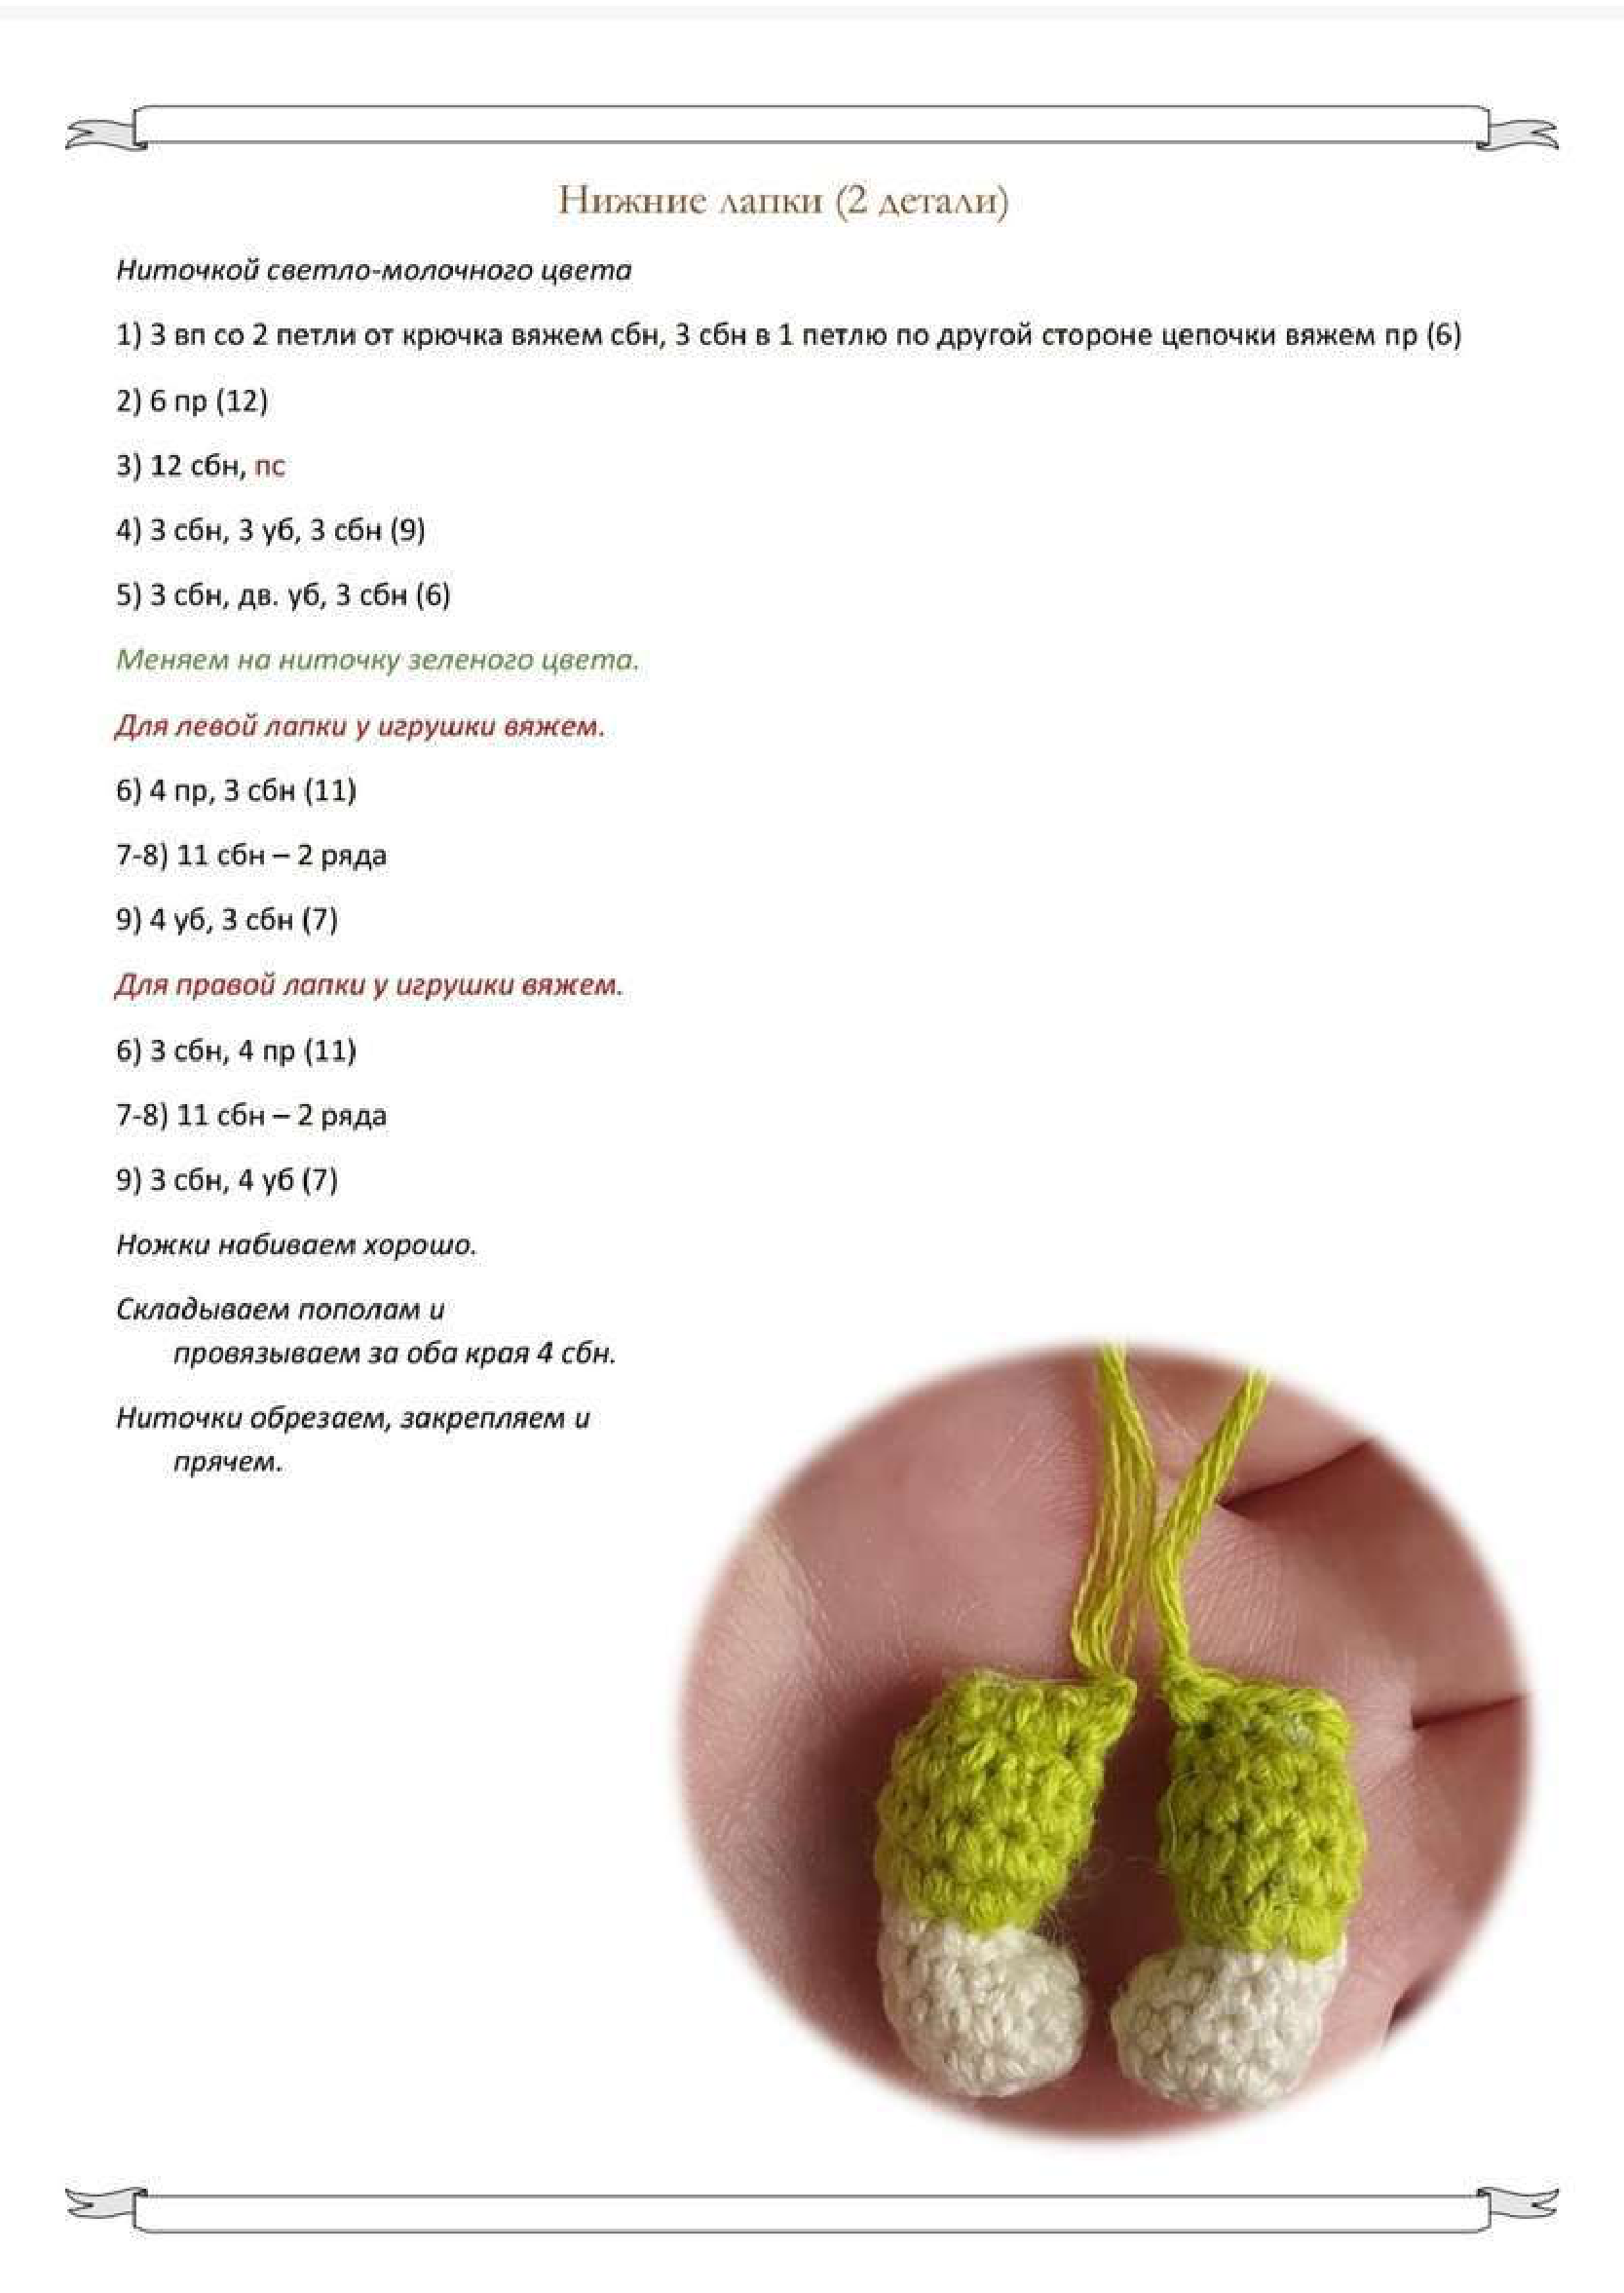
Lower Paws (Make 2)
Start with light milky yarn.
- Chain 3. Starting from the 2nd chain from your hook, crochet 1 sc, then 3 sc into the very last chain. Continue working on the other side of the chain, crochet 1 inc (6 stitches).
- 6 inc (12).
- 12 sc, then sl st to join the round (12).
- 3 sc, 3 dec, 3 sc (9).
- 3 sc, 1 dbl dec (crochet 3 sc stitches together), 3 sc (6).
Now, switch to green yarn.
For the Left Lower Leg of your Avocado Cat:
- 4 inc, 3 sc (11).
- Sc in each of the 11 stitches around (11).
- Sc in each of the 11 stitches around (11).
- 4 dec, 3 sc (7).
For the Right Lower Leg of your Avocado Cat:
- 3 sc, 4 inc (11).
- Sc in each of the 11 stitches around (11).
- Sc in each of the 11 stitches around (11).
- 3 sc, 4 dec (7).
Stuff the lower legs well with fiberfill.
Fold each leg in half and crochet 4 sc through both edges to close the opening. Fasten off and weave in the yarn tail securely.
Tail
With green yarn.
- 5 sc in a Magic Ring (5).
- Sc in each of the 5 stitches around (5).
- Sc in each of the 5 stitches around (5).
- Sc in each of the 5 stitches around (5).
- Sc in each of the 5 stitches around (5).
- Sc in each of the 5 stitches around (5).
Do not stuff the tail.
Fold the tail piece in half and crochet 2 sc through both edges to close the opening. Fasten off and weave in the yarn tail securely.
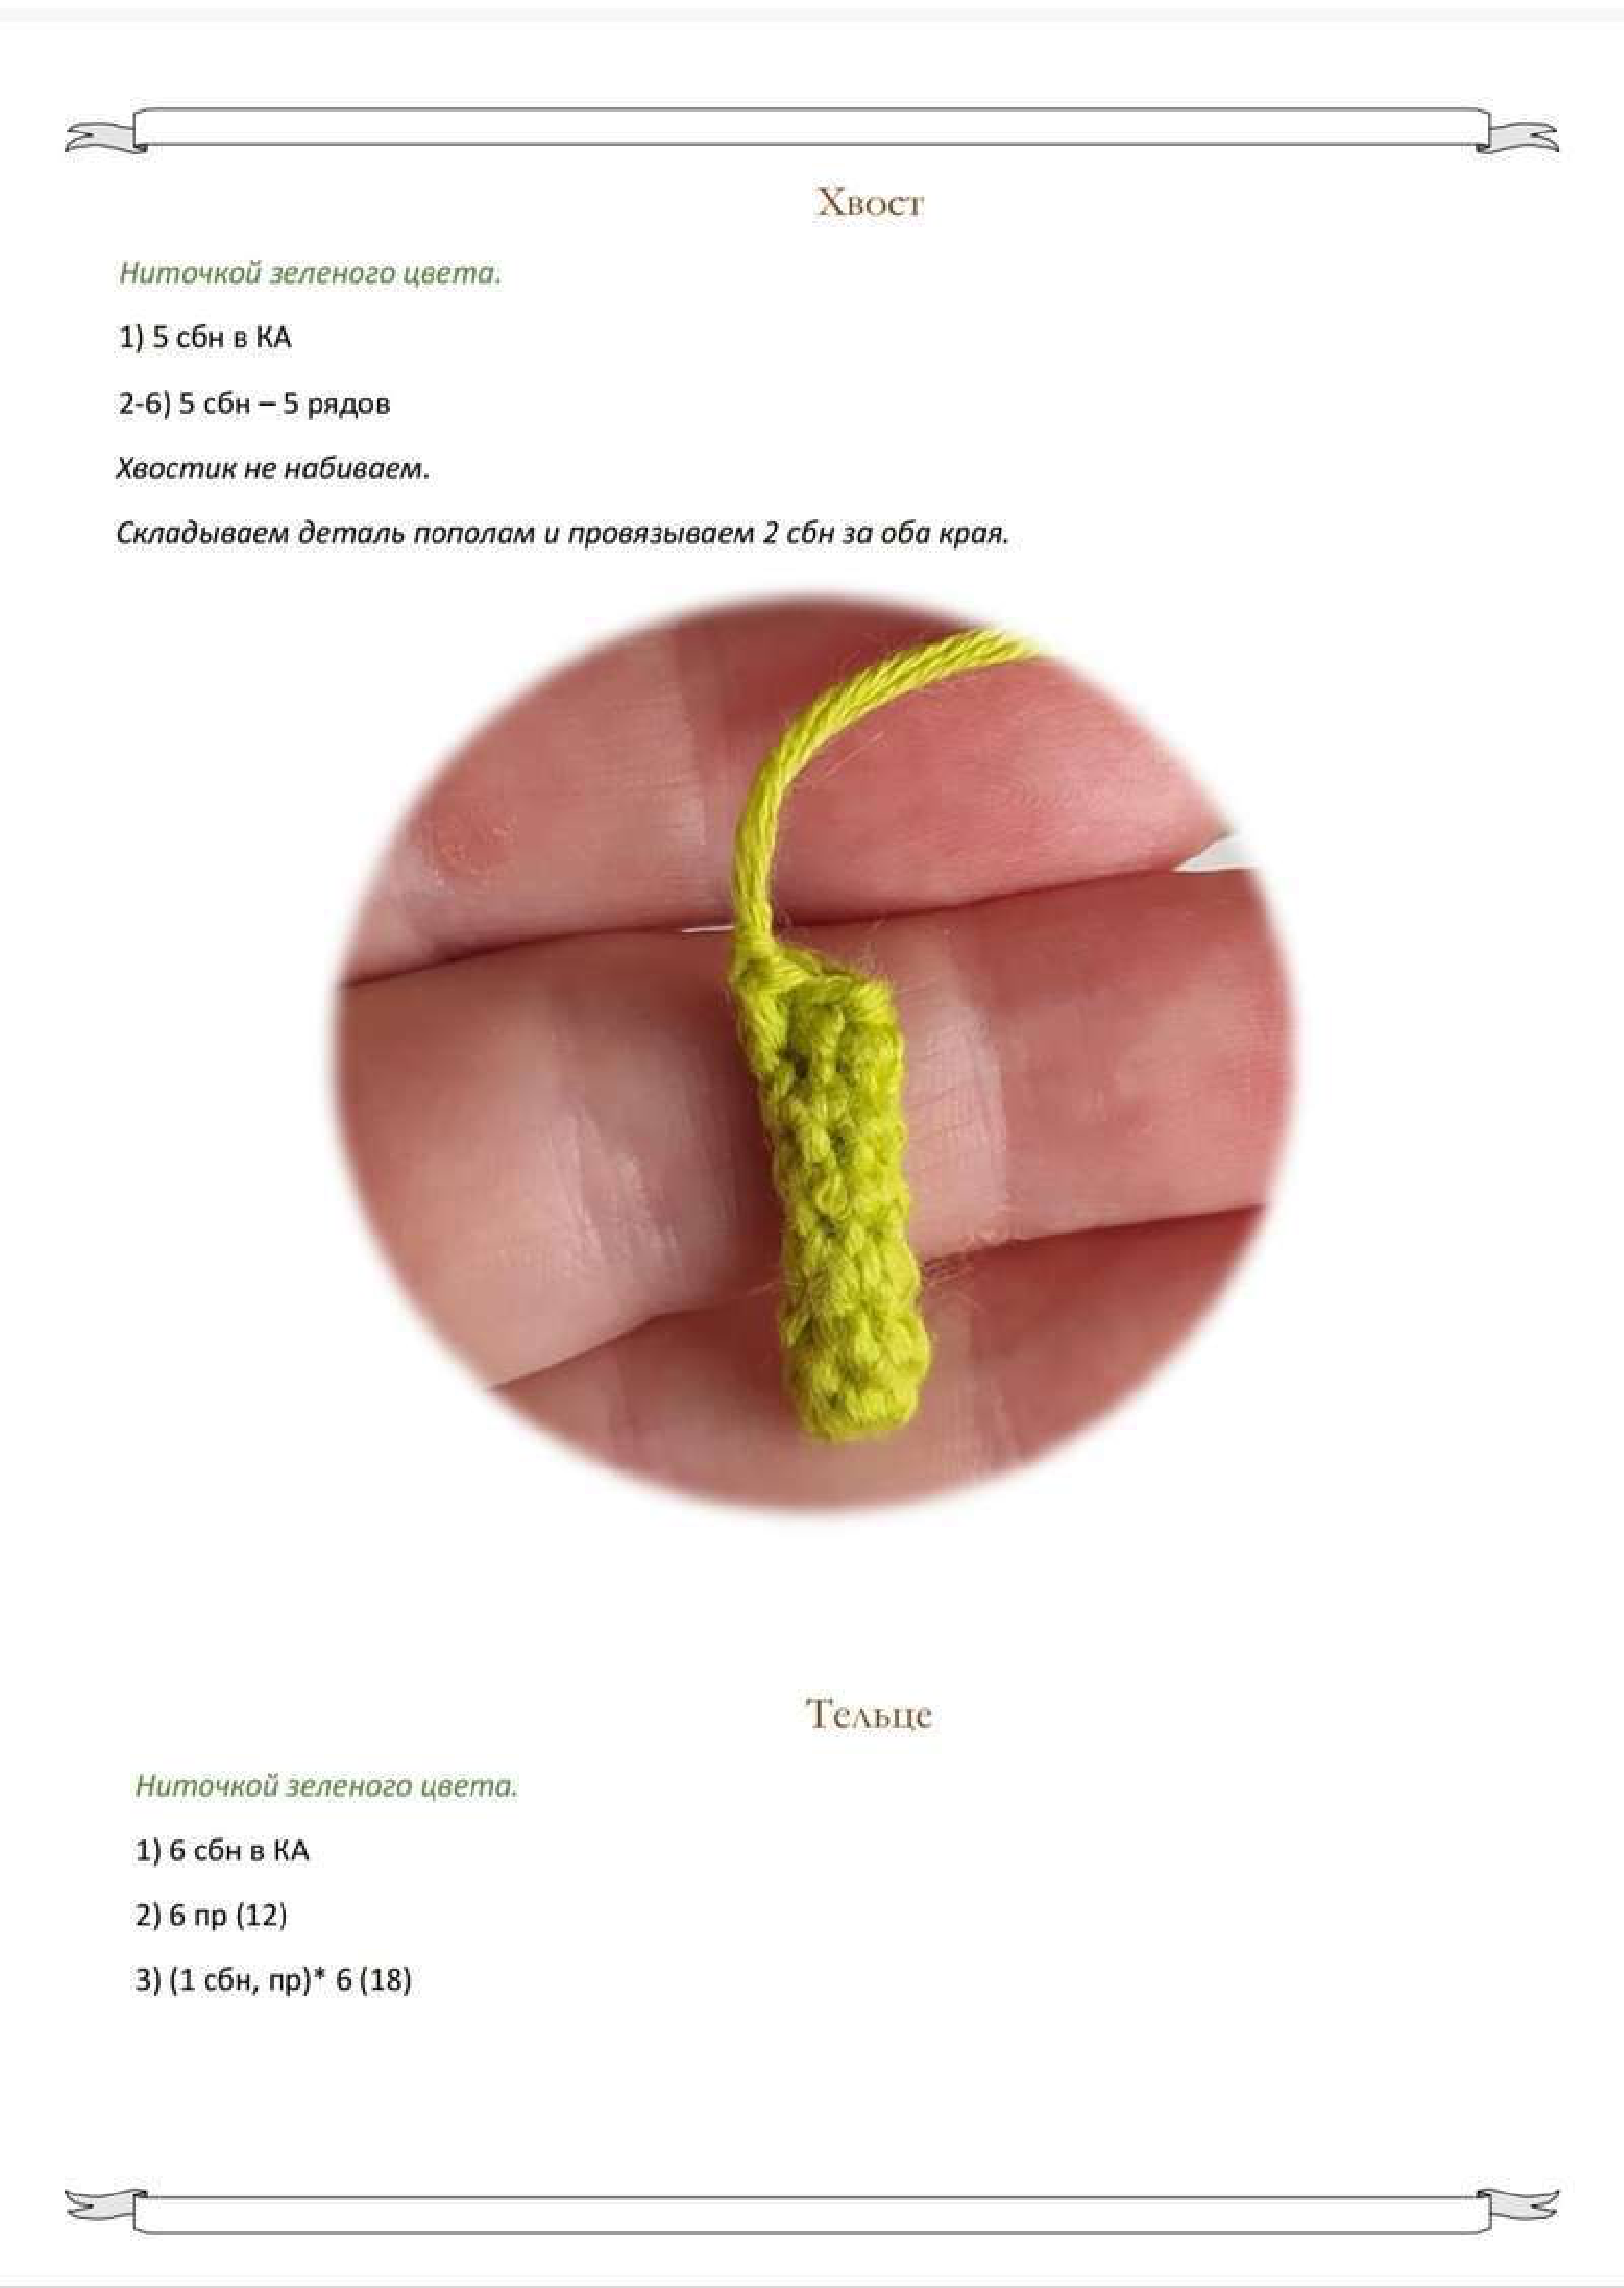
Body
Start with green yarn.
- 6 sc in a Magic Ring (6).
- 6 inc (12).
- (1 sc, inc) * 6 times (18).
Now, it’s time to join the lower paws!
- 3 sc, then crochet 4 sc together with the right lower paw (make sure to crochet through both a stitch on the body and a stitch on the paw), 4 sc, then crochet 4 sc together with the left lower paw, 3 sc (18).
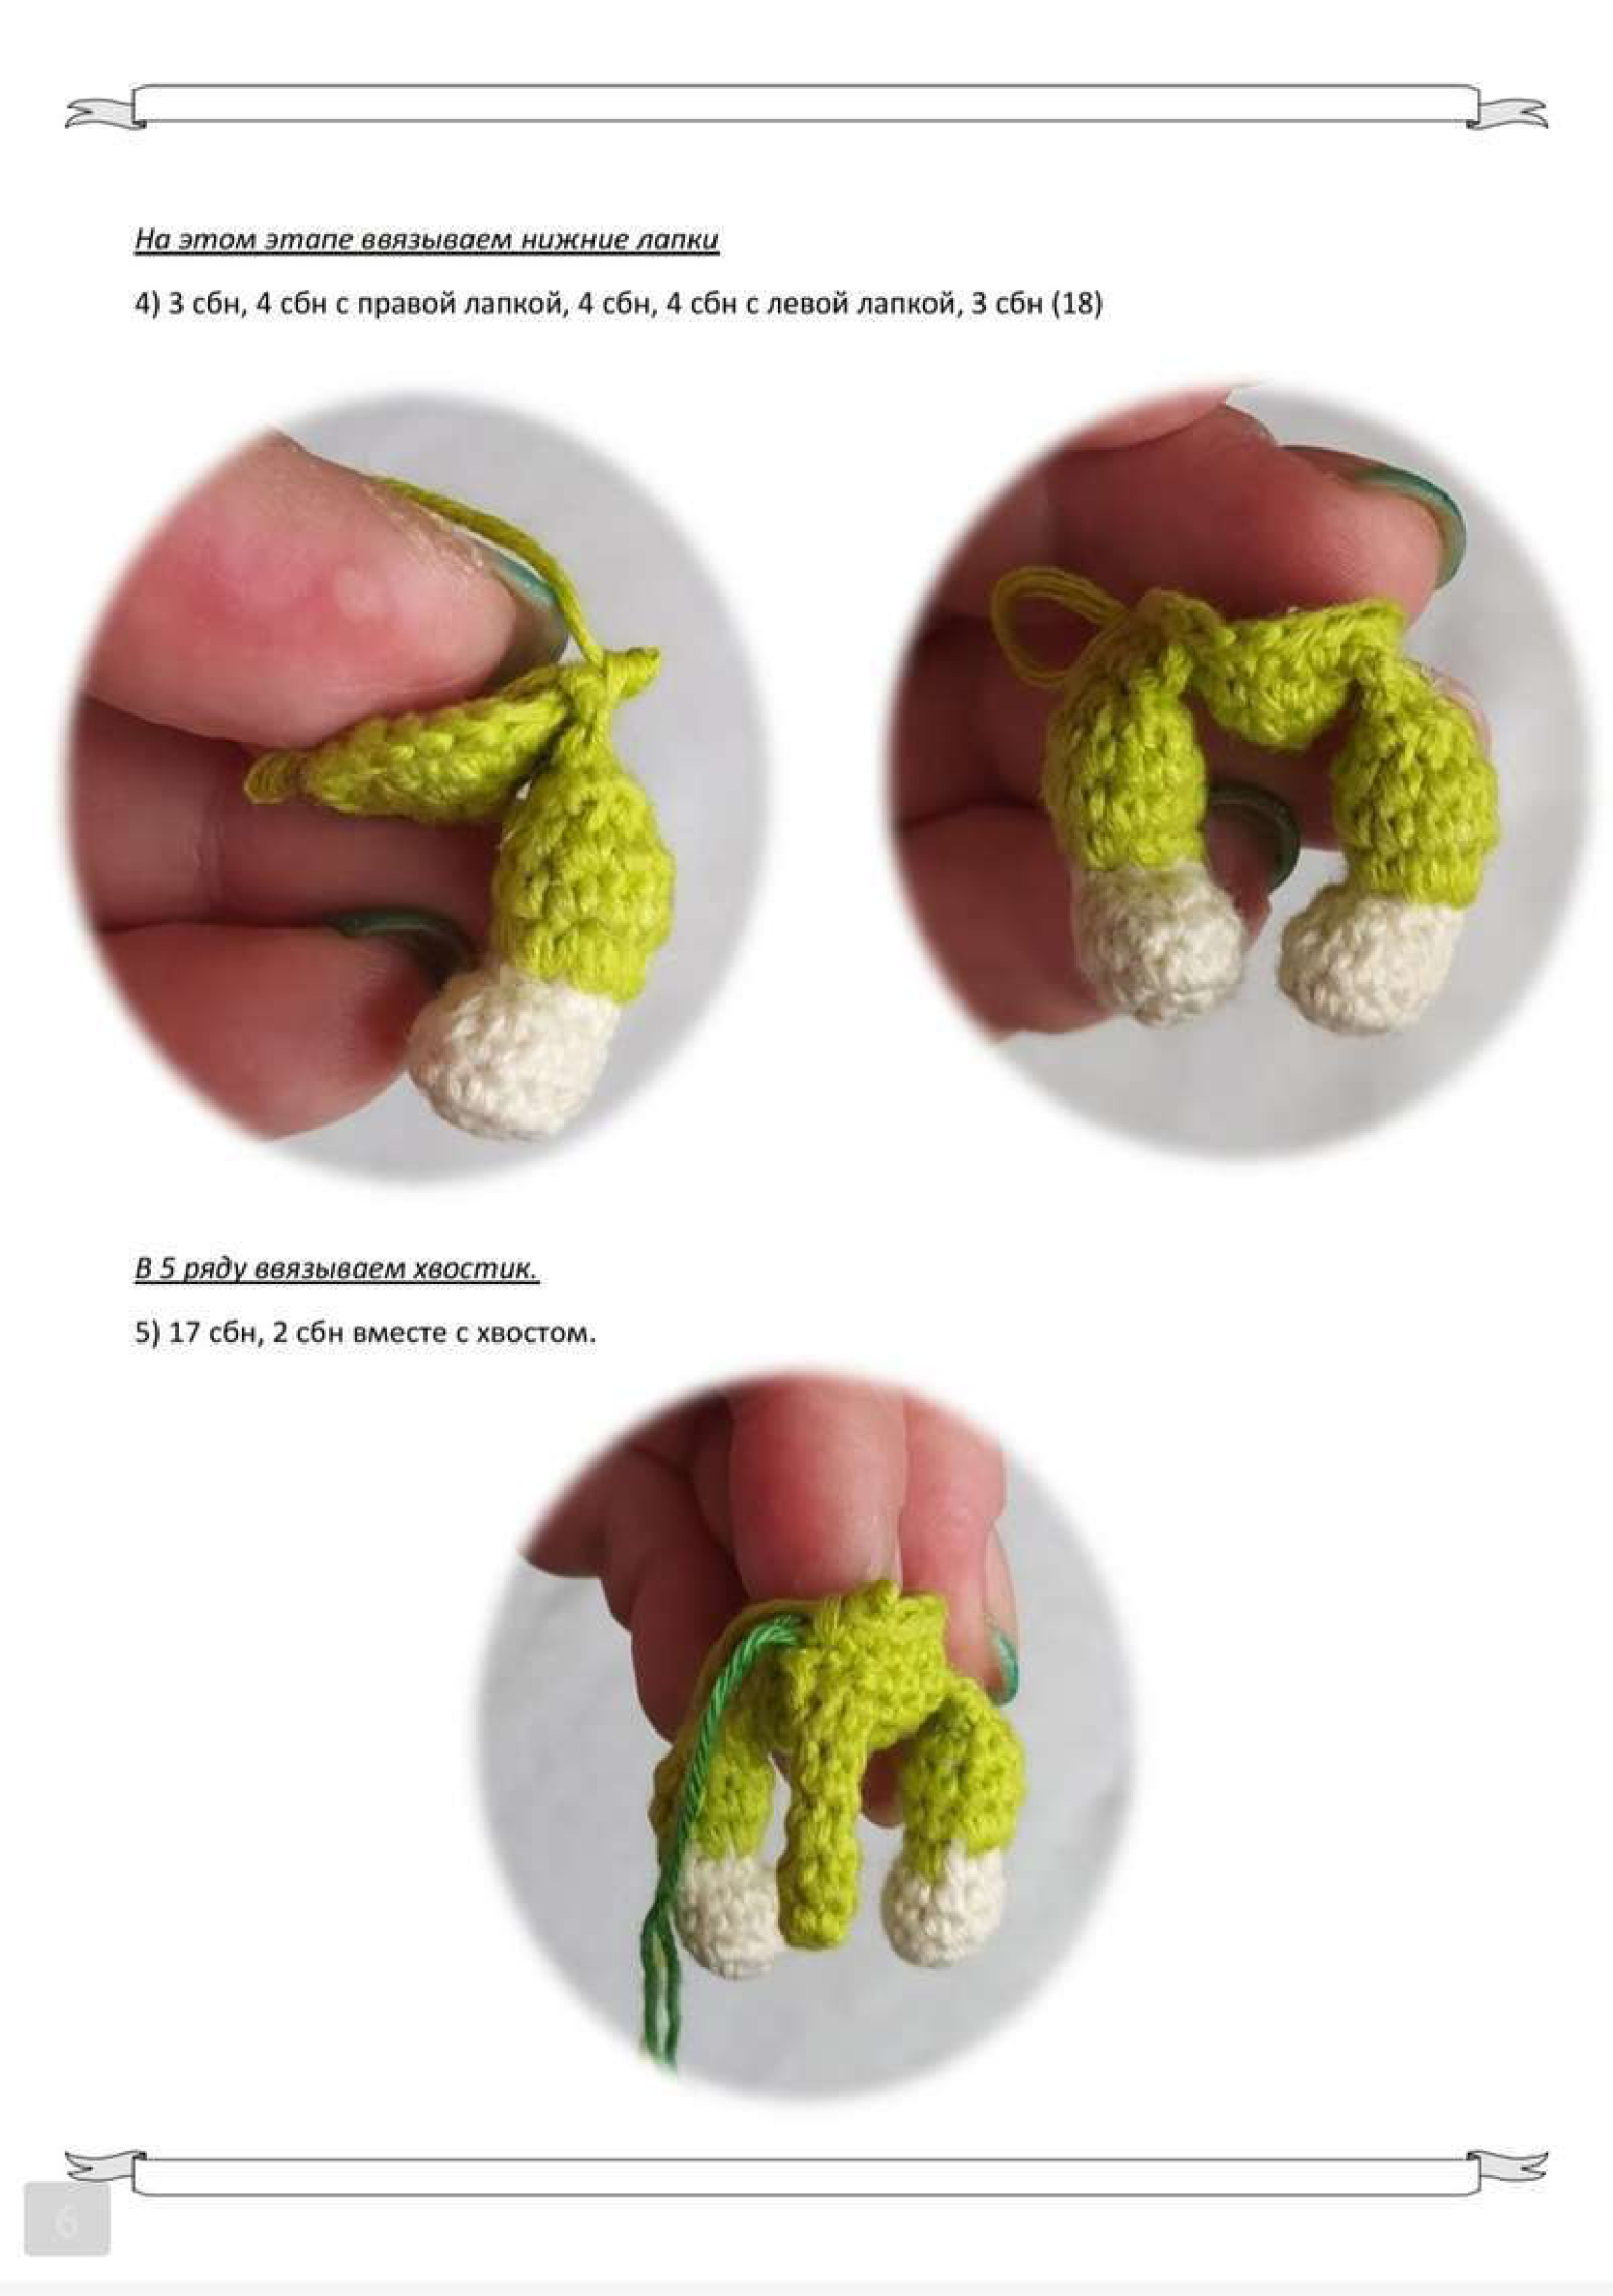
In the next row, we’ll join the tail.
- 17 sc, then crochet 2 sc together with the tail (crochet through both a stitch on the body and a stitch on the tail) (18).
Place a stitch marker to clearly indicate the beginning of your rounds.
- Sc in each of the 18 stitches around (18).
- Sc in each of the 18 stitches around (18).
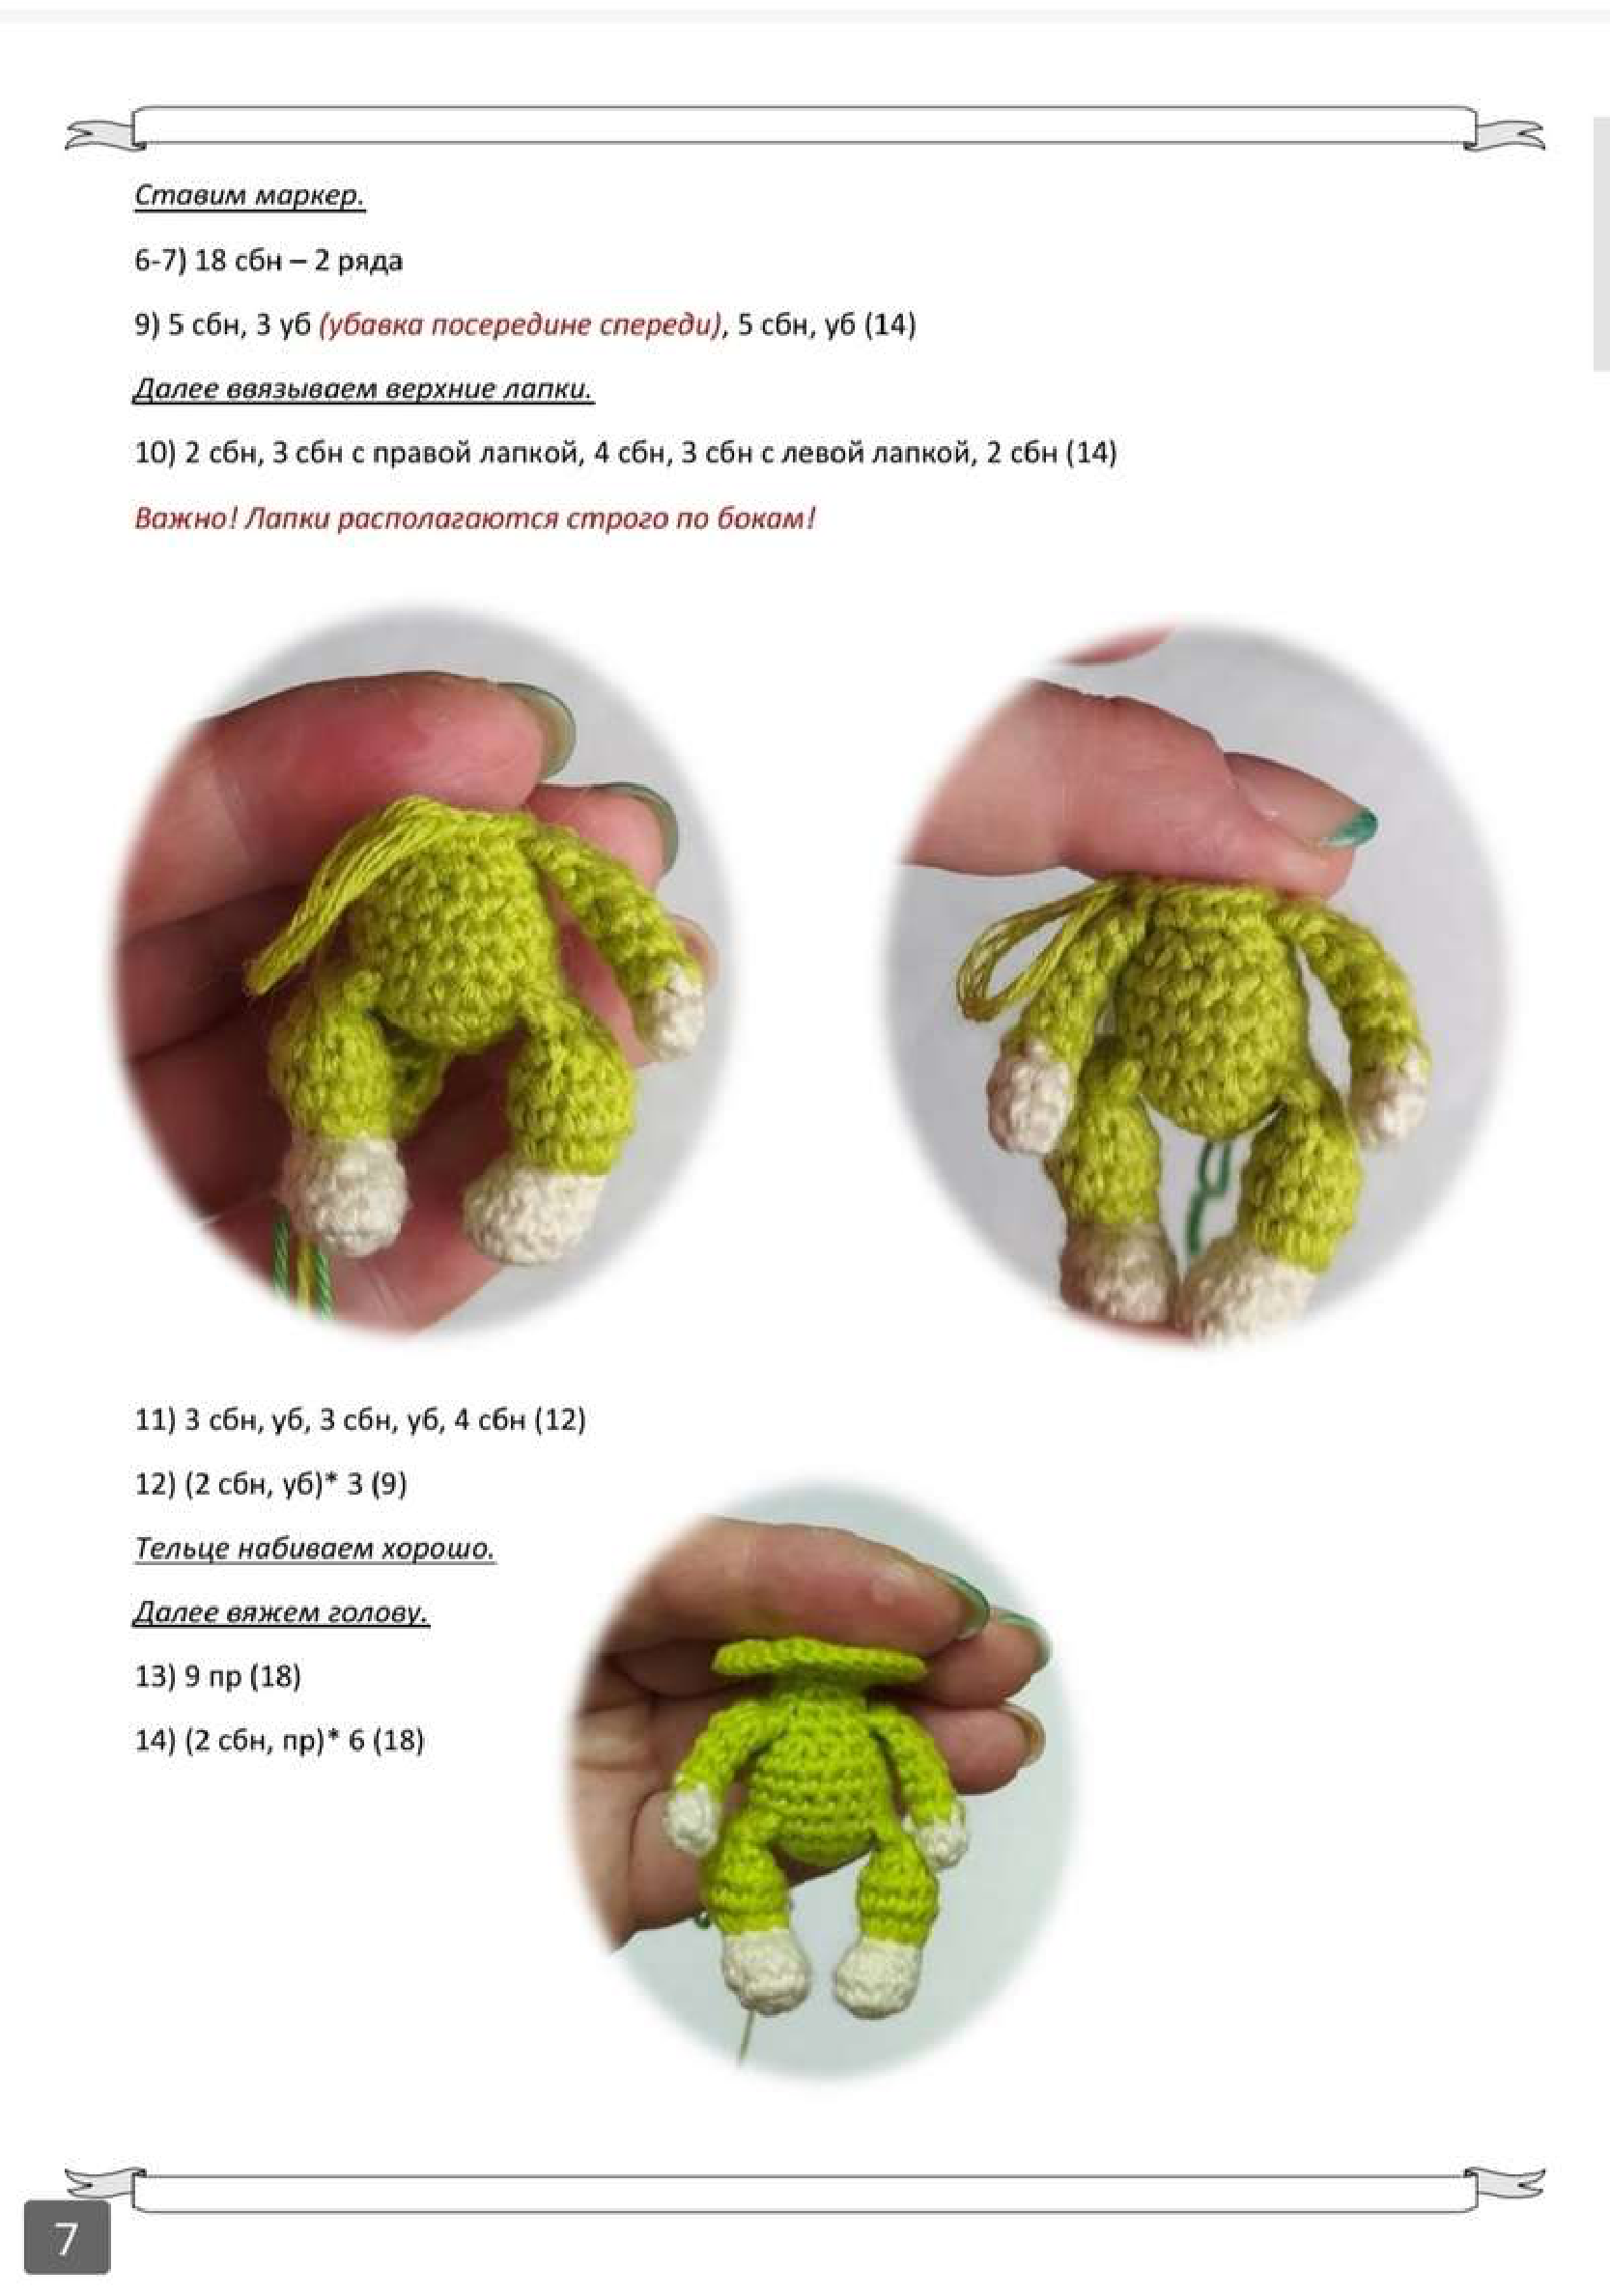
- 5 sc, 3 dec (these decreases should be centered at the front of the body), 5 sc, 1 dec (14).
Next up: joining the upper paws!
- 2 sc, then crochet 3 sc together with the right upper paw, 4 sc, then crochet 3 sc together with the left upper paw, 2 sc (14).
Important: Make sure the upper paws are strictly positioned on the sides of the body for the best look!
- 3 sc, dec, 3 sc, dec, 4 sc (12).
- (2 sc, dec) * 3 times (9).
Stuff the body well with fiberfill, ensuring it’s firm but not bulging.
Head
Continue directly from the body with green yarn.
- 9 inc (18).
- (2 sc, inc) * 6 times (24).
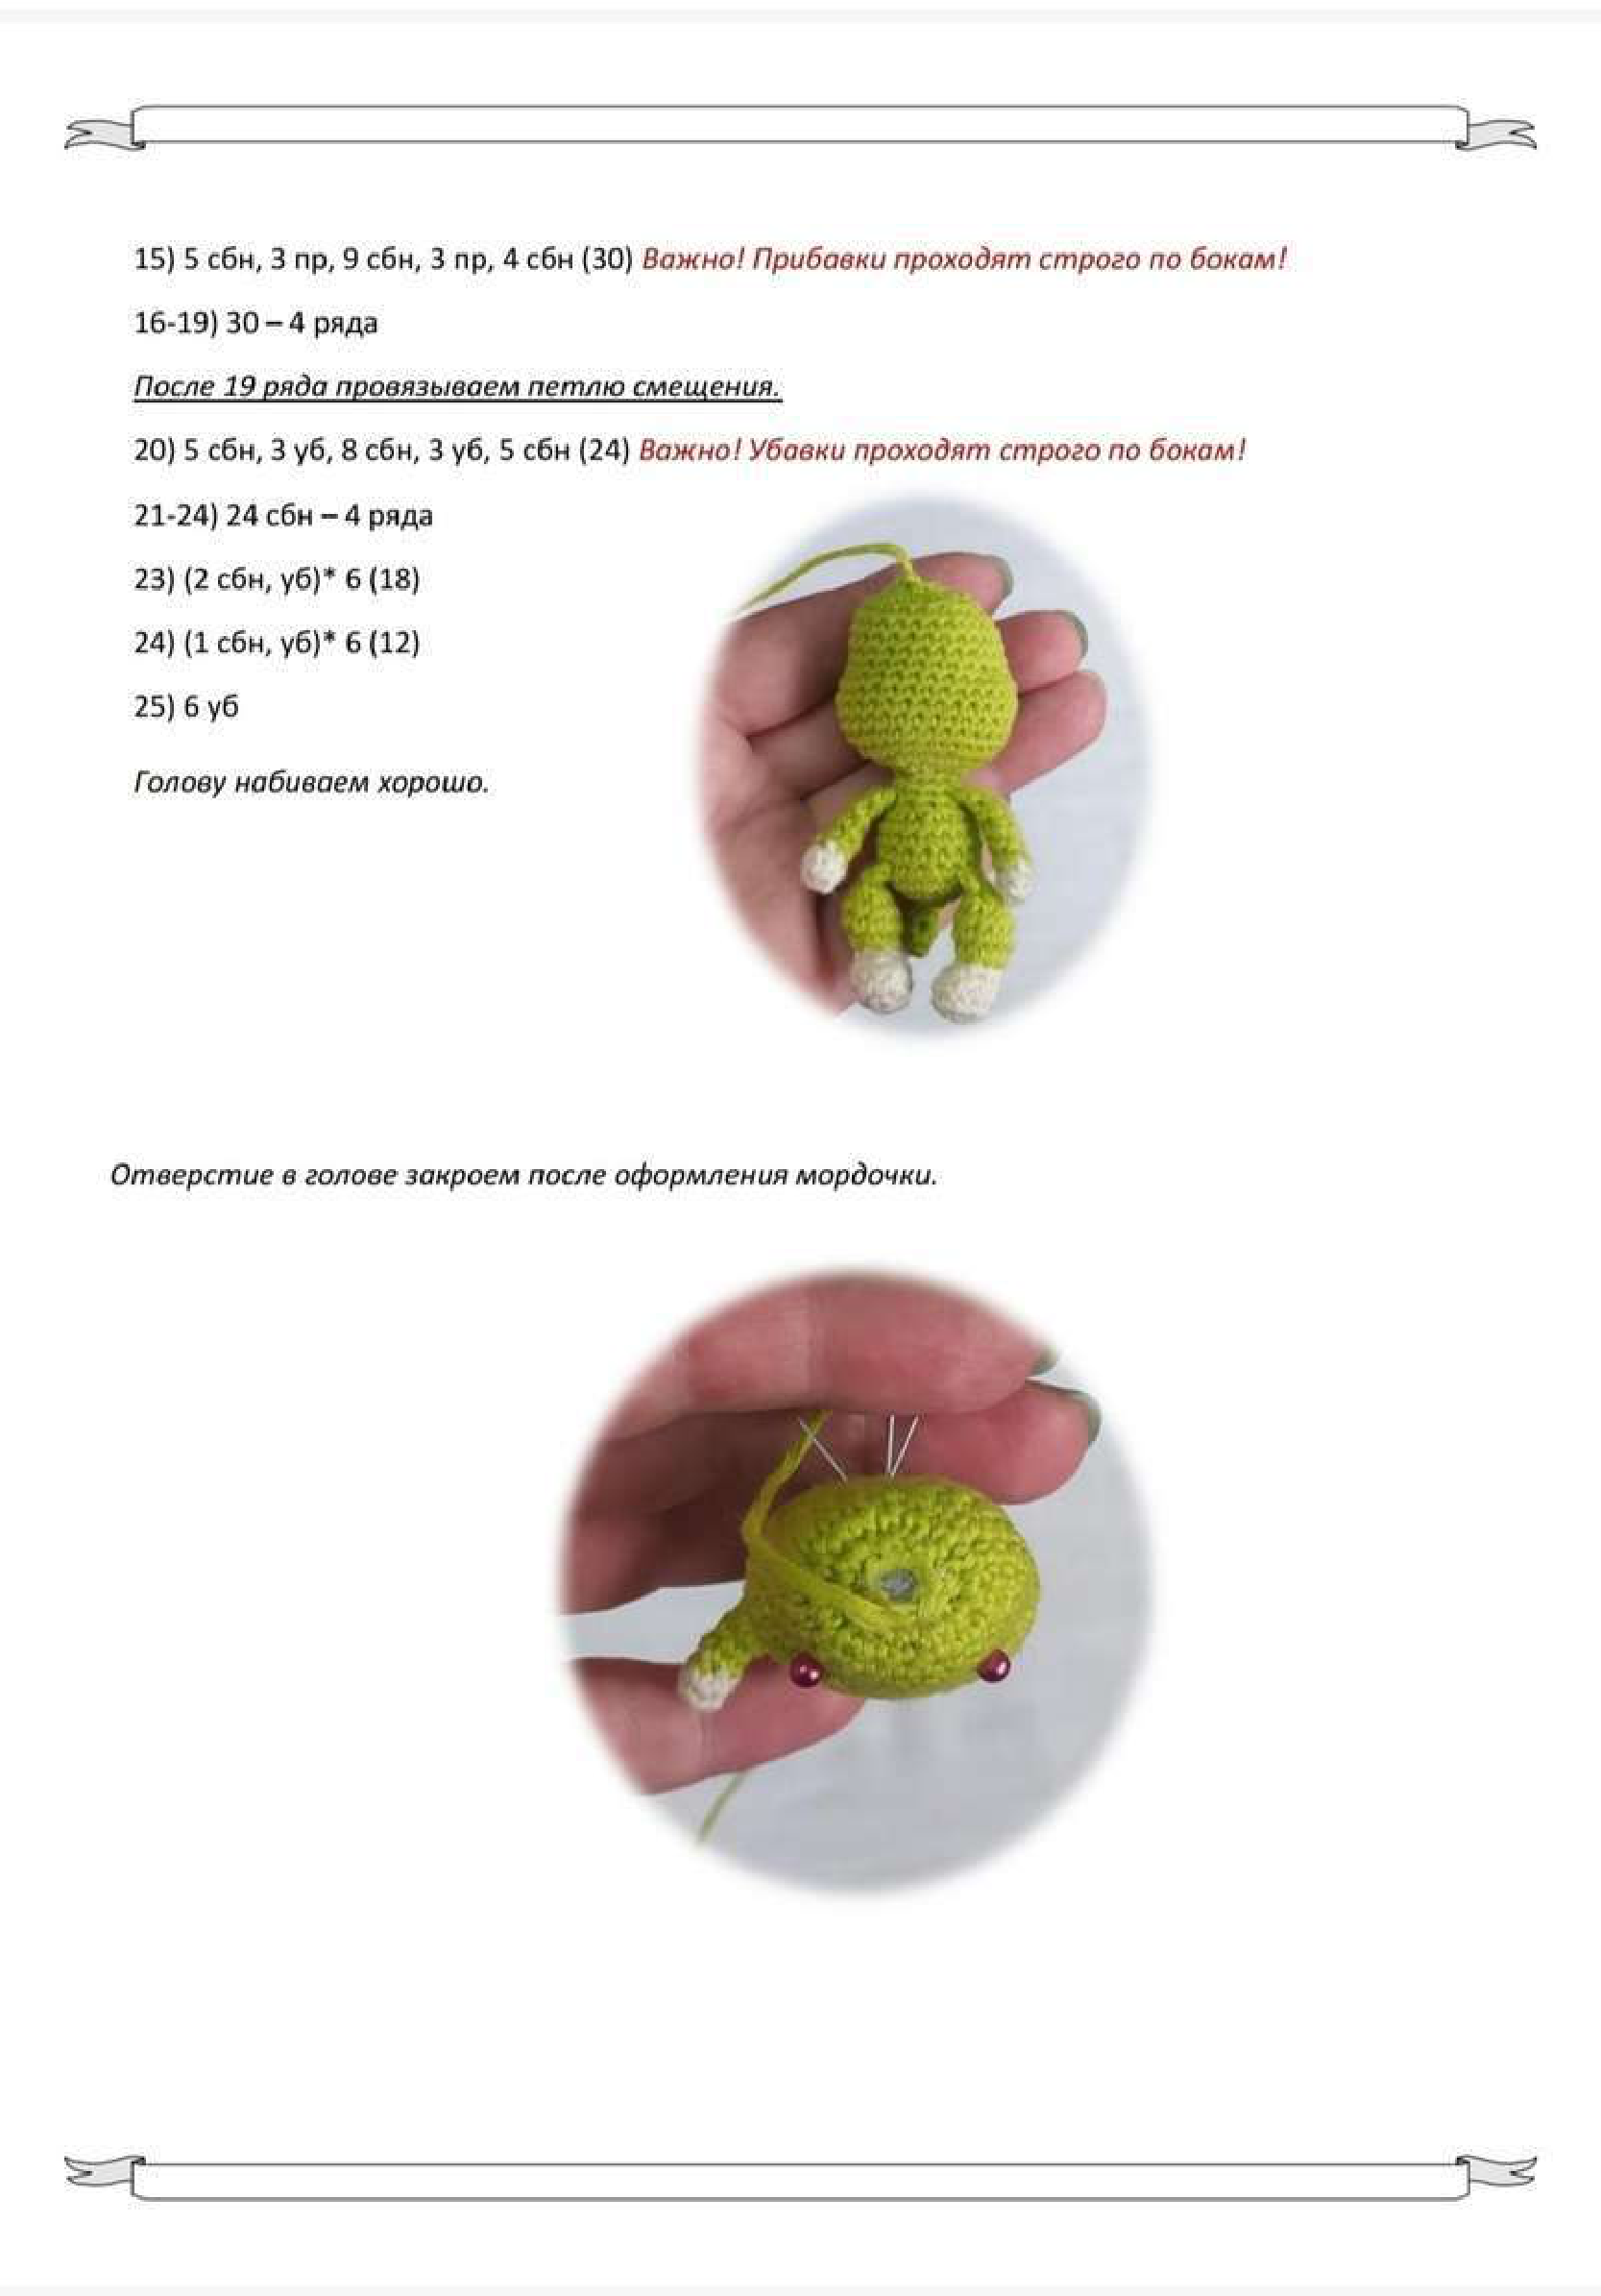
- 5 sc, 3 inc (these increases should be on one side of the head), 9 sc, 3 inc (these increases should be on the opposite side), 4 sc (30).
Important: Ensure these increases are strictly positioned on the sides of the head to begin shaping the avocado body!
- Sc in each of the 30 stitches around (30).
- Sc in each of the 30 stitches around (30).
- Sc in each of the 30 stitches around (30).
- Sc in each of the 30 stitches around (30).
After completing round 19, if your hook is not centered on the side, crochet a few slip stitches (shift stitches) to adjust your starting point for the next round, ensuring decreases are symmetrical.
- 5 sc, 3 dec (these decreases should be on one side), 8 sc, 3 dec (these decreases should be on the opposite side), 5 sc (24).
Important: Ensure these decreases are strictly positioned on the sides of the head!
- Sc in each of the 24 stitches around (24).
- Sc in each of the 24 stitches around (24).
- Sc in each of the 24 stitches around (24).
- Sc in each of the 24 stitches around (24).
- (2 sc, dec) * 6 times (18).
- (1 sc, dec) * 6 times (12).
- 6 dec (6).
Stuff the head well with fiberfill. Do not close the opening just yet, as we will need it open for embroidering the muzzle and performing facial tightening.
Facial Features: Tightening
This technique helps define the face of your amigurumi. You’ll need a tapestry needle and a long strand of strong, matching green yarn or robust thread.
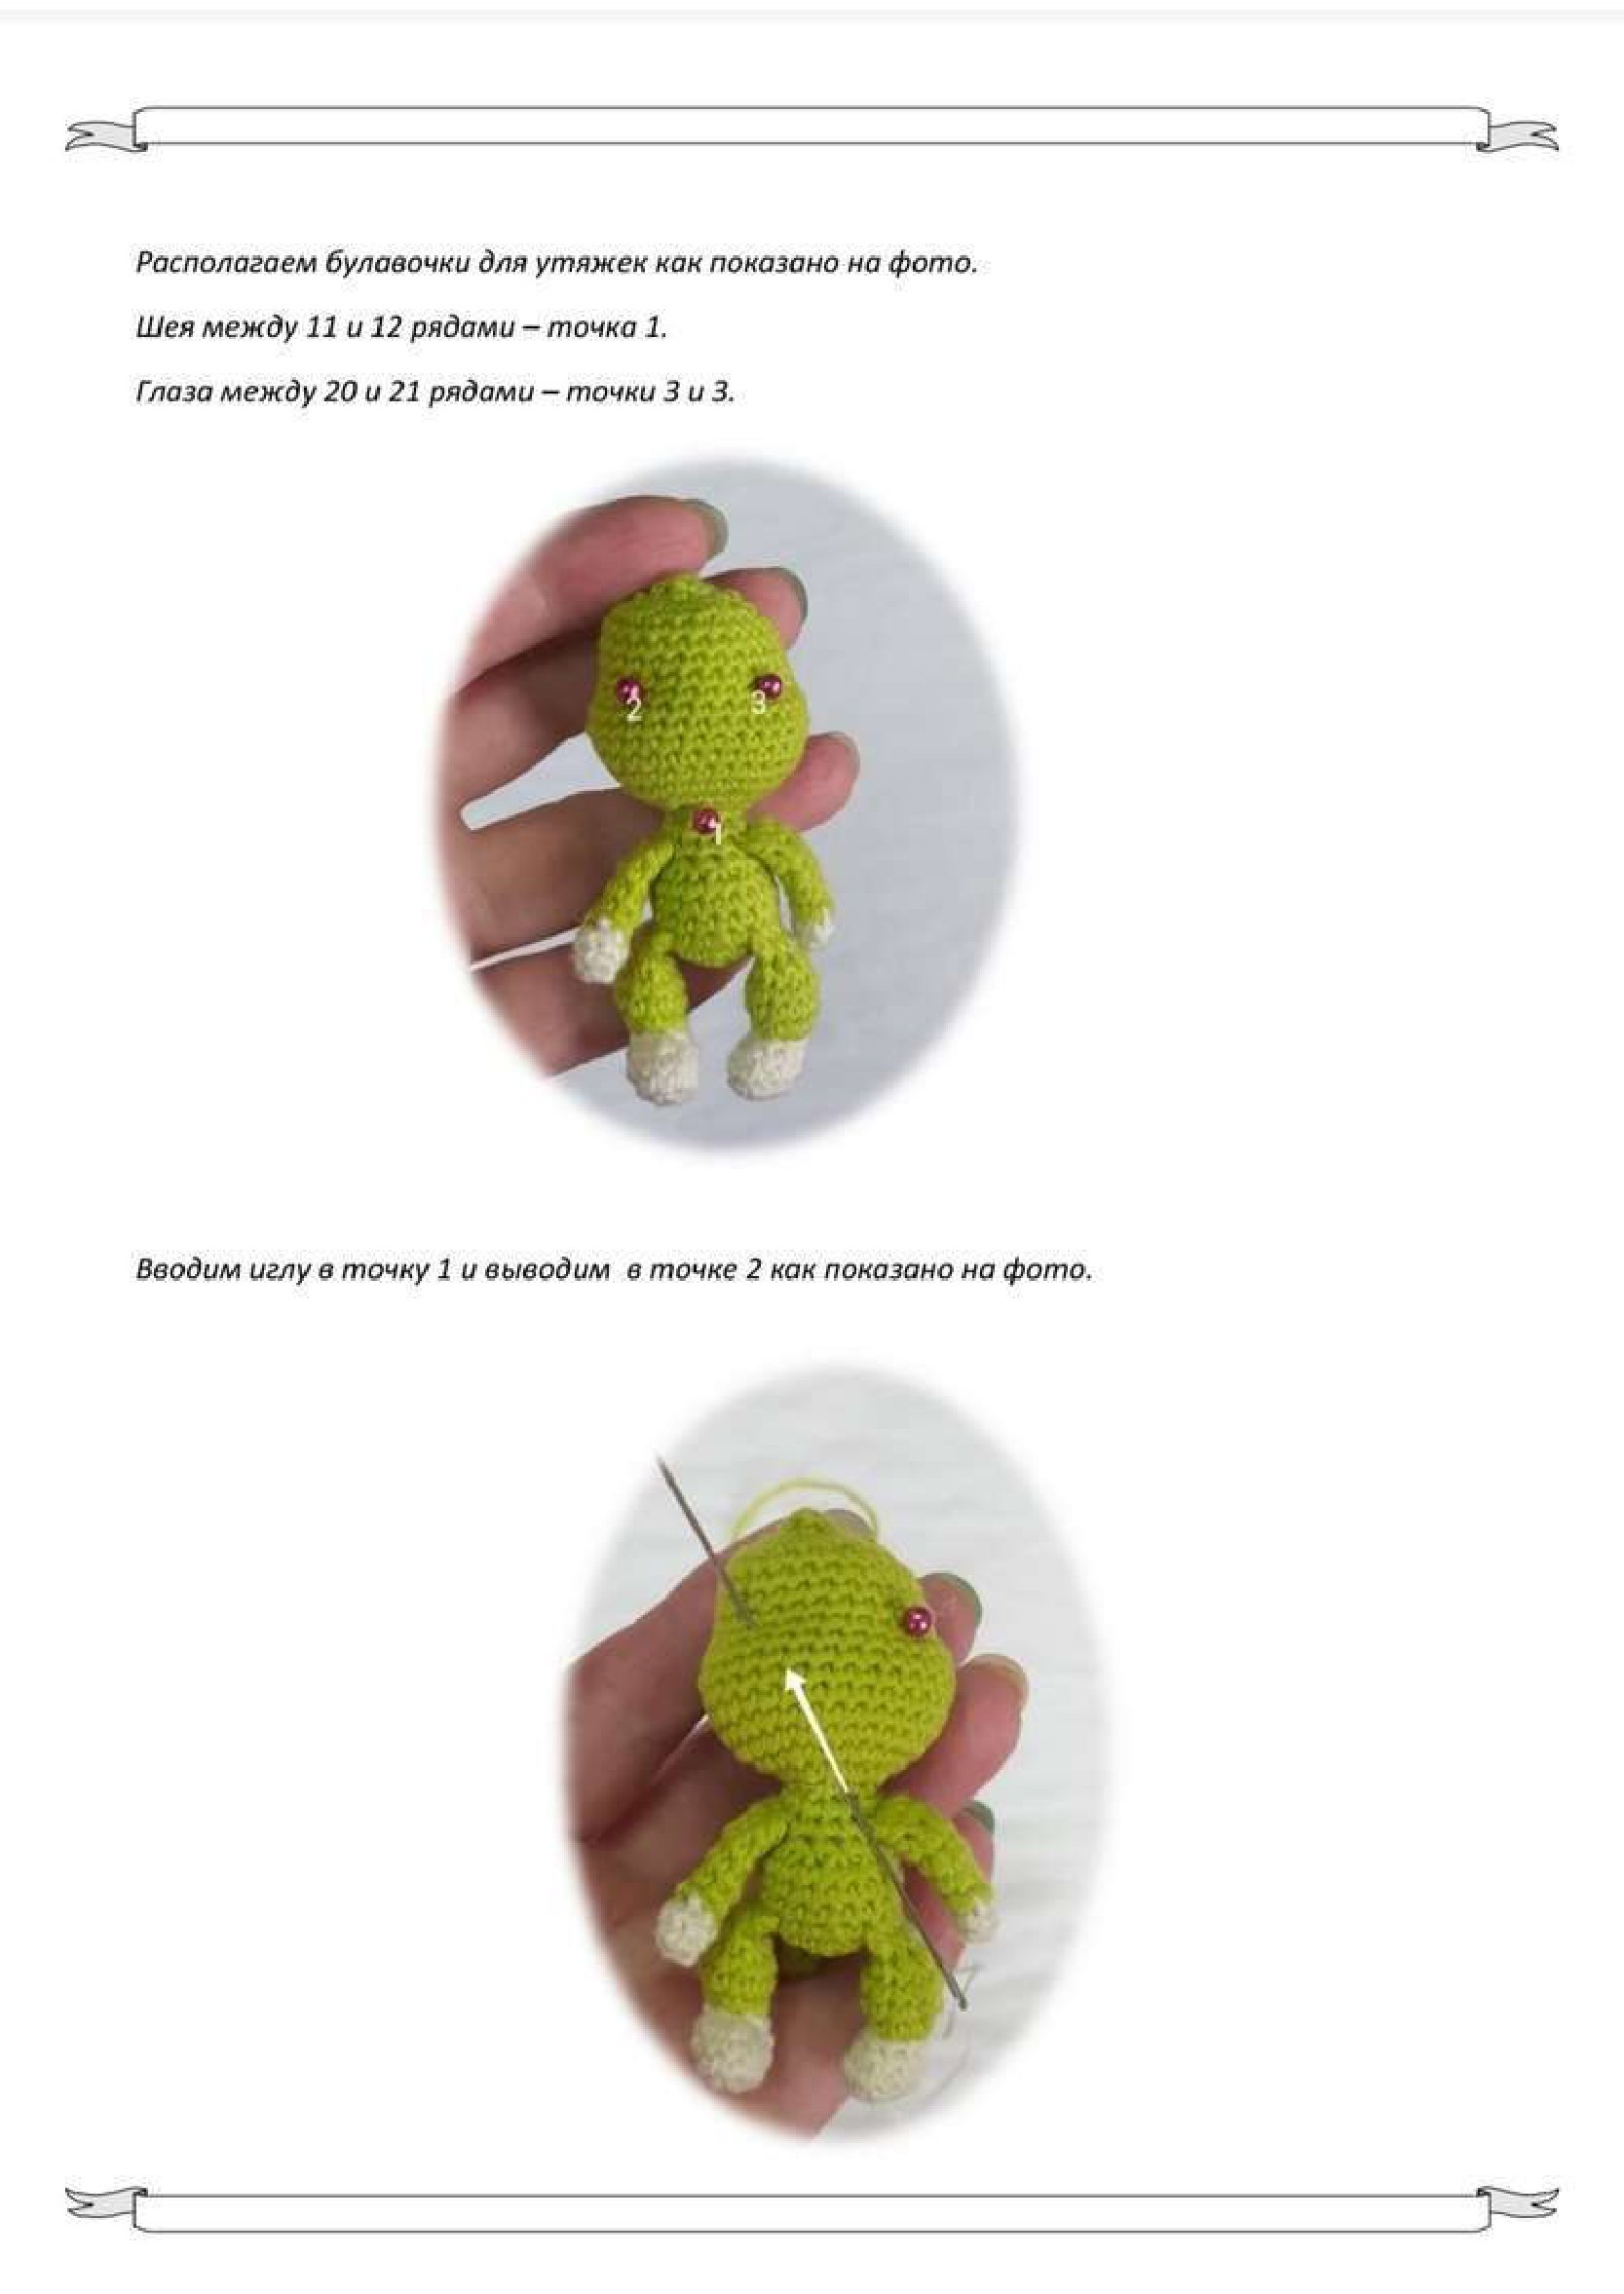
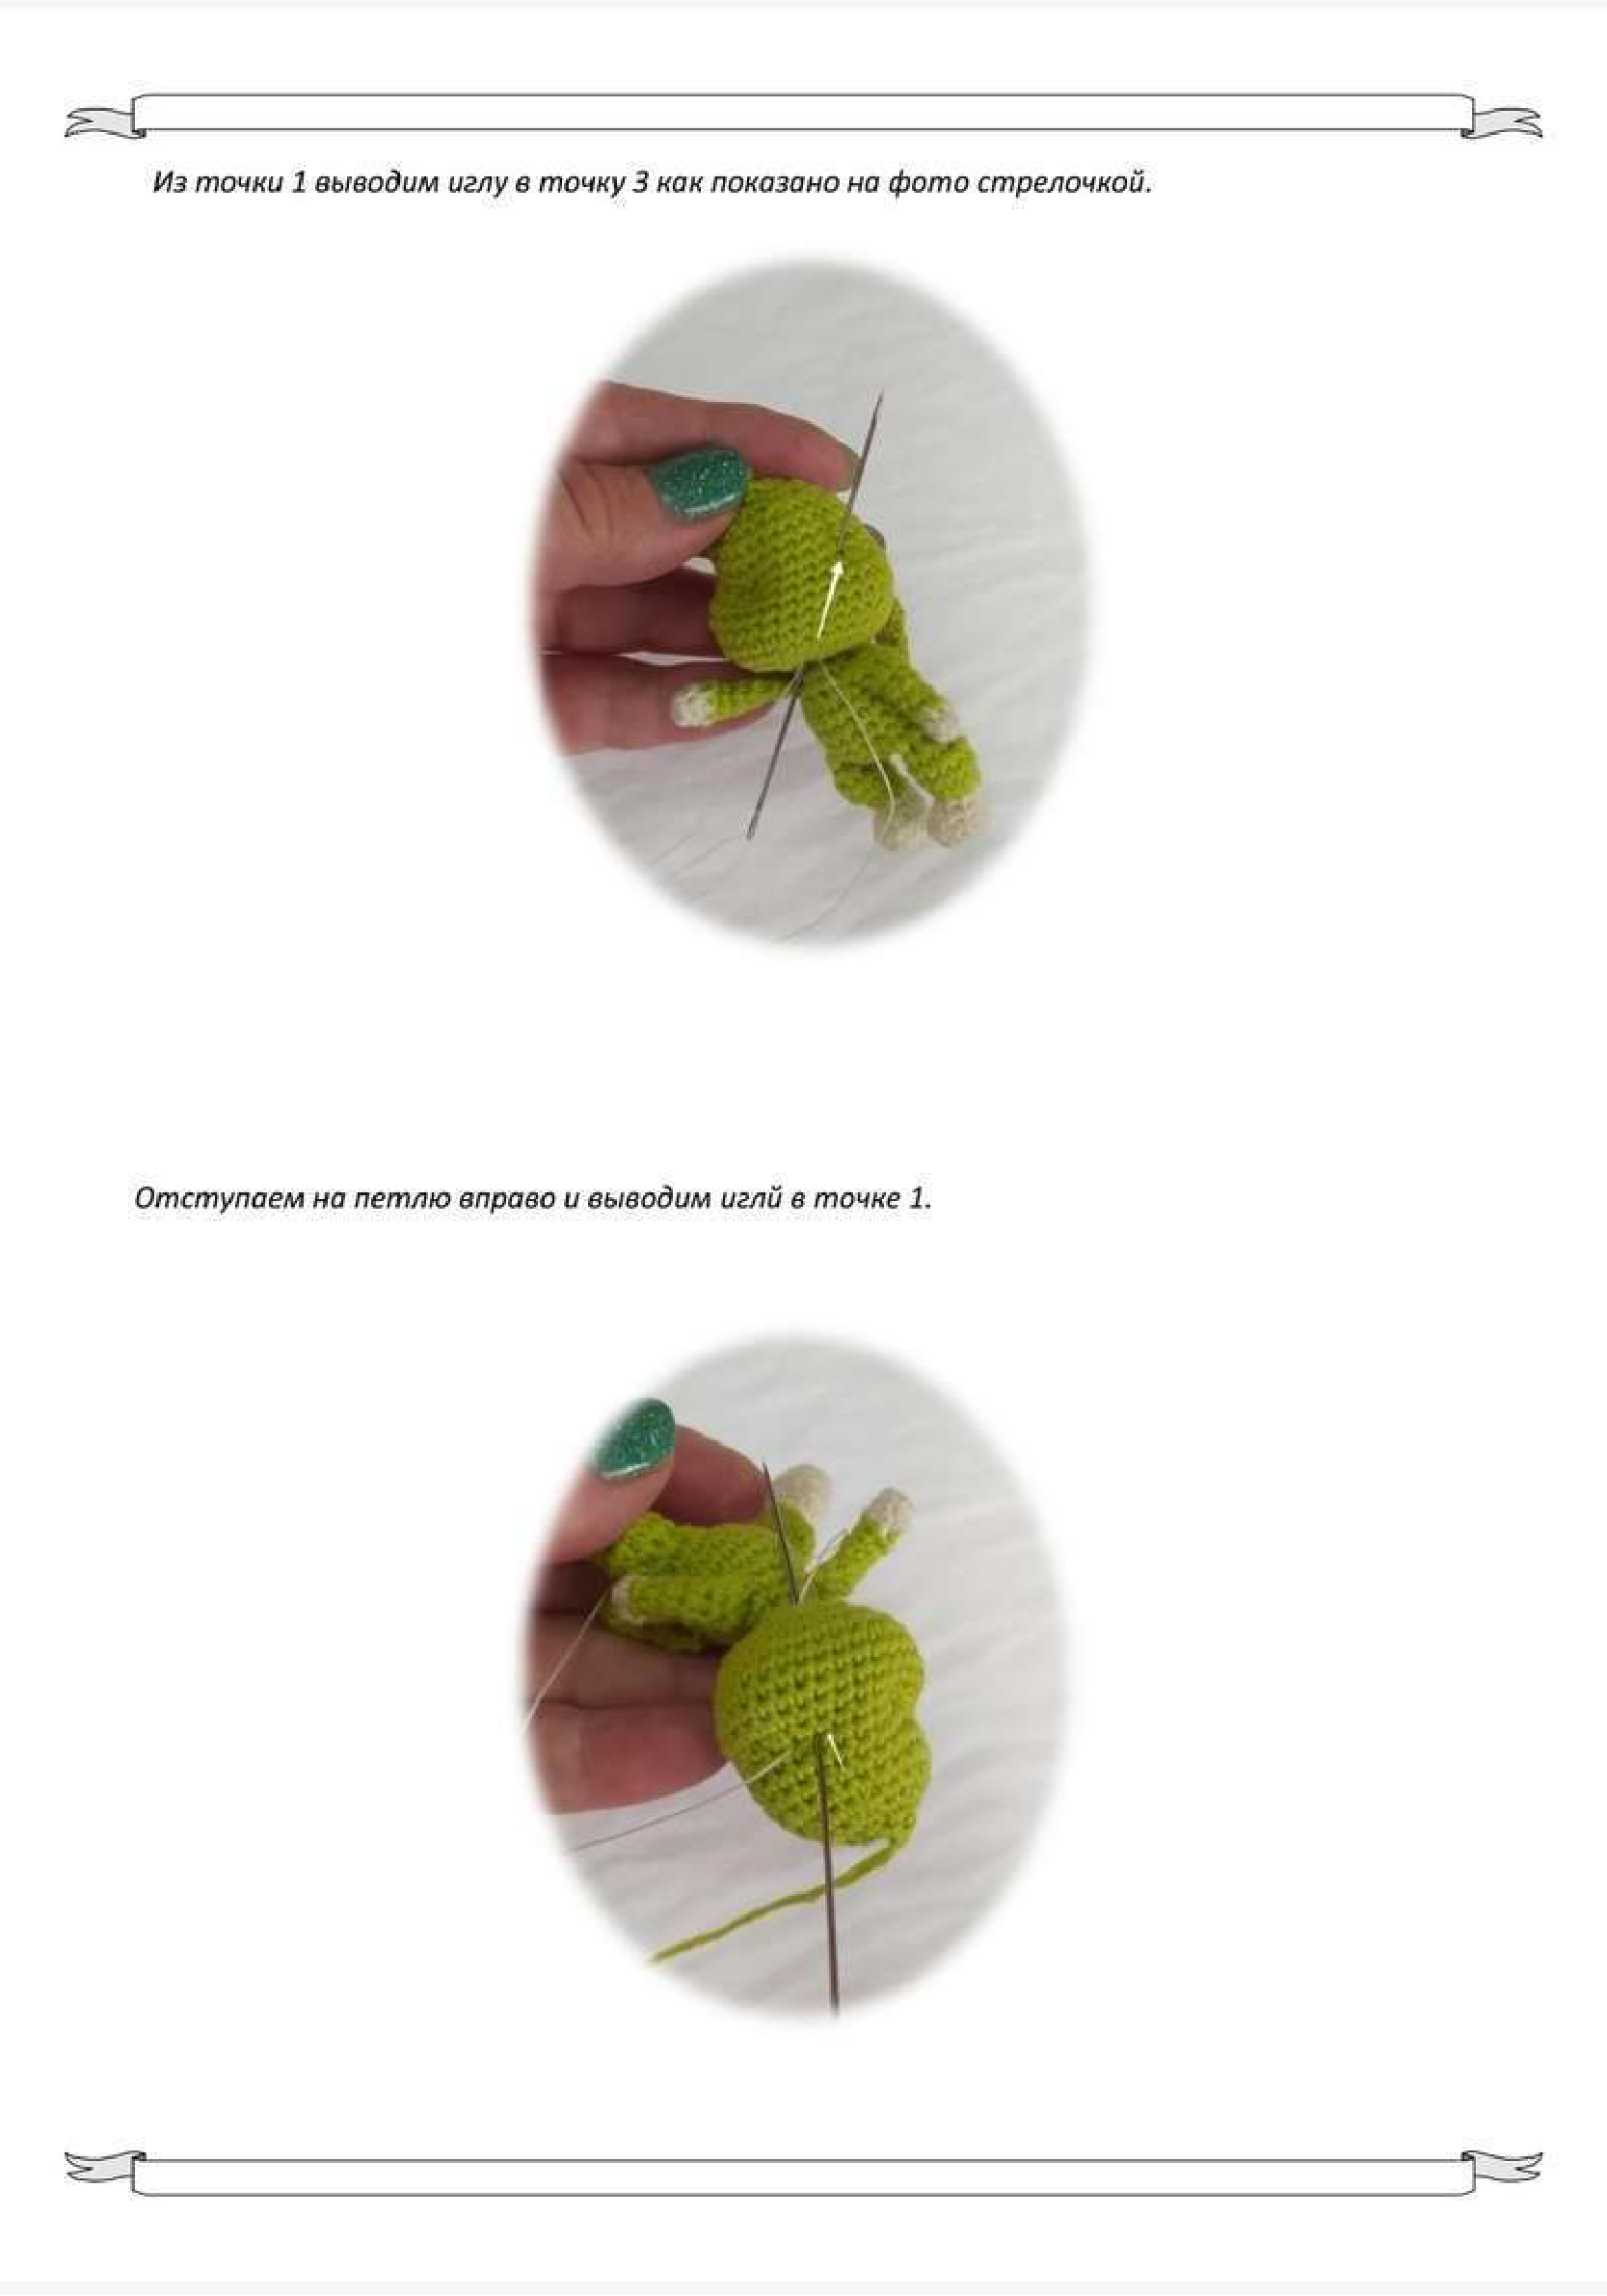
First, use pins to mark the spots for tightening as shown in the photo:
- Neck (Point 1): This is the join between the body and head, specifically between rows 11 and 12 of the Body.
- Back of Neck (Point 2): Directly opposite Point 1, on the back of the neck.
- Eyes (Points 3 and 3): These will be between rows 20 and 21 of the Head, spaced appropriately for your safety eyes.
-
- Insert your needle at Point 1 (front of neck) and bring it out at Point 2 (back of neck) as shown in the photo.
-
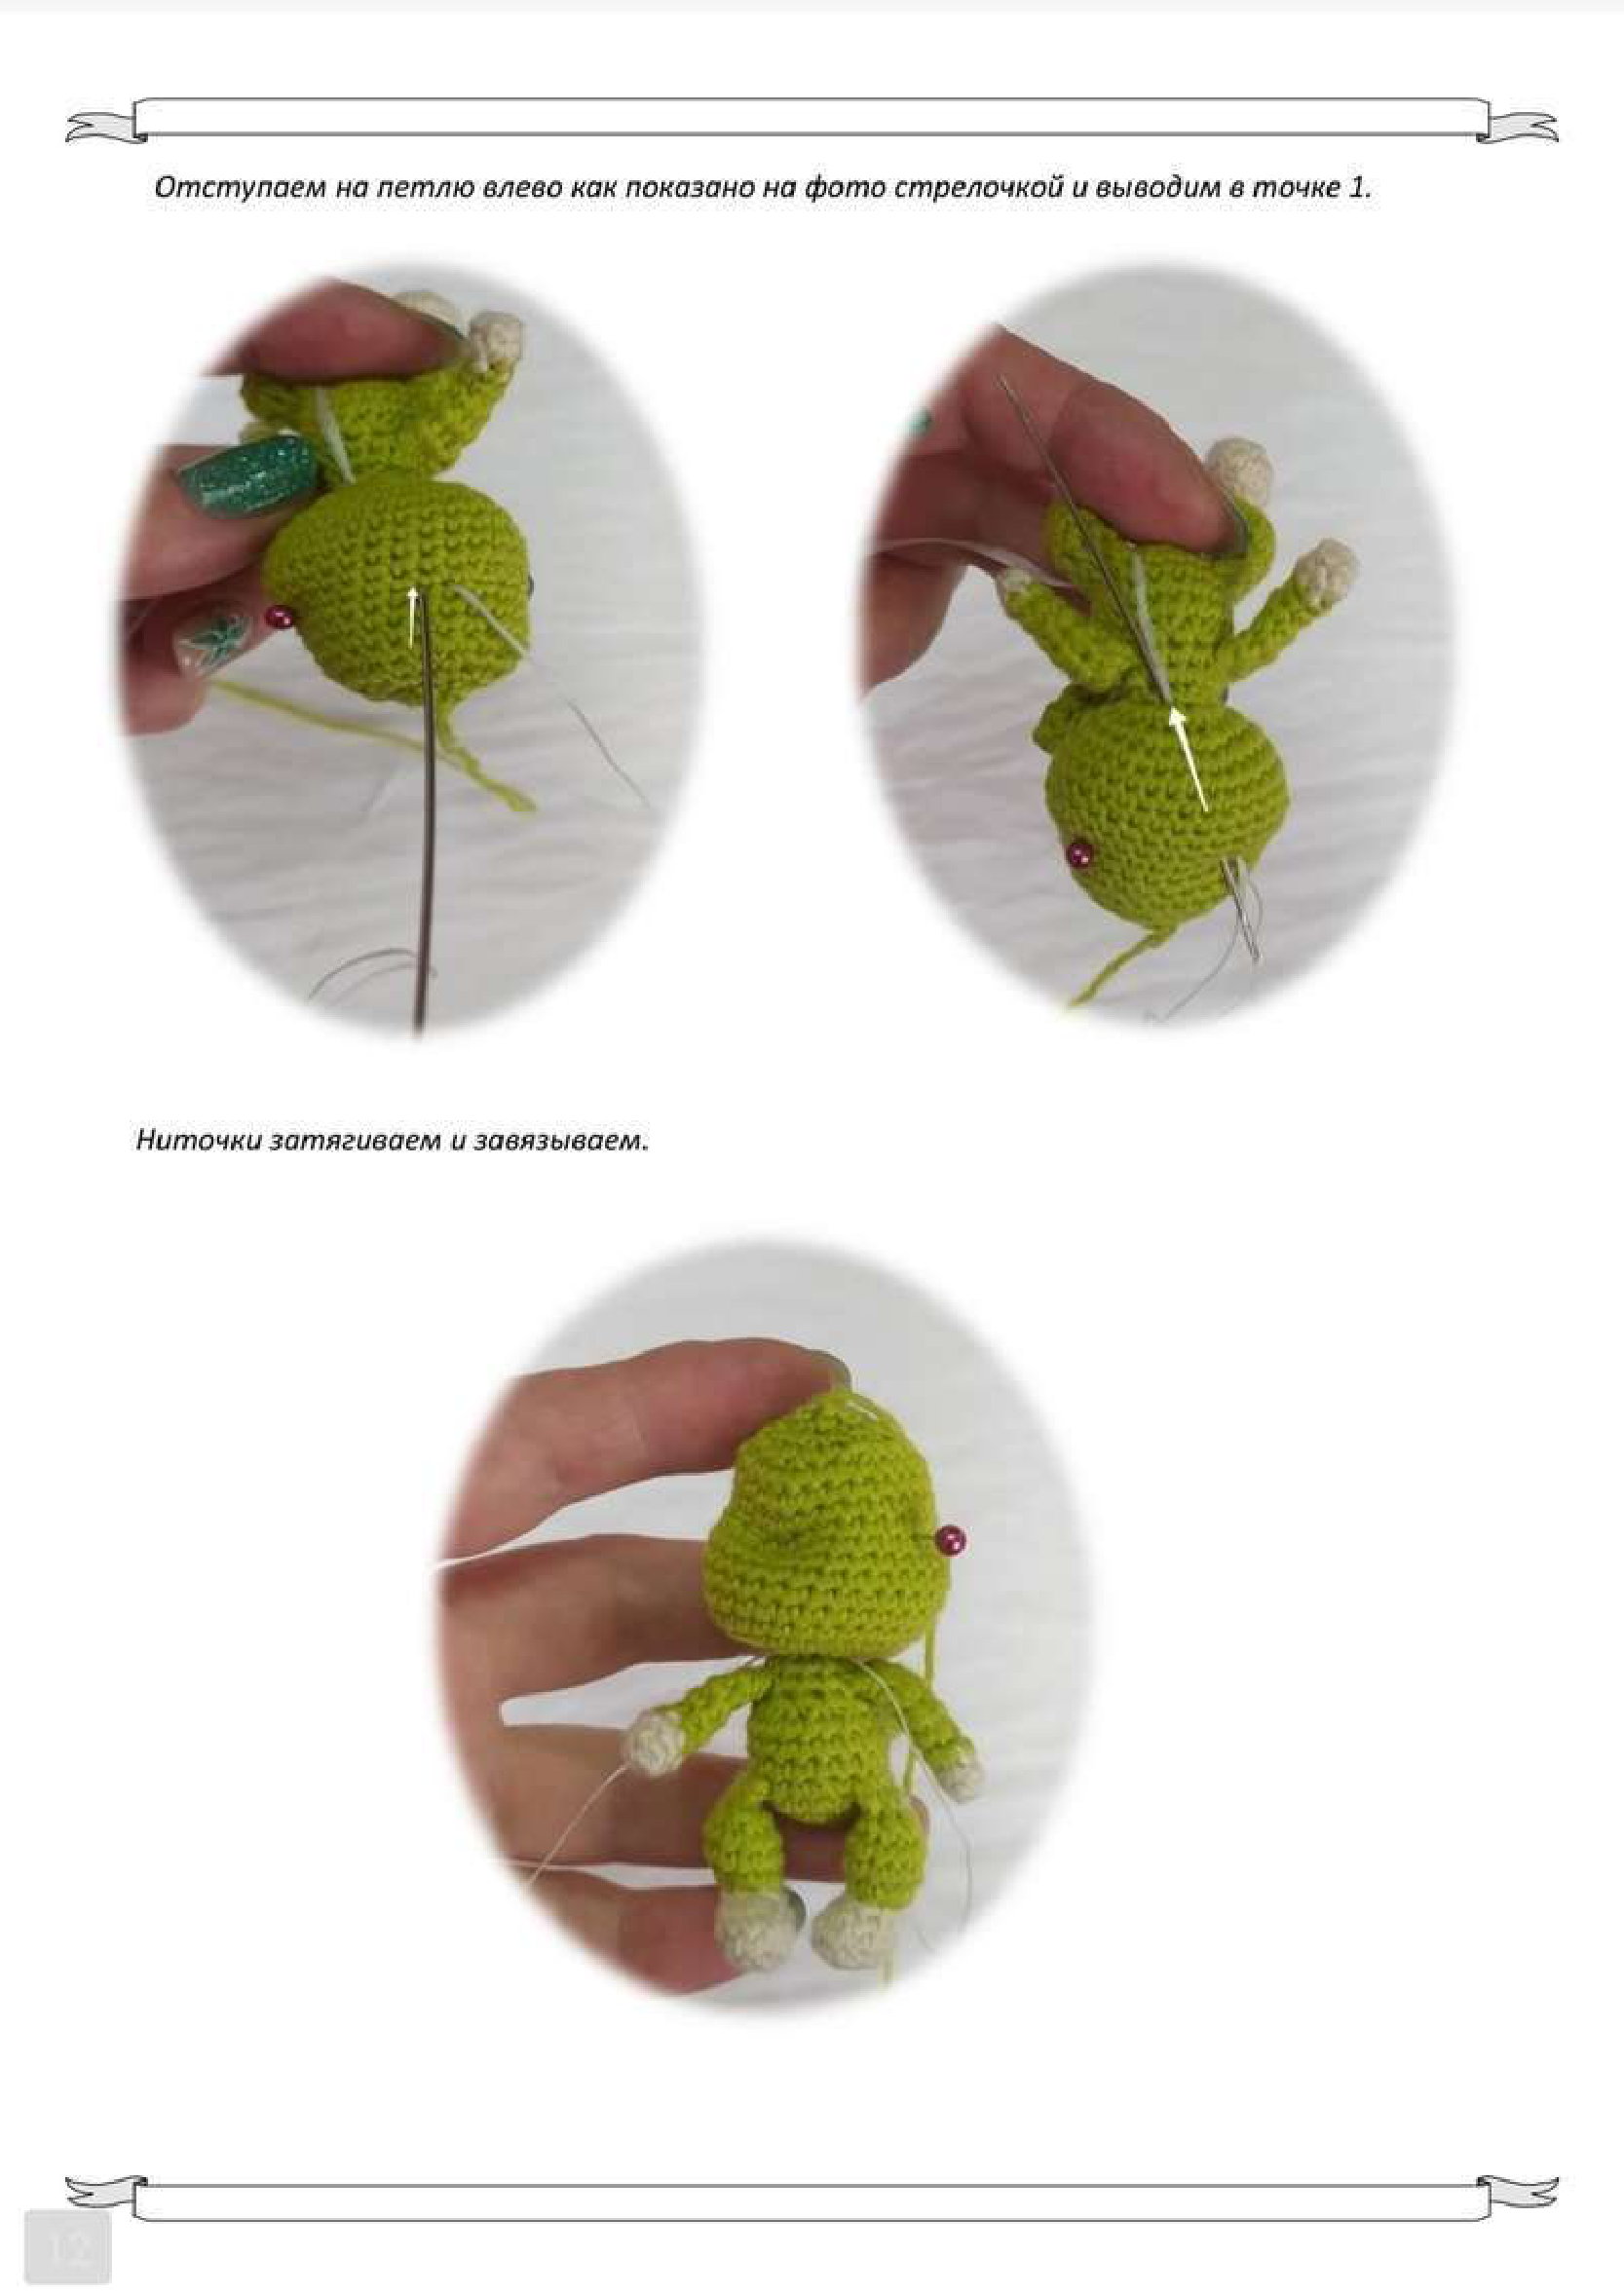
- Move your needle one stitch to the left from Point 2 (as indicated by the arrow in the photo) and bring it back out at Point 1.
- Gently pull the threads tight to create a slight indentation for the neck. Tie the threads securely and carefully hide the tails inside the head/body.
-
- Now, insert your needle at Point 1 (front of neck again) and bring the needle out at one of the eye spots (Point 3) as shown by the arrow in the photo.
- Move your needle one stitch to the right from Point 3 and bring the needle back out at Point 1.
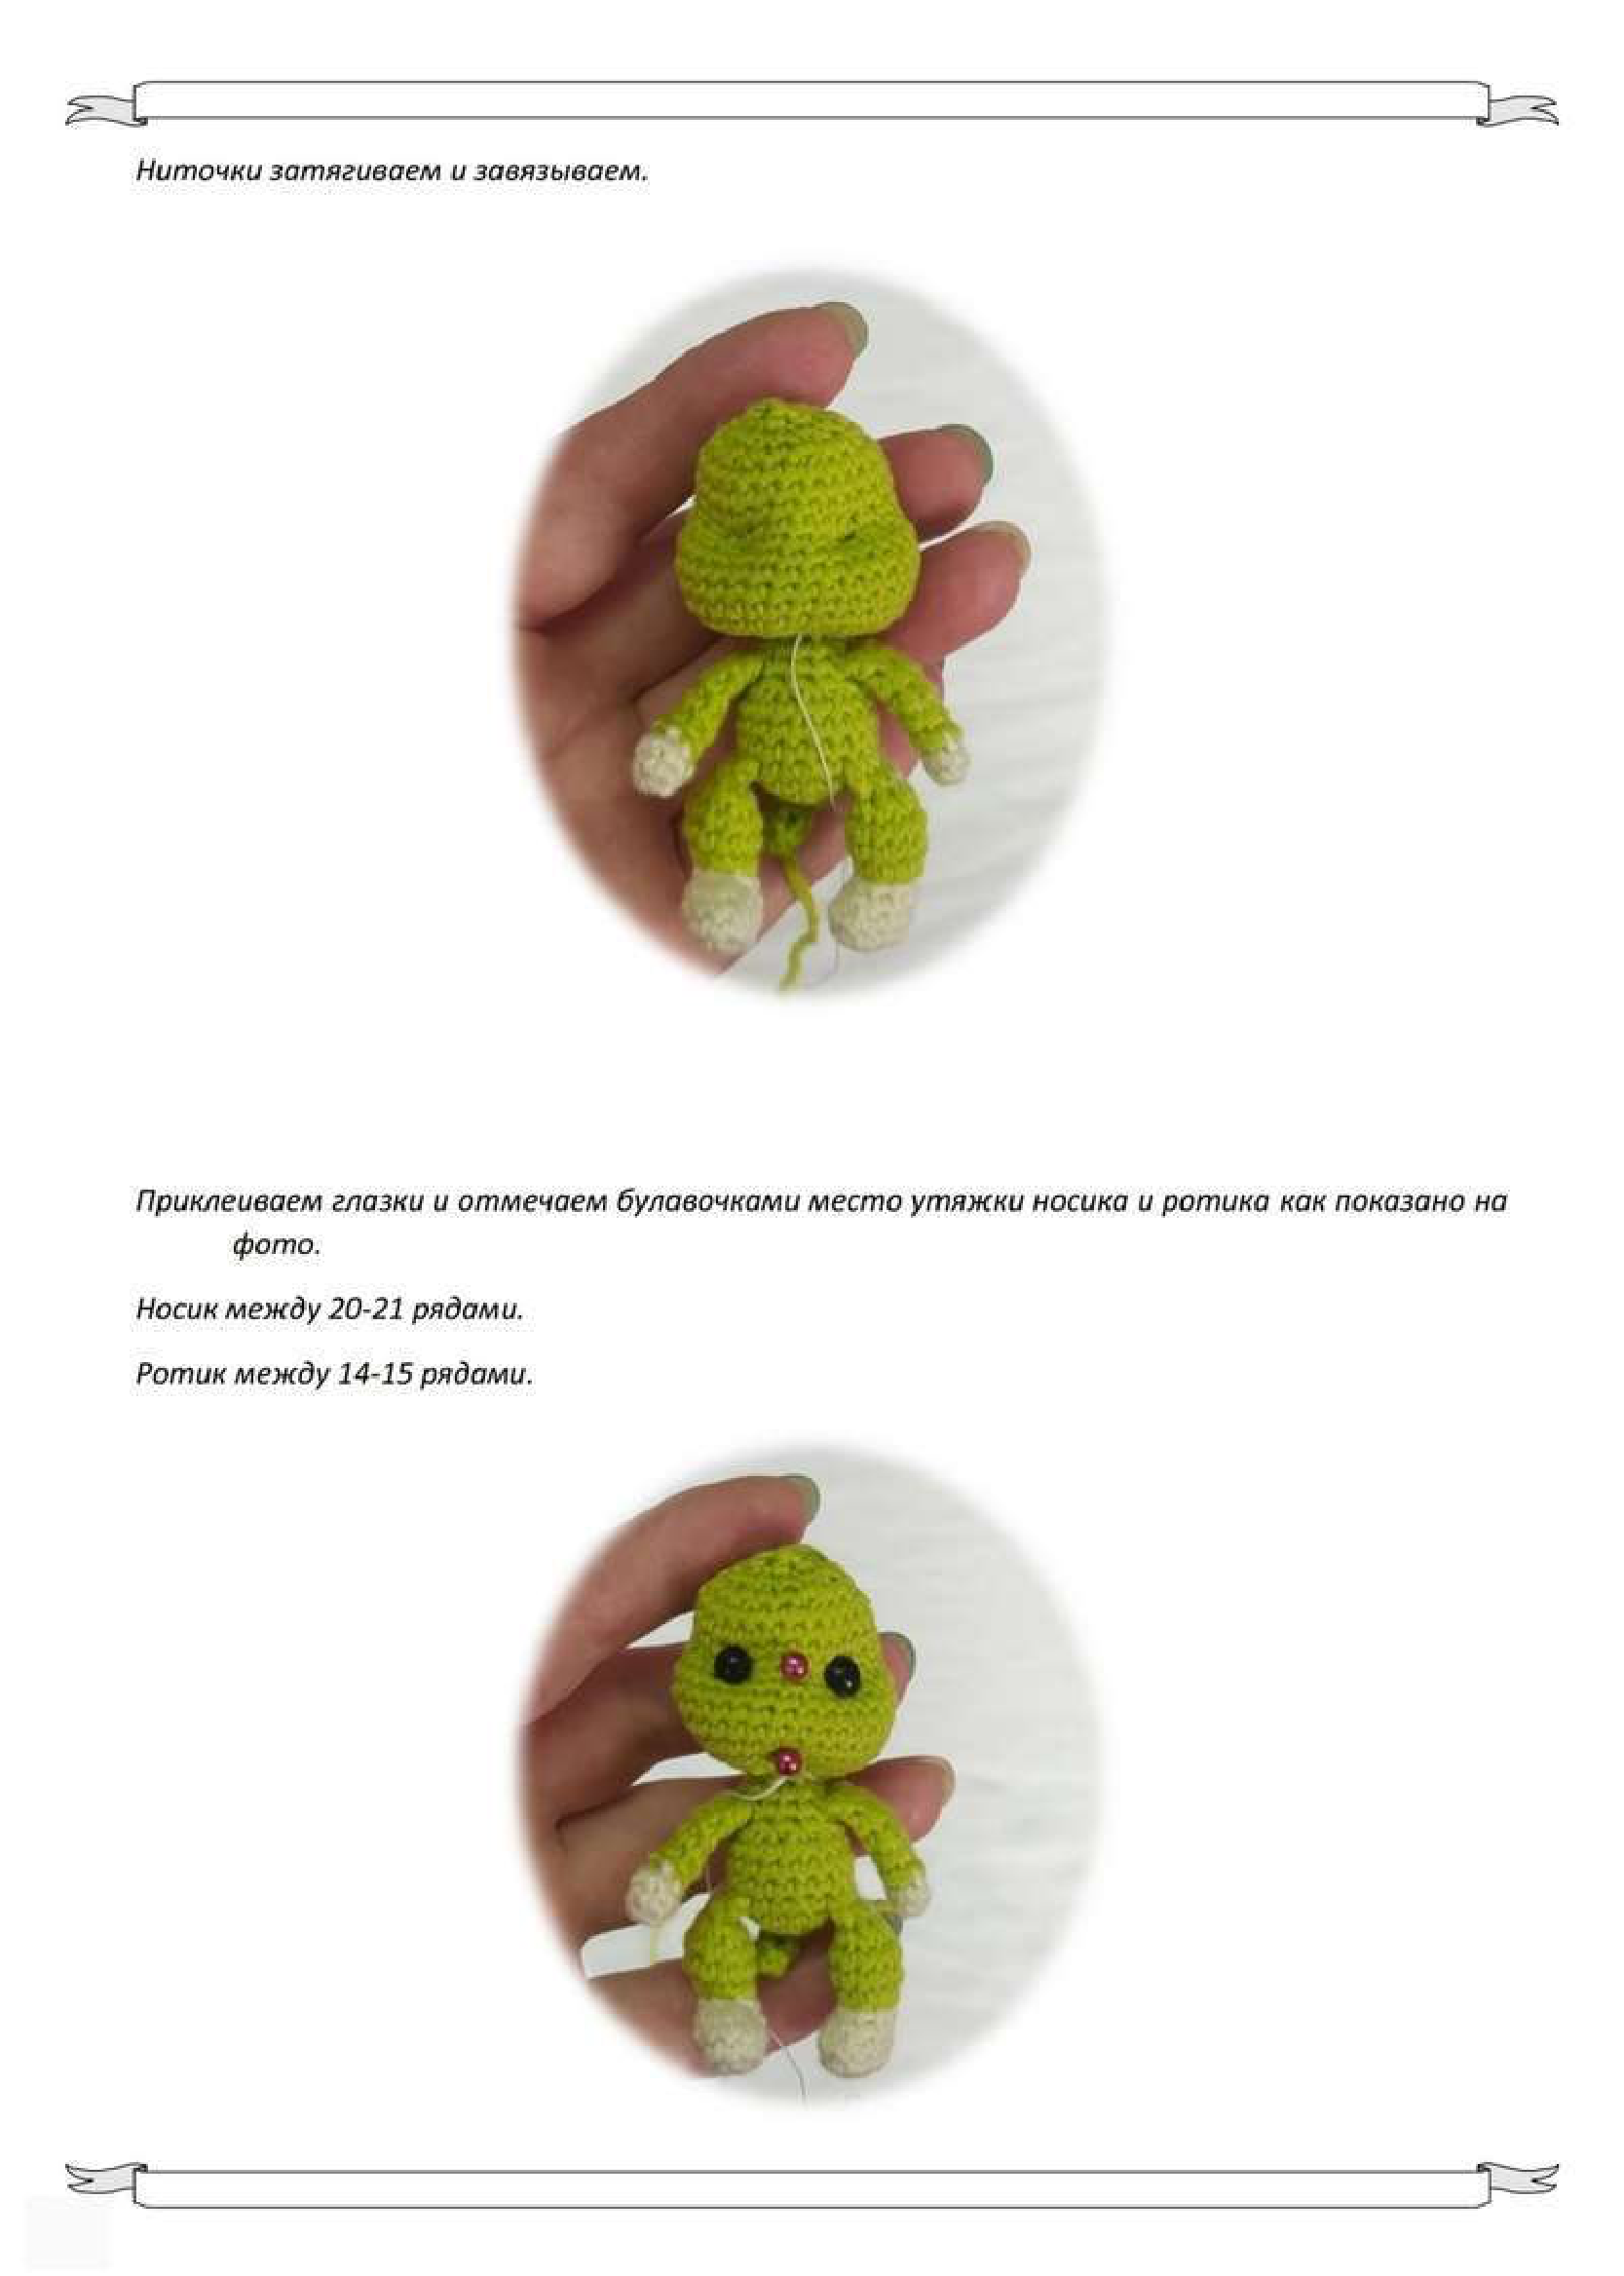
- Gently pull the threads to create an indentation for the eye. Repeat this process for the other eye. Tie the threads securely and hide the tails.
Once the eye tightening is done, securely glue the safety eyes into place in the indentations you’ve created.
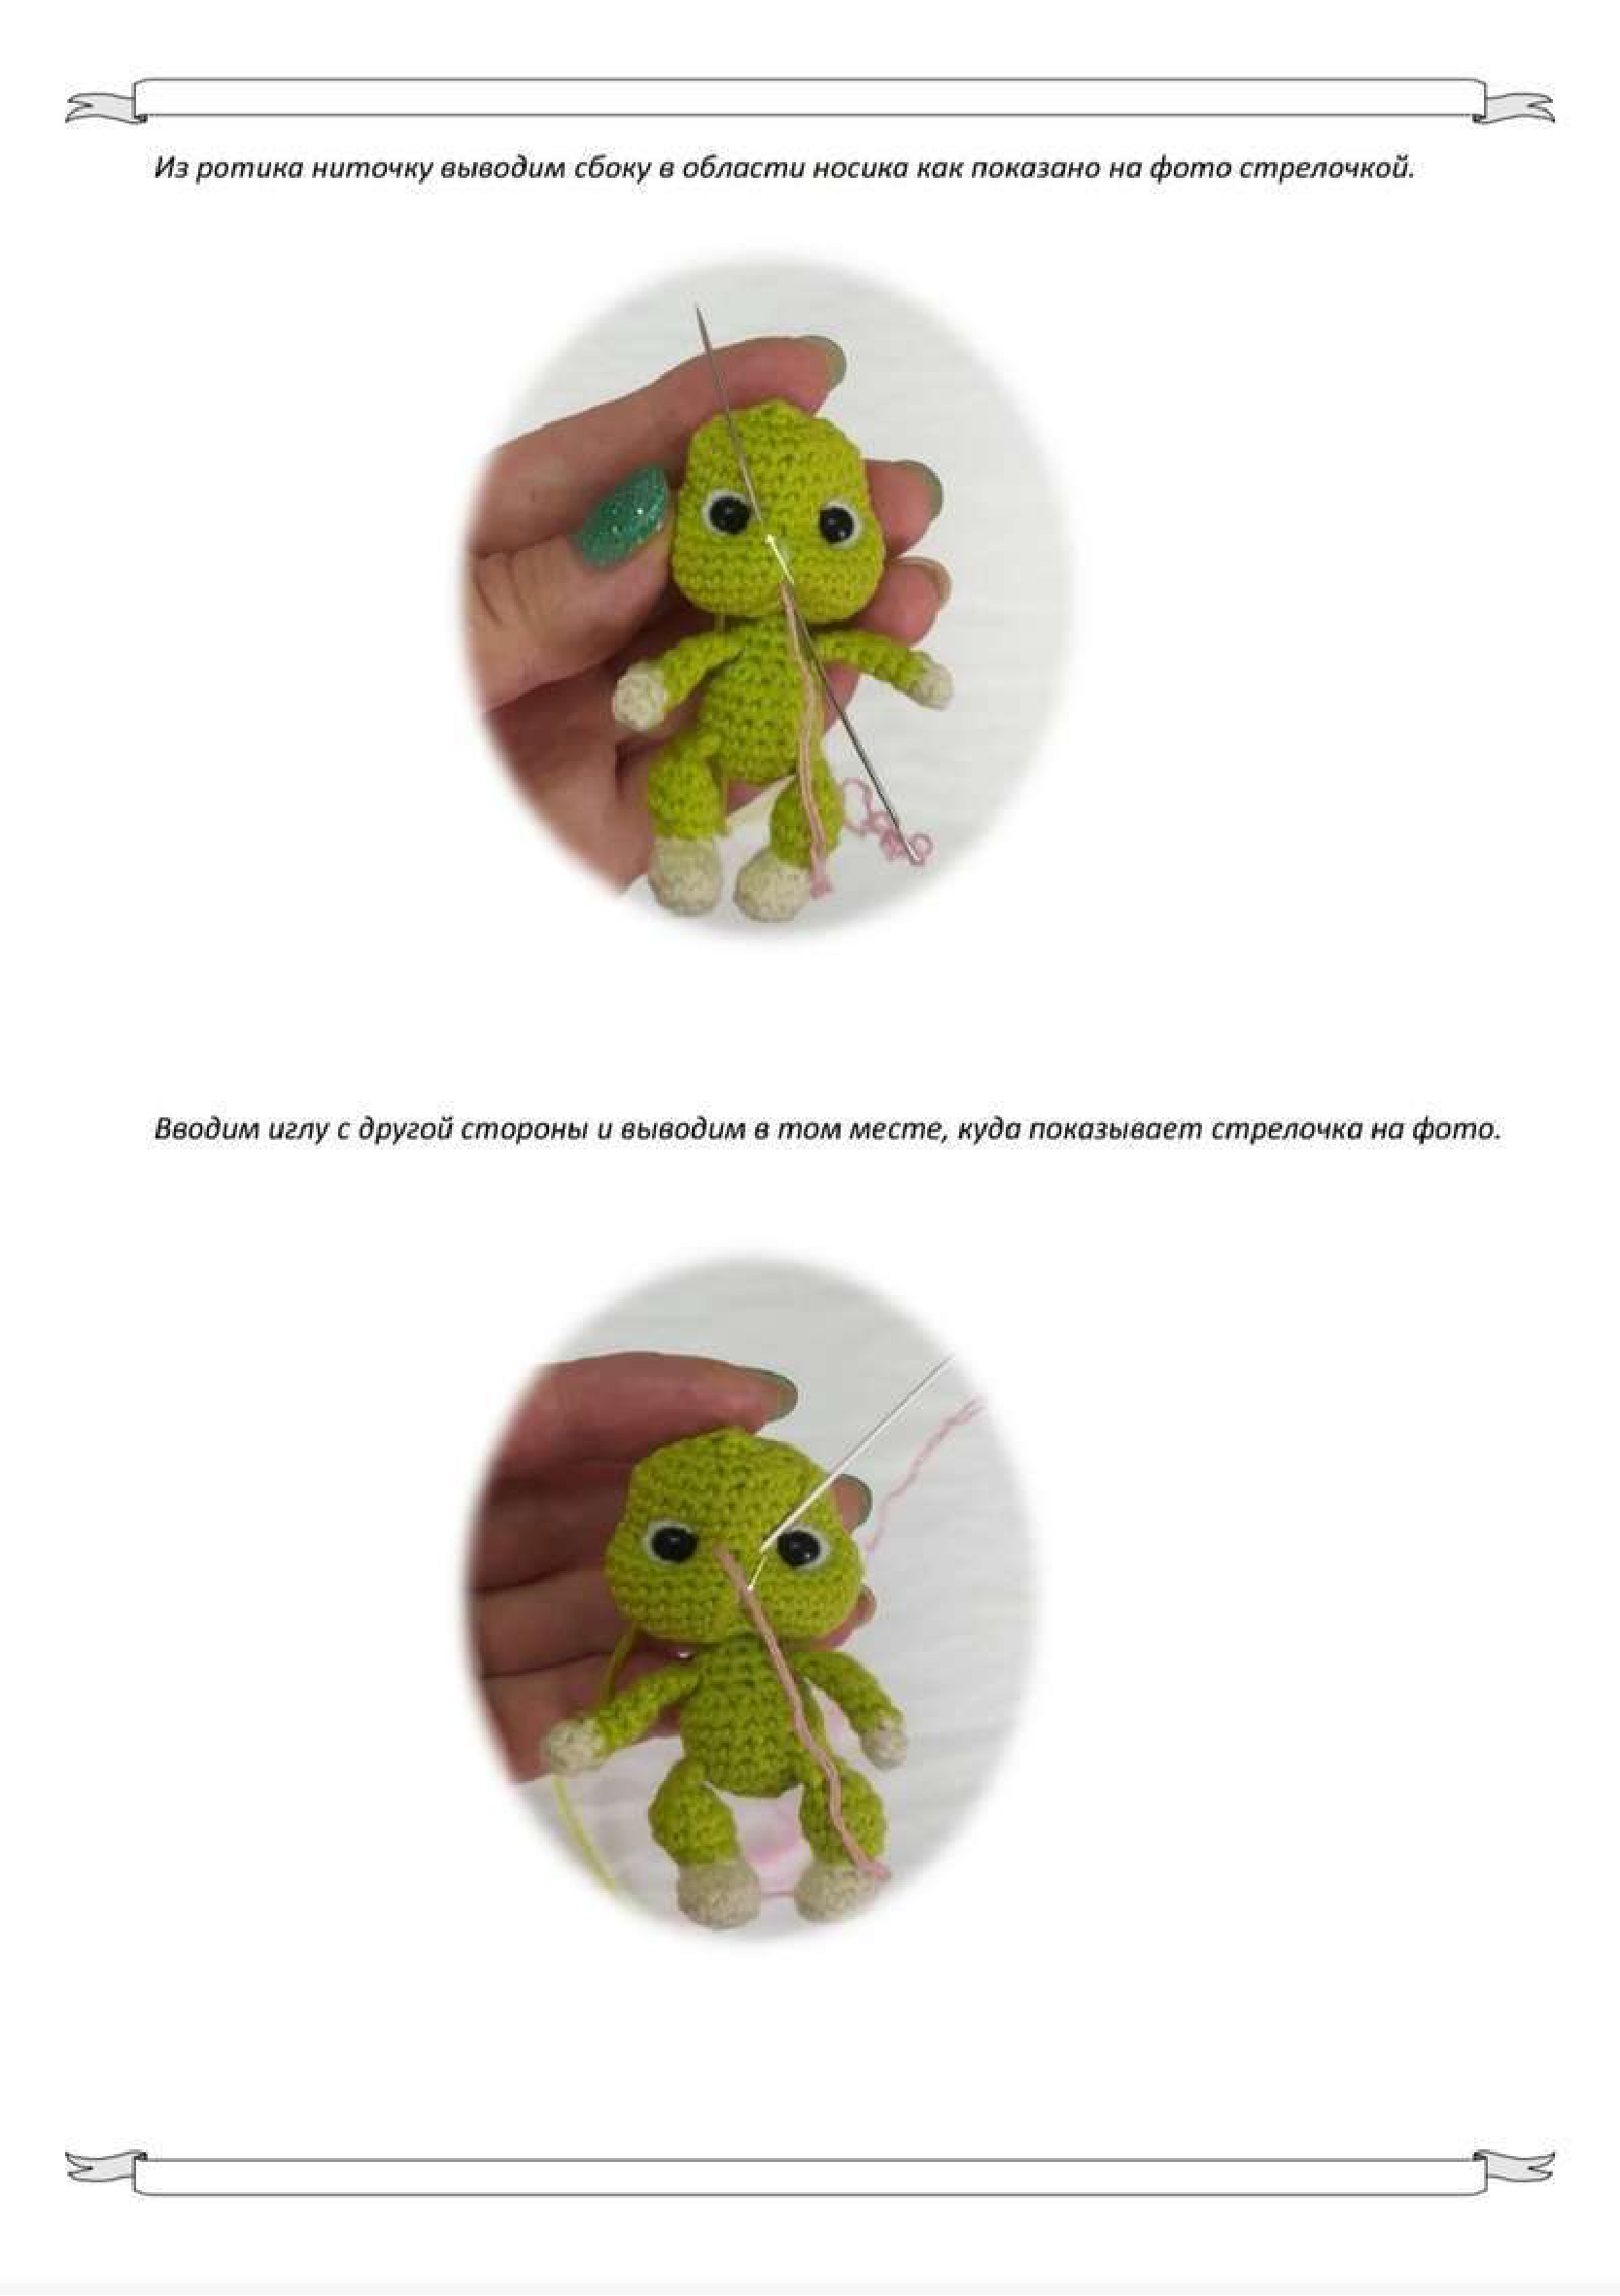
Next, mark the spots for the nose and mouth tightening with pins as shown in the photo:
- Nose: Positioned between rows 20-21 of the Head.
- Mouth: Positioned between rows 14-15 of the Head.
-
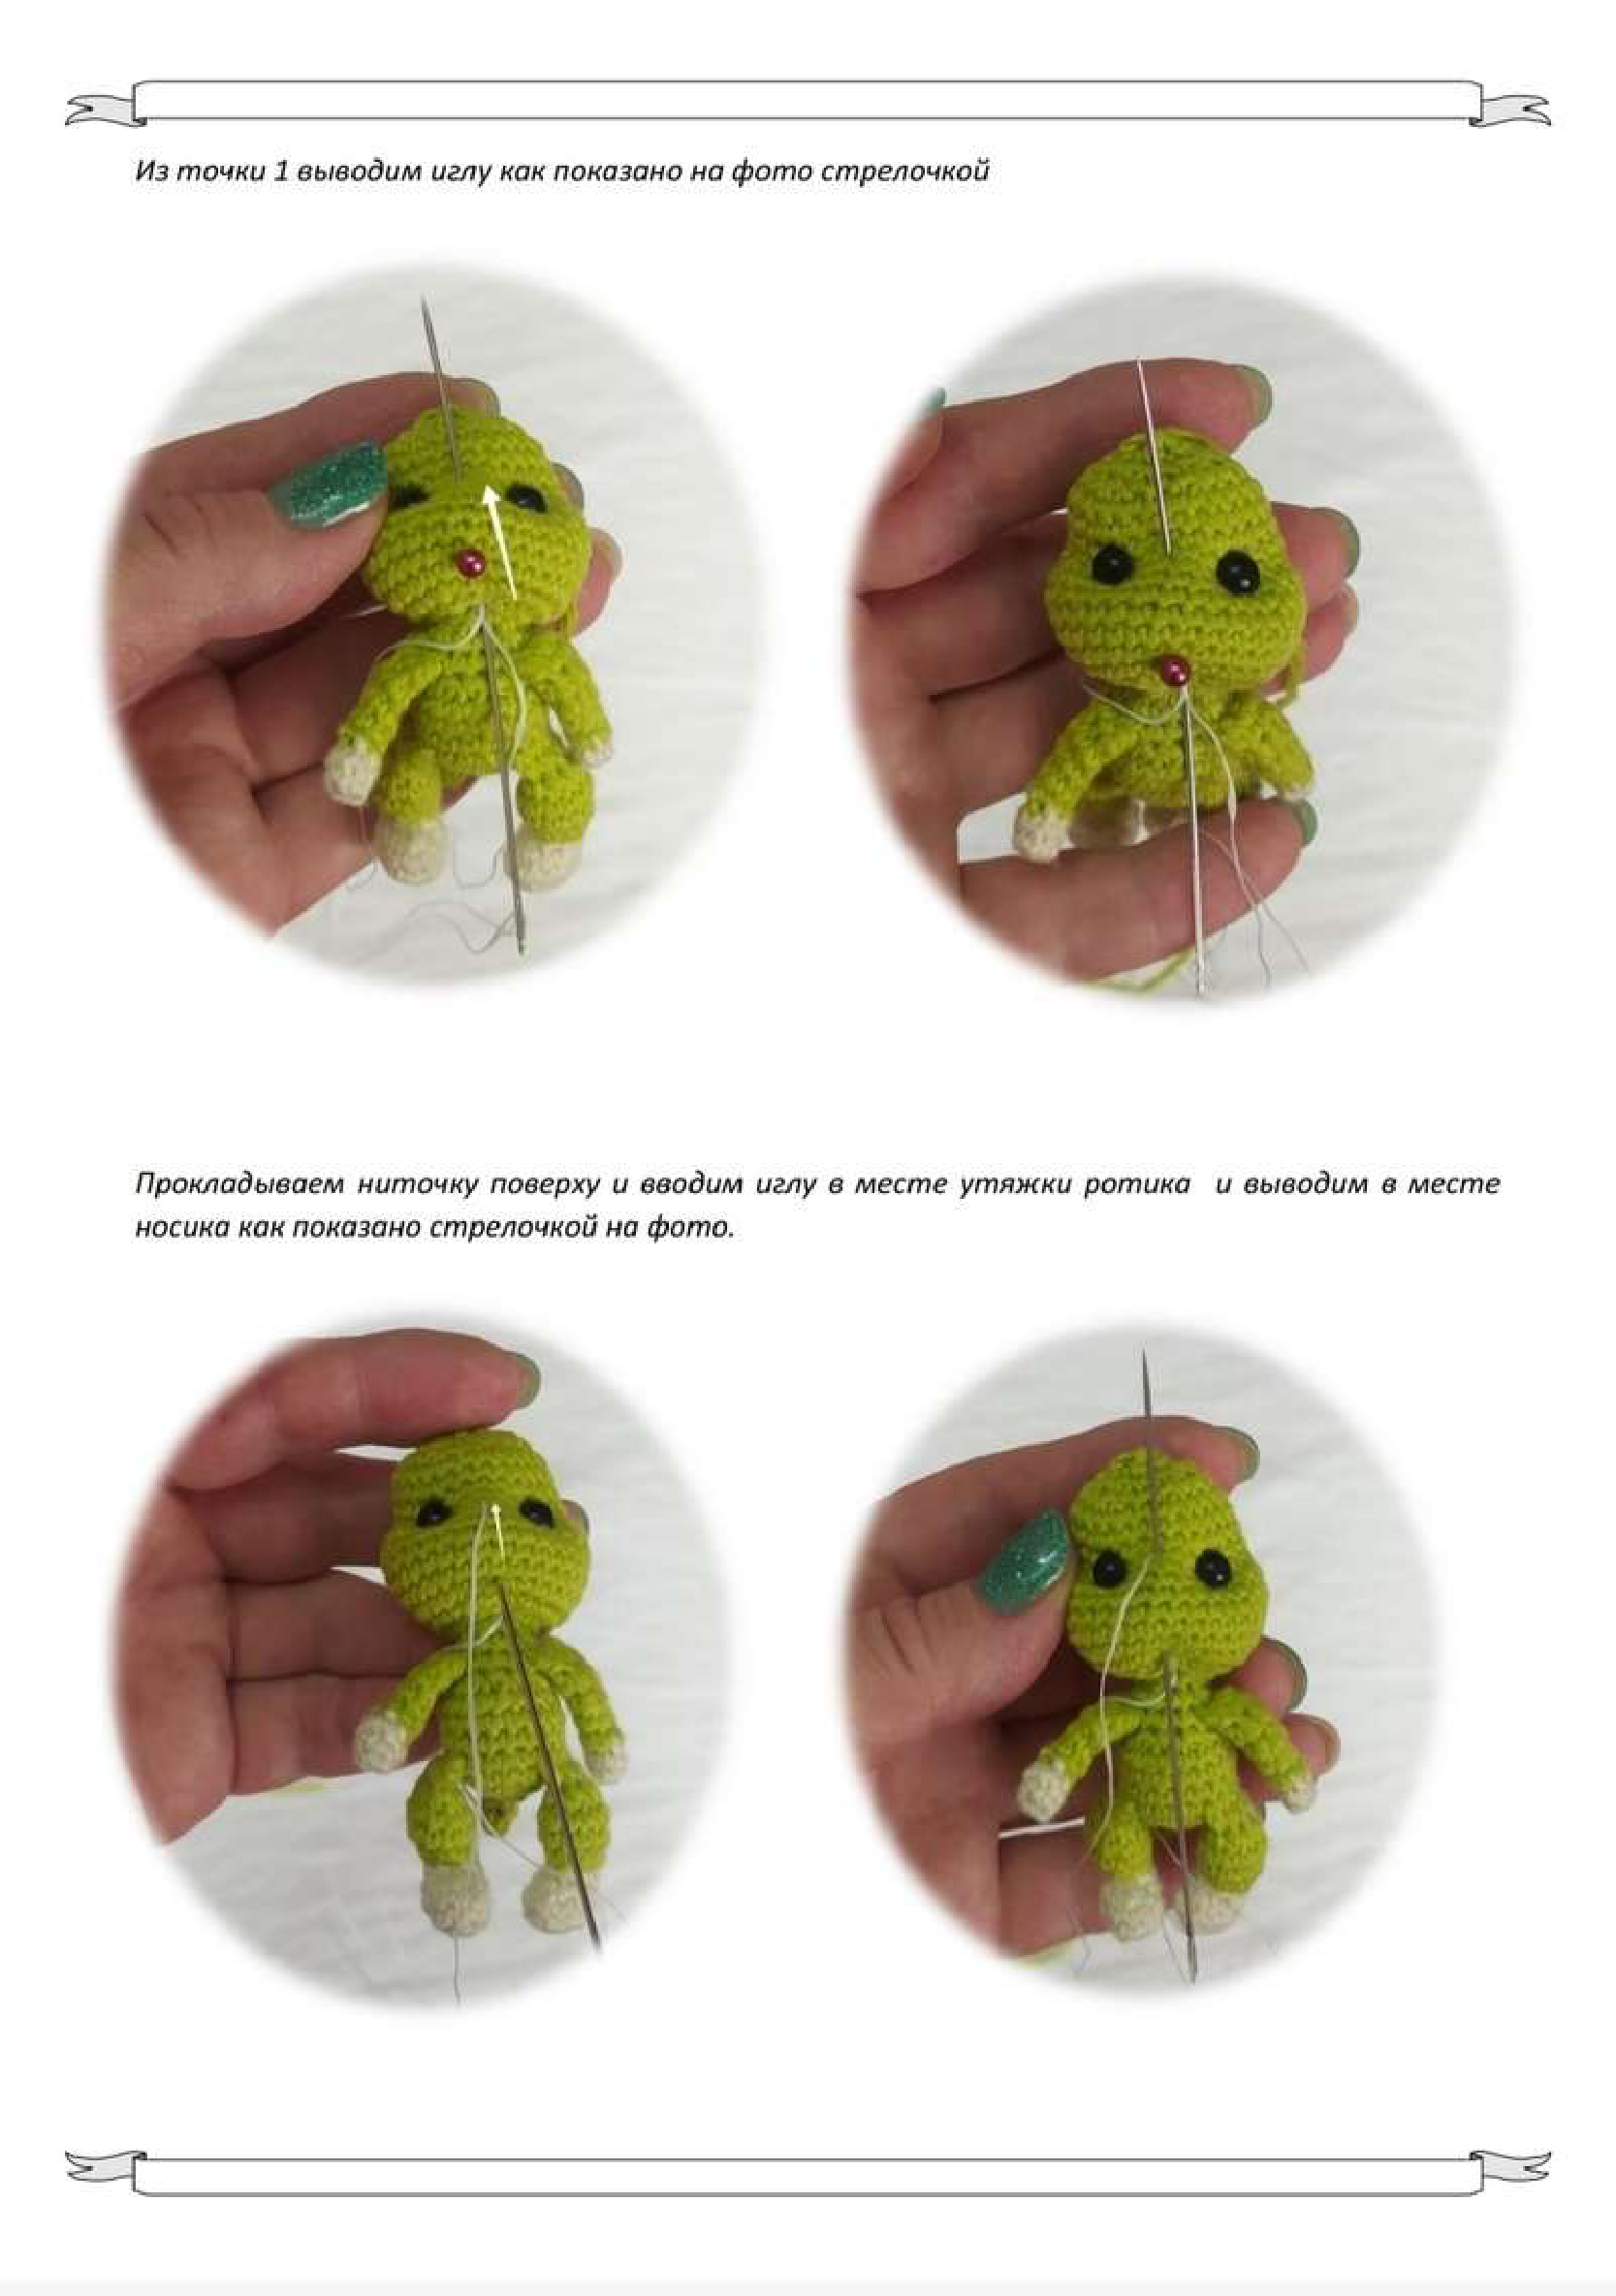
- Insert your needle at Point 1 (neck) and bring it out at the marked mouth tightening spot.
- Lay the thread over the top (across the mouth area) and insert the needle back into the mouth tightening spot, bringing it out at the nose spot as shown by the arrow in the photo.
-
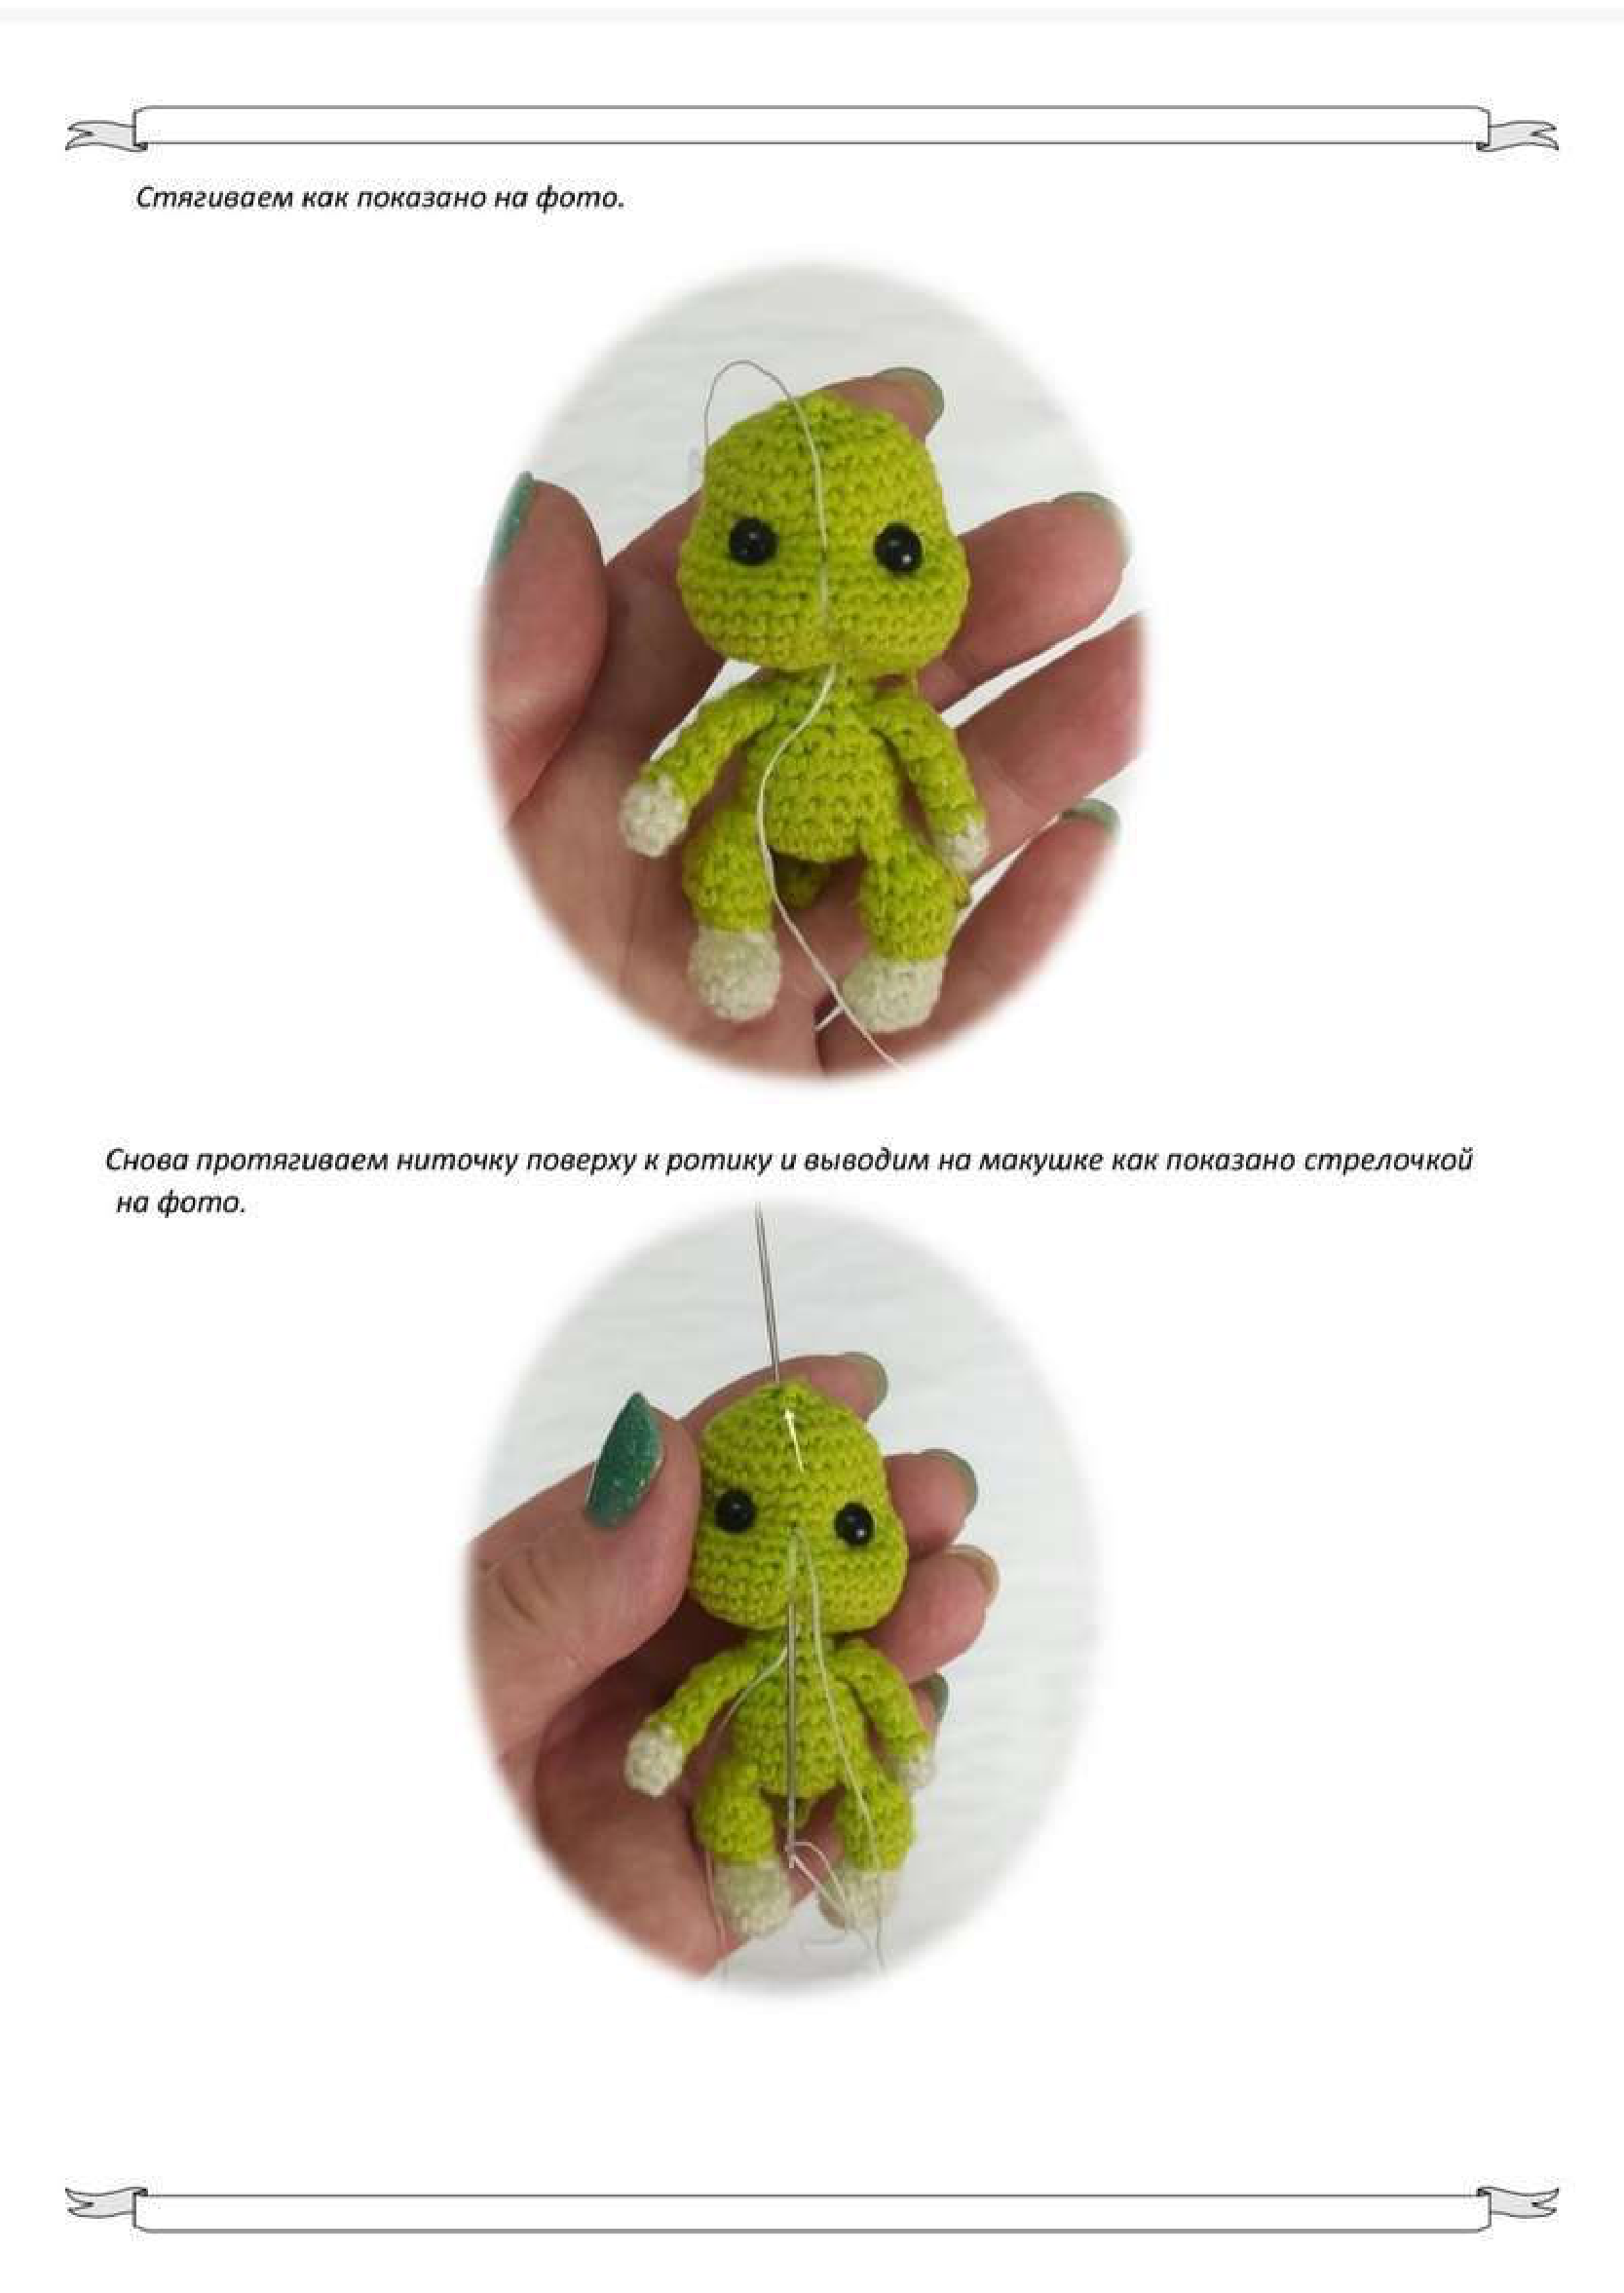
- Pull the thread tight as shown in the photo to create the desired mouth and nose indentations.
- Again, pull the thread over the top (from the nose to the mouth area) and bring the needle out at the crown of the head (the open top of the head).

-
- Bring the second end of the thread out to the crown as well. Tie these two ends securely together and cut them short, hiding them inside the head.
Embroidering the Muzzle
Now that the facial tightening is complete, we can embroider the nose and mouth details.
-
- Using your tapestry needle, insert 3 strands of mouline thread into the open head opening (crown) and bring it out at the mouth tightening spot.
- From the mouth spot, bring the thread out to the side in the nose area as indicated by the arrow in the photo.
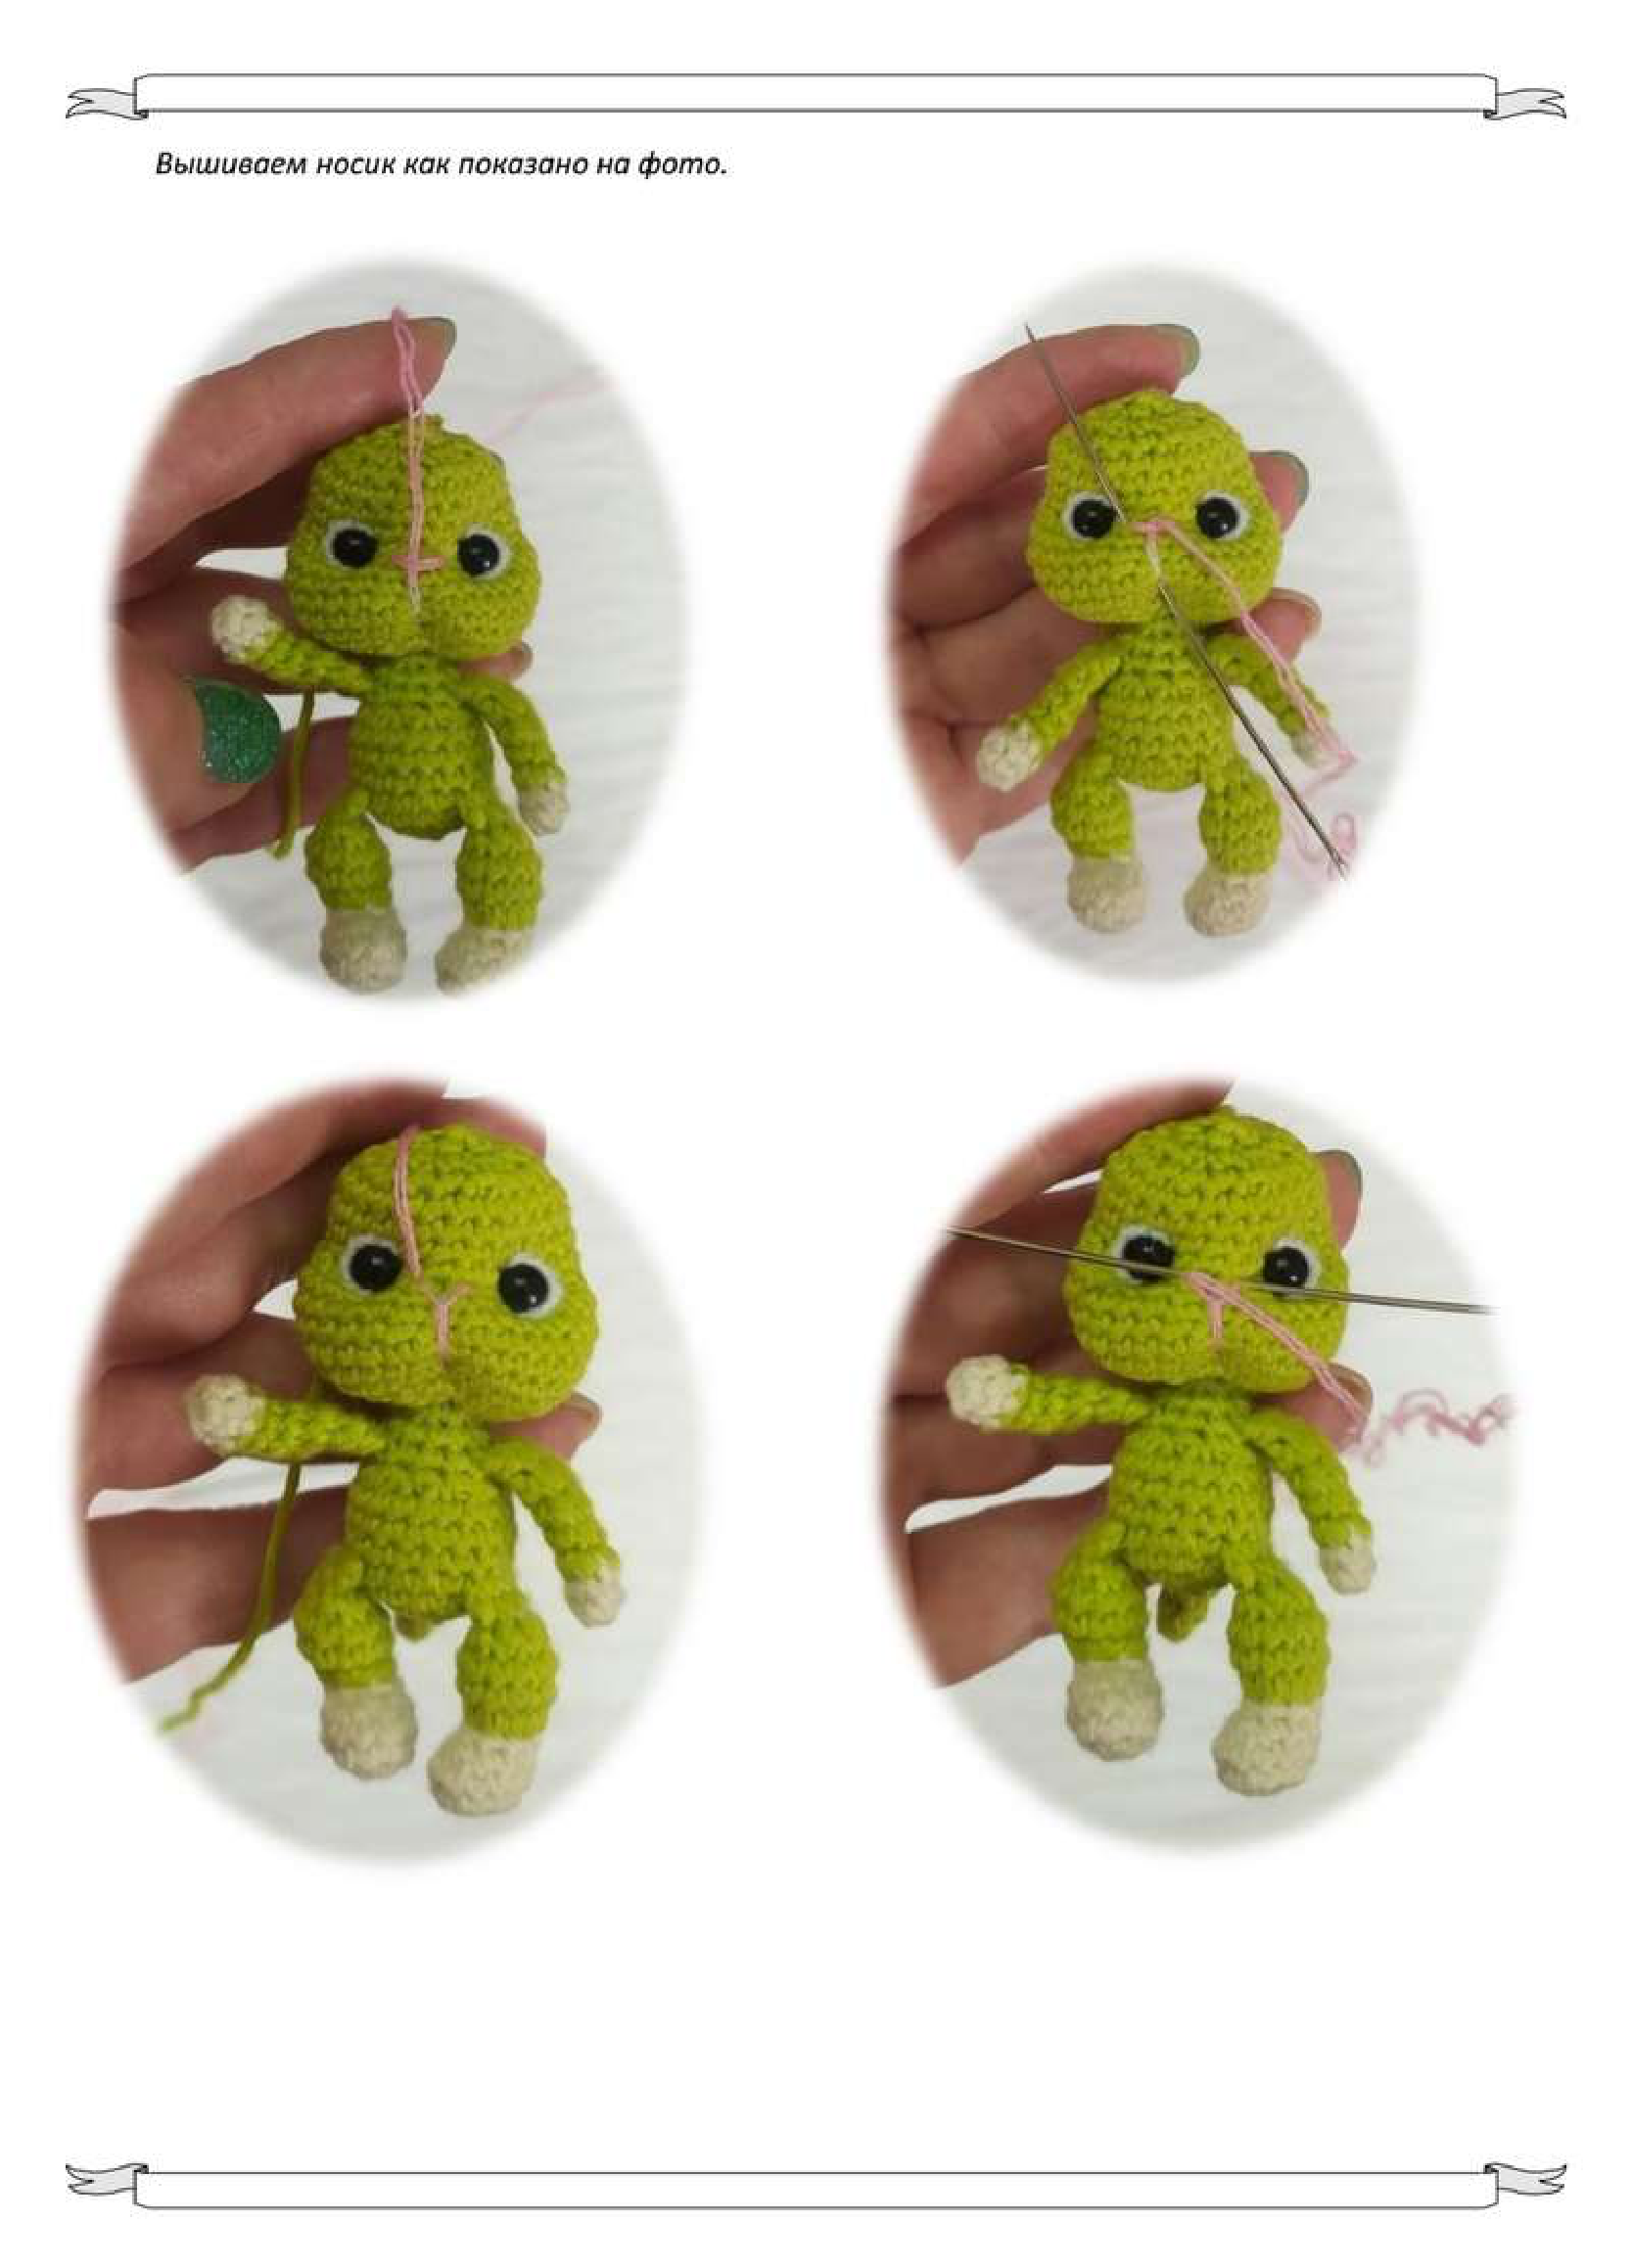
-
- Insert the needle from the other side of the nose area and bring it out at the spot indicated by the arrow in the photo.
- Carefully embroider the nose by stitching back and forth, filling in the shape until it’s to your liking, as shown in the photo.
Once the muzzle is embroidered, securely close the opening at the top of the head with your tapestry needle. Weave the remaining yarn tail through the front loops of the last round and pull tight to close the hole. Knot and hide the tail inside the head.
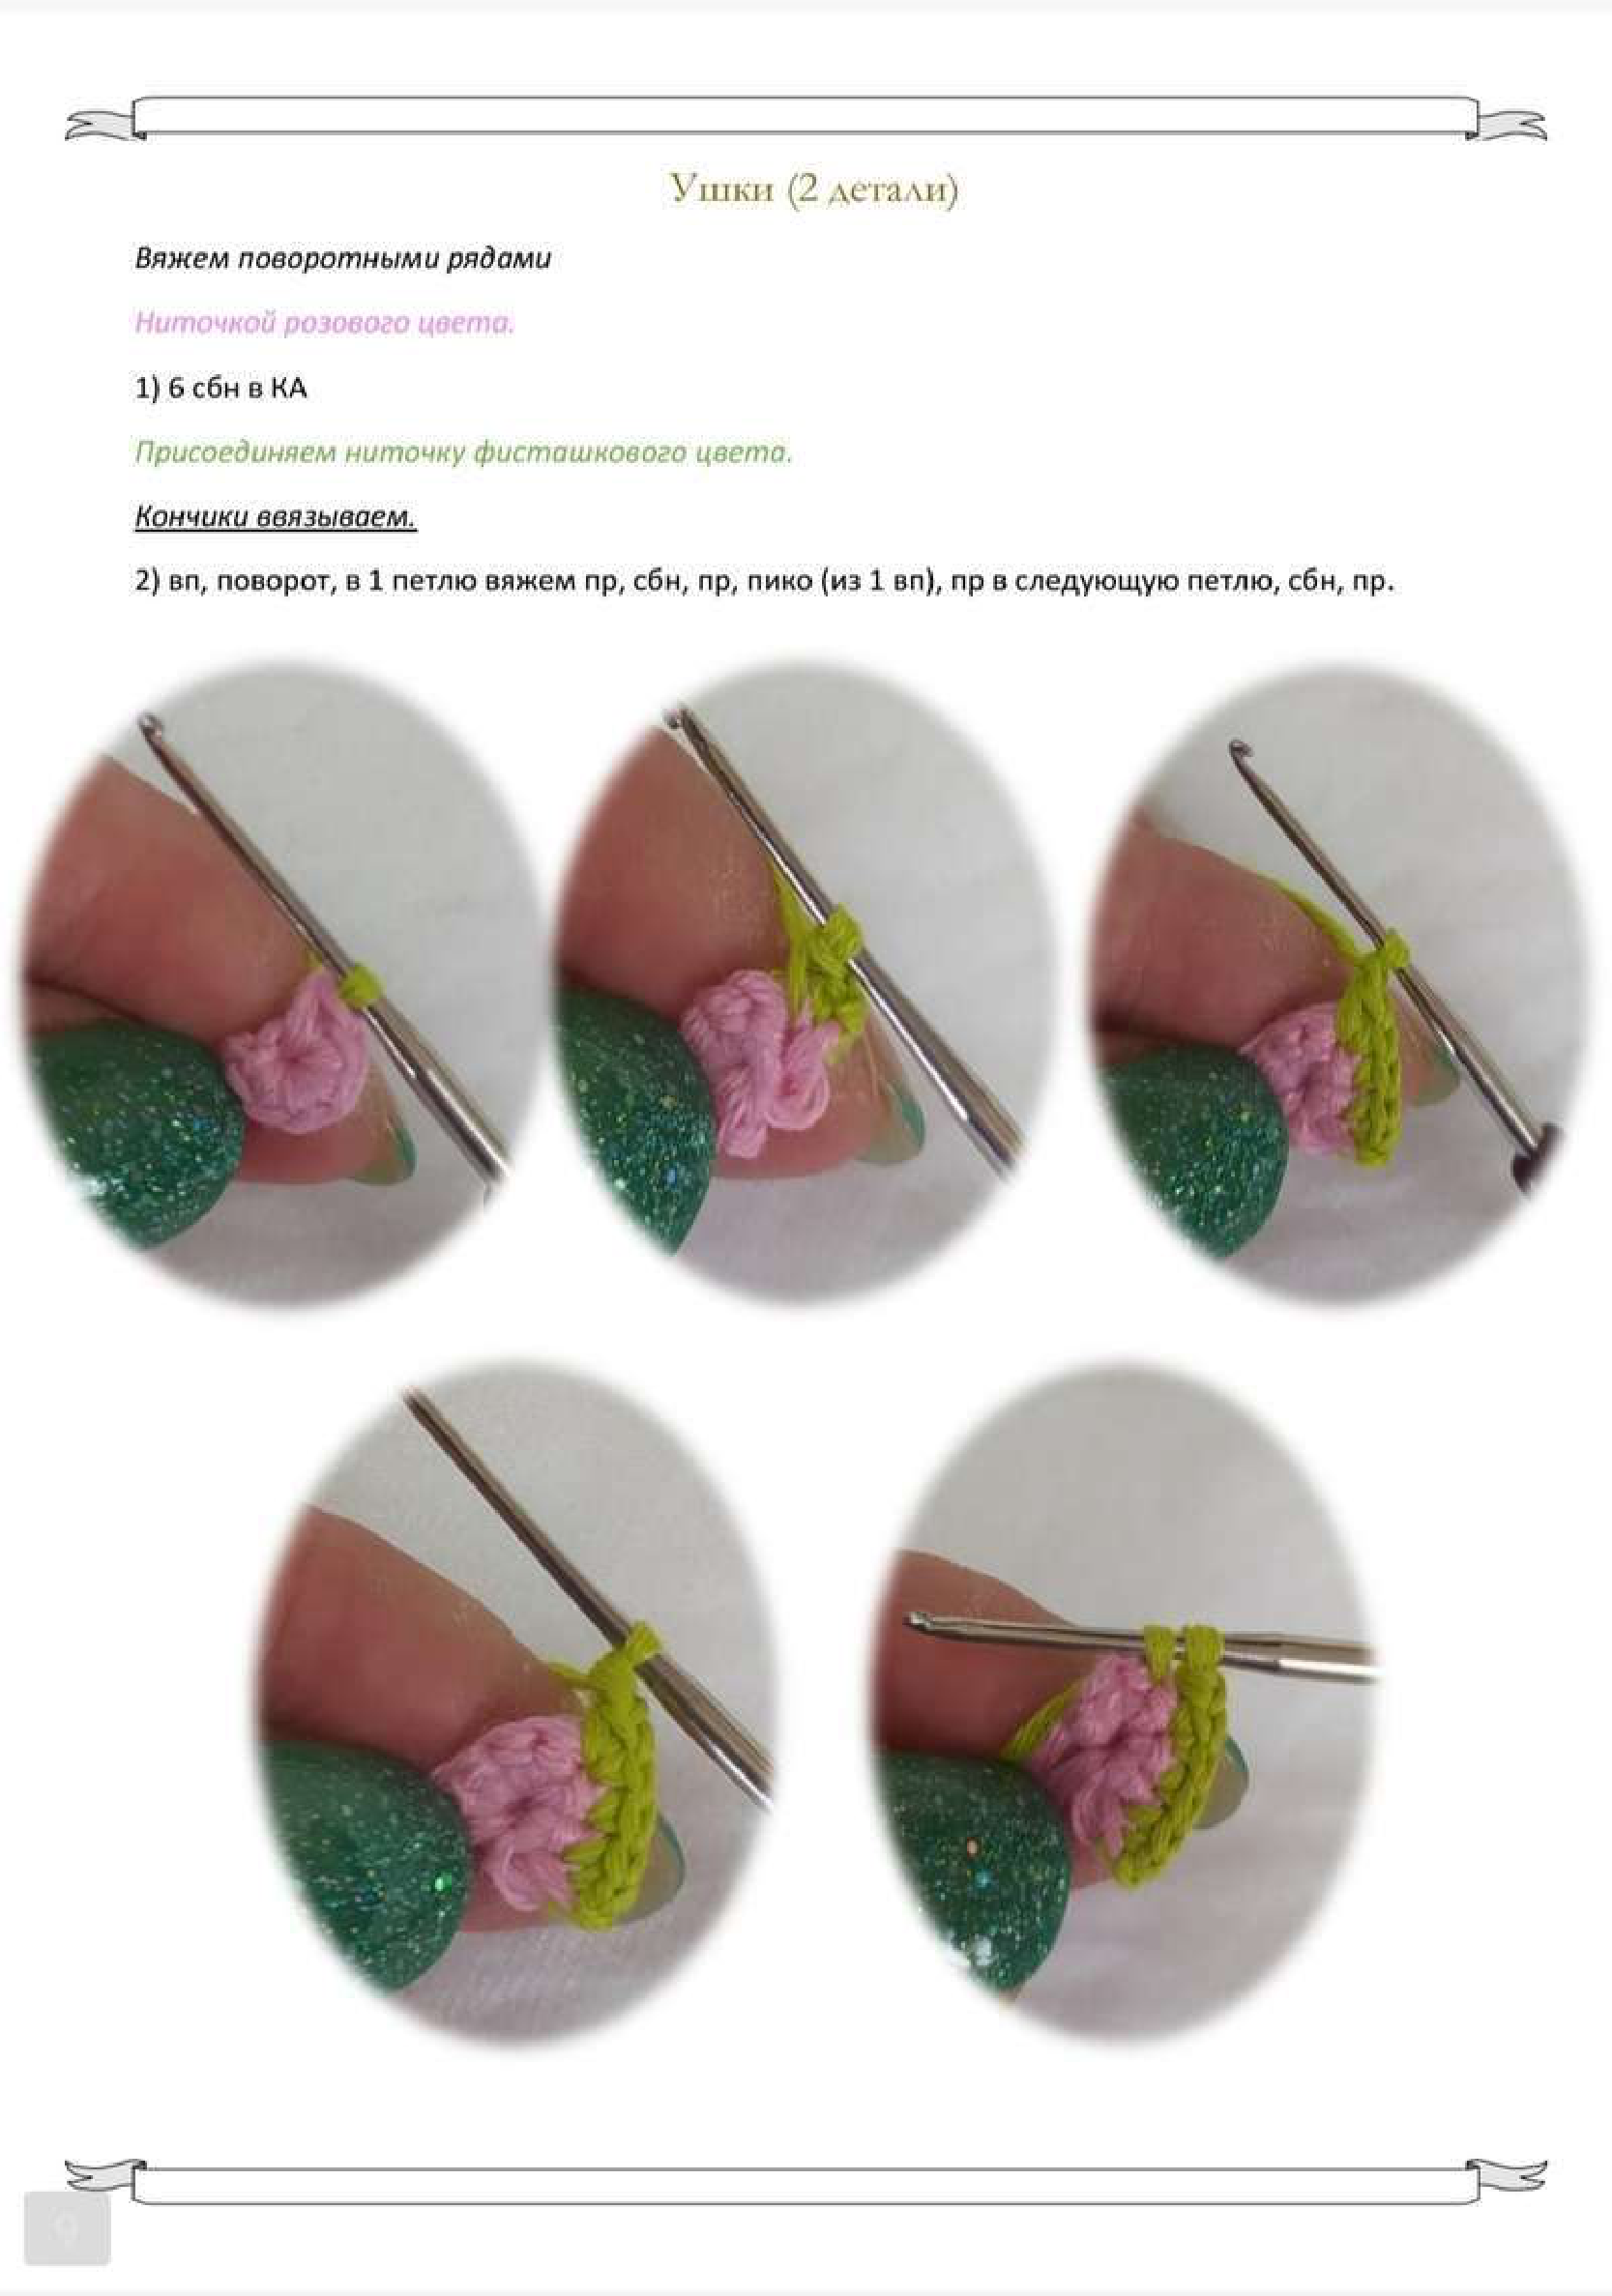
Ears (Make 2)
Crochet in turning rows.
With pink yarn.
- 6 sc in a Magic Ring (6).
Join pistachio-colored yarn. Weave in the ends of the pink yarn securely.
- Chain 1, turn your work. In the 1st stitch, crochet 1 inc, 1 sc, 1 inc. Then make a picot stitch (ch 1, sl st into the same stitch). In the next stitch, crochet 1 inc, 1 sc, 1 inc.
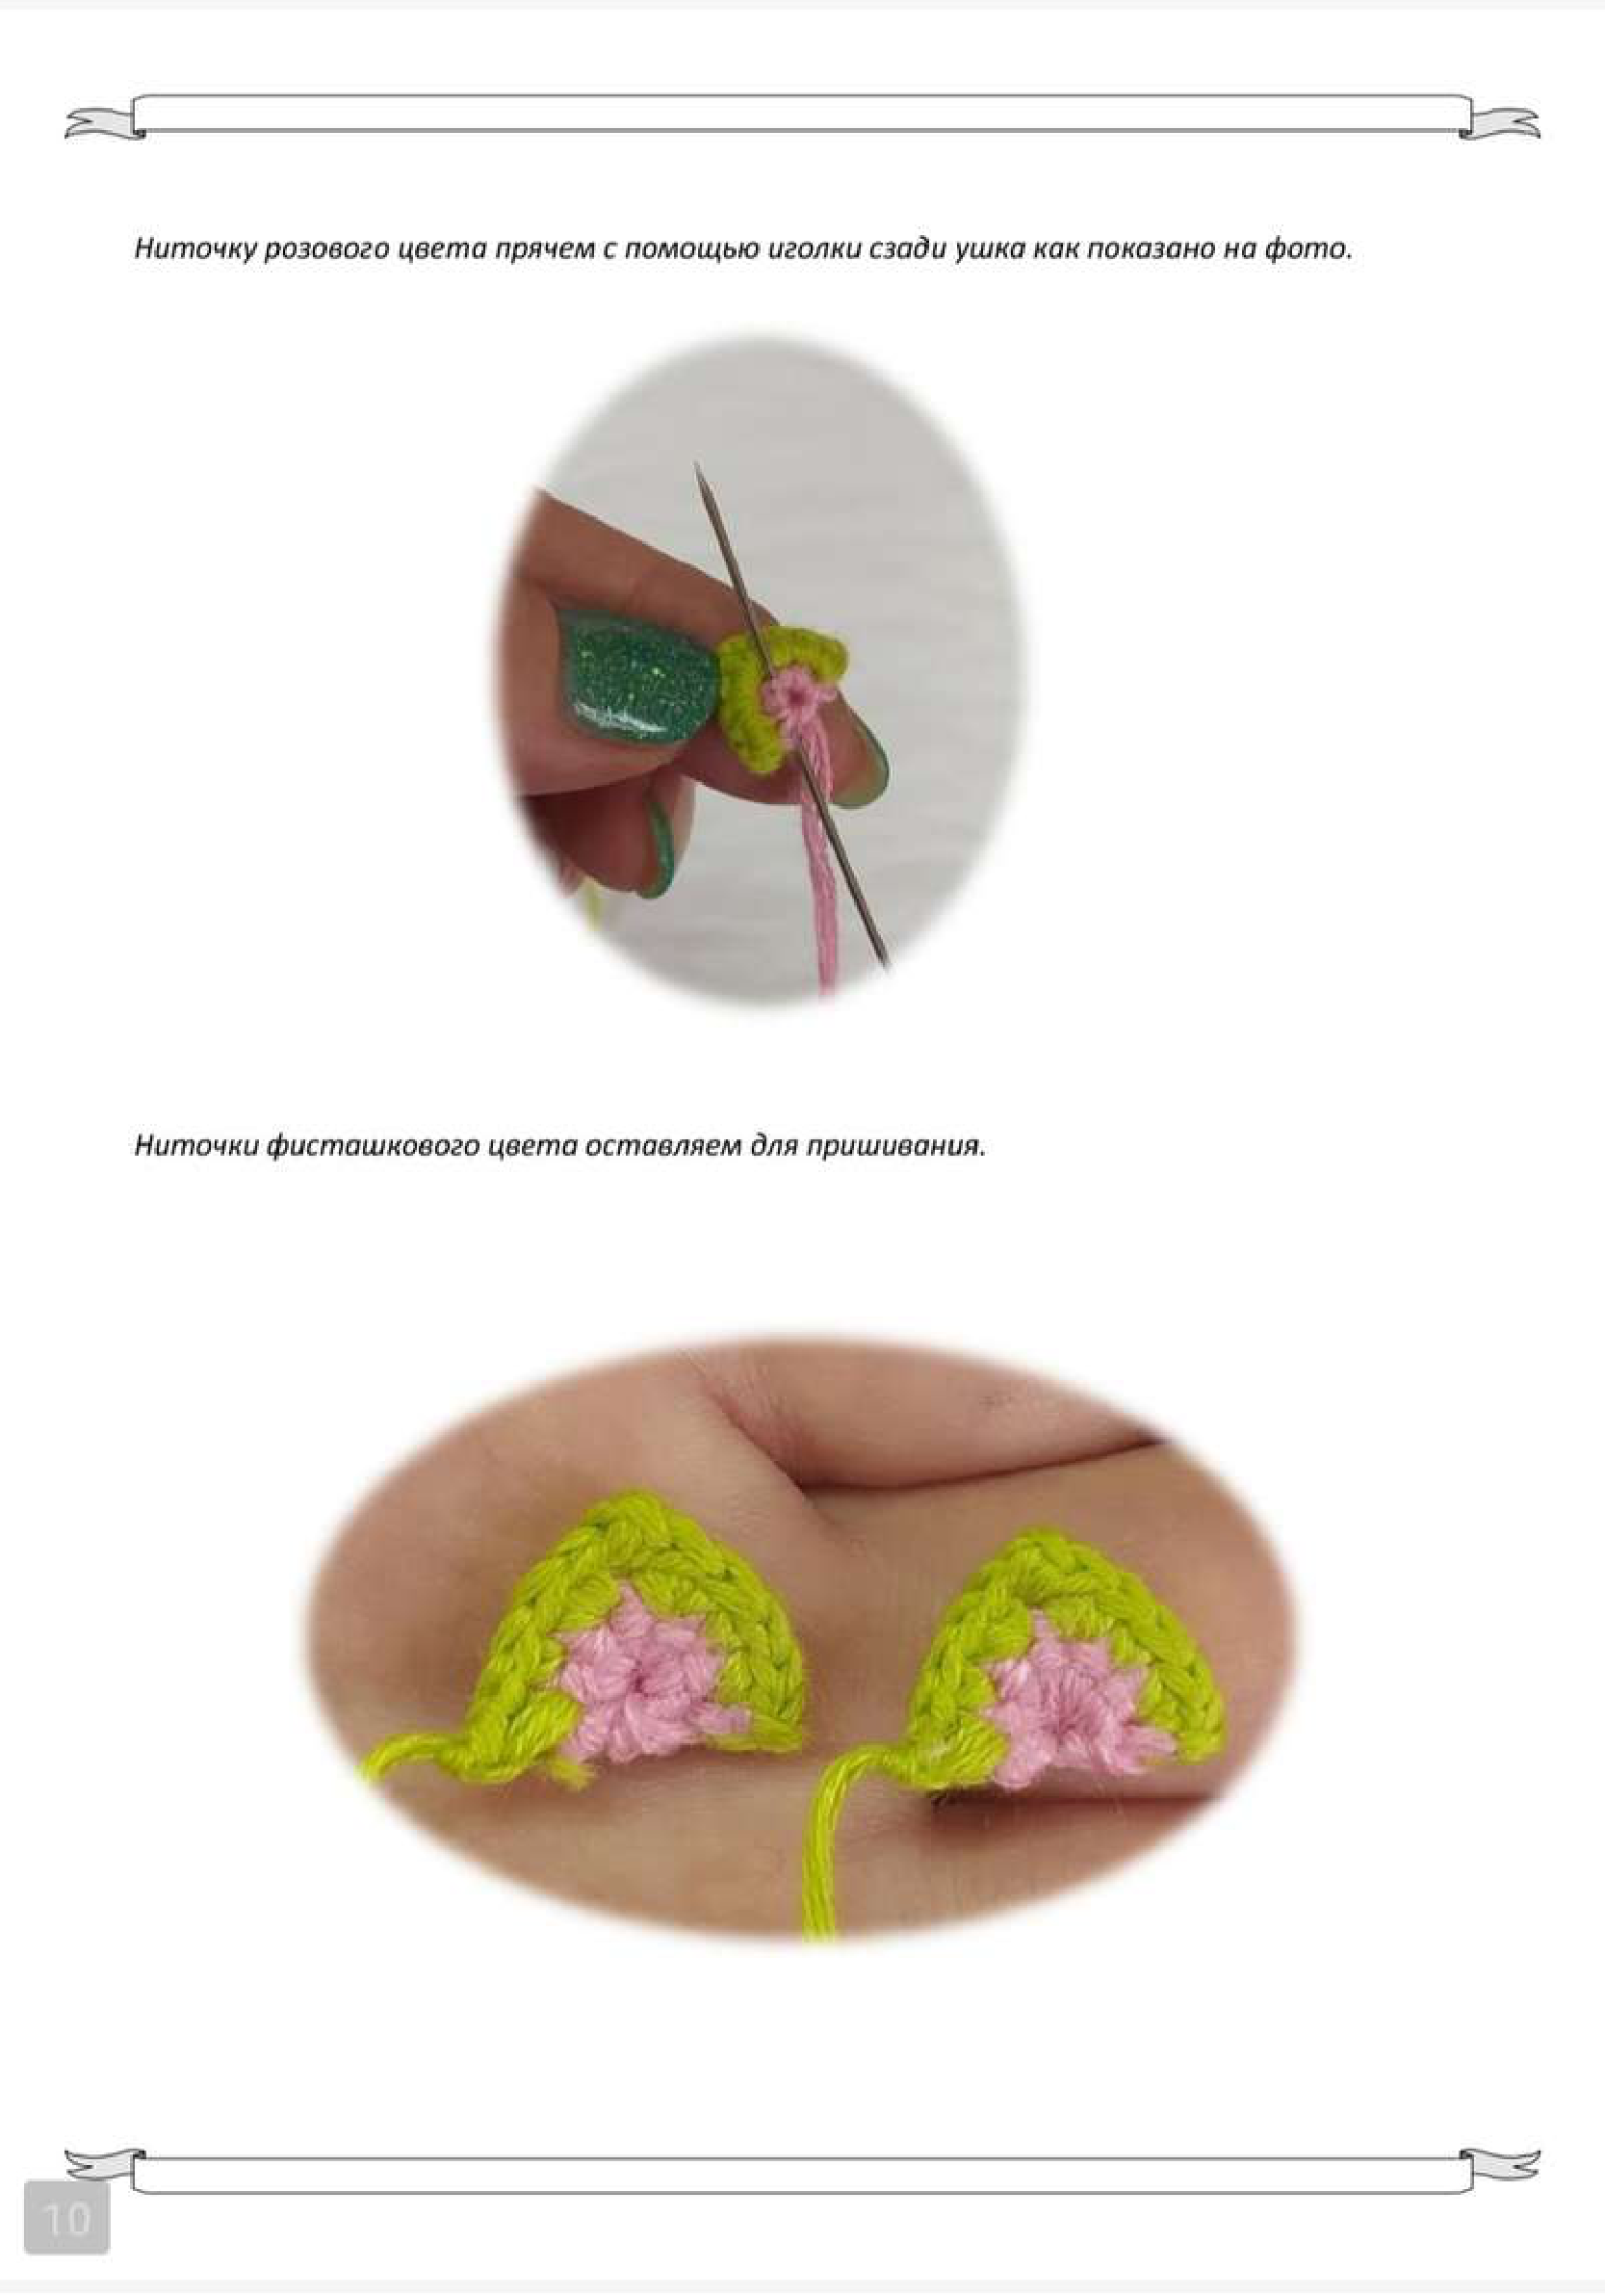
Hide the pink yarn tail using a needle behind the ear, as shown in the photo. Leave a long tail of the pistachio-colored yarn for sewing the ear onto the head.
Finishing Touches
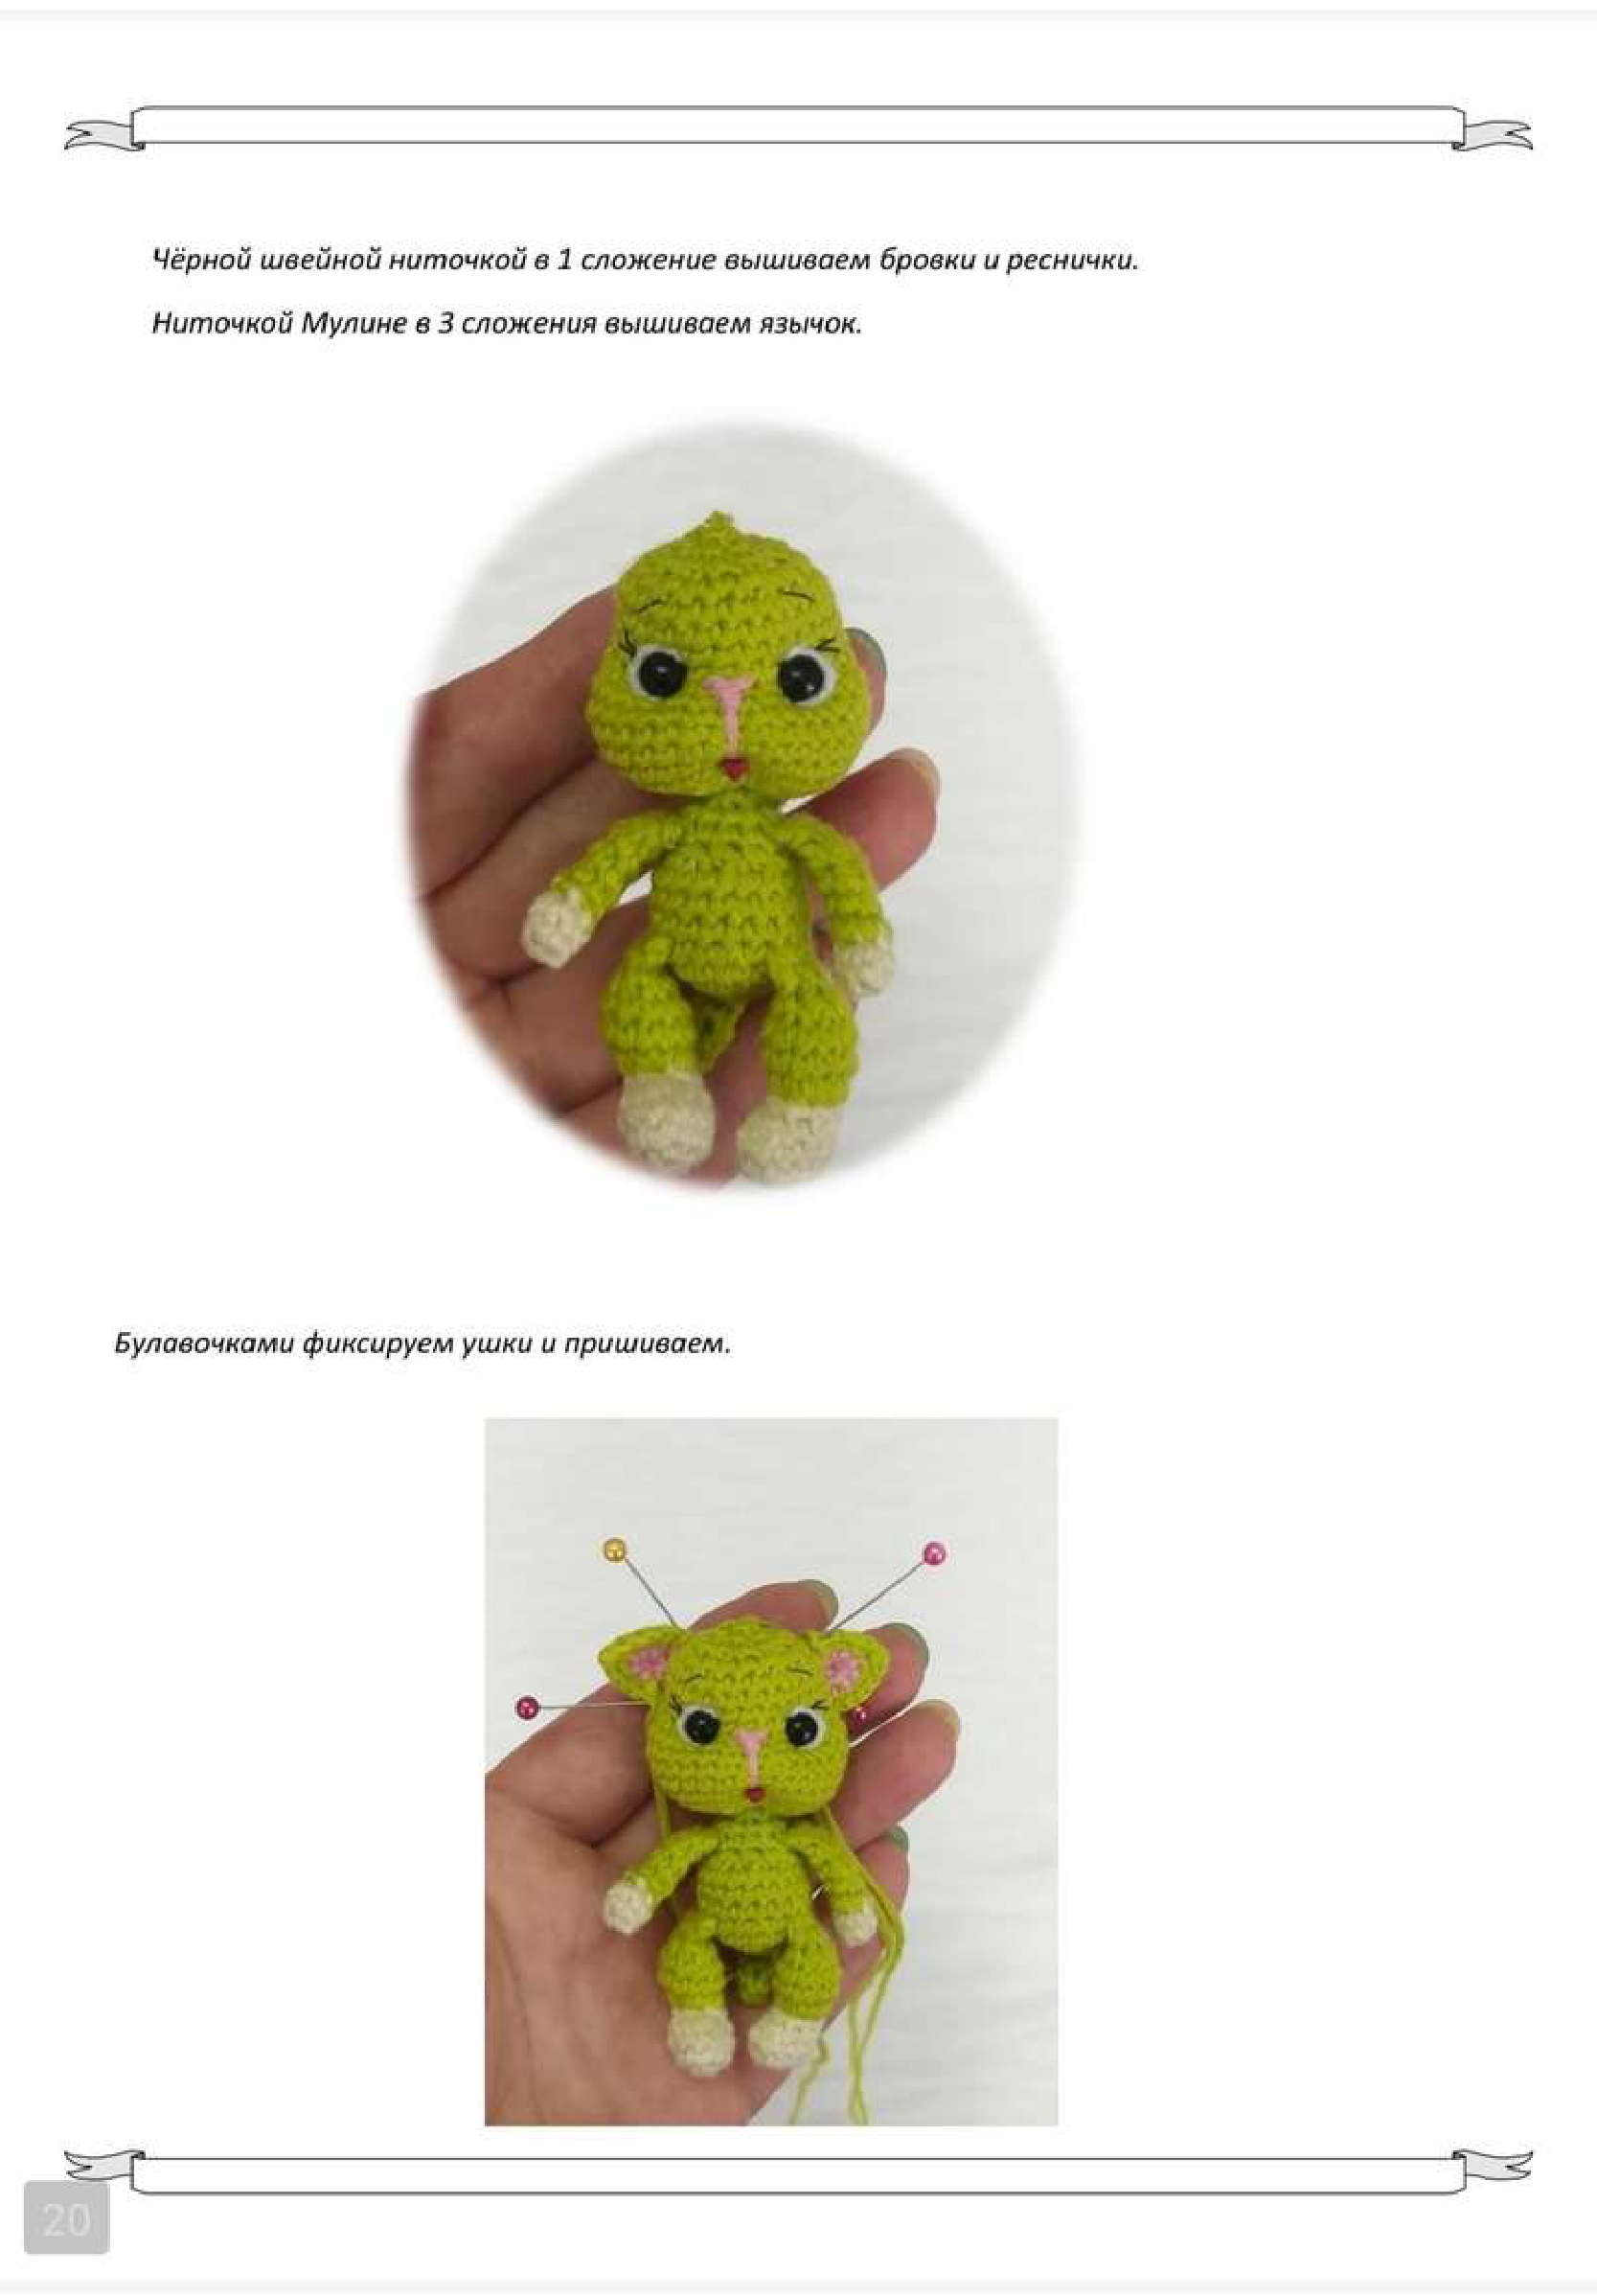
- Embroider delicate eyebrows and eyelashes using a single strand of black sewing thread.
- Embroider a cute little tongue with 3 strands of mouline thread just below the nose/mouth area.
- Position the ears on top of the head using pins to find the perfect placement and symmetry.
- Sew the ears securely onto the head using the long pistachio yarn tails you left earlier.
Congratulations! You’ve successfully crocheted your adorable Avocado Cat!
We hope you enjoyed making this pattern. Share your finished projects with us – we’d love to see your unique Avocado Cat creations!