Cute Amigurumi Cat Free Pattern
Crochet a Purr-fect Pal: The Adorable Master Cat Pattern!
Welcome to Crochetto, where creativity purrs to life! Are you ready to embark on a delightful crochet adventure? We’re thrilled to bring you the enchanting Master Cat pattern, a charming project perfect for creating a cuddly companion. This pattern is designed to be clear and enjoyable, guiding you step-by-step to bring your very own adorable feline friend to life. Whether you’re making a gift for a loved one or a new addition to your own collection, this crochet cat is sure to bring a smile to anyone’s face. Let’s gather our supplies and start crocheting!
Abbreviations and Stitches Used
- SC: Single Crochet
- MR: Amigurumi Ring (also known as Magic Ring or Magic Circle)
- INC: Increase (make two single crochet stitches in the same stitch)
- SL ST: Slip Stitch
- CH: Chain Stitch
- DEC: Decrease (single crochet two stitches together)
- HDC: Half Double Crochet
- DTR: Double Treble Crochet (also TrC in some US terms)
- Bobble: Work 4 or 6 Double Crochet stitches into the same stitch, then yarn over and pull through all loops on hook to close.
Materials You’ll Need
- Plush yarn of your choice
- 4mm crochet hook
- Yarn needle for sewing and weaving in ends
- Scissors
- Safety eyes (10-12mm, choose based on desired look)
- Embroidery thread for facial details (nose, mouth, whiskers)
Customizing Your Master Cat: Design Variations
One of the joys of this pattern is its versatility! The following are simply suggestions for altering your cat’s appearance, allowing you to create a truly unique amigurumi friend. Feel free to experiment with these ideas or come up with your own creative twists!
- Standard Pattern: Follow the main instructions for a classic look.
- Larger Size with Intertwining: Consider using larger eyes (e.g., 12mm), Type 3 ears, and hind legs made with a 6 DC bobble for a bigger, bolder cat.
- Shortened Head: Adjust by modifying or skipping Rounds 5-6. This can pair well with 10mm eyes and no eye tightening.
- Extended Muzzle: Repeat Round 2 for a longer snout. This can be combined with 12mm eyes, no eye tightening, an extended tail, and Type 3 ears.
- Eye Placement and Tightening: Experiment with eye placement (suggested between the physical Rounds 3-4 of the head, 6 stitches apart) and whether to add eye tightening for different expressions.
Let’s Begin: Head and Body
We’ll start by crocheting the head and body in one piece, working in continuous rounds unless otherwise specified. Use a stitch marker to keep track of your rounds.
- Start with 6 SC in a MR (6)
- 6 INC (12)
- (SC, INC) x 6 (18)
- (2 SC, INC) x 6 (24)
- Rounds 5-6: 24 SC (2 rounds)
- (2 SC, DEC) x 2, 16 SC (22)
- 14 SC, Bobble, 3 SC, Bobble, 3 SC (22)
(Eyes are typically placed between the physical rounds 3 and 4 of the head, about 6 stitches apart, after this round or as you prefer.) - (SC, INC) x 5, 12 SC (27)
- 27 SC
- (2 SC, INC) x 5, 12 SC (32)
- Tail: From the current stitch, CH 10. Starting from the second chain from the hook, work 9 SC along the chain. Continue working on the main body from the next stitch.
- Rounds 12-13: 32 SC (2 rounds)
- (2 SC, DEC) x 5, 12 SC (27)
- 19 SC, Bobble, 6 SC, Bobble (27)
- SC, (SC, DEC) x 3, continue past the tail base, (SC, DEC) x 2, 12 SC (24)
- 24 SC
- (2 SC, DEC) x 6 (18)
- (SC, DEC) x 6 (12)
- 6 DEC. Pull opening tight to close. Cut yarn and weave in the tail.
Designer’s Note: If you found the tail attachment a bit tricky and ended up with 22-23 SC in Round 17, don’t worry! It’s perfectly fine. Just continue with the pattern, and when it’s time, pull the final opening tight. This minor deviation will not critically affect your finished cat.
Ears
You have two options for your cat’s ears. Position them on top of the head, approximately 2 rounds above the eyes and 2-3 SC distance apart. Work these stitches into the head directly where you want the ears to be.
First Type of Ears:
Into the chosen stitch on the head: 2 CH, then work DTR, DC, and 3 CH into the same stitch. Finish with a SL ST into the same stitch.
Second Type of Ears:
Attach yarn to the head where you want the ear to begin. Into the same stitch: SC. Into the next stitch: HDC, DTR, HDC, and CH 1. Into the next stitch: SC. Finish with a SL ST. (This ear uses 3 stitches on the head in total. Hold the toy facing you as you work.)
Optional Legs
If you’d like to add small sewn-on legs to your cat, here’s a simple pattern:
- Start with 6 SC in a MR (6)
- 6 INC (12)
- Work 1-2 rounds of 12 SC.
Make four of these, stuff lightly, and sew them to the underside of your cat’s body.
Finishing Touches
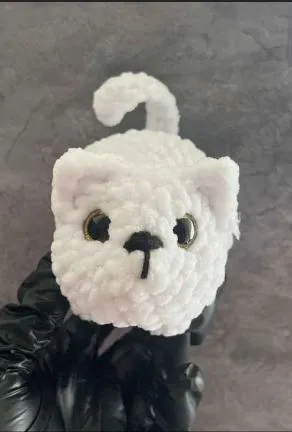
Once your Master Cat is crocheted, it’s time to bring its personality to life! Securely attach the safety eyes, making sure they are symmetrical. Use embroidery thread to stitch on a charming nose, a subtle mouth, and maybe some playful whiskers. You can also embroider eyebrows for extra expression!
Take a moment to admire your handiwork. You’ve created a truly special amigurumi cat!
We hope you thoroughly enjoyed creating your Master Cat! Nothing makes us happier at Crochetto than seeing your beautiful handmade creations. Please share your finished cats with us on social media! Tag @Crochetto and use the hashtag #CrochettoMasterCat so we can admire your work and celebrate your crafting success. Happy crocheting, and we look forward to inspiring your next project!