Easy Crochet Cuddly Hamster Amigurumi!
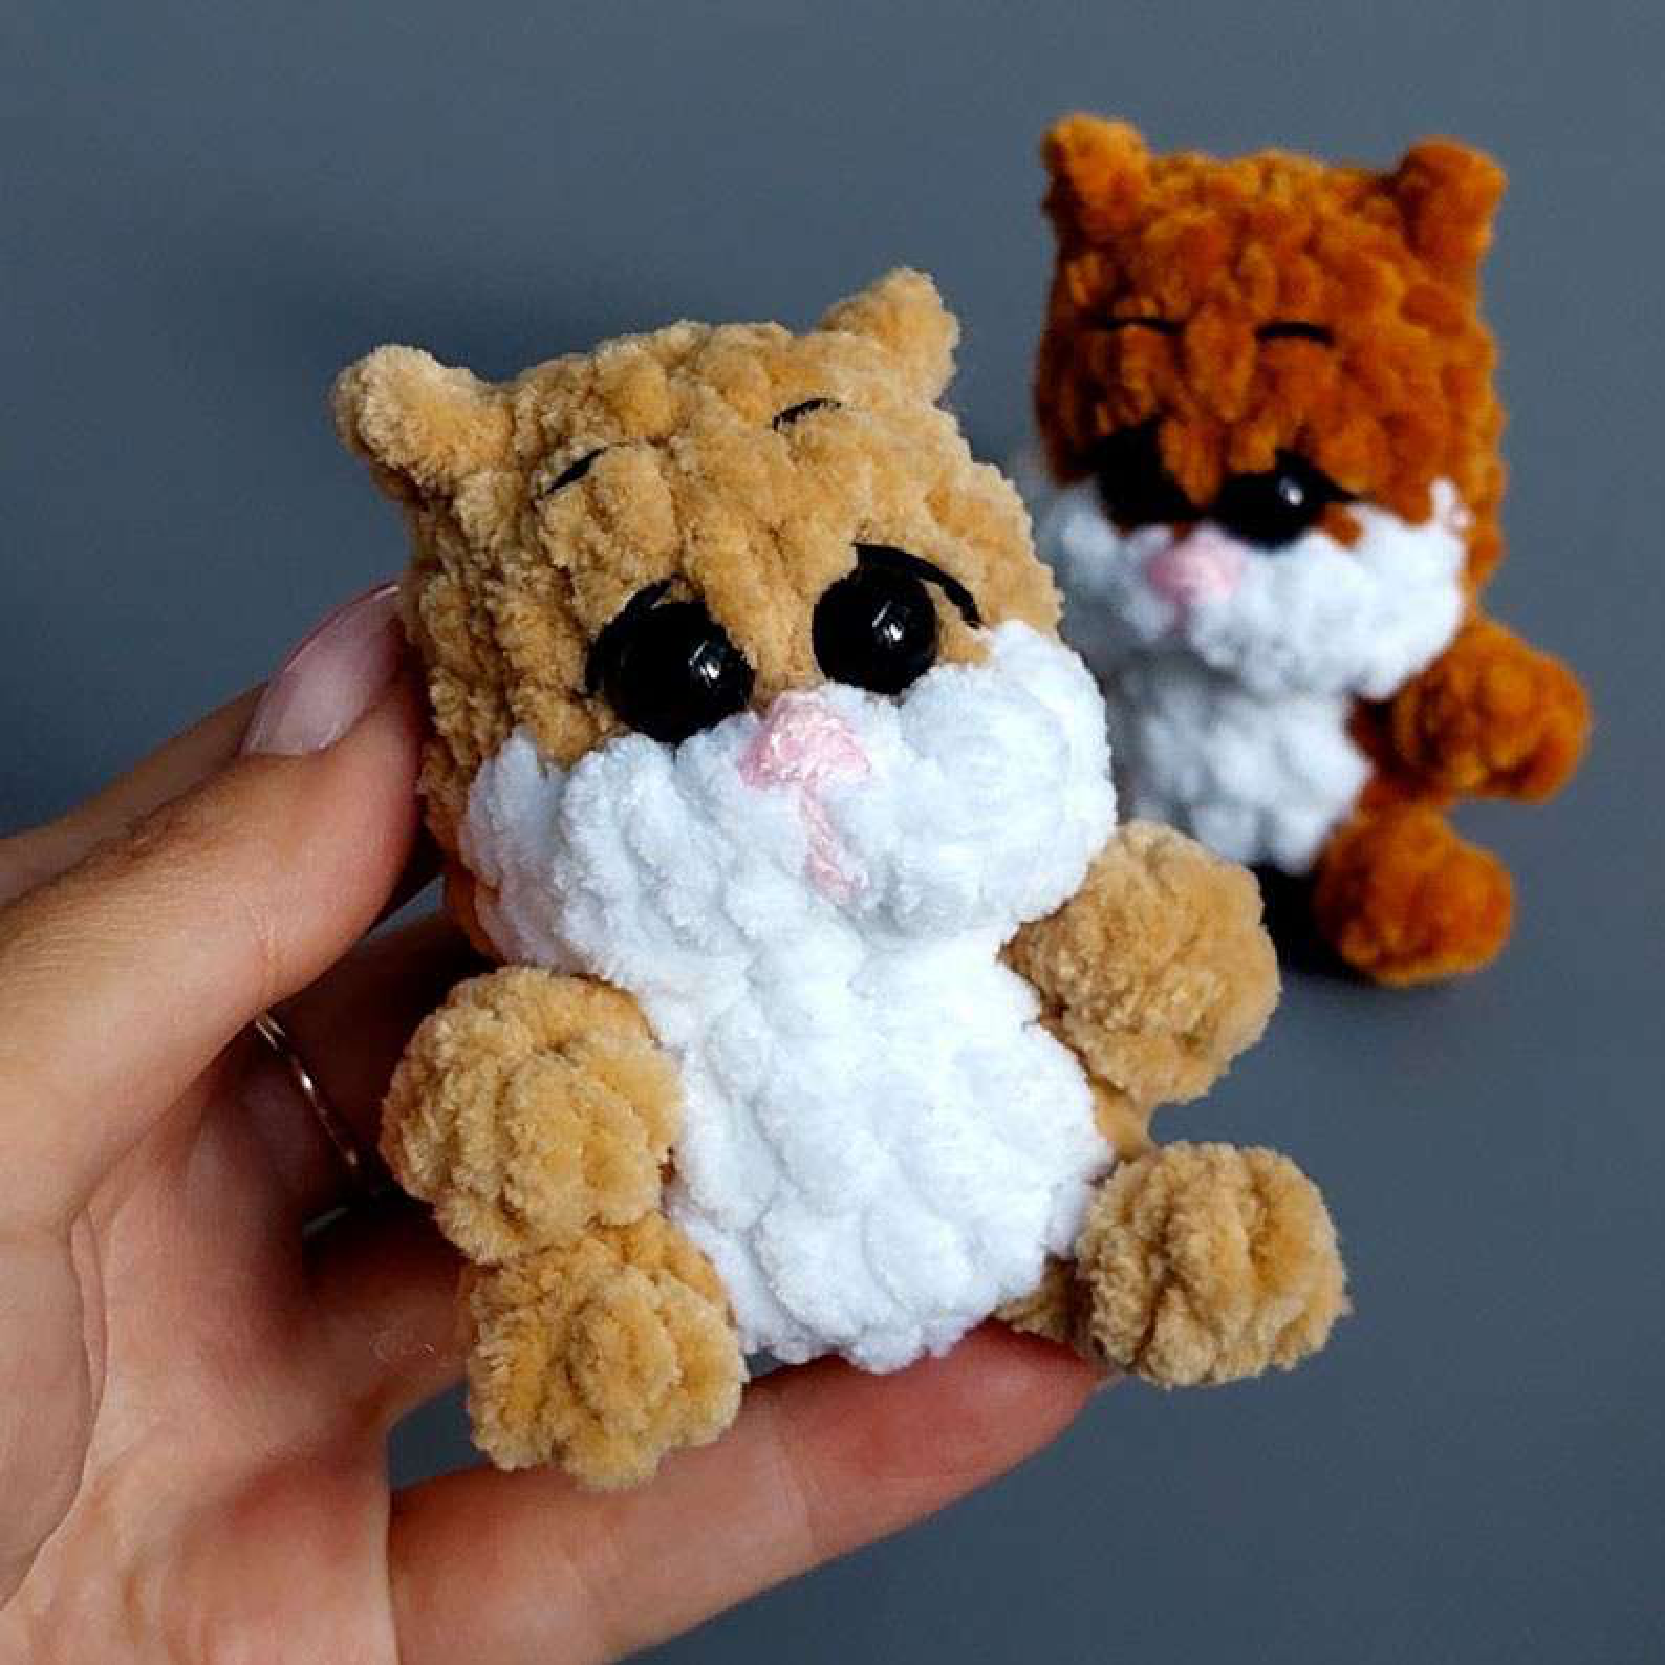
Get ready to crochet the most adorable little hamsters! This easy-to-follow pattern will guide you through creating a charming amigurumi friend, perfect for gifts or to add a touch of cuteness to your home. We’ll be using plush yarn for that extra huggable feel. Let’s grab our hooks and get started!

Materials You’ll Need
- Plush yarn (120m/100g density) – Choose your main color (brown, grey) and a contrasting color (white for belly).
- Crochet hook: 3.75 mm
- Polyester fiberfill (stuffing)
- Tapestry needle (for sewing and weaving in ends)
- Stitch marker
- Safety eyes: 10 mm
Abbreviations
Familiarize yourself with these common crochet terms:
- sc – single crochet
- inc – increase (2 sc in one stitch)
- dec – decrease (single crochet 2 stitches together)
- ch – chain stitch
- sl st – slip stitch
- dc – double crochet
- hdc – half double crochet
- Sh (Shell/Cluster) – crochet into one stitch with one top: 4 dc for legs and 3 dc for arms. (This creates a textured bobble or cluster)
Special Stitch Explained: Sh (Shell/Cluster)
For Legs (4dc cluster): Yarn over, insert hook into stitch, yarn over, pull up loop, yarn over, pull through 2 loops (2 loops on hook). Repeat 3 more times in the same stitch (5 loops on hook). Yarn over, pull through all 5 loops on hook. This forms a bobble-like shape.
For Arms (3dc cluster): Yarn over, insert hook into stitch, yarn over, pull up loop, yarn over, pull through 2 loops (2 loops on hook). Repeat 2 more times in the same stitch (4 loops on hook). Yarn over, pull through all 4 loops on hook.
Let’s Start Crocheting!
Body and Head (One Piece)
Important: Stuff your hamster as you go to get a nice, firm shape. We’ll start with your main color (brown/grey).
-
- Round 1: Make a magic ring, then crochet 8 sc into the ring. (8 stitches)
- Round 2: This round creates the first set of increases and the legs!
- (inc) x 3 (using main color)
- First Leg: Chain 3. Starting from the 2nd chain from your hook, work a Sh (4dc cluster). Then sl st into the base of the stitch on the magic ring where you would have normally done the next sc. Sl st into the *next* available stitch on the magic ring.
- Change to white yarn.
- (inc) x 2 (using white yarn)
- Change back to main color yarn.
- Second Leg: Chain 3. Starting from the 2nd chain from your hook, work a Sh (4dc cluster). Then sl st into the base of the stitch on the magic ring where you would have normally done the next sc. Sl st into the *next* available stitch on the magic ring.
- (inc) x 3 (using main color)
- Tail: Chain 2. Sl st into the base of the current stitch.
- Round 3:
- 6 sc (main color)
- 4 sc (white color)
- 6 sc (main color)
- Round 4:
- 6 sc (main color)
- 5 sc (white color)
- 5 sc (main color)

Forming the special stitches for the limbs.
-
- Round 5: This round creates the arms and decreases the body.
- (dec) x 3 (using main color)
- First Arm: Chain 4. Starting from the 2nd chain from your hook, work a Sh (3dc cluster). Then work 2 sl st along the remaining chains. Sl st into the base of the stitch on the body where you would have normally done the next sc.
- (dec) x 3 (Work these decreases using white yarn. For the very last decrease of this set, the first stitch will be white, and the second stitch will be main color to transition.)
- Second Arm: Chain 4. Starting from the 2nd chain from your hook, work a Sh (3dc cluster). Then work 2 sl st along the remaining chains. Sl st into the base of the stitch on the body where you would have normally done the next sc.
- (dec) x 2 (using main color)
- Round 6:
- (inc) x 3 (main color)
- (inc) x 3 (white color)
- (inc) x 2 (main color)
- Round 5: This round creates the arms and decreases the body.

Observe the shape taking form after a few rounds.
- Round 7:
- 6 sc (main color)
- (inc) x 2
- 2 sc
- (inc) x 2 (all white color)
- 4 sc (main color)
- Round 8:
- 6 sc (main color)
- (dec) x 2
- 2 sc
- (dec) x 2 (all white color)
- 4 sc (main color)
You no longer need the white yarn. Cut it and fasten off. Continue with the main color. - Round 9-10: 16 sc (2 rows) (16 stitches per row)
- Round 11: This round creates the ears and shapes the head.
- (2 sc, dec)
- (sc, Ear: Chain 2. Work 1 hdc into the 2nd chain from the hook. Sl st into the base of the stitch on the body. , sc, dec)
- (2 sc, dec)
- (2 sc, Ear: Chain 2. Work 1 hdc into the 2nd chain from the hook. Sl st into the base of the stitch on the body. , dec)
- Round 12: (dec) x 6 (6 stitches)
Fasten off, leave a long tail for sewing. Use your tapestry needle to weave the tail through the front loop of each remaining stitch and pull tight to close the opening. Weave in the end.
Finishing Touches
- Eyes: Insert the 10 mm safety eyes between Rows 9 and 10 of the head, with a distance of 3-4 stitches between them. Make sure they are securely fastened from the inside.
- Nose: Using pink embroidery floss or thin yarn, embroider a small triangular nose directly below the eyes.
- Embellishments: With black embroidery floss, carefully embroider small eyebrows above the eyes and outline the eyes for a more defined look.

The adorable face with embroidered details.
And there you have it! Your very own cute crocheted hamster. We hope you enjoyed making this pattern.

Pattern designer: Galina Burlakova. You can find more of her wonderful patterns!