
Fly Into Fun! The Adorable Bat Crochet Pattern You Need
Introduction: Your Next Amigurumi Adventure Awaits!
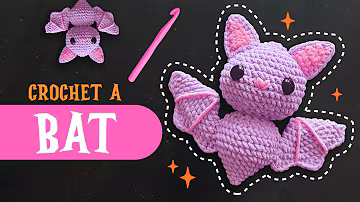
Are you ready to dive into a charming and slightly spooky crochet project that’s perfect for Halloween, gifting, or simply adding a touch of adorable whimsy to your home? Look no further! This comprehensive guide will walk you through creating your very own amigurumi bat. Whether you’re a seasoned crocheter looking for a fun new challenge or a beginner eager to tackle your first three-dimensional project, our detailed bat crochet pattern is designed to be clear, engaging, and incredibly rewarding.
Forget the scary stereotypes; our little friend is designed to be irresistibly cute, with big eyes and a friendly demeanor. This article provides not just the step-by-step instructions for the bat crochet pattern but also essential tips, material insights, and ideas for customizing your creation. We’ll cover everything from selecting the perfect yarn to mastering the stitches, ensuring your crocheting journey is smooth and enjoyable. Get your hooks ready, because by the end of this tutorial, you’ll have a delightful, handmade bat ready to hang around your home!

Why Crochet a Bat? More Than Just a Halloween Decoration
Crocheting can be incredibly therapeutic, and bringing a little creature to life with your own hands offers immense satisfaction. A crochet bat, specifically, offers a unique blend of cute and quirky, making it a standout project. This particular bat crochet pattern is surprisingly versatile and can fit into various themes.
Perfect for Halloween & Beyond
While often associated with Halloween, our amigurumi bat transcends seasonal boundaries. Imagine a tiny, adorable bat hanging from your rearview mirror, peeking out of a bookshelf, or perched on a plant. They make fantastic, unique gifts for animal lovers, especially those who appreciate the less-loved creatures of the night. Plus, making your own decorations adds a personal touch to holiday festivities. This bat crochet pattern can be customized with different colors to suit any aesthetic.
Beginner-Friendly Amigurumi Project
Amigurumi, the Japanese art of crocheting small stuffed yarn creatures, often seems daunting to newcomers. However, this bat crochet pattern is structured to introduce fundamental amigurumi techniques like the magic ring, single crochet increases, and invisible decreases in an accessible way. The components are relatively small, allowing you to see progress quickly, which is incredibly motivating. It’s a fantastic project to build confidence before moving on to more complex amigurumi designs.
A Gift That Delights
Handmade gifts carry a special sentiment. A crocheted bat, made with love and care, is a thoughtful present for friends, family, or even as a unique party favor. You can personalize each bat by choosing specific yarn colors, adding unique embellishments, or even embroidering tiny initials. It’s a gift that truly shows effort and affection, guaranteed to bring a smile to anyone’s face. This adorable bat crochet pattern is sure to be a hit!
Before You Begin: Gathering Your Supplies
Preparation is key to a smooth crocheting experience. Having all your materials ready before you start will prevent interruptions and allow you to fully immerse yourself in the creative process of this bat crochet pattern. Here’s a detailed look at what you’ll need:
Essential Materials for Your Bat Crochet Pattern
- Yarn: You’ll need a main color (e.g., black, grey, dark brown, or even a fun purple!) for the body and head, and a contrasting color (e.g., pink, light grey, or even glow-in-the-dark yarn for extra spooky fun!) for the wing details and inner ear. Acrylic yarn is often recommended for amigurumi due to its durability, affordability, and wide color range.
- Crochet Hook: Choose a hook size appropriate for your chosen yarn. For amigurumi, it’s generally recommended to go down one or two hook sizes from what the yarn label suggests. This creates a tighter fabric, preventing stuffing from showing through. A common choice for worsted weight yarn is a 3.0mm to 4.0mm hook.
- Stuffing: Polyfill (polyester fiberfill) is the most common choice, providing a soft, resilient fill. You can also use scrap yarn or fabric scraps for a more eco-friendly approach, though polyfill gives the smoothest finish.
- Safety Eyes: These plastic eyes come with a backing that secures them in place, making them safe for children’s toys. The size will depend on your bat’s finished size, but 6mm to 9mm are typical for this type of amigurumi.
- Darning Needle (or Yarn Needle): Essential for weaving in ends and sewing your amigurumi pieces together neatly.
- Stitch Markers: In amigurumi, you often work in continuous rounds, making stitch markers invaluable for keeping track of the beginning of your rounds. Simple plastic locking markers or even a contrasting piece of yarn can work.
- Scissors: For cutting yarn tails.
Choosing the Right Yarn (Weight, Type, Color)
The yarn you choose significantly impacts the final look and size of your crochet bat. For this specific bat crochet pattern, a worsted weight (Aran/10-ply) or DK (light worsted/8-ply) yarn is ideal. Acrylic is a great starting point, but don’t shy away from experimenting with cotton for a denser feel or even velvet yarn for a super soft, plush bat. When it comes to colors, while traditional bat colors are dark, feel free to unleash your creativity! Imagine a bright pink bat, a mystical purple one, or even a rainbow bat!
Selecting Your Crochet Hook
As mentioned, choosing a hook size slightly smaller than what’s recommended for your yarn is crucial for amigurumi. This creates tight stitches, preventing stuffing from escaping and giving your bat a firm, shapely appearance. If your stitches are too loose, your bat might look lumpy or sparse.
Safety Eyes vs. Embroidered Eyes
While safety eyes provide a classic, expressive look, if your amigurumi bat is intended for very young children (under 3), embroidered eyes are a safer alternative to prevent choking hazards. You can easily embroider simple black circles or sleepy lines using black embroidery floss.
Other Indispensable Tools
Beyond the basics, a little bit of fabric glue can help secure knot ends inside your amigurumi for extra durability. Some crafters also like using small weights (like poly pellets) in the base of their amigurumi to make them sit upright, though this isn’t necessary for this particular bat crochet pattern.
Mastering Amigurumi Basics: Essential Skills
Before we dive into the specific stitches for this bat crochet pattern, let’s briefly review some fundamental techniques common in amigurumi. If you’re new to these, consider practicing them a few times before starting your bat.
Understanding Key Crochet Stitches
- Magic Ring (MR): This creates a tight, adjustable starting loop, essential for seamless amigurumi. It eliminates the hole you’d typically get with a chain-2 start.
- Single Crochet (SC): The most common stitch in amigurumi, creating a dense fabric.
- Increase (Inc): Working two single crochet stitches into one stitch from the previous round. This expands the piece.
- Invisible Decrease (Inv Dec): A technique specifically used in amigurumi to reduce stitches without leaving a noticeable bump or gap. This is vital for a smooth finish on your bat.
- Slip Stitch (SL ST): Used to join rounds or to finish off.
- Half Double Crochet (HDC) & Double Crochet (DC): Used for shaping the wings, adding height and dimension.
Pro Tip: The Invisible Decrease
The invisible decrease is a game-changer for amigurumi. Instead of inserting your hook through both loops as with a standard decrease, you insert it through the *front loop only* of the first stitch, then immediately through the *front loop only* of the next stitch. Yarn over, pull through both front loops. Yarn over, pull through both loops on the hook. This technique makes your decreases virtually undetectable, leading to a much cleaner finish for your bat crochet pattern. We’ll be using this extensively in the body and head!

Gauge & Tension (Importance for Amigurumi)
While not strictly necessary to achieve the general shape for this bat crochet pattern, understanding gauge and maintaining consistent tension is crucial for amigurumi. A tight, even tension ensures your stitches are compact, preventing stuffing from showing through. If your stitches are too loose, your bat might look floppy or lumpy. If you find your piece is significantly larger or smaller than expected, adjust your hook size accordingly.
Your Spooky-Cute Bat Crochet Pattern: Step-by-Step
Now for the fun part! We’ll break down this adorable bat crochet pattern into manageable sections: wings, body, head, and ears. Follow these detailed instructions to bring your amigurumi bat to life.

Part 1: Crafting the Bat Wings (Make 2)
The wings are arguably the most distinctive feature of our bat. You’ll create two identical pieces, shaping them with a combination of increases and varied stitch heights to achieve that classic bat wing silhouette. This section of the bat crochet pattern is particularly satisfying.
Starting the Foundation
- Round 1: Make a Magic Ring. Single Crochet (SC) 5 into the ring. (Total 5 SC)
- Round 2: Work 5 increases around (2 SC in each stitch). (Total 10 SC)
- Round 3: Pattern: [1 SC, 1 increase] repeat 5 times. (Total 15 SC)
- Round 4: Pattern: [2 SC, 1 increase] repeat 5 times. (Total 20 SC)
- Round 5: Pattern: [3 SC, 1 increase] repeat 5 times. (Total 25 SC)
- Round 6: Pattern: [4 SC, 1 increase] repeat 5 times. (Total 30 SC)
- Round 7: Pattern: [5 SC, 1 increase] repeat 5 times. (Total 35 SC)
- Join the round with a Slip Stitch (SL ST) and chain 1.
Shaping the Iconic Wing
This round is where the magic happens, giving your bat its signature wing shape by working through both layers of crochet.
- Shaping Round (Round 8):
- Fold the wing so the last stitch/seam is on the right side. You will now crochet through both layers simultaneously to join them and create the wing shape.
- Pattern:
- 2 Double Crochets (DC) in the first stitch.
- 1 DC in the next stitch.
- 1 Half Double Crochet (HDC) in the next.
- 1 SC in the next.
- Skip 1 stitch.
- 1 SL ST in the next.
- 1 SC in the next.
- 1 HDC in the next.
- 3 DC in the next (all in the same stitch).
- 1 HDC in the next.
- 1 SC in the next.
- Skip 1 stitch.
- 1 SL ST in the next.
- 1 SC in the next.
- 1 HDC in the next.
- 1 DC in the next.
- 2 DC in the last stitch.
- Chain 1, leave a long tail for sewing, and cut the yarn.
Adding Decorative Details
This step adds a touch of flair to your wings, giving them that classic skeletal bat wing look.
- Add Wing Details:
- Using a darning needle and your contrasting color yarn (e.g., pink), insert the needle from the top curve of the wing.
- Bring the needle back through the center of the magic ring.
- Repeat, bringing the yarn back through the magic ring and out a different spot on the back.
- Tie the two yarn tails together securely on the back of the wing and tuck them inside.
- Repeat: Make a second wing following the exact same steps.
Pro Tips for Perfect Wings
Ensuring your wings look symmetrical is key. Pay close attention to your stitch counts and consider using stitch markers liberally, especially during the shaping round. Blocking your wings lightly after completion can also help them lay flat and hold their shape better, giving your finished bat crochet pattern a polished look.
Part 2: Building the Bat Body
The body forms the main structure of your amigurumi bat. It starts small, gradually increases to create a rounded belly, and then decreases to form the neck base, ready for head attachment. This section of the bat crochet pattern is foundational.
Beginning the Base
- Round 1: Make a Magic Ring. SC 4 into the ring. (Total 4 SC)
- Join with a SL ST and chain 1.
- Round 2: Pattern: [1 SC, 1 increase] repeat 2 times. (Total 6 SC)
- Join with a SL ST and chain 1.
- Round 3: Work 6 increases around (2 SC in each stitch). (Total 12 SC)
- Join with a SL ST and chain 1.
Expanding the Shape
- Round 4: Pattern: [2 SC, 1 increase] repeat 4 times. (Total 16 SC)
- Join with a SL ST and chain 1.
- Round 5: Pattern: [7 SC, 1 increase] repeat 2 times. (Total 18 SC)
- Join with a SL ST and chain 1.
- Next Round (after 18 SC): Pattern: [2 SC, 1 increase] repeat 6 times. (Total 24 SC)
- Join with a SL ST and chain 1.
- Next Round (after 24 SC): Pattern: [3 SC, 1 increase] repeat 6 times. (Total 30 SC)
- Join with a SL ST and chain 1.
The Art of Decreasing & Stuffing
- Straight Rounds:
- Rounds 8-11: SC 30 in each round for 4 rounds. (Total 30 SC per round)
- Join with a SL ST and chain 1.
- Rounds 8-11: SC 30 in each round for 4 rounds. (Total 30 SC per round)
- Round 12: Pattern: [3 SC, 1 invisible decrease] repeat 6 times. (Total 24 SC)
- *Invisible Decrease:* Insert hook into the front loop of the first stitch, then immediately into the front loop of the next stitch. Yarn over, pull through both front loops. Yarn over, pull through both loops on hook.
- Join with a SL ST and chain 1.
- Stuff the body firmly with polyfill or scrap yarn. Ensure it’s evenly distributed for a smooth shape.
- Round 13 (Last Body Round): Work 12 invisible decreases around. (Total 12 SC)
- Join with a SL ST and chain 1. Leave a long tail for sewing and cut the yarn.
Stuffing Tip: Don’t be afraid to use a good amount of stuffing! A firmly stuffed amigurumi holds its shape better and feels more substantial. Use the back of your crochet hook or a chopstick to push stuffing into tight spots.
Part 3: Designing the Bat Head
The head is the most expressive part of your bat! We’ll craft a sphere, adding character with safety eyes and an embroidered nose. This section is key to the overall charm of your bat crochet pattern.
Foundation & Growth Rounds
- Round 1: Make a Magic Ring. SC 6 into the ring. (Total 6 SC)
- Join with a SL ST and chain 1.
- Round 2: Work 6 increases around. (Total 12 SC)
- Join with a SL ST and chain 1.
- Round 3: Pattern: [2 SC, 1 increase] repeat 4 times. (Total 16 SC)
- Join with a SL ST and chain 1.
- Round 4: Pattern: [1 SC, 1 increase] repeat 8 times. (Total 24 SC)
- Join with a SL ST and chain 1.
- Round 5: Pattern: [2 SC, 1 increase] repeat 8 times. (Total 32 SC)
- Join with a SL ST and chain 1.
- Round 6: Pattern: [7 SC, 1 increase] repeat 4 times. (Total 36 SC)
- Join with a SL ST and chain 1.
- Round 7: Pattern: [17 SC, 1 increase] repeat 2 times. (Total 38 SC)
- Join with a SL ST and chain 1.
- Round 8: Pattern: [1 increase, 18 SC] repeat 2 times. (Total 40 SC)
- Join with a SL ST and chain 1.
- Straight Rounds:
- Rounds 9-12: SC 40 in each round for 4 rounds. (Total 40 SC per round)
- Join with a SL ST and chain 1.
- Rounds 9-12: SC 40 in each round for 4 rounds. (Total 40 SC per round)
Creating the Facial Features (Eyes, Nose)
- Round 13: Pattern: [3 SC, 1 invisible decrease] repeat 8 times. (Total 32 SC)
- Join with a SL ST and chain 1.
- Round 14: Pattern: [2 SC, 1 invisible decrease] repeat 8 times. (Total 24 SC)
- Join with a SL ST and chain 1.
- Place Safety Eyes: Position safety eyes between rounds 9 and 10, about 7 stitches apart. Secure them firmly on the inside. Experiment with placement; slightly closer eyes can make your bat look cuter, while wider eyes can give it a more surprised expression.
- Embroider Nose: Using your contrasting yarn and a darning needle, embroider a small heart-shaped or triangular nose between the eyes, centered and about four stitches apart from each eye. Tie off and tuck in the ends securely.
Stuffing for a Full Look
- Stuff the head firmly. Ensure the stuffing is packed tightly and evenly, especially around the eyes, to prevent dimples.
- Round 15 (Last Head Round): Work 12 invisible decreases around. (Total 12 SC)
- Join with a SL ST and chain 1. Cut the yarn, leaving a long tail for sewing.
Part 4: Shaping the Bat Ears (Make 2)
The ears add another layer of cuteness to your amigurumi bat. Each ear is created from two panels – a main color and a contrasting inner ear – which are then crocheted together for a neat finish. This section completes the distinct silhouette of our bat crochet pattern.
Crocheting Each Ear Panel
- Make Each Ear Panel (Main Color and Contrasting Color):
- Chain 6.
- Row 1: Starting from the second chain from the hook, SC 5 across. Chain 1, turn. (Total 5 SC)
- Row 2: SC 5 across. Chain 1, turn. (Total 5 SC)
- Row 3: SC 3, 1 invisible decrease. Chain 1, turn. (Total 4 SC)
- Row 4: SC 1, 1 invisible decrease, SC 1. Chain 1, turn. (Total 3 SC)
- Row 5: SC 3 across. Chain 1, turn. (Total 3 SC)
- Row 6: SC 1, 1 invisible decrease. Chain 1, fasten off. (Total 2 SC)
- Repeat these steps to make one ear panel in your main color and one in your contrasting color.
Seamlessly Joining the Panels
- Join the Ear Panels:
- Place the contrasting color panel directly on top of the main color panel.
- Using your main yarn color, make a slip knot and put it on your hook.
- Insert your hook through both panels anywhere on the left side. Yarn over and pull through both panels and the slip knot (this acts as your first single crochet to join). Mark this stitch.
- Continue single crocheting around the edge of both panels:
- SC 7 stitches along the outer curve.
- Chain 1 (at the corner).
- Work 4 SL STs along the bottom edge (the chained edge).
- Chain 1 (at the next corner).
- SC 7 stitches along the other outer curve.
- Take out your stitch marker and SL ST into the first SC of the round. Chain 1 and fasten off.
- Weave in all yarn tails except for one long tail at the bottom, which you’ll use for sewing.
- Repeat all steps to create a second complete ear.
Customizing Ear Colors
The contrasting inner ear is a great opportunity to add a pop of color! Pink is a popular choice for a cute look, but you could also use a lighter shade of your main color, or even a sparkly yarn for a touch of magic. Consider what complements your chosen main bat color best when working on this bat crochet pattern.
Bringing Your Bat to Life: Assembly Instructions
This is where all your hard work comes together! Assembling your amigurumi bat requires patience and neat stitching. Take your time to position each piece correctly before sewing to ensure your bat looks its best. A well-assembled bat completes the journey of this wonderful bat crochet pattern.
Attaching the Ears with Precision
- Pin the ears to the top of the head for placement. They should be sewn from Round 3 to Round 8 of the head, allowing them to stand upright nicely.
- Using a darning needle and the long tail left on the ears, sew them securely to the head with small, neat stitches. Weave in any remaining tails into the head.
Securing the Head to the Body
- The head and body both have 12 stitches at their openings. You will sew these together in a seamless manner.
- Use a darning needle and the long tail from either the head or body (choose the longer one for convenience).
- Sew the head to the body by going through the front loop of a stitch on the body and then a corresponding stitch on the head, moving all the way around. This technique creates a strong, neat join.
- Once sewn, weave in the tail several times through the joint and cut off any excess yarn close to the surface, allowing it to retract inside.
Placing and Sewing the Wings
- Use a darning needle and the long tail on one of the wings.
- Pass the tail through the inside of the wing so it comes out the other side near the top.
- Position the wings on the body, attaching them between Round 7 and Round 10 of the body. You can use pins to hold them in place temporarily while you assess the best angle and symmetry.
- Sew the wings securely to the body, ensuring they are firmly attached and can withstand gentle play.
- To reinforce the attachment, pass both tails from the wings through the body to meet at the same spot on the back. Tie a small, secure knot close to the body, then gently push the knot inside the body to hide it. Cut off any excess yarn.
Final Touches for Durability
After assembly, give your bat a gentle squeeze and reshape to distribute the stuffing evenly. Double-check all sewn seams to ensure they are secure. A little extra attention to detail here will ensure your amigurumi bat stands the test of time and becomes a cherished companion.
Customizing Your Bat Crochet Pattern
The beauty of a handmade item is the ability to infuse it with your personal style. This bat crochet pattern offers ample opportunities for customization, allowing you to create a truly unique creature.
Yarn Variations & Size Adjustments
- Yarn Weight: Want a tiny bat for a keychain? Use sport or fingering weight yarn with a smaller hook. Craving a giant, huggable bat? Opt for super bulky yarn and a larger hook. Remember that changing yarn weight will alter the finished size significantly.
- Fiber Type: While acrylic is robust, consider using cotton for a denser, slightly heavier bat, or chenille/velvet yarn for an incredibly soft, plush companion.
- Color Play: Don’t stick to traditional black or grey! Experiment with vibrant colors like purple, teal, or even multi-colored variegated yarn for a whimsical look. A white or light grey bat with pink ears could be super charming.
Adding Embellishments (Cheeks, Fangs, Bows)
- Rosy Cheeks: A touch of pink blush applied with a makeup brush or embroidered pink circles below the eyes can add extra cuteness.
- Tiny Fangs: For a slightly more “vampy” bat, embroider two tiny white fangs just below the nose.
- Accessories: Add a small crocheted bow tie, a tiny witch’s hat, or a mini scarf to dress up your bat for different seasons or occasions.
- Glow-in-the-Dark Yarn: Use glow-in-the-dark yarn for the wing details or even for the entire bat for a truly spooky effect that comes alive at night.
Theme Ideas (Halloween, Vampire, Kawaii)
Consider the purpose of your bat. Is it for a Halloween display? A cute, pastel-colored kawaii collection? Or a slightly more gothic, vampire-themed companion? The possibilities are endless when working with this adaptable bat crochet pattern.
Troubleshooting Common Crochet Challenges
Even experienced crocheters run into snags sometimes. Here are a few common issues you might encounter while working on your bat crochet pattern and how to overcome them.
Gaps in Your Amigurumi
If you notice small holes or gaps where stuffing peeks through, your tension might be too loose, or your hook size might be too large for your yarn. Try going down a hook size. Also, ensure you are pulling your magic ring very tight and consistently using the invisible decrease for seamless rounds.
Uneven Stitching
New to amigurumi? It takes practice to develop consistent tension. Don’t worry if your first few rounds look a bit wobbly. Keep practicing, and your stitches will become more even over time. Using stitch markers at the beginning of every round is crucial to keep your counts accurate, which contributes to even shaping.
Yarn Management Tips
Tangles are the bane of any crocheter’s existence! Consider using a yarn bowl or a center-pull ball to keep your yarn flowing smoothly. When changing colors, ensure your knots are small and secure, tucked away neatly inside the piece to avoid bulk.
Quick Takeaways: Your Bat Crochet Journey
- The provided bat crochet pattern is suitable for both beginners and experienced crafters.
- A smaller hook size than recommended for your yarn is key for tight amigurumi stitches.
- The invisible decrease is essential for a smooth, professional finish.
- Firm and even stuffing ensures your bat holds its adorable shape.
- Don’t be afraid to personalize your bat with different yarn colors, sizes, and embellishments.
- Proper assembly, including secure sewing and weaving in ends, guarantees a durable finished product.
Frequently Asked Questions (FAQs)
- Q1: How long does it take to complete this easy bat crochet pattern?
- A1: For a beginner, it might take anywhere from 3-6 hours, spread across a few sessions. Experienced crocheters could complete it in 1-3 hours. The time largely depends on your speed and familiarity with amigurumi techniques.
- Q2: Can I sell the bats I make using this amigurumi bat pattern free?
- A2: Most free patterns are for personal use. While many designers allow selling finished items with credit, always check the original pattern’s terms of use if you plan to sell. If no terms are specified, crediting the designer is always good practice.
- Q3: What kind of yarn is best for a beginner crochet bat?
- A3: A smooth, worsted weight (medium #4) acrylic yarn is ideal for beginners. It’s affordable, easy to work with, and widely available. Avoid fuzzy or textured yarns for your first bat crochet pattern as they can hide stitches.
- Q4: My bat’s head looks a bit lumpy after stuffing. What went wrong?
- A4: Lumpy stuffing usually indicates it wasn’t packed evenly or firmly enough. Use small pieces of polyfill and push them into all crevices, especially around the eyes, with a chopstick or the back of your hook. Continue adding stuffing until the head feels firm and smooth.
- Q5: Are there any specific tips for crocheting Halloween crochet projects like this bat?
- A5: For Halloween projects, consider using glow-in-the-dark yarn, adding small spooky accessories like a tiny cauldron or a witch hat, or incorporating traditional Halloween colors like orange, black, and purple. This makes your bat crochet pattern even more festive.
Conclusion: Your New Amigurumi Companion Awaits!
Congratulations! You’ve reached the end of this journey, and hopefully, you now have an adorable, handmade amigurumi bat to show for it. This bat crochet pattern is more than just a set of instructions; it’s an invitation to explore your creativity, refine your crochet skills, and create something truly special. From selecting your yarn to the final stitches of assembly, each step contributes to bringing your unique bat to life. The joy of holding a finished project that you’ve crafted with your own hands is truly unparalleled.
Whether your bat will be a charming piece of Halloween decor, a cuddly companion for a child, or a delightful gift for a friend, it carries the warmth and personality of a handmade item. We hope this detailed bat crochet pattern has empowered you and ignited a passion for amigurumi. Remember, every stitch is a step in your creative journey, and every finished project is a testament to your dedication and skill. Keep exploring, keep creating, and most importantly, keep enjoying the wonderful world of crochet!
Share Your Creations!
We absolutely love seeing your finished projects! Did you try this bat crochet pattern? We’d be thrilled if you shared photos of your adorable amigurumi bats on your favorite social media platforms. Tag us or use a relevant hashtag so we can admire your work! What unique color combinations did you choose for your bat?
