
Free Adorable Bunny Crochet Pattern
Adorable “Bunny” Amigurumi: Free Crochet Pattern!
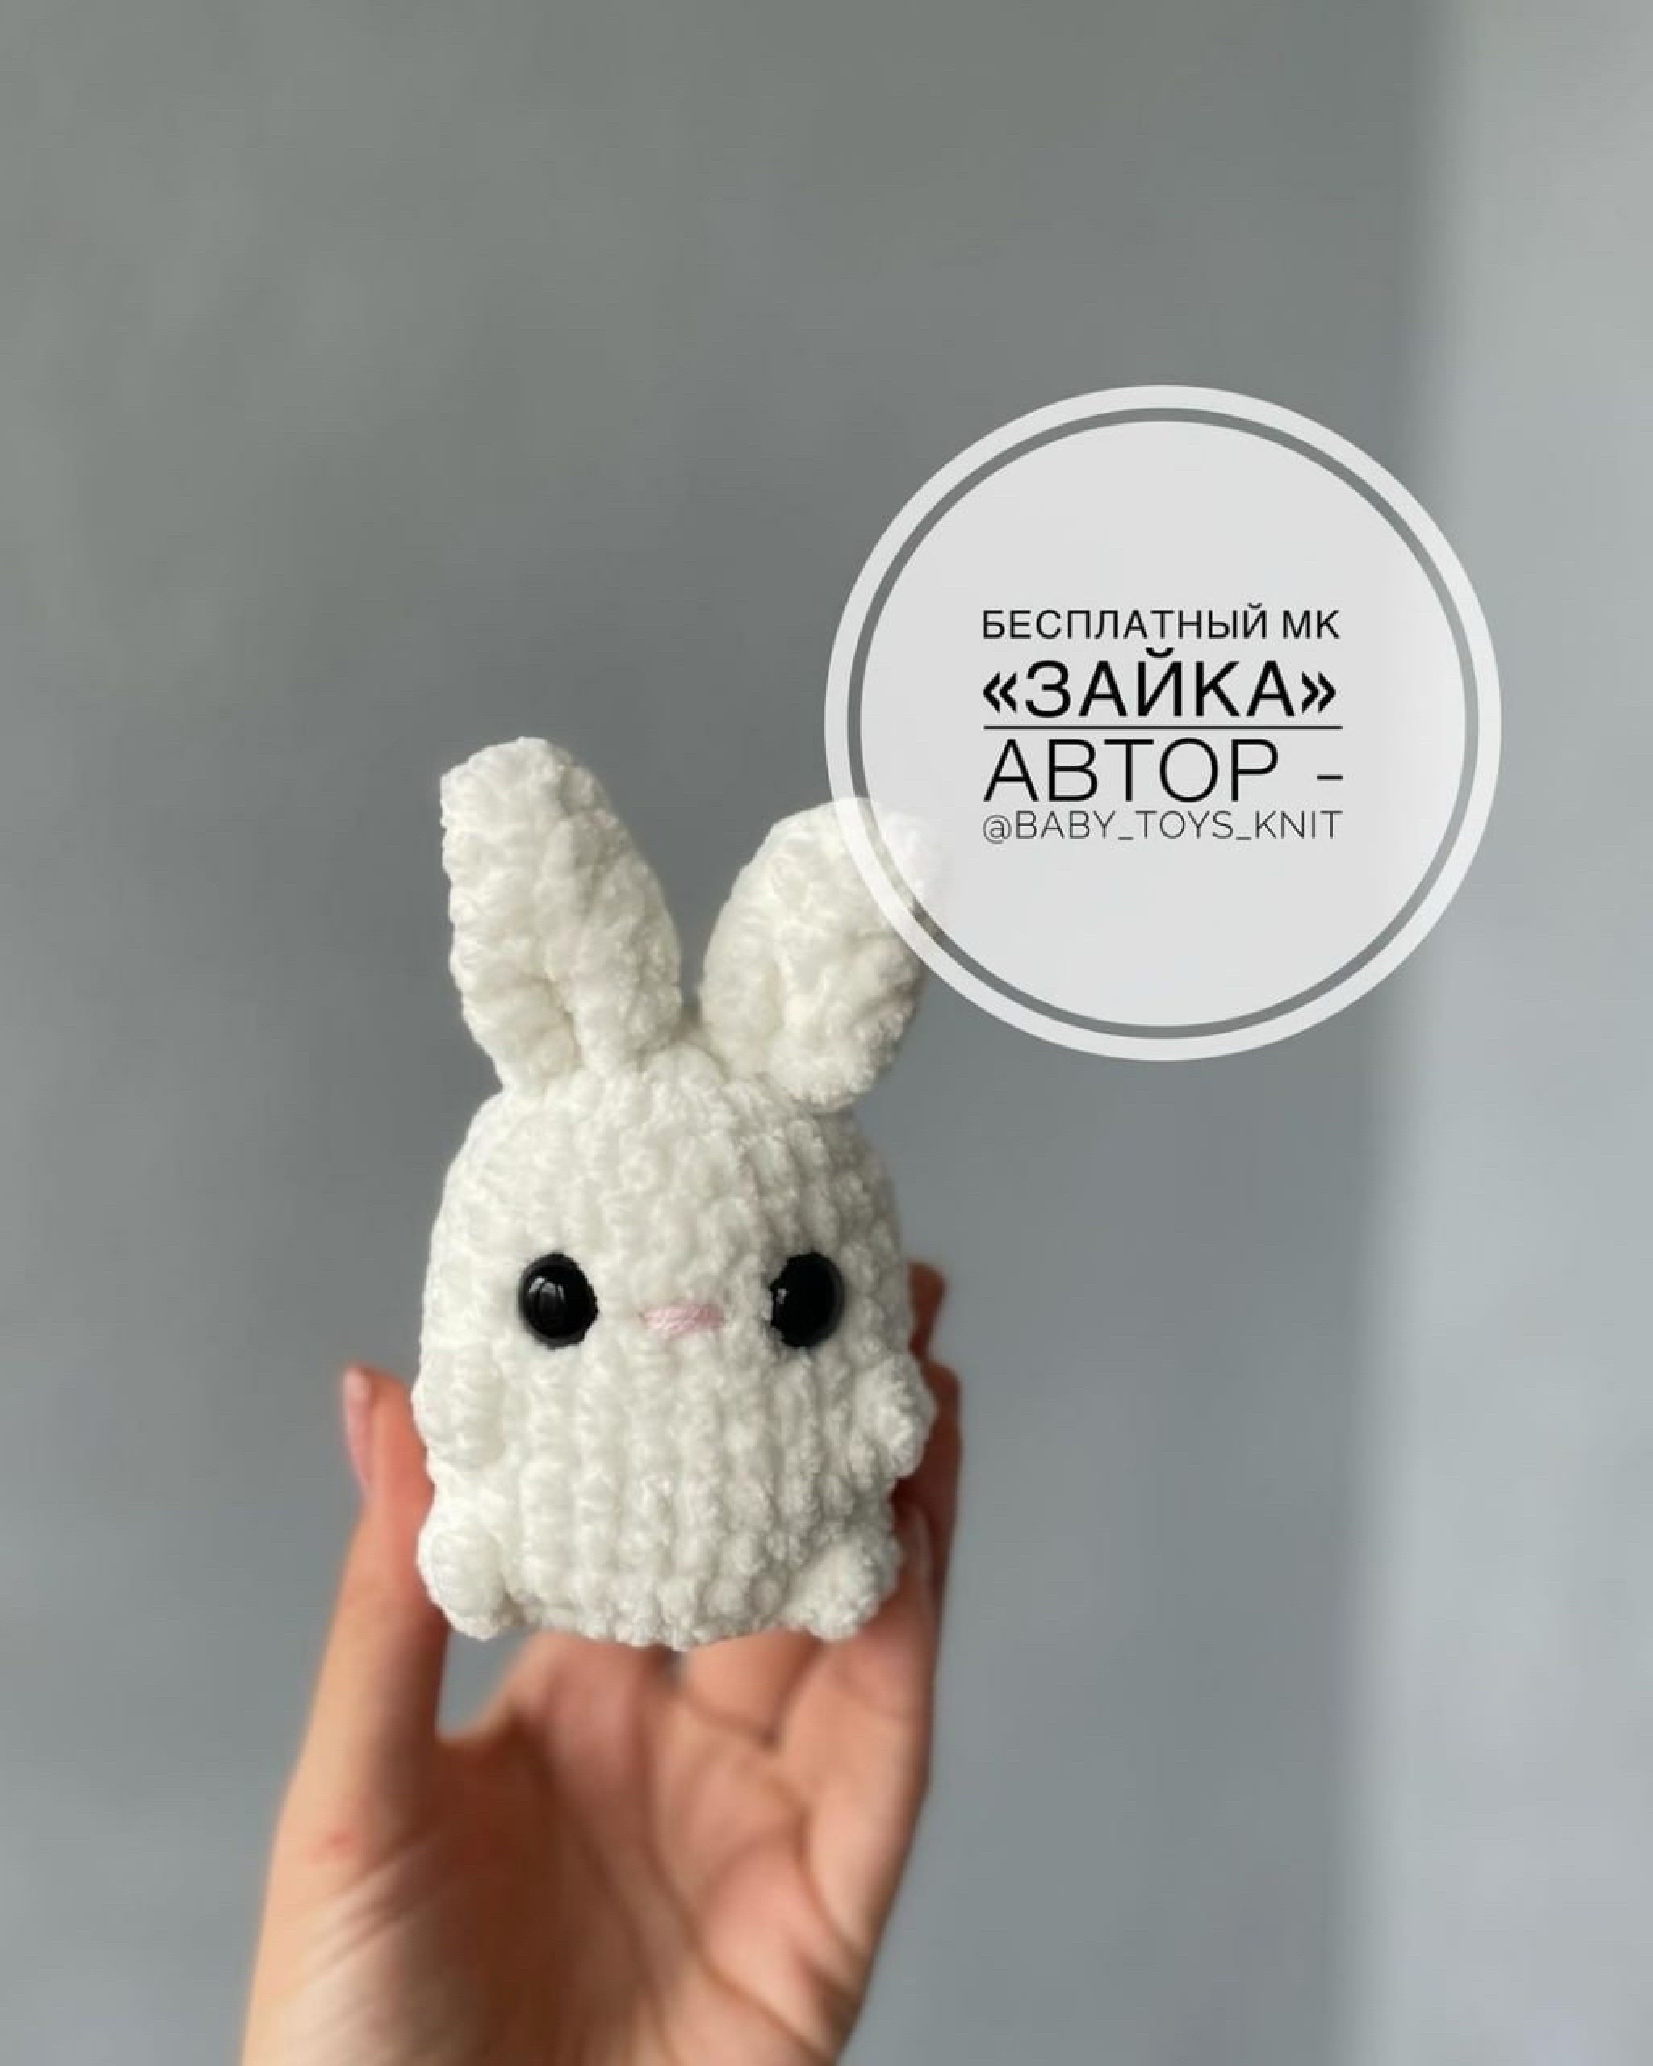
Get ready to crochet the cutest little bunny amigurumi! This free pattern, brought to you by @BABY_TOYS_KNIT, guides you through creating a charming soft toy perfect for gifts or delightful decor. Let’s gather our supplies and start stitching!
Materials You’ll Need
To create your lovable bunny, make sure you have these materials on hand:
- Yarn: Wolans Bunny Baby (The author used color 71)
- Hook: 3.5 mm crochet hook
- Safety Eyes: 12 mm
- Nose Yarn: Pink YarnArt Jeans thread for embroidering the nose
- Stuffing: Fiberfill or your preferred toy stuffing
- Tools: Yarn needle, scissors, stitch markers (optional)
Abbreviations Used
- sc: single crochet
- inc: increase (work 2 single crochets into the same stitch)
- dec: decrease (single crochet 2 together, sc2tog)
- MR: Magic Ring (also known as Magic Circle)
- dc: double crochet
- sl st: slip stitch
- ch: chain
- ( )*: Repeat instructions in parentheses the specified number of times
- [ ]: Stitch count at the end of the round
Let’s Get Started!
Head and Body (One Piece)
We’ll crochet the head and body as a continuous piece. Use stitch markers to keep track of your rounds.
- Start with a Magic Ring (MR) and work 6 single crochets (sc) into it. [6 sc]
- Increase in each stitch around: 6 increases (inc). [12 sc]
- (1 sc, inc) repeated 6 times. [18 sc]
- (2 sc, inc) repeated 6 times. [24 sc]
- (3 sc, inc) repeated 6 times. [30 sc]
- sc in each of the 30 stitches for 3 rows. [30 sc]
- sc in each of the 30 stitches. [30 sc]
- sc in each of the 30 stitches. [30 sc]
- Work 8 sc, then a bobble stitch (3 unfinished double crochets worked into the same stitch, then yarn over and pull through all loops on hook), then 8 sc, another bobble stitch (3 unfinished dc), and finally 12 sc. [30 sc]
- sc in each of the 30 stitches. [30 sc]
- sc in each of the 30 stitches. [30 sc]
- Work 8 sc, then a bobble stitch (4 unfinished double crochets worked into the same stitch, then yarn over and pull through all loops on hook), then 8 sc, another bobble stitch (4 unfinished dc), and finally 12 sc. [30 sc]
- sc in each of the 30 stitches. [30 sc]
- (3 sc, dec) repeated 6 times. [24 sc]
- *** Time to insert the safety eyes! Place them between rows 6 and 7, with approximately 4 single crochets distance between them. Start stuffing your bunny firmly. ***
- Work 12 decreases (sc2tog) around. [12 sc]
- Work 6 decreases (sc2tog) around. [6 sc]
- Finish Off: Cut the yarn, leaving a long tail. Thread the tail onto a yarn needle. Weave the needle through the front loop of each of the remaining 6 stitches. Pull tight to close the opening. Secure and hide the yarn tail inside the body.
Ears (Make 2)
These adorable ears will give your bunny character!
- Start with a Magic Ring (MR) and work 6 single crochets (sc) into it. [6 sc]
- sc in each of the 6 stitches. [6 sc]
- (1 sc, inc) repeated 3 times. [9 sc]
- (2 sc, inc) repeated 3 times. [12 sc]
- (2 sc, dec) repeated 3 times. [9 sc]
- (1 sc, dec) repeated 3 times. [6 sc]
- Finish Off: Cut the yarn, leaving a tail for sewing. Fold the ear in half. Using your yarn needle, sew each ear to the top of the head, attaching them between rows 2 and 3 of the head.
Tail
Add a cute little fluffy tail to the back of your bunny.
- Locate the back of the bunny, between rows 12 and 13.
- Attach your yarn in the center of this area with a slip knot.
- Chain 3 (ch 3).
- Starting from the second chain from the hook, work a “triple increase of sc” (3 single crochets into the same chain stitch).
- Then work 1 sc into the next chain stitch.
- Insert your hook back under a sc of the body where you started, and work a slip stitch (sl st) to join the tail.
- Finish Off: Secure the yarn, cut it, and hide the tail inside the body.
Nose
Give your bunny a sweet expression by embroidering its nose.
- Using your pink YarnArt Jeans thread and a yarn needle, embroider a small triangular or V-shaped nose between the safety eyes.
Congratulations!
You’ve just created an adorable crochet bunny! We hope you enjoyed this free pattern from @BABY_TOYS_KNIT. Don’t forget to share your finished bunny with us on social media!
Happy Crocheting!