
Free Crochet Pattern Cute Bear
There is something timeless about a handmade teddy bear. Whether it’s sitting on a nursery shelf or acting as a pocket-sized companion, a crocheted bear carries a warmth that store-bought toys simply can’t match.
Today, we are diving deep into the “Simple Bear” (Prosto Mishka) pattern, originally designed by the talented @julia_ami. This project is a fantastic middle-ground for crocheters: it’s simple enough for a dedicated beginner but includes unique construction techniques—like a seamless head-to-leg transition—that will keep advanced makers engaged.
In this guide, we’ve translated the original Russian instructions into Standard US Crochet Terms and added professional tips to help you achieve a boutique-quality finish.
Part 1: Preparation & Materials
To achieve the “Simple Bear” look, yarn choice is everything. The original pattern calls for cotton blends, which provide the crisp stitch definition and durability essential for amigurumi.
1. The Yarn Palette (Weight: Sport / Fine #2)
- Main Body: Beige (Suggested: YarnArt Jeans Color 07 or Hobbii Friends Cotton 8/4).
- Muzzle & Belly: Milk or Cream (Suggested: YarnArt Jeans Color 03).
- Inner Ears: Powder Pink (Suggested: YarnArt Baby Cotton Color 413).
- Scarf: Pistachio Green (Suggested: Gazzal Baby Cotton Color 3457).
- Cheeks: Soft Red or Rose.
2. Tools & Notions
- Hooks: * 1.5mm hook: Used for the bear’s body to ensure a tight, “no-hole” tension so stuffing doesn’t peek through.
- 4.0mm hook: Specifically for the scarf to give it a soft, draped texture.
- Eyes: 6mm Safety Eyes.
- Embroidery Thread: Black (mouth/eyes), White (eye highlights), and Brown (nose/details).
- Stuffing: High-quality polyester fiberfill.
- Essential Extras: Stitch markers, long darning needle, and sharp scissors.
Part 2: Understanding the Abbreviations (US Terms)
- MR: Magic Ring
- Ch: Chain
- Sc: Single Crochet
- Sl st: Slip Stitch
- Inc: Increase (2 sc in one stitch)
- Dec: Decrease (Invisible decrease recommended)
- BLO: Back Loops Only
- St(s): Stitch(es)
Part 3: The Pattern Breakdown
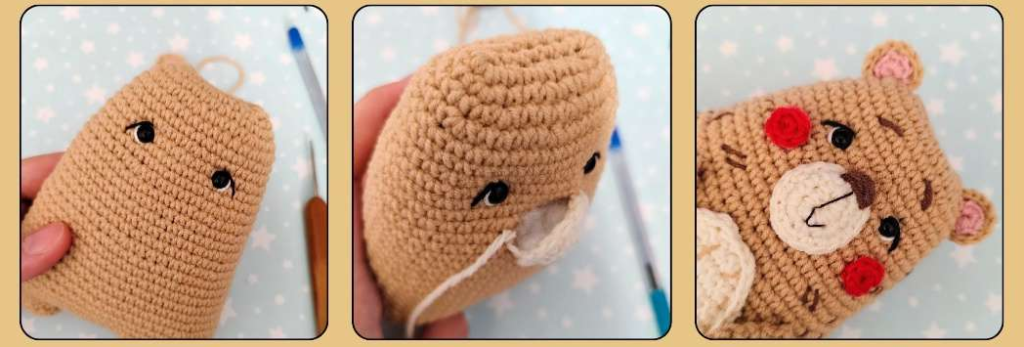
Phase 1: The Head, Body, and Legs (One Seamless Piece)
This bear is worked from the top down. The head and body are a continuous piece, which then splits to form the legs.
The Foundation:
- Rnd 1: Ch 8. Starting in 2nd ch from hook: inc, 5 sc, 4 sc in the last chain loop. Turning to work across the opposite side of the chain: 5 sc, inc (18 sts). We will now work in a continuous spiral.
- Rnd 2: (1 sc, inc), (2 sc, inc) x 5, 1 sc (24).
- Rnd 3: (3 sc, inc) x 6 (30).
- Rnd 4: (2 sc, inc), (4 sc, inc) x 5, 2 sc (36).
- Rnd 5–6: Sc in each st (36).
- Rnd 7: (5 sc, inc) x 6 (42).
- Rnd 8–10: Sc in each st (42).
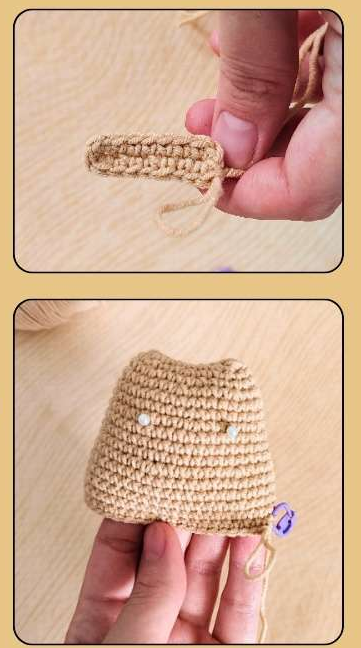
- Pro Tip: Insert 6mm safety eyes between rounds 8 and 9, roughly 8 stitches apart.
- Rnd 11: (3 sc, inc), (6 sc, inc) x 5, 3 sc (48).
- Rnd 12–16: Sc in each st (48).
- Rnd 17: (7 sc, inc) x 6 (54).
- Rnd 18–23: Sc in each st (54).
- Rnd 24: (8 sc, inc) x 6 (60).
- Rnd 25–28: Sc in each st (60).
- Rnd 29: (8 sc, dec) x 6 (54).
- Rnd 30: Sc in each st (54).
- Rnd 31: (7 sc, dec) x 6 (48).
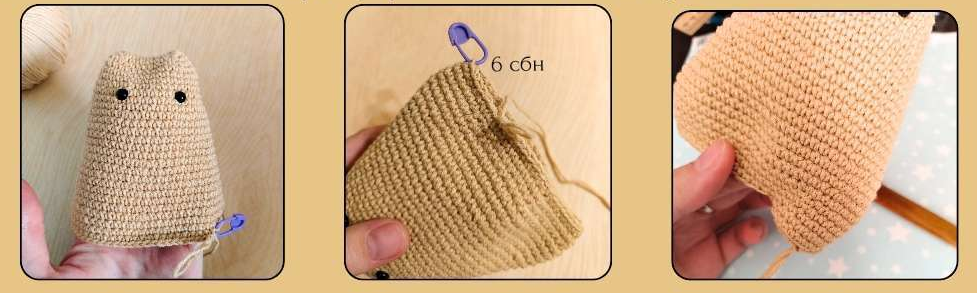
Splitting the Legs:
To create the legs, we divide the 48 stitches.
- Continue with 6 sc to reach the side of the bear.
- Leg 1: Count 8 sc from your marker. Skip 10 stitches on the back/front and join to create a circle of 18 stitches (including the join).
- Work Leg 1: 18 sc for one round. Then, (dec) x 9 in BLO. Fasten off and cinch the hole shut.
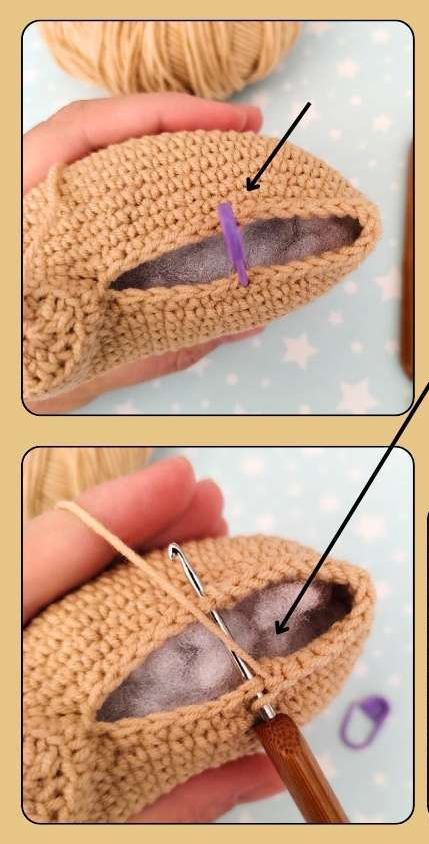
- Leg 2: Stuff the head and body firmly. Repeat the process on the other side with the remaining stitches to create the second 18-sc leg. Sew the small gap between the legs closed using your beige yarn.
Phase 2: The Detailed Features
The Muzzle (Milk Yarn)
- Rnd 1: Ch 4. In 2nd ch: 2 sc, 4 sc in one loop, 2 sc (8).
- Rnd 2: inc, 1 sc, (inc, 2 sc, inc), 1 sc, inc (12).
- Rnd 3: 1 sc, inc, 1 sc, (1 sc, inc) x 3, 1 sc, inc, 1 sc.
- Fasten off, leaving a long tail. This will be stuffed slightly when sewn to the face.
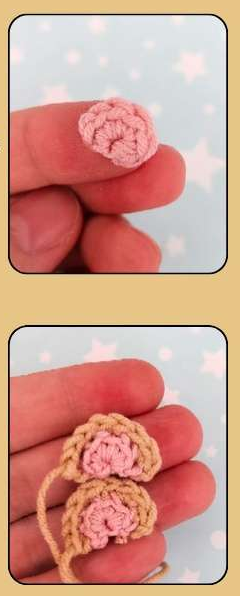
The Ears (Unique Two-Tone Design)
- Pink Inner (Make 2): 6 sc in MR. Do not join. Fasten off.
- Beige Outer (Make 2): 6 sc in MR. Do not join. Ch 1, turn.
- Joining: Place the pink part over the beige. Crochet them together: (1 sc, inc) x 3 (9 sts), working through both layers.
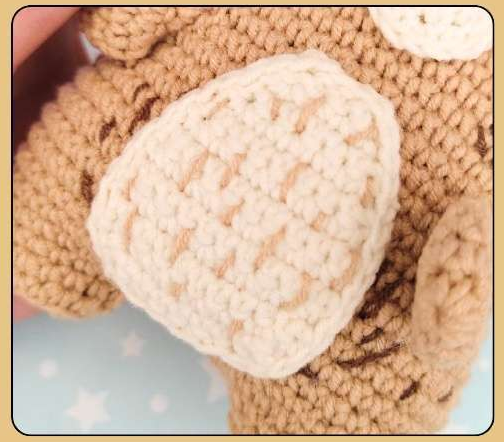
The Belly Plate (Milk Yarn)
Worked in turning rows (flat).
- Ch 5, work 4 sc.
- Increase at ends to reach 6, then 8, then 10 stitches.
- Work 6 rows of 10 sc.
- Decrease back down to 6 stitches.
- Finish: Sc or Sl st around the entire border to create a clean edge.
The Arms (Make 2)
- 6 sc in MR.
- (inc) x 6 (12).
- Rnds 3–6: 12 sc.
- Flatten the arm and sc the opening shut (6 sc). Ch 1, turn, then (dec, 2 sc, dec).
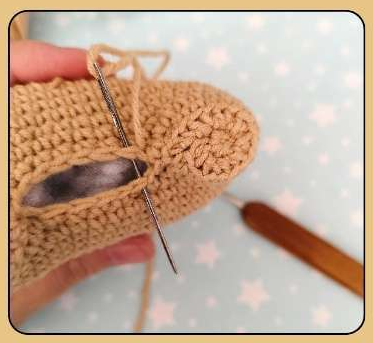
Part 4: Assembly & Styling
The difference between a “good” amigurumi and a “professional” one is in the assembly.
- The Face: Before sewing the muzzle, pin it centrally between the eyes. Use brown thread for a wide, flat nose. Use black thread for thin, slightly surprised eyebrows.
- The Eyes: For a soulful look, use white thread to embroider a small “u” shape around the bottom outer edge of the safety eye, and black thread for a thin upper eyelid.
- The “Vibe”: Sew the cheeks just below and to the side of the eyes.
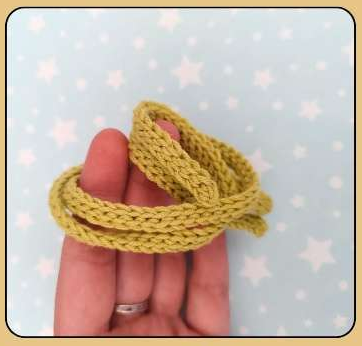
- The Scarf: Using your 4.0mm hook, Ch 141. Work slip stitches back down the chain in BLO for 2–3 rows. This creates a ribbed, knit-look scarf that wraps perfectly around the bear’s neck.
Final Thoughts
The “Simple Bear” is a masterclass in minimalist design. By focusing on clean stitches and thoughtful embroidery, you create a character rather than just a toy.
Did you make this bear? We’d love to see your color choices! Tag your photos with #SimpleBearProject and mention @julia_ami to share your work with the global crochet community.
Happy Stitching!