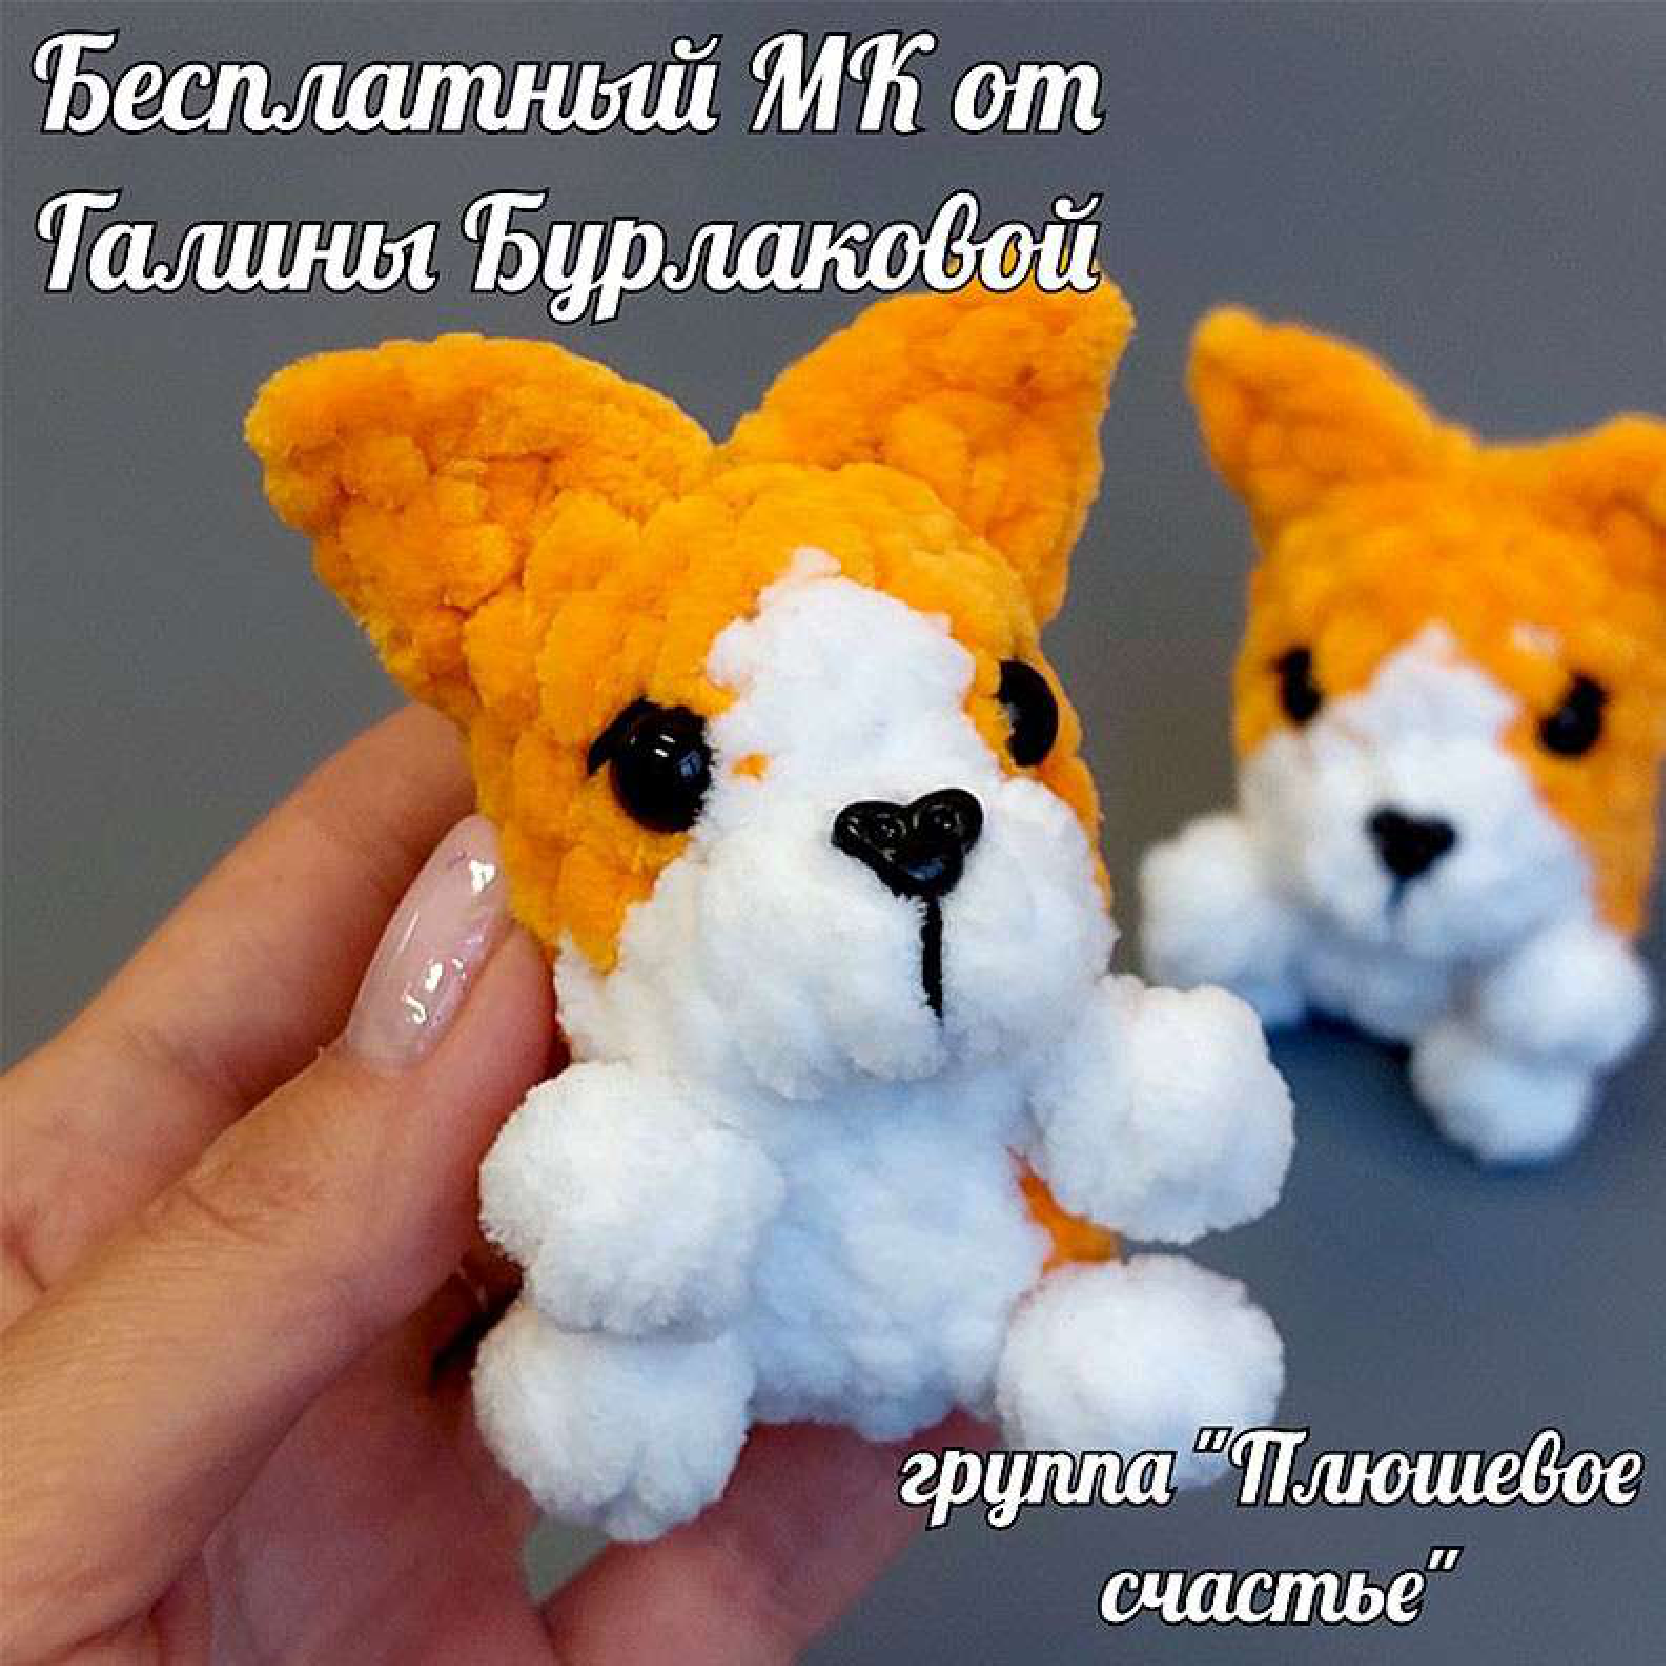
Free Korzhik Horse Keychain Crochet Pattern!
Get ready to crochet the cutest little plush horse keychain, affectionately named Korzhik! This adorable pattern, designed by Galina Burlakova from the “Plush Happiness” group, is perfect for adding a touch of handmade charm to your keys or bag. Follow along with our easy-to-understand steps and create your very own!
Materials Needed
- Plush Yarn: (e.g., Himalaya Dolphin Baby, YarnArt Dolce) with a density of 120m/100g. You’ll need white and orange colors.
- Faux Fur Yarn: For the tail and mane (choose a matching or contrasting color).
- YarnArt Jeans: For the bridle (a small amount of a contrasting color like brown or black).
- Crochet Hook: 3.75 mm
- Stuffing: Polyester fiberfill
- Tapestry Needle: For sewing and weaving in ends.
- Stitch Marker: To keep track of your rounds.
- Safety Nose: 7×9 mm
- Safety Eyes: 8 mm
- Black Embroidery Yarn: For detailing the eyes and nose bridge.
Abbreviations
Here are the crochet terms you’ll encounter in this pattern:

- sc: Single crochet
- inc: Increase (work 2 single crochets into the same stitch)
- dec: Decrease (single crochet 2 stitches together)
- ch: Chain stitch
- sl st: Slip stitch
- hdc: Half double crochet
- dc: Double crochet
- Shell: Work 3 double crochet stitches together into one stitch (this creates a 3-dc cluster)
- sc3tog: Single crochet 3 stitches together
- W: Work in white color
- O: Work in orange color
Let’s Crochet!
We’ll start by making the body and head as one continuous piece, then add the ears and details.
Body & Head (worked in one piece)
Work in continuous rounds unless otherwise specified. Use a stitch marker to mark the beginning of each round.
- Round 1: (W) Make 8 sc in an amigurumi magic ring. (8 stitches)
- Round 2: (W)
- Work (inc) x3 into the first 3 stitches (6 sc total).
- First Paw: Chain 3. Starting in the 2nd chain from the hook, work a Shell (3-dc cluster). Slip stitch into the next (last) chain. Then, slip stitch back into the *same stitch* on the body where you started the chain.
- Work (inc) x2 into the next 2 stitches (4 sc total).
- Second Paw: Chain 3. Starting in the 2nd chain from the hook, work a Shell (3-dc cluster). Slip stitch into the next (last) chain. Then, slip stitch back into the *same stitch* on the body where you started the chain.
- Work (inc) x3 into the next 3 stitches. For the last stitch of the last increase, **change to orange yarn** by pulling the orange yarn through the last two loops on your hook.
- Tail: Using orange yarn, chain 5. Starting from the 2nd chain from the hook, sl st, then work 3 sc, and finally sl st back into the *same stitch* on the body where you started the chain. (You should have 16 stitches around the body when counting only the body stitches, not the paws/tail loops.)
- Round 3: (O) 6 sc, (W) 4 sc, (O) 6 sc. (16 stitches)
- Round 4: (O) 6 sc, (W) 4 sc, (O) 6 sc. (16 stitches)
- Round 5:
- (O) 2 sc, dec, 2 sc.
- (W) Third Paw: Crochet the same way as the lower paws (Chain 3. Starting in the 2nd chain from hook, work a Shell. Slip stitch into the next chain. Slip stitch back into the *same stitch* on the body where you started the chain.).
- (W) dec, 2 sc.
- Fourth Paw: Crochet the same way as before.
- (O) dec, 2 sc, dec. (12 stitches)
- Round 6: (O) (sc, inc) x2, (W) (sc, inc) x2, sc, (O) inc, sc, inc. (18 stitches)
- Round 7: (O) 6 sc, (W) 2 sc, 2 hdc in next st, hdc, 2 hdc in next st, 2 sc, (O) 5 sc. (20 stitches)
- Round 8: (O) 7 sc, (W) (sc, dec) x2, sc, (O) 6 sc. (18 stitches)
- Round 9: (O) 7 sc, (W) dec, sc, dec, (O) 6 sc. (16 stitches)
- Round 10: (O) 7 sc, (W) sc3tog, (O) 6 sc. (14 stitches)
- Round 11: (O) (dec) x7. (7 stitches)
Remember to stuff your Korzhik firmly as you go, especially before closing the head entirely.
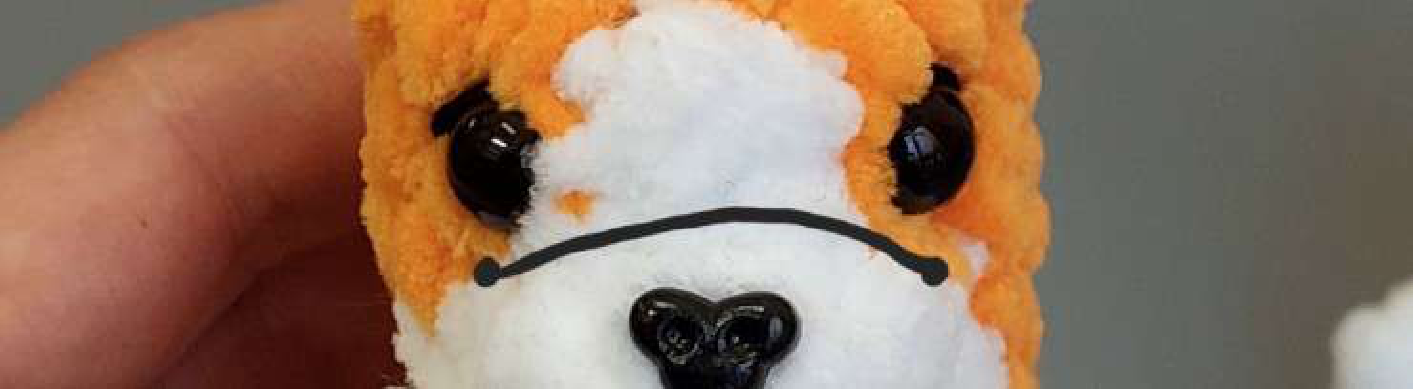
Eye Placement & Indentation
Insert the 8mm safety eyes between rounds 9 and 10. Position them into the 1st orange stitch immediately next to the white color section on each side. The original pattern suggests an eye indentation technique. Refer to the photo below for guidance on how the eyes should be placed and possibly indented for a cuter look.
Ears
Now let’s add the ears using white yarn. You’ll attach the yarn directly to the head.
Right Ear
- Attach white yarn between rounds 9 and 10 on the right side of the head.
- In the next stitch (from where you attached the yarn), work the following sequence: (sc, dc, ch 2, sl st into 2nd ch from hook, dc) all into the *same stitch*.
- In the next stitch (which will be one of the closing stitches from the last round), work sc, then sl st.
Left Ear
- Attach white yarn into the closing stitches of the last round on the left side of the head.
- In the next stitch (from where you attached the yarn), work sc.
- In the following stitch, work the following sequence: (dc, ch 2, sl st into 2nd ch from hook, dc, sc) all into the *same stitch*.
- Sl st into the next stitch.
Finishing Touches
Almost done! Just a few more steps to bring your Korzhik to life.
- Using black embroidery yarn, embroider small details around the safety eyes to give them more definition. Also, embroider a small bridge for the nose.
- Insert the 7×9 mm safety nose into place.
- Weave in any remaining loose ends neatly.
Your Korzhik Keychain is Ready!
Congratulations! You’ve just crocheted an adorable Korzhik keychain. He’s perfect for gifting or keeping for yourself.