
How to Crochet Mermaid Tail Blanket: Free Pattern & Tutorial
- Ch 3 (counts as 1 dc of your first V-st). Work 1 dc in the first stitch.
- Skip the next stitch, then work a V-st (2 dc) in the following stitch.
- Repeat from * to * all the way around.
- Join with a sl st to the top of the beginning ch-3.
Round 3 (Odd Round – Increase):
- Ch 3. We will now work our V-stitches into the space created by the V-stitches from the previous round.
- Work V-stitches in each V-st space until you reach the corner of the oval.
- In the corner V-st space, work an increase by making 3 dc instead of 2.
- Continue with regular V-stitches (2 dc) along the side until you reach the other corner.
- In the other corner V-st space, work another increase (3 dc).
- Finish the round with regular V-stitches.
- Join with a sl st to the top of the beginning ch-3.
Rounds 4 – 11:
Continue growing the cocoon by alternating between the two types of rounds:
- All Even-numbered rounds (4, 6, 8, 10): No increases. Work one V-st (2 dc) in every space available around.
- All Odd-numbered rounds (5, 7, 9, 11): Increase rounds. Work one increase (3 dc) in each of the two corner spaces, and regular V-stitches everywhere else.
Rounds 12 – 20:
From this point on, we stop increasing to create the straight body of the blanket.
- For rounds 12 through 20, work all rounds without increases, just like you did for the even rounds. Simply make one V-st (2 dc) in every space around.
At the end of Round 20, ch 1 and fasten off.
Part 2: Creating the Opening (Top Section)
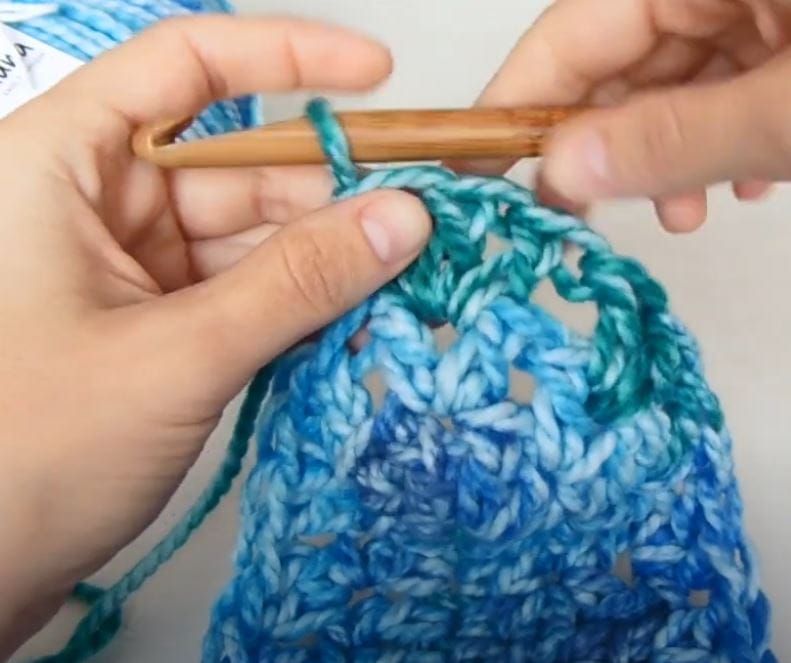
Now we’ll stop working in the round and start working in rows to create the opening.
- Lay your cocoon flat and find the center V-stitch on the back side.
- Insert your hook into the space of that center V-stitch and join your yarn.
Row 21:
- Ch 3, and work 1 dc in the very same space. (This creates your first V-st for the row).
- Continue working one V-st in each V-st space across the row.
- When you reach the other side, do not join. Your row is complete.
Row 22:
- Ch 3 and turn your work.
- Work 1 dc in the first V-st space to create your first V-stitch of the new row.
- Continue working one V-st in each space across.
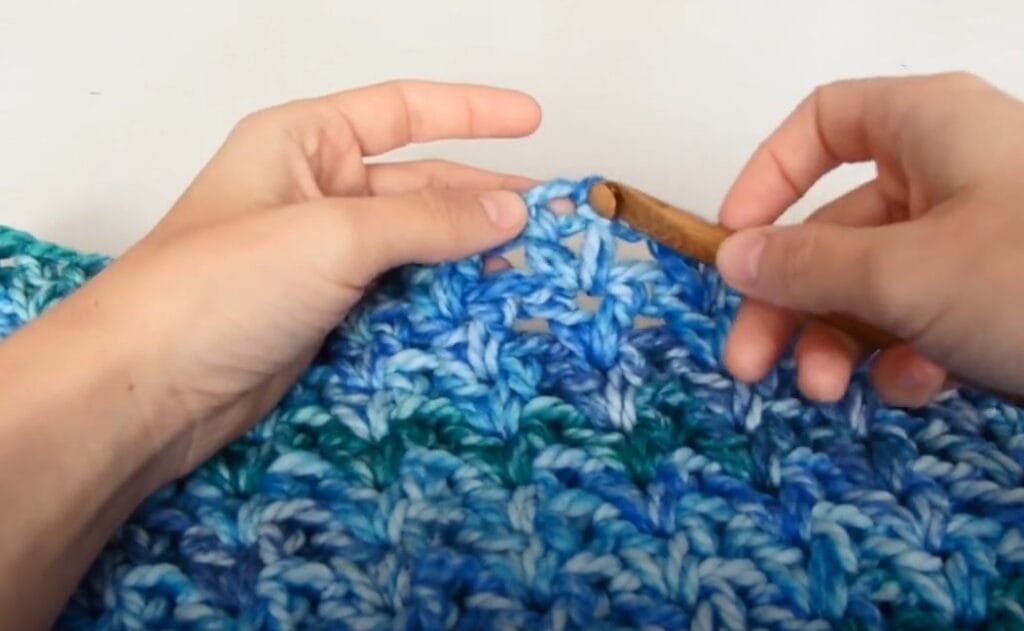
Continue:
Repeat Row 22 until your blanket reaches the desired length. Set the body aside for now—it’s time to make the grand finale: the tail!
Part 3: Crocheting the Mermaid Fin (Make 2)
The tail fin is made in two identical pieces, which are then joined together.
Row 1:
- Ch 15, then ch 3 extra.
- Work 1 dc in the 4th ch from hook, and 1 dc in each ch across. (You should have 15 dc total, counting the starting ch-3).
Row 2 (Increase Row):
- Ch 3, turn.
- We will now use the Back Post Double Crochet (bpdc) stitch to create a beautiful ribbed texture.
- Work 2 bpdc around the post of the very first stitch. This is your increase.
- Work 1 bpdc around each of the remaining stitch posts across the row.
Row 3 (Increase Row):
- Ch 3, turn.
- Work 1 bpdc around each stitch post until you reach the last stitch.
- Work 2 bpdc around the post of the last stitch. This ensures your increases stay on the same side, creating that classic angled fin shape.
Continue:
Keep repeating the pattern of increasing on the same side for each row. You will alternate placing the increase at the beginning of the row (like Row 2) and at the end of the row (like Row 3). Continue this until you have completed 15 rows.
Fasten off. Now, make a second, identical piece.
Part 4: Assembly & Finishing Touches
You’re almost there! It’s time to put it all together.
- Join the Fin: Place your two fin pieces together, with the textured sides facing out. Line up the straight center edges (your starting chains). Using your hook and yarn, single crochet these two edges together to create one solid fin.
- Attach the Fin: Position your assembled fin at the bottom opening of the blanket’s cocoon. Using your tapestry needle and a length of yarn, securely sew the fin in place.
- Finishing: Weave in all your remaining ends for a clean, professional finish.
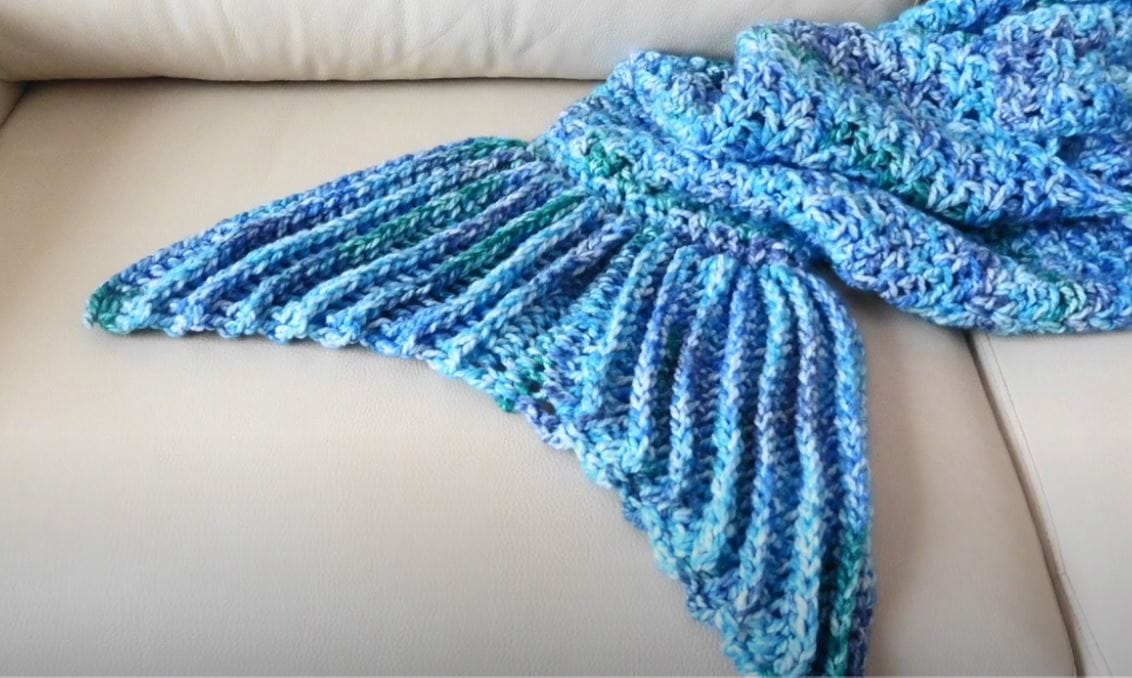
And that’s it! You now have a stunning, handmade mermaid tail blanket.
I hope you loved this tutorial and are thrilled with your cozy new creation! It’s the perfect gift for a loved one or a special treat for yourself.
Happy Crocheting