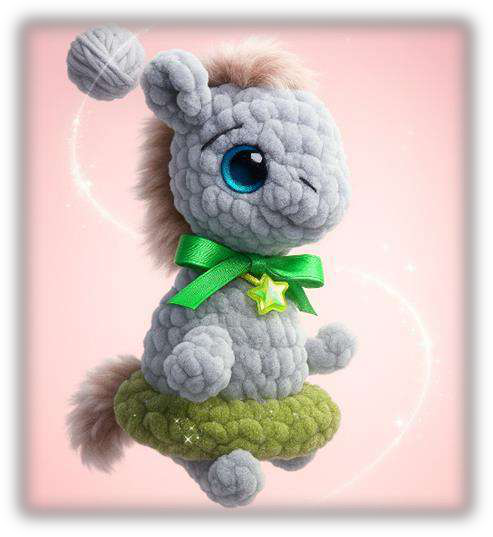
Igogoshka Horse: Free No-Sew Crochet Pattern!
Crochet Your Own Adorable Igogoshka Horse: Free Pattern!
A free master class by Maria from Masya.Toys. Let’s get crocheting!
Hello, crochet lovers! Today we have a wonderful free pattern to share from Maria of Masya.Toys. This “Igogoshka” horse is an absolutely adorable, quick project that’s perfect for gifts or market prep. The best part? The toy is crocheted in one piece from the head down, with the ears, legs, and skirt crocheted in as you go. This means minimal sewing!
This pattern is designed for those who already have basic crochet skills. Let’s gather our materials and get started!
Materials You’ll Need
- Plush Yarn: Main color for the body and an additional color for the skirt. (Example: Wolans Bunny Baby 120m/100g)
- Fur Yarn: For the mane and tail. (Example: Funcy Fur)
- Black Yarn: A small amount for embroidering face details.
- Crochet Hook: 4 mm (or size appropriate for your yarn).
- Safety Eyes: 12 mm.
- Stuffing: Polyester fiberfill.
- Other Tools: A yarn needle, scissors, stitch marker, and thread for sculpting (optional).
Using these materials, the finished horse will be approximately 10 cm (4 inches) tall.
Abbreviations (US Terms)
- MR: Magic Ring
- CH: Chain Stitch
- SC: Single Crochet
- HDC: Half Double Crochet
- INC: Increase (2 SC in the same stitch)
- DEC: Decrease (crochet 2 stitches together)
- SL ST: Slip Stitch
- BLO: Back Loop Only
- FLO: Front Loop Only
- (…): Total number of stitches at the end of the row
- (…) * X: Repeat the instructions in the parentheses X times
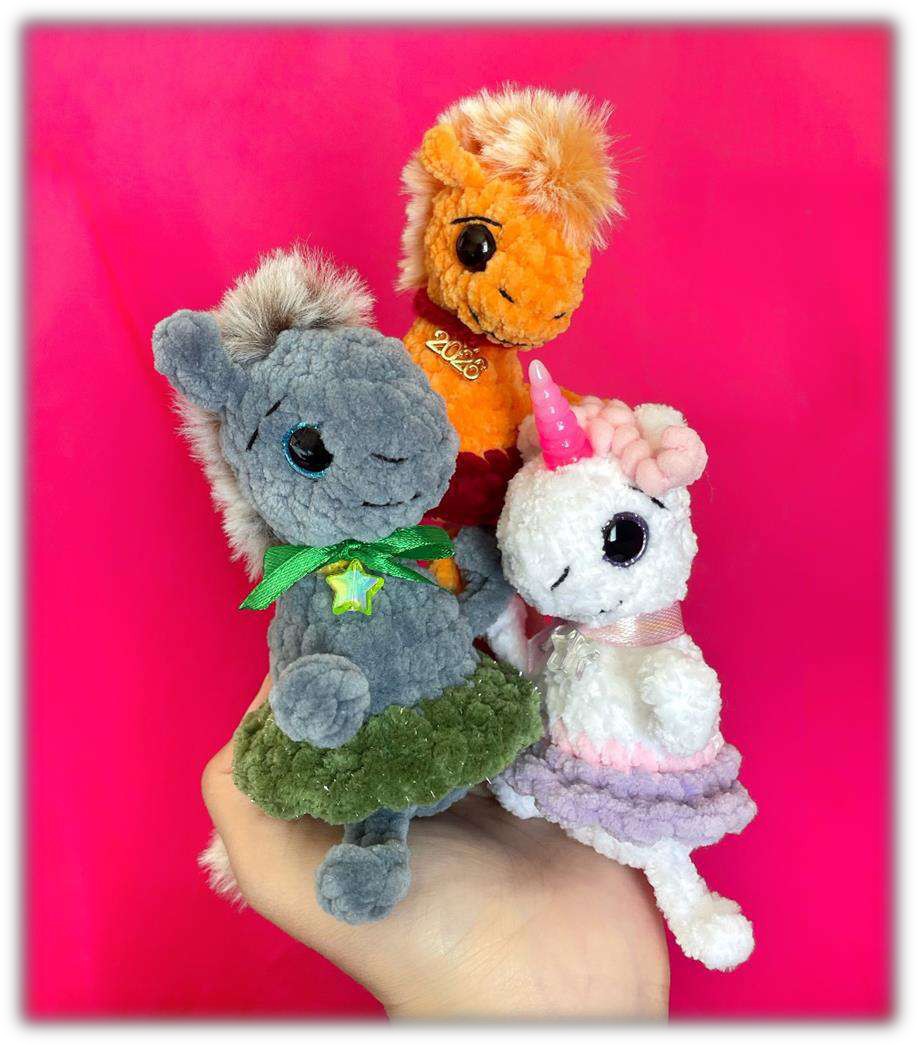
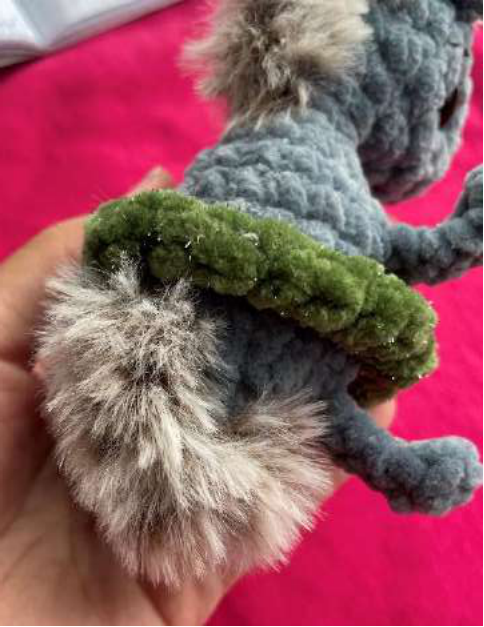
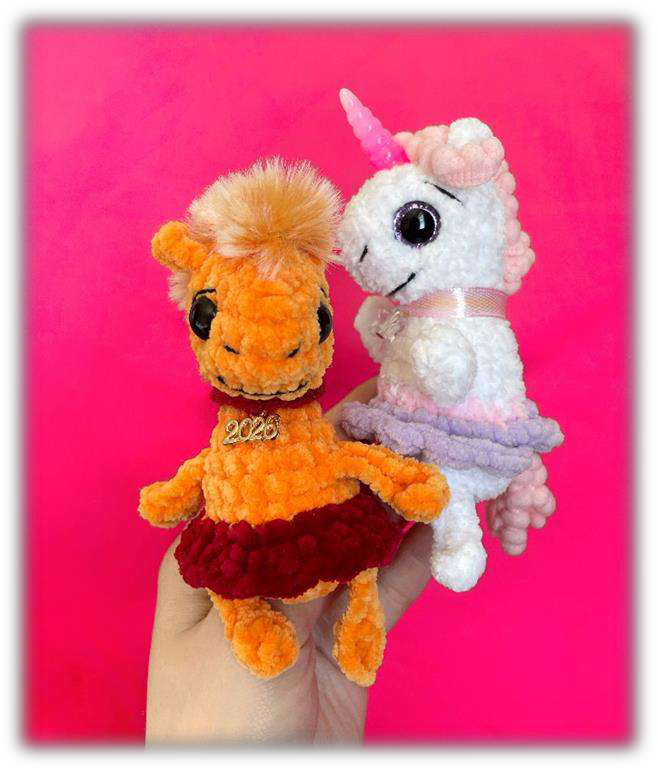
Gallery of Ideas
Before we begin, check out these adorable variations for some inspiration! You can customize your Igogoshka with different yarns and colors.

Igogoshka Horse Crochet Pattern
We’ll start with the main color yarn for the head.
Head and Body
- Row 1: Start with a CH 6. Working from the 2nd chain from the hook: INC, 3 SC, 3 SC in the last stitch. Continue on the other side of the chain: 3 SC, INC in the last stitch. (13)

- Row 2: INC, make the first ear (in FLO: 1 SC, CH 3, and starting from the 2nd CH from hook, work 2 HDC down the chain, then SL ST into the same FLO stitch), 3 SC, 3 INC, 3 SC, make the second ear (same as the first), INC. (18)
- Row 3: 2 SC, working in the BLO behind the first ear make an INC, (2 SC, INC) * 4, 1 SC, working in the BLO behind the second ear make 1 SC, 1 SC, INC. (24)
- Row 4: 24 SC around. (24)
- Row 5: 2 SC, 10 DEC, 2 SC. (14)
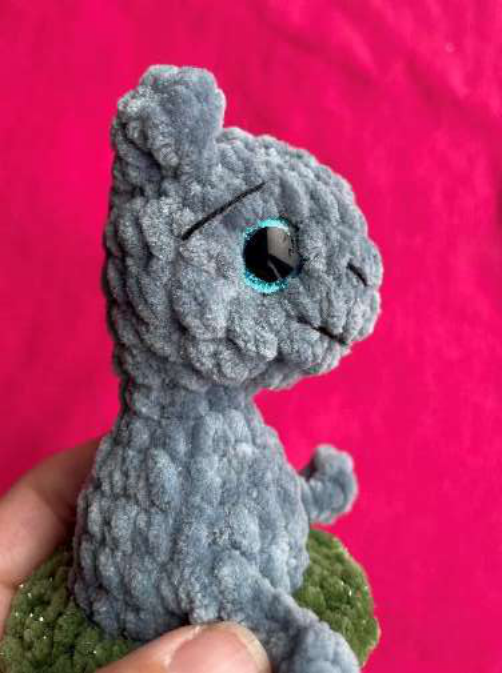
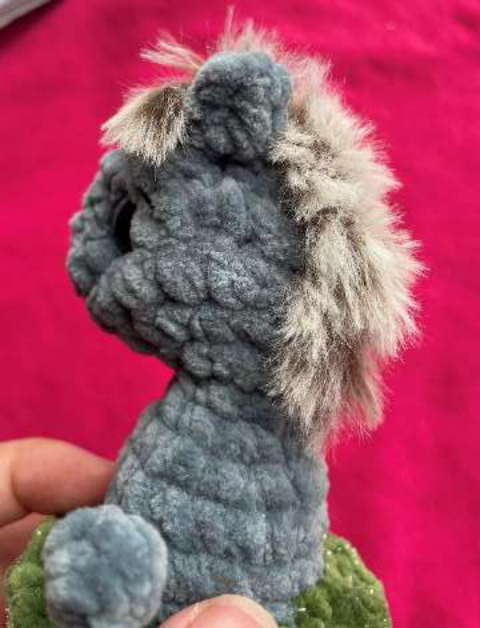
Time to add the eyes! Insert 12 mm safety eyes between Rows 3 and 4. Count 7 stitches from the beginning of Row 4 and insert the right eye. Then, count 9 stitches across and insert the left eye. - Row 6: 3 SC, 4 DEC, 3 SC. (10)
Start stuffing the head firmly. - Row 7: 3 SC, 2 DEC, 3 SC. (8)
- Row 8: 8 SC around. (8)
- Row 9: (1 SC, INC) * 4. (12)
- Row 10: (1 SC, INC) * 6. (18)
- Row 11: 7 SC, make the first front leg (CH 6, from 2nd CH from hook work an INC of HDC, then 4 SL ST down the rest of the chain), continue on the body with 7 SC, make the second front leg (same as the first), 4 SC on the body. (18)
- Rows 12-13: 18 SC around. (18) – 2 rows total


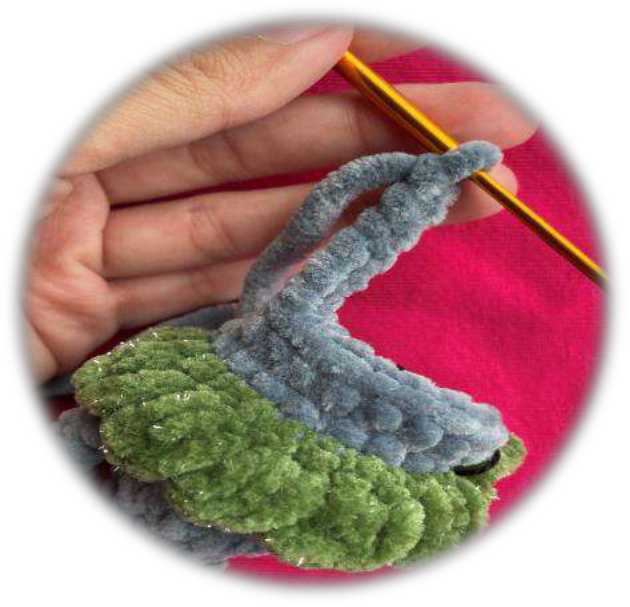
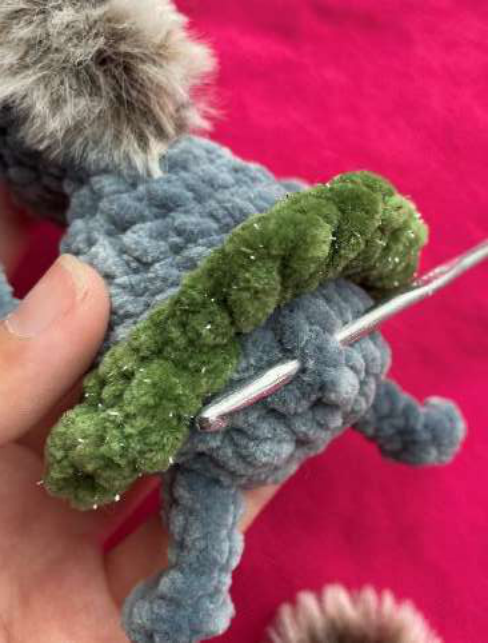
Crocheting the Skirt
At the end of Row 13, change to your skirt color in the last stitch. We will now work in the Front Loops Only (FLO) of Row 13 to create the skirt.
- Skirt Row 1: Working in FLO of Row 13: (2 SC, INC) * 6. (24)
- Skirt Row 2: (SL ST, INC of HDC) * 11, 1 SL ST, 1 SC. Change back to your main body color in this last SC. Fasten off the skirt color and cut the yarn.


Finishing the Body
Now, pick up your main color yarn and continue crocheting the body.
- Row 14: Go back to Row 13 and work 18 SC in the Back Loops Only (BLO) that were left behind the skirt. (18)
- Row 15: 8 SC, make the first back leg (CH 6, from 2nd CH from hook work an INC of HDC, then 4 SL ST down the rest of the chain), continue on the body with 7 SC, make the second back leg (same as the first), 3 SC on the body. (18)
Finish stuffing the body firmly. - Row 16: (1 SC, DEC) * 6. (12)
- Row 17: 6 DEC. (6)
Cut the yarn, leaving a tail. Use your yarn needle to weave the tail through the front loops of the final 6 stitches and pull tight to close the hole. Weave in the end.


Finishing Touches
Face Sculpting (Optional)
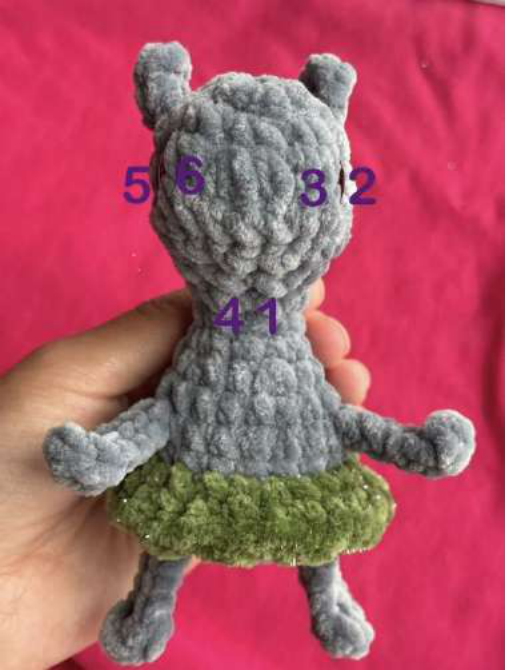
Sculpting the face adds a lot of character! Use a strong thread (like a thick black cotton thread) and a long needle. Follow the diagram and photos below.
- Insert your needle at point 1 (front of the neck, between rows 7-8) and exit at point 2 (under the left eye).
- Re-insert the needle at point 3 (next to point 2) and exit at point 4 (next to point 1). Pull gently to create an indent.
- Repeat for the other side: Insert at point 1, exit at point 5 (under the right eye). Re-insert at point 6 and exit at point 4. Pull gently and tie off the ends securely.

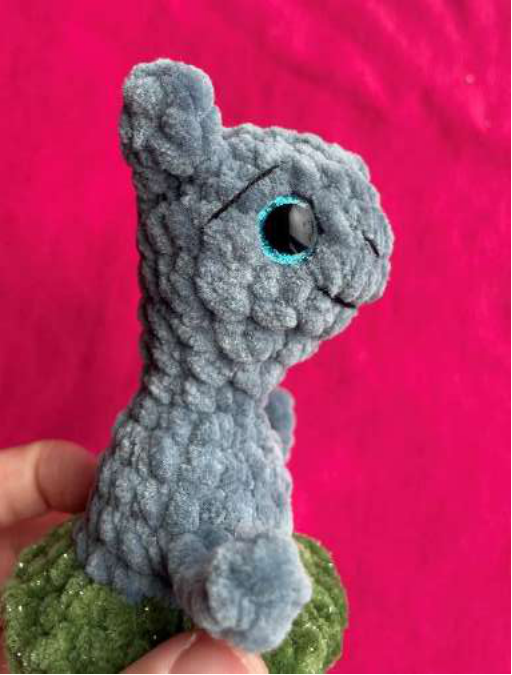
Compare the difference sculpting makes!
Embroidery
Using your black yarn, embroider nostrils, a smile, and eyebrows to bring your horse to life.
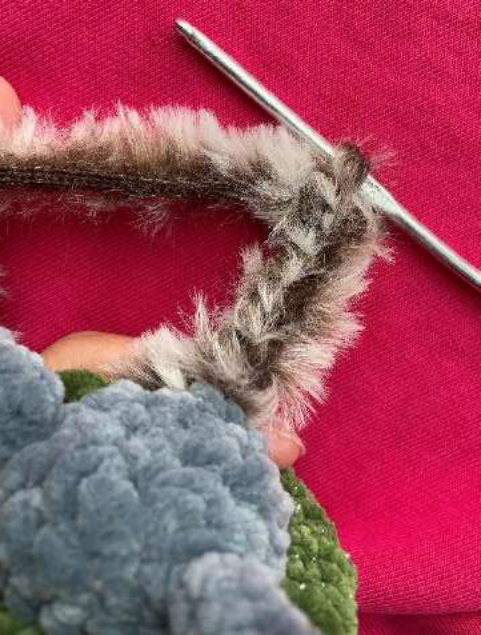
Mane and Tail
Now for the fun, fluffy parts!
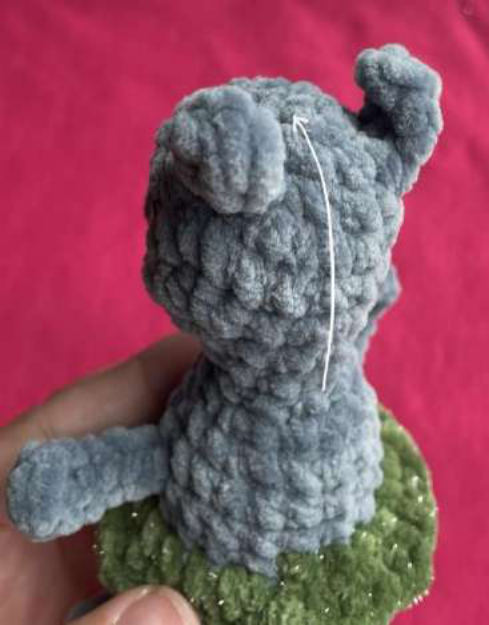
Mane
Attach your fur yarn at the back of the neck, around Row 8. Crochet a line of single crochets up to the top of the head (about 8 SC). Cut the yarn, fasten off, and weave in the end.
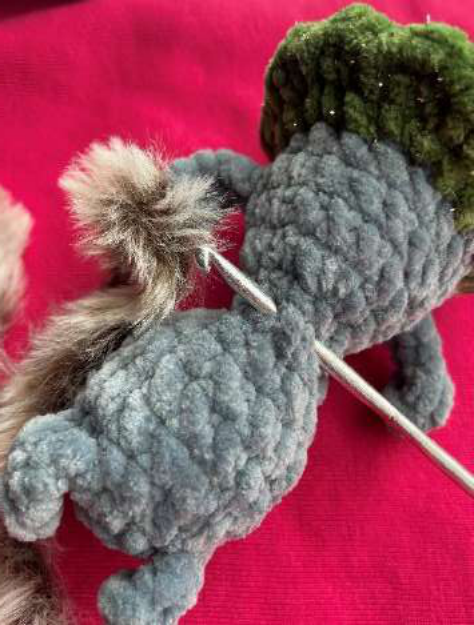
Tail
Attach your fur yarn at the back of the body, around Row 15. CH 7. Starting from the 2nd chain from the hook, work 6 SC back down the chain. SL ST to the body to secure. Cut the yarn and weave in the end.
Decorate!
Your horse is ready! Feel free to add a pendant, a bow, or a ribbon. Let your imagination run wild!
Share Your Creation!
Thank you for crocheting along! Maria from Masya.Toys would be absolutely thrilled to see your finished Igogoshka horses. You can share your work and tag her on social media (@Masya.Toys).
Happy crocheting!
“`