Pawsitively Adorable: Free Step-by-Step Tiny Amigurumi Kitten Pattern
“`html
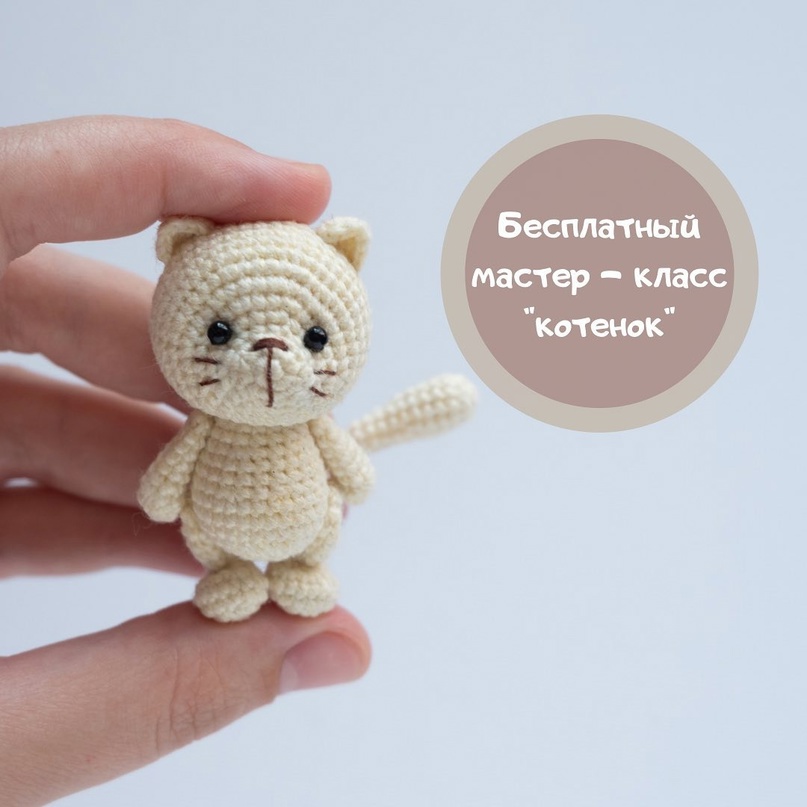
How to Crochet a Tiny Amigurumi Kitten: Free Step-by-Step Pattern
Looking for a quick and adorable crochet project? This tiny amigurumi kitten is the perfect choice for beginners and experienced crocheters alike. Whether you want to make a cute keychain, a desk companion, or a small gift, this miniature cat is sure to bring a smile to anyone’s face.
Materials You Will Need
To achieve the look of the kitten in the photos, we recommend using the following materials:
- Cotton yarn in your choice of color (Cream or White is suggested)
- Crochet hook size appropriate for your yarn (typically 2.0mm to 2.5mm for amigurumi)
- Small safety eyes (approx. 4-6mm)
- Fiberfill stuffing
- Yarn needle and strong sewing thread
- Embroidery thread for the nose and whiskers (dark brown or pink)
- Scissors
Crochet Abbreviations (US Terms)
This pattern uses standard US crochet terminology:
- MR: Magic Ring
- sc: Single Crochet
- inc: Increase (2 sc in one stitch)
- dec: Decrease (sc 2 stitches together)
- ch: Chain
- sl st: Slip Stitch
- rnd: Round
- […] The number of stitches at the end of the round
Step-by-Step Pattern
1. The Head (Starting with the Muzzle)
The head is worked in a continuous spiral. Do not join rounds unless specified.
Rnd 1: 6 sc in MR [6]
Rnd 2: inc * 6 [12]
Rnd 3: sc * 12 [12]
Rnd 4: (sc, inc) * 6 [18]
Rnd 5: 3 sc, (sc, inc) * 6, 3 sc [24]
Rnd 6: 4 sc, inc, (2 sc, inc) * 5, 4 sc [30]
Rnd 7: 3 sc, (3 sc, inc) * 6, 3 sc [36]
Rnd 8: 5 sc, inc, (4 sc, inc) * 5, 5 sc [42]
Rnd 9-14: sc * 42 [42]
Rnd 15: (5 sc, dec) * 6 [36]
Rnd 16: sc * 36 [36]
Rnd 17: (4 sc, dec) * 6 [30]
Rnd 18: (3 sc, dec) * 6 [24]
Rnd 19: (2 sc, dec) * 6 [18]
Rnd 20: (sc, dec) * 6 [12]
Rnd 21: dec * 6 [6]
Fasten off, weave in the end, and pull the remaining hole closed tightly.
2. The Ears (Make 2)
Chain: Start with a chain of 2.
Rnd 1: 5 sc in the second chain from the hook.
Rnd 2: Ch 1, turn. 2 sc, 3 sc in the next stitch, 2 sc.
Fasten off, leaving a long tail for sewing.
3. The Body
Rnd 1: 6 sc in MR [6]
Rnd 2: inc * 6 [12]
Rnd 3: (sc, inc) * 6 [18]
Rnd 4: (2 sc, inc) * 6 [24]
Rnd 5: (3 sc, inc) * 6 [30]
Rnd 6-8: sc * 30 [30]
Rnd 9: 4 sc, (dec, 2 sc) * 5, dec, 4 sc [24]
Rnd 10-11: sc * 24 [24]
Rnd 12: (2 sc, dec) * 6 [18]
Rnd 13-14: sc * 18 [18]
Rnd 15: (sc, dec) * 6 [12]
Rnd 16: dec * 6 [6]
Fasten off, stuff the body firmly, and sew the bottom closed.
4. The Legs (Make 2)
Rnd 1: 6 sc in MR [6]
Rnd 2: inc * 6 [12]
Rnd 3: (sc, inc) * 6 [18]
Rnd 4: sc * 18 [18]
Rnd 5: 3 sc, dec * 6, 3 sc [12]
Rnd 6: 3 sc, dec * 3, 3 sc [9]
Rnd 7: sc * 9 [9]
Rnd 8: (2 sc, inc) * 3 [12]
Rnd 9-11: sc * 12 [12]
Rnd 12: dec * 6 [6]
Fasten off and leave a tail for sewing.
5. The Arms (Make 2)
Rnd 1: 6 sc in MR [6]
Rnd 2: inc * 6 [12]
Rnd 3: (2 sc, dec) * 3 [9]
Rnd 4-8: sc * 9 [9]
Rnd 9: (sc, dec) * 3 [6]
Fasten off and leave a tail for sewing.
6. The Tail
Rnd 1: 6 sc in MR [6]
Rnd 2: inc * 6 [12]
Rnd 3-6: sc * 12 [12]
Rnd 7: (2 sc, dec) * 3 [9]
Rnd 8-11: sc * 9 [9]
Rnd 12: (sc, dec) * 3 [6]
Rnd 13-21: sc * 6 [6]
Fasten off, leaving a long tail for sewing.
Assembly and Finishing Touches
Designing the Face
Before sewing the head to the body, it is easier to finish the face:
- Eyes: Place safety eyes between rounds 5 and 6. They should be approximately 7 stitches apart (counting along round 5).
- Nose: Using embroidery thread, sew a small “V” or “T” shape for the nose and a small line down for the mouth.
- Ears: Sew the ears to the top of the head, approximately between rounds 11 and 12.
Final Assembly
- Head to Body: Securely sew the head to the top of the body using a strong thread.
- Limbs: Sew the arms and legs to the body in a position that allows the kitten to sit or stand comfortably.
- Tail: Sew the tail to the back of the body.
Pro Tip: When sewing the pieces together, use a double strand of strong thread to ensure your kitten stays together during play or travel!
“`