
pokeball crochet pattern: Crochet a Plush Poké Ball: A Step-by-Step Guide!
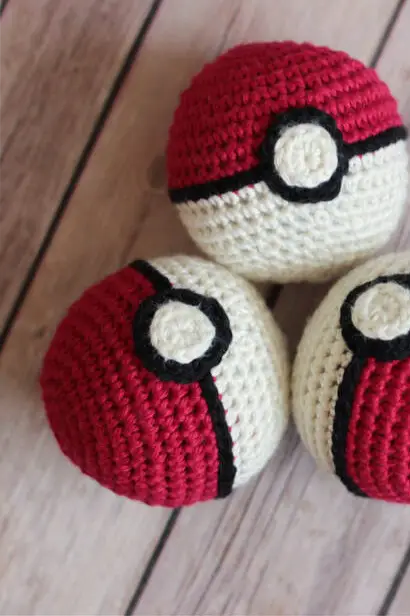
Get ready to catch ’em all with this adorable, squishy Poké Ball! Perfect for playtime or as a fantastic accessory for your next costume, this pattern is designed to be fun and straightforward. Let’s grab our hooks and get started!
Understanding the Basics: Your Stitch Glossary
Before we dive in, here’s a quick reference for the abbreviations used in this pattern:
- st(s): stitch(es)
- ch: chain
- ss: slip stitch
- sc: single crochet
- inc: single crochet increase (work 2 single crochets into the same stitch)
- dec: single crochet decrease1 (decrease over 2 single crochets)
What You’ll Need: Materials
Gather these supplies to create your plush Poké Ball:
- Yarn: “I Love This Cotton!” in Red, Ivory or White, and Black.
- Hook: Size G (4.0 mm) crochet hook.
- Tools: Tapestry needle for finishing, and Fiberfill stuffing to make it plush.
- Optional: A stitch marker can be very helpful to keep track of your rounds.
Crafting the Button
We’ll start by making the iconic white button for your Poké Ball.
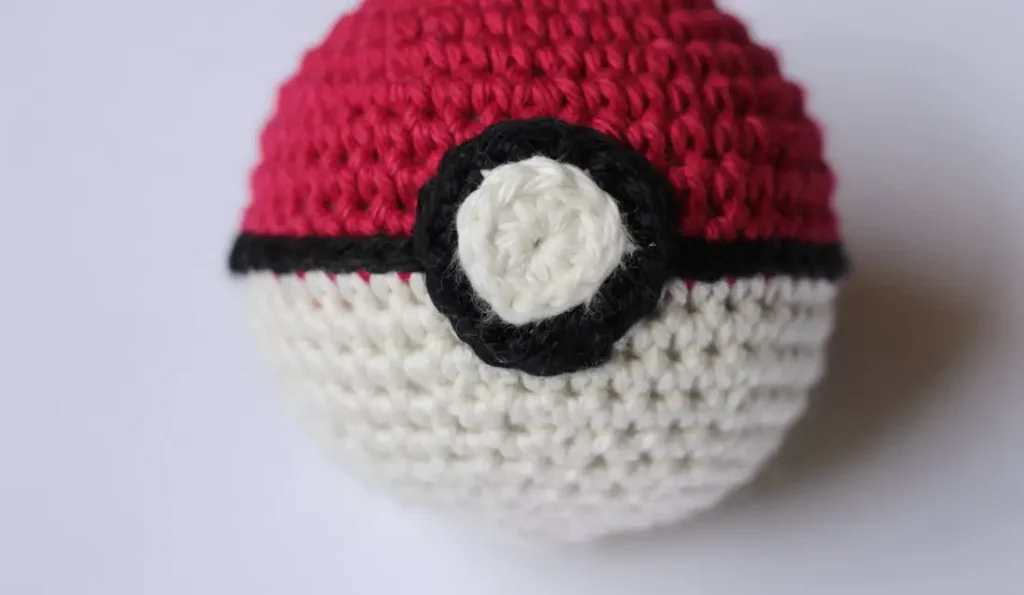
With the white yarn:
- Round 1: Create a magic circle. Chain 2, then work 10 half double crochets (hdc) into the circle. Pull the circle taut to close. Finish this round with either an invisible join or a simple slip stitch to connect (you should have 6 stitches).
- Fasten off the white yarn.
With the black yarn:
- Round 2: Working into the 3rd loop only, repeat the sequence of [increase, single crochet] 5 times. Finish with an invisible join or a simple slip stitch to connect (you should have 15 stitches).
- Fasten off the black yarn, making sure to leave a long tail – you’ll use this for sewing later!
Crocheting the Ball
Now for the main event – the Poké Ball itself! We’ll start with red, then switch to white.
With the red yarn:
- Round 1: Make a magic circle. Chain 1 and work 6 single crochets into the circle. Pull taut to close, then slip stitch to your first single crochet to join (6 stitches).
- Round 2: Chain 1, then increase in every stitch around. Slip stitch to join (12 stitches).
- Round 3: Chain 1, then repeat [increase, single crochet] 6 times. Slip stitch to join (18 stitches).
- Round 4: Chain 1, then repeat [single crochet, increase, single crochet] 6 times. Slip stitch to join (24 stitches).
- Round 5: Chain 1, then repeat [increase, single crochet in the next 3 stitches] 6 times. Slip stitch to join (30 stitches).
- Round 6: Chain 1, then single crochet around. Slip stitch to join (30 stitches).
- Round 7: Chain 1, then repeat [single crochet in the next 2 stitches, increase, single crochet in the next 2 stitches] 6 times. Slip stitch to join (36 stitches).
- Round 8: Chain 1, then repeat [increase, single crochet in the next 5 stitches] 6 times. Slip stitch to join (42 stitches).
- Rounds 9-11: Chain 1, then single crochet around. Slip stitch to join (42 stitches).
Switch to the white yarn:
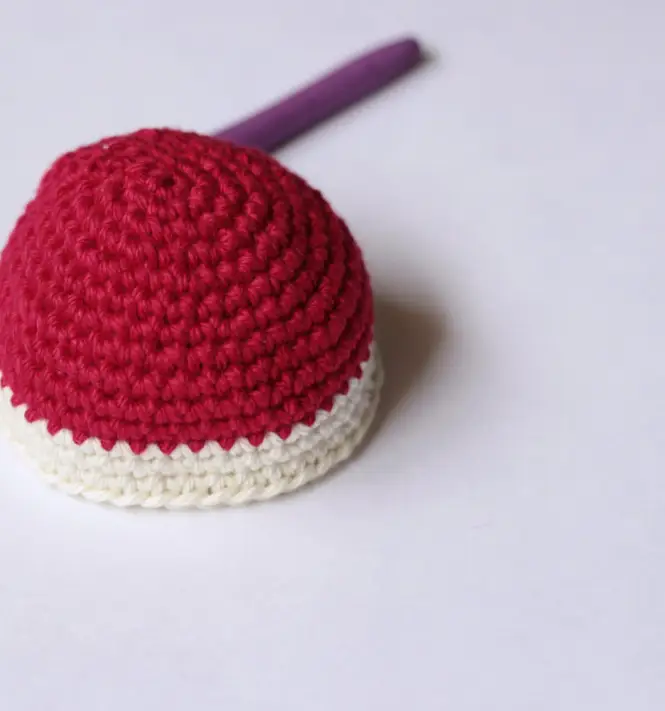
- Rounds 12-14: Chain 1, then single crochet around. Slip stitch to join (42 stitches).
Adding the Black Line & Continuing the Ball
Now, we’ll pause our white yarn work to add the distinctive black line, then resume shaping the ball.
- Pause with the white yarn for a moment! You can use a stitch marker to secure your working loop if you’re concerned about it unraveling.
- With the black yarn, use a surface crochet technique to create a neat line across where your red and white sections meet.
- Fasten off the black yarn, then pick up your white yarn again exactly where you left off.
Continuing with the white yarn:
- Round 15: Chain 1, then repeat [decrease, single crochet in the next 5 stitches] 6 times. Slip stitch to join (36 stitches).
- Round 16: Chain 1, then repeat [single crochet in the next 2 stitches, decrease, single crochet in the next 2 stitches] 6 times. Slip stitch to join (30 stitches).
- Round 17: Chain 1, then single crochet around. Slip stitch to join (30 stitches).
- Round 18: Chain 1, then repeat [decrease, single crochet in the next 3 stitches] 6 times. Slip stitch to join (24 stitches).
- Start stuffing your Poké Ball now! Continue to add fiberfill as you work the remaining rounds.
- Round 19: Chain 1, then repeat [single crochet, decrease, single crochet] 6 times. Slip stitch to join (18 stitches).
- Round 20: Chain 1, then repeat [decrease, single crochet] 6 times. Slip stitch to join (12 stitches).
- Round 21: Chain 1, then decrease around. Slip stitch to join (12 stitches).
- Finish stuffing your Poké Ball firmly. Fasten off your yarn, leaving a long tail. Using your tapestry needle, weave this tail through the front loops of the last round. Pull taut to close the opening. Weave in any remaining loose ends.
Assembly: Bringing It All Together
Almost there! Time to attach the button.
- Using the long black yarn tail you left earlier and your tapestry needle, sew the button securely to the center of the ball, directly over the black surface crochet line.
- Weave in any remaining ends to give your Poké Ball a neat finish.
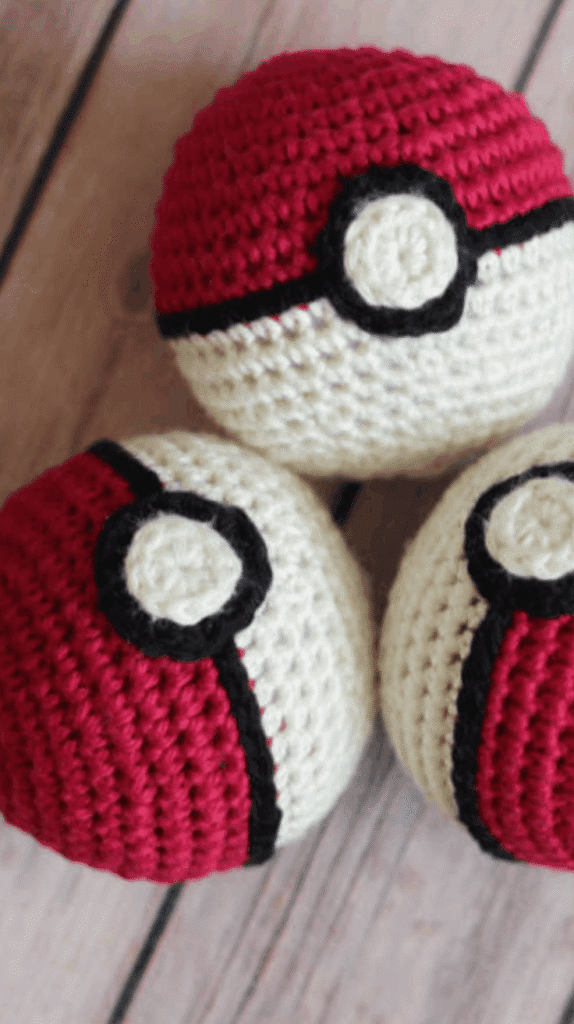
Congratulations!
You’ve done it! You now have an adorable, squishy plush Poké Ball. It’s soft enough for imaginative play and makes a fantastic addition to any trainer’s costume. I hope you had fun with this pattern!
Important Note: This pattern is for personal use only. If you have any questions or comments, feel free to reach out in the comments section below, via email, or on social media.
Happy hooking!