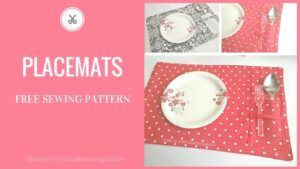
Quick & Chic! Your easy placemats to sew free pattern Awaits
Hey, fabulous sewists! Are you ready to add a touch of handmade charm to your dining table? Megan from Modern Moon Quilt Studio is here to share an incredibly fun and straightforward project: beautiful quilted placemats! Whether you’re a seasoned quilter or just starting your sewing journey, this **easy placemats to sew free pattern** is designed for you. Not only will these placemats elevate your mealtime experience, but they also make fantastic gifts!
Before we dive into the step-by-step instructions, make sure to watch our comprehensive video tutorial to see every detail in action. And for a bonus, don’t miss the coordinating cloth napkins tutorial to complete your table setting!
Gather Your Supplies: Everything You Need for Your Easy Placemats to Sew
To make these charming quilted placemats, you’ll need a few essential items. For a more detailed breakdown of fabric requirements and specific tools, be sure to check the accompanying blog post (link usually found in the video description or channel notes).
Materials per Placemat:
- Fabric: Two fat quarters (one for the top, one for the back). For a sturdier placemat, consider using canvas or duck cloth.
- Binding Fabric: A coordinating fabric for a polished edge.
- Coordinating Thread: Aurifil cotton 50-weight thread in colors that complement your chosen fabrics.
- Quilt Batting: This is an excellent project for using up leftover batting scraps! If your pieces aren’t large enough, you can easily butt the edges together and join them with a wide zigzag stitch – no one will ever know! [1]
Tools You’ll Need:
- Rotary Cutter, Cutting Mat, and Ruler: A 24-inch ruler is highly recommended for precise cuts.
- Fabric Marker: A Hera marker or an air-soluble marker for marking quilting lines.
- Basting Method: Basting spray is efficient for smaller projects like these placemats, but pins or large safety pins work perfectly too.
- Sewing Machine: A standard presser foot works, but a walking foot can be helpful for feeding multiple layers through smoothly.
- Iron and Ironing Board: Essential for crisp seams and flat fabric.
- Wonder Clips or Pins: For holding binding in place.
Step-by-Step Guide: Your Easy Placemats to Sew Free Pattern
1. Precision Cutting for Perfect Placemats
For a finished placemat size of 14 inches by 19 inches, we’ll start by cutting our fabric and batting slightly larger. Cut both your top fabric, backing fabric, and batting to 14.5 inches by 19.5 inches. This gives you a little extra wiggle room for sewing and quilting, ensuring you can trim everything down to a perfect, crisp finish later on. [2]
2. Basting Your Quilt Layers
Basting is crucial for keeping your fabric layers smooth and stable during quilting. Here’s how to create your placemat sandwich:
- Lay your backing fabric right side down on a flat surface. Apply an even coat of basting adhesive.
- Carefully place your batting on top, ensuring it covers the entire backing fabric. Smooth out any wrinkles or ripples. [3]
- Spray the batting with basting adhesive.
- Lay your top fabric right side up on the batting, again smoothing meticulously to eliminate any imperfections.
- Flip the entire placemat sandwich over and give the backing one more good smooth to release any hidden wrinkles.
3. Marking Your Quilting Design
Now for the creative part! We’re going for a modern diagonal design using straight lines at a 45-degree angle. Use your 24-inch ruler and a Hera marker (or air-soluble marker) to mark lines two inches apart across the placemat. This creates a visually appealing and easy-to-quilt pattern.
4. Quilting Your Placemat Layers
Take your basted and marked placemat to your sewing machine. While a walking foot is great for multiple layers, a standard presser foot will also work. [4] Use a coordinating thread (e.g., ivory on top, red in the bobbin for a Valentine’s theme) and quilt along your marked lines.
After completing the first set of lines, mark a second set of lines perpendicular to the first. For a unique modern look, these lines can be spaced further apart, perhaps four inches, to create a captivating rectangular pattern. Quilt these second lines, and you’ll be amazed at the texture and design! [1]
5. Trimming for a Professional Finish
Once your quilting is complete, it’s time to square up your placemat. Using your rotary cutter, cutting mat, and ruler, trim the placemat to its final desired dimensions of 14 inches by 19 inches. This step ensures all edges are straight and your placemat is perfectly rectangular. [4]
6. Attaching the Binding (The Finishing Touch!)
Binding adds a clean, durable edge to your placemat and is a hallmark of quilted projects.
Creating Binding Strips:
Cut your binding fabric into 2.25-inch strips. Sew these strips together end-to-end on a diagonal to create one continuous long strip. Fold this strip in half lengthwise and press well. [1]
Sewing Binding to the Front:
Align the raw edge of your binding strip with the raw edge of the placemat’s front. Sew along the edge using a quarter-inch seam allowance. When you reach a corner, stop about a quarter-inch from the edge, backstitch, and remove your project. Fold the binding strip away from you at a 45-degree angle, finger press, then fold it back towards you at a 90-degree angle to create a mitered corner. Continue sewing, starting from the very edge of the next side, backstitching at the start. [1, 4]
Joining Binding Ends:
When you have a 6-8 inch gap remaining, you’ll need to join the binding ends. Stretch out the two ends and overlap them by the original width of your binding strips (2.25 inches). Mark and trim the excess. Open up the binding strips, lay them right sides together at a 90-degree angle (you may need to gently fold the placemat). Pin in place and sew diagonally from corner to corner. [1] Before trimming, unfold to ensure it lays flat and isn’t twisted. Trim the excess, leaving a quarter-inch seam allowance, then finish sewing the binding to the front of the placemat, remembering to backstitch. [1]
Finishing the Binding to the Back:
Flip your placemat over. You’ll see the stitching line from attaching the binding to the front. Fold the binding over this edge, covering the previous stitching line by about an eighth to a quarter of an inch. Clip or pin it in place. For added stability, you can even glue baste with a thin bead of washable school glue, setting it with a hot iron. [2]
Stitching in the Ditch:
Return to the front of the placemat. Using the “stitch in the ditch” technique, drop your needle right into the seam where the binding meets the placemat. Stitch precisely in this “ditch” as close to the binding as possible, ensuring the folded binding on the back is caught in your stitches. [1]
For corners, stitch slowly to the inner point, drop your needle, lift the presser foot, rotate the placemat 90 degrees, and continue stitching. Backstitch at the beginning and end of your stitching line to secure everything. [1]
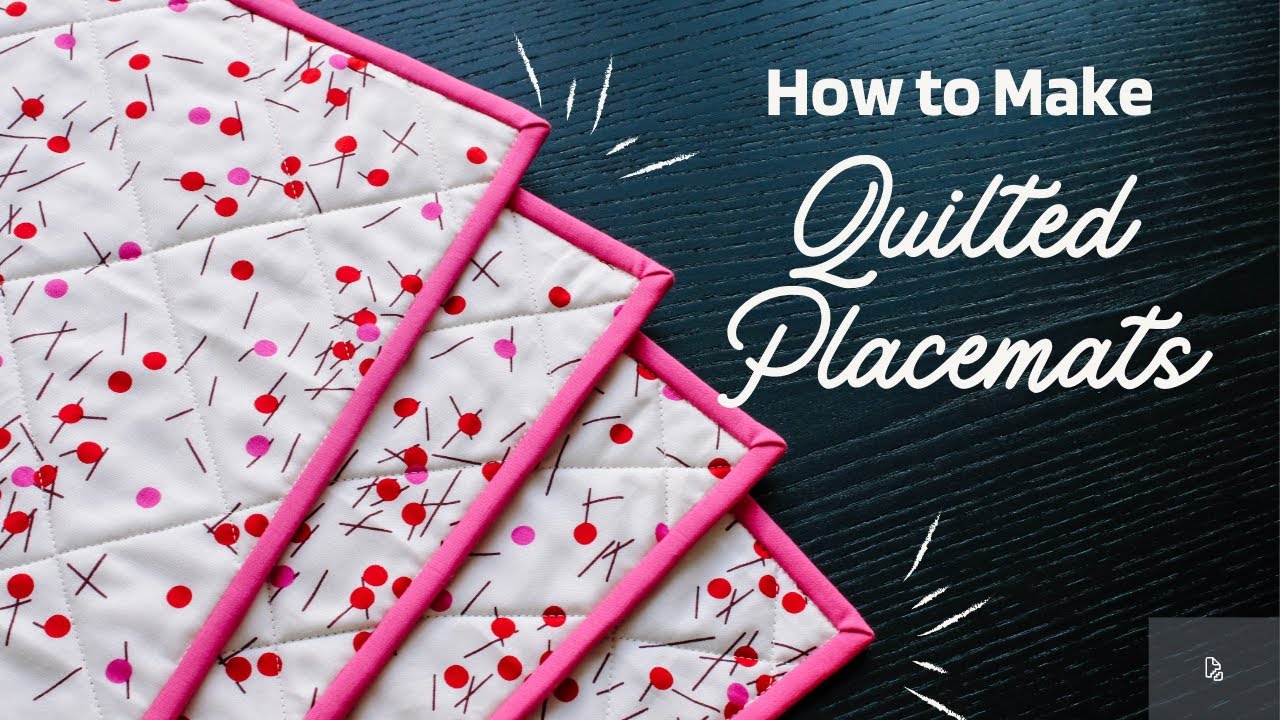
Your Beautiful, Handmade Placemats are Ready!
And just like that, your custom, quilted placemat is complete! You’ve successfully followed an **easy placemats to sew free pattern** and created something truly special for your home. We hope you enjoyed this sewing adventure.
Don’t stop here! Head over to our companion video to learn how to make perfectly coordinating cloth napkins to complete your stunning table ensemble. Happy sewing!