Spooky Cute! Easy Crochet Ghost Pattern: Make Yours Today!
Spooktacular Fun: Your Ultimate No-Sew Crochet Ghost Pattern
Are you ready to add a touch of charmingly spooky décor to your home this Halloween season? Or perhaps you’re looking for a quick, satisfying project that results in an adorable, squeezable friend. Look no further! This ultimate guide to the no-sew crochet ghost pattern is exactly what you need. Perfect for crocheters from confident beginners to seasoned experts, this pattern is designed for speed, simplicity, and maximum cuteness. Forget complicated sewing and endless pieces; this delightful amigurumi ghost comes together magically in one piece, making it a truly joyful creative experience. In this detailed tutorial, we’ll walk you through everything from selecting the squishiest yarn to mastering the special stitches that give this ghost its unique personality. Get your hooks ready to conjure up the sweetest spirit you’ve ever made with this fantastic crochet ghost pattern!
Why You’ll Adore This Crochet Ghost Pattern
In the wide world of amigurumi, some patterns just stand out, and this little ghost is one of them. It’s more than just a Halloween decoration; it’s a project that combines ease, speed, and charm, making it a go-to for any time you need a quick creative fix. Here’s why you’re going to fall in love with this particular crochet ghost pattern.
Perfect for Beginners & Quick to Make
One of the biggest draws of this pattern is its accessibility. If you’re new to the world of amigurumi, this is the perfect project to build your confidence. The instructions are straightforward, using basic stitches that are easy to master. [11] Unlike complex patterns that can be intimidating, this ghost works up incredibly quickly, often in just a couple of hours. This makes it an ideal project for a relaxing afternoon or a last-minute handmade gift. The instant gratification of seeing your cute ghost take shape so fast is incredibly rewarding and motivating for crocheters of all skill levels. This is the kind of easy crochet ghost pattern you’ll return to again and again.
The Magic of a No-Sew Amigurumi Project
Let’s be honest: for many crocheters, attaching amigurumi parts is the least enjoyable step. Sewing on tiny arms, legs, and ears can be fiddly and time-consuming. That’s where the genius of this crochet ghost pattern truly shines—it’s completely no-sew! [15] The arms are cleverly constructed as part of the body using a bobble stitch, and the ruffled bottom is worked directly into the existing stitches. This integrated construction not only saves you a ton of time and effort but also results in a sturdier, more durable finished product, which is especially great if your ghost is destined to be a toy for little hands.
Customizable Spooky Fun!
While the pattern is perfect as is, it also serves as a wonderful blank canvas for your creativity. This crochet ghost pattern is your starting point for a whole legion of spirited friends! You can easily change the ghost’s personality by embroidering different expressions—a sleepy face, a mischievous wink, or a tiny, smiling mouth. Experiment with different yarn colors for a whole rainbow of ghosts. Imagine a pastel pink ghost for a touch of “spooky-cute” or a ghost made with glow-in-the-dark yarn for an extra Halloween surprise! The possibilities are truly endless.
Gathering Your Ghostly Supplies
Before you begin your spooky creation, let’s gather all the necessary materials. Having everything ready will make the process smooth and enjoyable. Here’s a detailed look at what you’ll need for this delightful crochet ghost pattern.
Choosing the Perfect Yarn (Plush, Chunky, and Beyond)
The yarn you choose will define your ghost’s personality. For that irresistibly soft and cuddly look, a chunky or super chunky plush yarn in white is highly recommended. [15] Brands like Hobbii Baby Snuggle, Himalaya Dolphin Baby, or Bernat Blanket yarn are excellent choices. Plush yarn is very forgiving, as its fluffy texture helps to hide any minor imperfections in your stitches, creating a smooth, professional finish. However, don’t feel limited! A standard worsted-weight cotton yarn will create a smaller, more rustic-looking ghost with excellent stitch definition. [9] Feel free to experiment to create the perfect crochet ghost pattern for your style.
Essential Tools of the Trade
- Crochet Hook: A US G (4.0mm – 4.25mm) hook is a good starting point, but the most important thing is to match the hook to your yarn. [16] For amigurumi, it’s often best to use a hook size slightly smaller than the yarn label recommends to create tight stitches that the stuffing won’t poke through. [1]
- Poly-Fil Stuffing: This is what brings your ghost to life! You’ll need a good quality polyester fiberfill to give your ghost a firm but squeezable shape.
- Safety Eyes: A pair of 8mm or 10mm black safety eyes will give your ghost its classic, cute expression. Please remember that safety eyes are not recommended for children under three years old. If making this for a young child, it’s safer to embroider the eyes with black yarn.
- Scissors: Any sharp pair of scissors will do for snipping your yarn.
- Yarn Needle: A blunt-tipped tapestry or yarn needle is essential for weaving in the final end to close the ghost. [7]
- Stitch Markers: These are a lifesaver, especially when working in continuous rounds. A stitch marker helps you keep track of the beginning of each round, preventing you from losing your place. [1]
Mastering the Stitches for Your Ghost
This crochet ghost pattern uses a combination of fundamental crochet stitches and one special stitch that gives the ghost its adorable arms. Let’s do a quick review to ensure you’re ready to start.
A Quick Refresher on the Basics
You should be comfortable with these standard amigurumi stitches:
- Magic Ring (MR): The best way to start amigurumi, creating a tight, seamless beginning. [4]
- Single Crochet (SC): The most common stitch in amigurumi, creating a dense fabric.
- Increase (INC): Placing two single crochets into the same stitch to make the piece larger.
- Invisible Decrease (DEC): A method of decreasing that is much neater than a standard decrease, perfect for amigurumi. [4] To do this, you insert your hook into the front loops only of the next two stitches, then complete a single crochet as normal.
- Half Double Crochet (HDC): A stitch that’s halfway in height between a single and a double crochet, used here for the frills.
- Slip Stitch (SL ST): Used to join rounds or move yarn without adding height.
- Front Loops Only (FLO) & Back Loops Only (BLO): You’ll use these techniques to create the beautiful ruffled base of your ghost.
The Secret to Perfect Arms: The Bobble Stitch Explained
The “no-sew” magic for the arms comes from the Bobble Stitch. It looks complicated, but it’s quite simple once you get the hang of it. It creates a wonderful, poppy texture that’s perfect for little ghost arms. Here’s how you do it for this crochet ghost pattern:
- Yarn over your hook.
- Insert the hook into the designated stitch.
- Yarn over again and pull up a loop (you’ll have 3 loops on your hook).
- Repeat steps 1-3 four more times in the exact same stitch. You’ll accumulate loops on your hook. By the end, you should have 11 loops on your hook.
- To finish, yarn over one last time and carefully pull the hook through all the loops.
- Give your working yarn a gentle tug to tighten the stitch, and continue with the pattern. You’ve made a perfect little arm!
The Complete No-Sew Crochet Ghost Pattern (Step-by-Step)
Now for the fun part! Let’s bring your ghost to life. Follow these instructions round by round. Remember to place a stitch marker in the last stitch of each round to keep your place. [1]
This free crochet ghost pattern uses US crochet terminology.
H3: Starting at the Top: The Ghost’s Head
We begin at the very top of the ghost’s head and work our way down.
- Round 1: Make 6 SC into a magic ring. Pull the ring tight to close. (6 stitches)
- Round 2: INC in each stitch around. (12 stitches)
- Round 3: [SC in the first stitch, INC in the next stitch]. Repeat this sequence 6 times. (18 stitches)
- Round 4: [SC in the next 2 stitches, INC in the next stitch]. Repeat this sequence 6 times. (24 stitches)
- Rounds 5-8: SC in each of the 24 stitches around. (24 stitches for 4 rounds)
H3: Creating the Body and Adorable Bobble Arms
Now, we’ll create the bobble stitches for those cute, no-sew arms.
- Round 9: SC in the first 6 stitches. Make a Bobble Stitch in the next stitch (this is the first arm). SC in the next 10 stitches. Make a Bobble Stitch in the next stitch (the second arm). SC in the final 6 stitches of the round. (24 stitches)
H3: Adding Personality: Placing the Safety Eyes
It’s time to give your ghost a face! Place the safety eyes between Rounds 7 and 8. Position them symmetrically with the arms, about five stitches apart. Adjust them until you are happy with the placement, then securely attach the backs.
- Rounds 10-11: SC in each of the 24 stitches around. When you get to the bobble stitches, it might feel a bit tight, so just work slowly and carefully into the top of the stitch. (24 stitches for 2 rounds)
H4: Crafting the Ruffled, Ghostly Bottom (FLO Technique)
This is where we create the lovely wavy edge that makes our creation look like a proper floating spirit. This is a key part of this unique crochet ghost pattern.
- Round 12 (Front Loops Only): In this round, we work exclusively in the front loops only. [In the first FLO, work (1 SC, 1 HDC, 1 SC) all into the same loop. SL ST into the next FLO]. Repeat this sequence all the way around. You will have 12 beautiful frills at the end.
H4: Closing and Finishing Your Amigurumi Ghost
Now we’ll work into the back loops left over from Round 11 to close up the bottom.
- Round 13 (Back Loops Only): Find the back loops from Round 11. SC in each of the 24 back loops around. (24 stitches)
- Round 14: [SC in the next stitch, DEC]. Repeat this sequence 8 times. (16 stitches)
- Time to Stuff! Before the opening gets too small, firmly stuff your ghost with Poly-Fil. Make sure to push out the bobble stitch arms so they are well-defined.
- Round 15: Work 8 decreases around. (8 stitches)
Cut your yarn, leaving a long tail for sewing. Using your yarn needle, weave the tail through the front loops of the final 8 stitches. Pull the tail gently to cinch the hole closed. [15] Weave the end securely into the body and snip the excess. Congratulations on finishing your adorable crochet ghost pattern!
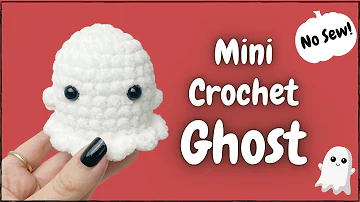
Visual Learner? Watch the Video Tutorial!
For those who find it easier to see a pattern in action, this full video tutorial will guide you through every single step of the no-sew crochet ghost pattern. You can pause, rewind, and crochet along at your own pace to ensure your ghost turns out perfectly.
Quick Takeaways
- This is a no-sew project, making it fast, fun, and beginner-friendly.
- The pattern primarily uses basic stitches like Single Crochet, Increases, and Decreases.
- The arms are created with a clever Bobble Stitch, integrated directly into the body.
- The ruffled bottom is made by working into the Front Loops Only (FLO) of a round.
- Plush, chunky yarn is recommended for an extra soft and cuddly finish.
- This crochet ghost pattern is easily customizable with different yarns and embroidered faces.
- It’s a quick project, perfect for Halloween markets, gifts, or festive décor.
Conclusion
You’ve done it! You’ve successfully completed this charming and spooky no-sew crochet ghost pattern. By now, you should have an adorable little spirit that’s ready to haunt your home in the cutest way possible. We’ve journeyed from gathering the plushest yarns and essential tools to mastering the basic amigurumi stitches and the special bobble stitch that brings this ghost’s arms to life. The true beauty of this project lies in its simplicity and the joy of creating something so endearing without the hassle of sewing. This crochet ghost pattern is more than just an instruction set; it’s a gateway to creativity. Whether you stick to the classic white or venture into a spectrum of spooky colors, each ghost you make will have its own unique personality. We hope you’ve enjoyed this process and feel inspired to create a whole host of these little ghouls. Now, go show off your fantastic creation!
We encourage you to share your finished ghost! Tag your creations on social media so everyone can see the wonderful work you’ve done with this crochet ghost pattern.
Frequently Asked Questions (FAQ)
- 1. What is the best yarn for this amigurumi ghost pattern?
- For a super soft and squishy ghost, a chunky or super chunky plush yarn (chenille) is best. However, a worsted-weight cotton or acrylic yarn will also work wonderfully for a smaller, more classic amigurumi look.
- 2. Is this crochet ghost pattern suitable for absolute beginners?
- This pattern is great for a confident beginner. As long as you are familiar with the basic stitches (single crochet, increase, decrease) and are willing to learn the bobble stitch, you can successfully complete this project. The no-sew aspect makes it easier than many other amigurumi patterns. [11]
- 3. Can I make this ghost bigger or smaller?
- Absolutely! To make a bigger ghost, use a thicker yarn (like jumbo blanket yarn) and a larger hook. To make a smaller ghost, use a thinner yarn (like DK or sport weight) and a smaller hook. The pattern remains the same.
- 4. How do I make sure my stuffing doesn’t show through?
- The key is to maintain tight tension and to use a crochet hook that is slightly smaller than what the yarn label suggests. [1] This creates a dense fabric that will keep the Poly-Fil stuffing securely inside your amigurumi ghost.
- 5. My bobble stitches look messy. What am I doing wrong?
- After you pull your hook through all the loops to complete the bobble stitch, make sure to give your working yarn a good tug to tighten everything up. Also, ensure you are pushing the “bobble” to the outside of the ghost’s body as you continue the next round to make it pop.
We’d Love to Hear From You!
Thank you for following along with this crochet ghost pattern! We hope you had a fantastic time creating your new spooky friend. What was your favorite part of making this pattern? Drop a comment below and let us know! If you enjoyed this tutorial, please consider sharing it with your fellow crochet-loving friends on Pinterest or Facebook!
References
- Bella Coco Crochet. (n.d.). Learn Amigurumi Crochet: A Beginner’s Guide. Retrieved from bellacococrochet.com
- Moogly. (2020). The Invisible Decrease for Amigurumi. Retrieved from mooglyblog.com [2]
- PlanetJune. (2017). The 5 Essential Techniques for Amigurumi. Retrieved from planetjune.com [4]