Teddy Bear Angel Crochet Pattern
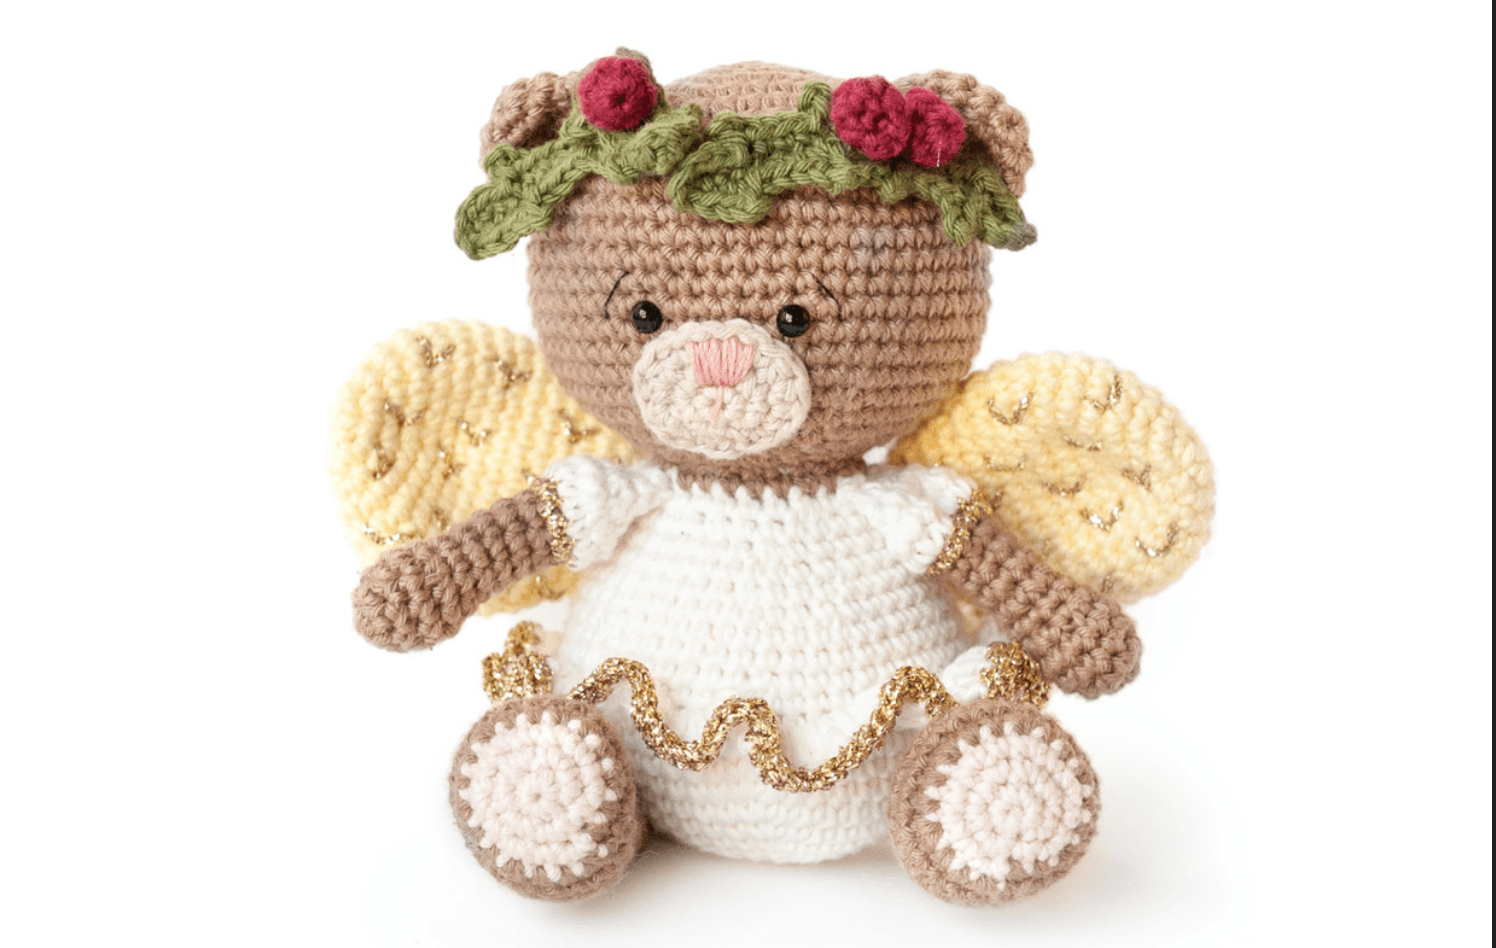
Create an adorable Teddy Bear Angel with this easy-to-follow crochet pattern using Rico Ricorumi DK yarn. Perfect as a gift, decoration, or keepsake, this pattern guides you step-by-step to achieve the best results.
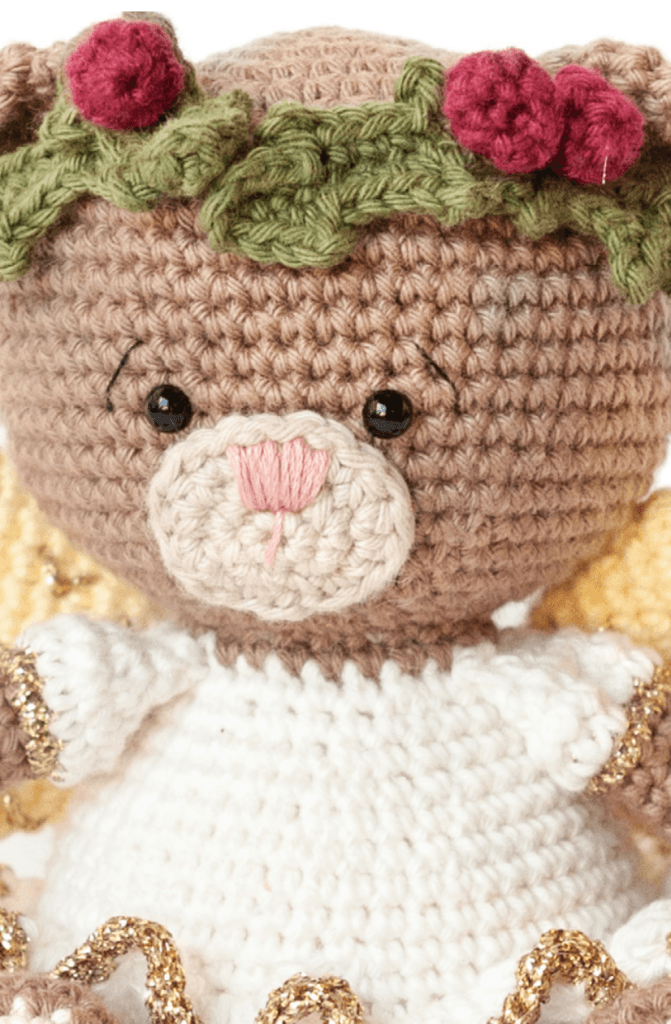
Materials Needed for Your Crochet Doll
Yarn Requirements
- Ricorumi DK
- Shade 002 (Cream) – 25g
- Shade 005 (Vanilla) – 25g
- Shade 007 (Pastel Pink) – 25g
- Shade 030 (Burgundy) – 25g
- Shade 048 (Olive) – 25g
- Shade 051 (Mastic) – 25g
- Shade 052 (Light Brown) – 25g
- Rico Ricorumi Lamé
- Shade 002 (Gold) – 10g
Additional Supplies
- Rico Embroidery Strand (Shade 044 – Dusky Pink, Shade 296 – Black)
- 2.5mm Crochet Hook
- 2x 5mm Eye Buttons
- Toy Stuffing
- Stitch Markers
- Yarn Needle
Crochet Gauge & Tension
26 sts and 26 rows = 10 x 10 cm
British Crochet Abbreviations
- BLO – Back loop only
- ch – Chain
- dc – Double crochet
- dec2tog – Decrease 2 stitches together
- Rnd(s) – Round(s)
- st(s) – Stitch(es)
Step-by-Step Crochet Doll Tutorial
1. Crocheting the Muzzle
Rnd 1: In mastic, working into magic ring, 6 dc.
Rnd 2: [2 dc into next st] 6 times. (12 sts)
Rnd 3: 1 dc, 2 dc into next st, 1 htr, 2 htr into next st (mark this 2 htr with a st marker), 1 dc, 2 dc into next 2 st, 1 dc, 2 htr into next st (mark this 2 htr with a st marker), 1 htr, 2 dc into next st, 1 dc. (18 sts)
Sl st into next st. Fasten off.
Embroidery Tip: Use dusky pink embroidery strand for the nose, centering it using the marked stitches from Rnd 3.
2. Creating the Doll’s Head
Rnd 1-9: Increase rounds (6 dc to 54 sts)
Rnd 10-18: Work even (54 dc)
Rnd 19-26: Decrease rounds (54 sts to 6 sts)
Pro Tip: Insert eye buttons between Rnds 15-16, 6 sts apart. Embroider eyebrows with black yarn over Rnds 14-15.
3. Crafting the Body
Rnd 1-9: Increase rounds (6 dc to 50 sts)
Rnd 10-12: Work even (50 dc)
Rnd 13: BLO 50 dc
Rnd 14-23: Decrease rounds (50 sts to 24 sts)
Stuffing Tip: Firmly stuff before attaching the head.
4. Designing the Skirt
Rnd 1: In cream, join to FLO of Rnd 13, [2 tr in next st] 50 times. (100 sts)
Rnd 2: In gold, [1 dc, 2 dc into next st] 50 times. (150 sts)
5. Making the Arms (x2)
Rnd 1-5: Shape hand (6 dc to 8 sts)
Rnd 6-14: Work sleeve (color changes to gold & cream)
6. Crocheting the Legs (x2)
Left Leg:
- Rnd 1-3: Pink foot (6 dc to 18 sts)
- Rnd 4-18: Brown leg (24 sts to 15 sts)
Right Leg: Same as left leg with extra dc before closing.
7. Adding Ears (x2)
Rnd 1-4: Shape ear (6 dc to 15 sts)
8. Crafting Wings (x2)
Rnd 1-17: Shape wing (6 dc to 12 sts)
Finishing Touch: Embroider gold “V” details.
9. Creating the Tail
Rnd 1-3: Simple tapered shape (6 dc to 9 sts)
10. Making Leaves (x4) & Berries (x3)
Leaves: Ch 10, work leaf shape with olive yarn.
Berries: 3 rounds of burgundy dc (6 sts each).

