
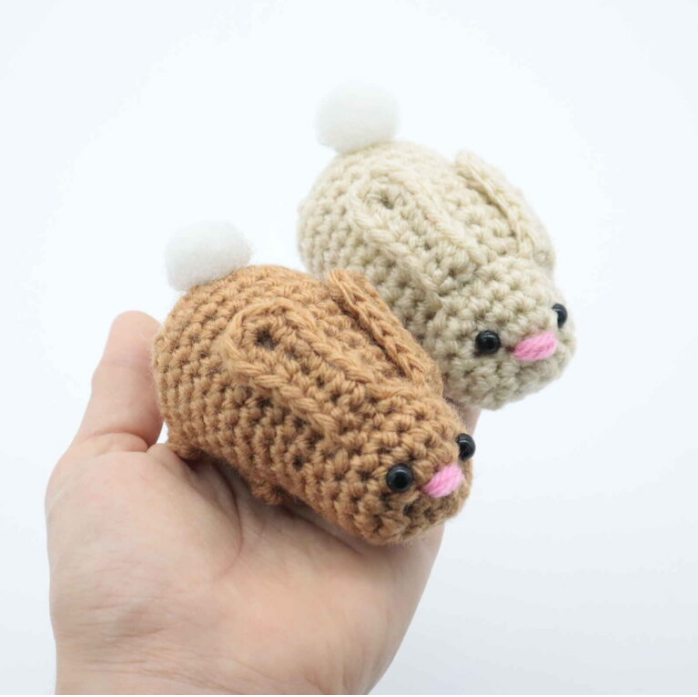
The No-Sew Scrap Bunny 🐰
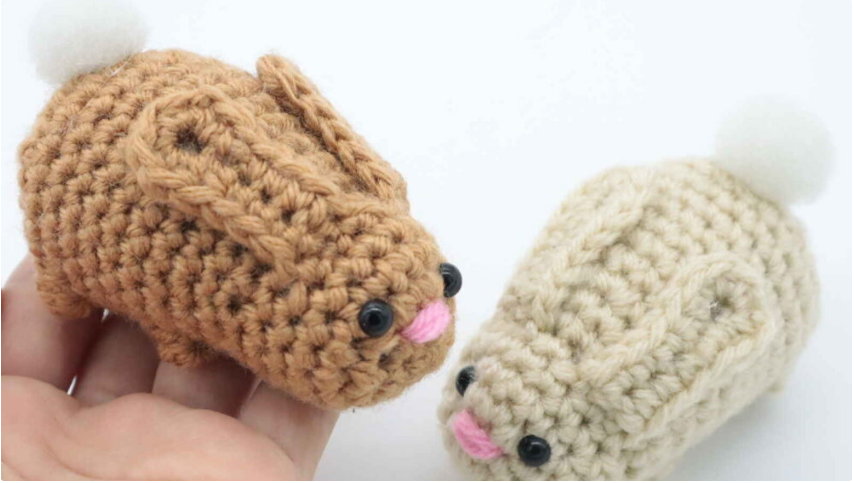
If you have a stash of leftover yarn and about 30 minutes, you have everything you need to make these adorable bunnies. These little amigurumi creatures are about 2.5 inches long and are perfect for quick gifts or market prep because they are genuinely addicting to make.
The best part? The ears are crocheted directly into the body, so there is no sewing involved for the main parts.
🧶 The Supplies List
Grab your scrap bin! Here is what you’ll need:
- Yarn: Main color (for body/ears) and Pink (for the nose).
- Hook: 4mm Crochet Hook.
- Eyes: Safety eyes.
- Tools: Scissors, Tapestry Needle, and Stuffing.
- Special Item: Hot glue (used for a clever “no-sew” tail hack!).
📝 The Pattern
Phase 1: The Ears (Make 2)
We make these first so we can crochet them in later.
- Row 1: Ch 7. Sc 4 times into the 2nd Ch from the hook. Sc in the next st. Sc in the next st. Sc into the next st.
- Turn & Work the Other Side: Now working on the opposite side of the chain: Sc into that same st. Sc in the next 4 st. Sc in the next st. Sc in the next 2 st.
- Finish: Fasten off and weave in your ends now. Set these aside.
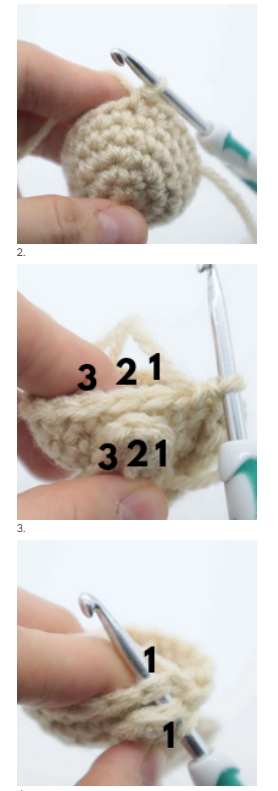
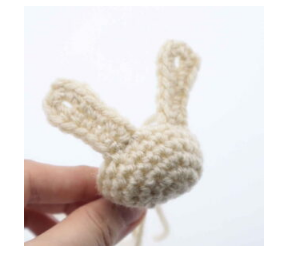
Phase 2: The Bunny Body
Worked in one continuous piece.
- Round 1: 6 Sc into a Magic Ring.
- Round 2: Inc all around (12).
- Round 3: Inc, Sc in the next st all around (18).Tip: Mark the 6th and 7th stitch here—this is where your safety eyes will go.
- Round 4-5: Sc all around (18).
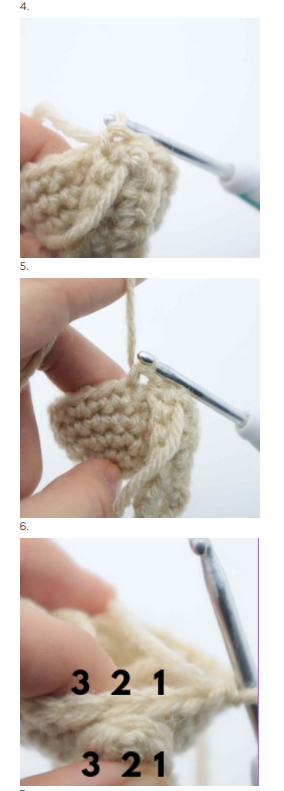
Round 6: The No-Sew Ear Attachment
This is where we join the ears to the head:
- Sc in the next st.
- Attach Ear 1: Align the 3 bottom stitches of an ear to the next 3 stitches of the head. Crochet through BOTH the ear and the head stitches: Sc in the next 3 st.
- Sc in the next st (head only).
- Attach Ear 2: Align the second ear. Crochet through BOTH layers again: Sc in the next 3 st.
- Sc in the next 6 st (head only).(Total stitches: 18)
- Round 7: Sc in the next 4 st. Working in FLO (Front Loop Only), repeat Inc, Sc in the next 2 st 4 times. Working in BOTH loops, Sc in the next 2 st (22).
- Round 8: Sc all around (22).
- Round 9: Sc in next st. Repeat Inc, Sc in next 6 st 2 times. Inc in next st, Sc in next 6 st (25).
The Feet & Shaping
- Round 10 (Front Feet): Sc in next 3 st. Popcorn st in next st. Sc in next 10 st. Popcorn st in next st. Sc in next 10 st (25).
- Round 11-15: Sc all around (25).
- Round 16 (Back Feet): Popcorn st in next st. Sc in next 5 st. Popcorn st in next st. Sc in next 18 st (25).
Closing Up
- Round 17: Repeat Dec, Sc in next 2 st 6 times. Sc in next st (19).
- Round 18: Repeat Dec, Sc in next st 6 times. Sc in next st (13).
- Round 19: Dec 6 times. Sc in next st (7).
- Finish: Fasten off, sew the remaining hole closed, and weave in your ends. (Don’t forget to secure your safety eyes where you marked them in Round 3!)
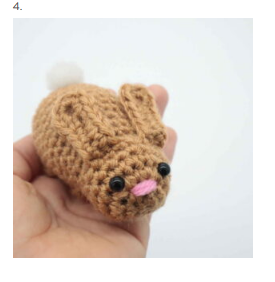
✨ Finishing Touches
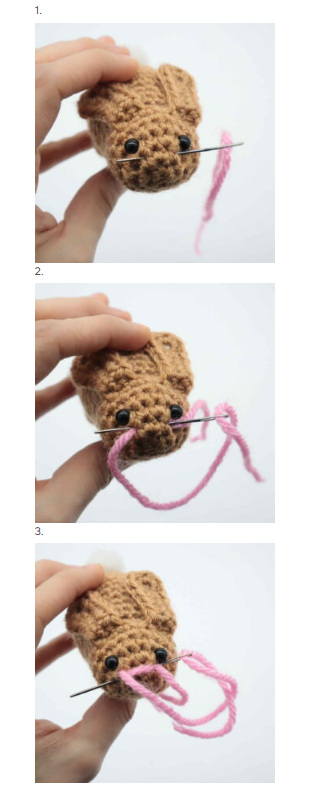
The Nose:
Using pink yarn and a needle, insert the needle on the right side of the face and exit under the left eye. Repeat this 2 times to create a simple, cute horizontal nose.
The “Cheat” Fluffy Tail:
Instead of making a tiny pom-pom, try this:
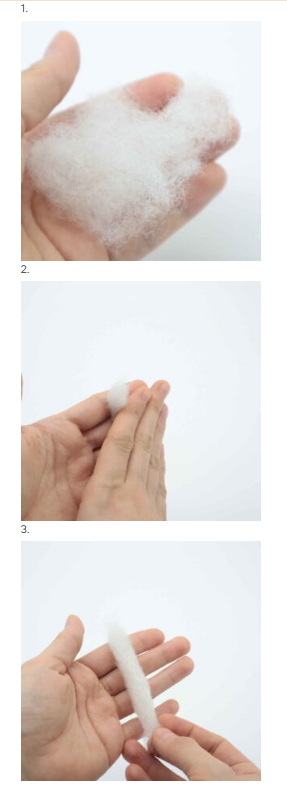
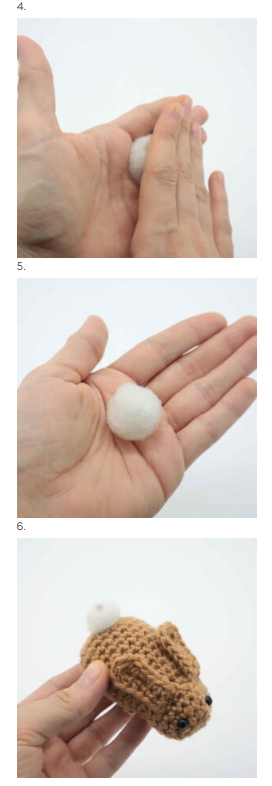
- Take a small tuft of stuffing.
- Roll it between your palms in circular motions until it forms a tight, round ball.
- Apply a small dab of hot glue to the back of the bunny and press the stuffing ball into place.
Happy Crocheting!