Tiny Fins, Big Charm: DIY Micro-Crochet Fish Brooch Pattern
DIY Crochet Fish Brooch Pattern: Step-by-Step Amigurumi Guide
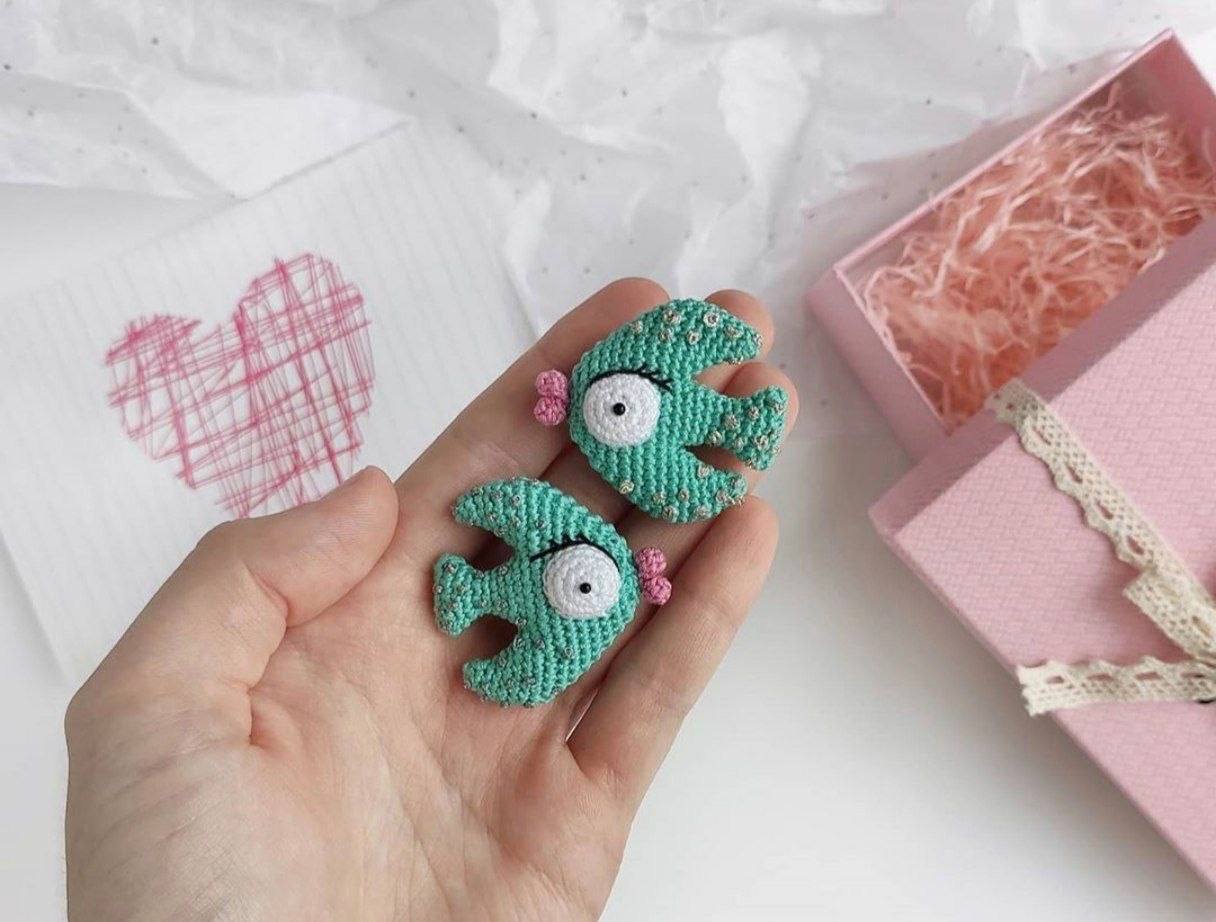
Create a charming micro-crochet fish brooch with this comprehensive, step-by-step pattern. Perfect as a jacket pin, bag accessory, or handmade gift, this cute amigurumi fish features fine details including textured fins, an expressive embroidered eye, and sweet tiny lips. Follow this guide to craft your own wearable art!
Materials and Tools
- Yarn/Thread: Very fine yarn or size 10 crochet thread (e.g., laceweight cotton) in aqua/teal (main body color), white (eye), and pink (lips).
- Crochet Hook: 0.75 mm steel crochet hook (US Size 14).
- Stuffing: Polyester fiberfill.
- Embroidery Floss: Black embroidery floss (for eyelashes) and metallic embroidery thread or tiny seed beads (for body decorations).
- Eye Detail: 2 mm black safety eye or small black bead.
- Hardware: 1.5 cm (approx. 0.6 inches) brooch pin back.
- Tools: Tapestry needle, scissors, glue (optional for eye).
Finished Size: Approximately 1.6 x 1.4 inches (4 x 3.5 cm).
Crochet Abbreviations (US Terms)
- MR: Magic Ring
- ch: chain
- sc: single crochet
- inc: increase (2 sc in the same stitch)
- dec: decrease (single crochet 2 stitches together)
- sl st: slip stitch
- st(s): stitch(es)
Step-by-Step Crochet Fish Brooch Pattern
Part 1: The Tail
Using main body color (teal/aqua):
- Ch 8. Starting in the 2nd chain from the hook: 1 inc, 5 sc, 3 sc in the last chain stitch. Working along the bottom side of the chain: 6 sc [16 sts]
- 1 dec, 6 sc, 1 dec, 5 sc [14 sts]
- (1 dec, 5 sc) repeat 2 times [12 sts]
- (1 dec, 4 sc) repeat 2 times [10 sts]
- (1 dec, 3 sc) repeat 2 times [8 sts]
- 8 sc [8 sts]
- (1 inc, 3 sc) repeat 2 times [10 sts]
- (1 inc, 4 sc) repeat 2 times [12 sts]
- (1 inc, 5 sc) repeat 2 times [14 sts]
Fasten off yarn and set the tail piece aside.
Part 2: The Fins (Make 2)
Using main body color (teal/aqua):
- 4 sc in MR [4 sts]
- 2 inc, 2 sc [6 sts]
- 1 sc, 2 inc, 3 sc [8 sts]
- 2 sc, 2 inc, 4 sc [10 sts]
- 3 sc, 2 inc, 5 sc [12 sts]
- 4 sc, 2 inc, 6 sc [14 sts]
- 5 sc, 2 inc [16 sts – incomplete round]
Cut thread for the first fin. Crochet the second fin following steps 1–7. Do not cut thread after finishing the second fin; proceed directly to joining the pieces.
Part 3: Joining the Parts & Body Assembly
Now, connect the tail and both fins together to continue working the main body in continuous rounds.
- Joining Round: Join Tail with 1 sl st, work 6 sc across the tail. Join First Fin with 1 sl st, work 15 sc across the fin. Work 7 sc across the opposite side of the tail. Work 16 sc across the second fin. [46 sts total]
- 46 sc [46 sts]
- 13 sc, 2 dec, 19 sc, 2 dec, 6 sc [42 sts]
- 12 sc, 2 dec, 17 sc, 2 dec, 5 sc [38 sts]
- 11 sc, 2 dec, 15 sc, 2 dec, 4 sc [34 sts]
- 10 sc, 2 dec, 13 sc, 2 dec, 3 sc [30 sts]
- 9 sc, 2 dec, 11 sc, 2 dec, 2 sc [26 sts]
- 8 sc, 2 dec, 9 sc, 2 dec, 1 sc [22 sts]
Begin stuffing the body lightly and evenly with fiberfill.
- 7 sc, 2 dec, 7 sc, 2 dec [18 sts]
- (5 sc, 2 dec) repeat 2 times [14 sts]
- 7 dec [7 sts]
Fill the body completely with fiberfill. Keep it firm enough to hold shape, but not overly hard. Leave a long tail of yarn for sewing, then cut the working yarn.
Part 4: The Eye
Using white yarn:
- 6 sc in MR [6 sts]
- 6 inc [12 sts]
- (1 sc, 1 inc) repeat 6 times [18 sts]
- 18 sc [18 sts]
Fasten off, leaving a long tail for sewing.
Attaching the Eye:
- Position the white circle on the side of the head.
- Sew it around the edge using front loops only, adding a tiny bit of fiberfill behind the eye before closing completely.
- Using 2–3 strands of black embroidery floss, stitch delicate eyelashes over the top edge of the white circle.
- Attach the 2 mm black eye or small bead directly into the center magic ring of the white eye.
Part 5: The Lips (Make 2)
Using pink yarn (worked with the wrong side facing outwards):
- 5 sc in MR [5 sts]
- 5 sc [5 sts]
Fasten off, leaving a tail for sewing. Add a tiny piece of fiberfill if room permits.
Attaching the Lips:
- Sew the two lip pieces together side-by-side at their bases.
- Insert the base of the connected lips into the front opening of the fish head.
- Pull the thread ends inside the body, knot securely, and hide the yarn tails.
- Use the remaining yarn tail from the body to pull the head opening tightly closed around the lips.
Finishing & Decoration
- Close Gaps: If any small holes remain where the fins and tail were joined to the body, use a needle and matching yarn to neatly stitch them shut.
- Add Details: Decorate the fish body with French knots using metallic embroidery thread, or sew on small decorative seed beads to mimic scales.
- Attach Pin Back: Position the 1.5 cm brooch pin back horizontally on the back side of the fish and sew it securely in place using matching yarn or strong thread.
Your beautiful hand-crocheted fish brooch is now complete and ready to wear or gift!