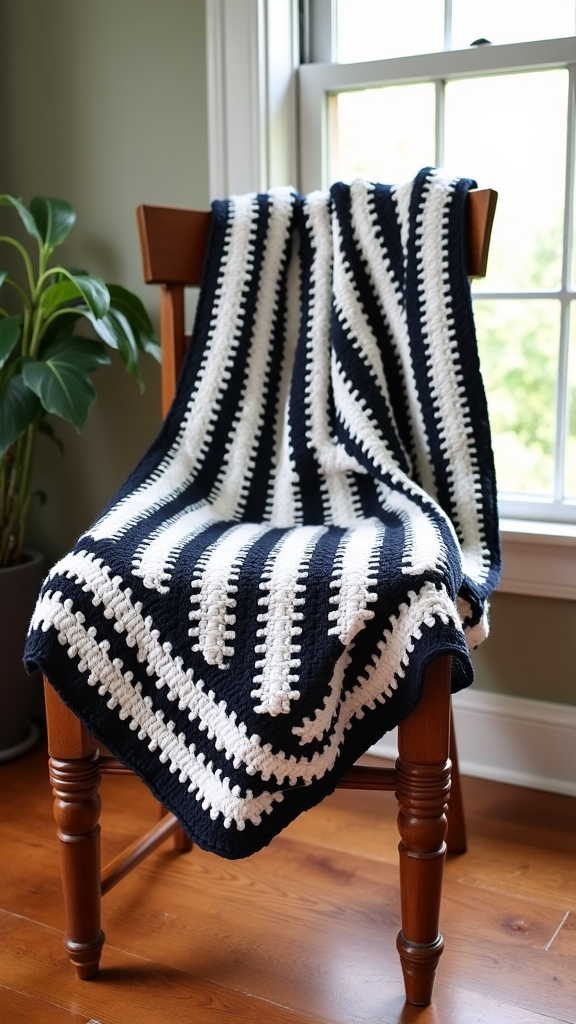
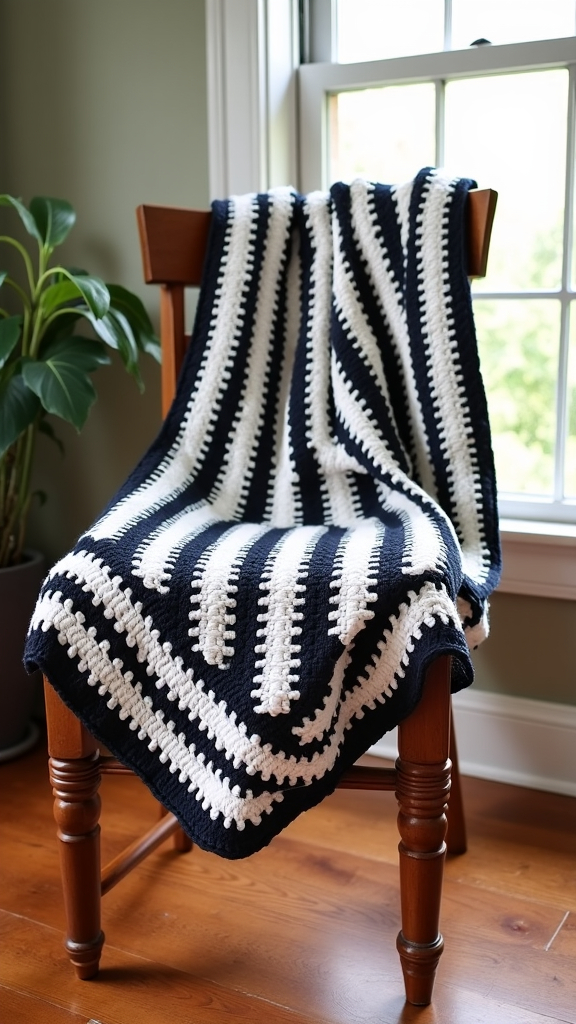
Zebra Blanket
This Zebra Blanket pattern is suitable for intermediate-level crocheters but includes step-by-step instructions for clarity.
Materials Needed:
- Yarn:
- Black (Worsted weight, approximately 1000 yards)
- White (Worsted weight, approximately 1000 yards)
- Crochet Hook: Size H/8 (5.0 mm) or the size needed for your desired tension.
- Scissors
- Tapestry Needle: For weaving in ends.
Stitches and Abbreviations:
- ch: Chain
- sc: Single Crochet
- dc: Double Crochet
- puff stitch: A cluster of stitches to create a raised texture
- sl st: Slip Stitch
- RS: Right Side
- WS: Wrong Side
Finished Blanket Size:
- Approximately 48” x 60” (adjustable).
Pattern Overview:
This pattern alternates rows of black and white in a striped design. Each stripe consists of 3 rows of double crochet (dc). The edges are bordered for a clean finish.
Instructions:
1. Foundation Chain:
- Using black yarn, make a foundation chain of 150 chains (or any multiple of 6 + 2 for your desired width).
- Add 2 chains to turn.
2. Row 1 (RS): Double Crochet Foundation Row
- Work 1 dc into the 3rd chain from the hook and each chain across.
- You should have 150 dc stitches.
- Turn your work.
3. Row 2: Puff Stitch Row
- Chain 2 (counts as first dc), then work a puff stitch into the next stitch.
- Puff Stitch Instructions:
- Yarn over, insert hook into the stitch, yarn over and pull up a loop (3 loops on hook).
- Repeat the above step two more times (7 loops on hook).
- Yarn over and pull through all 7 loops.
- Chain 1 to secure the puff stitch.
- Puff Stitch Instructions:
- Alternate between dc and puff stitches across the row, ending with a dc.
- Turn your work.
4. Row 3 (RS): Double Crochet Row
- Chain 2 (counts as first dc), then work 1 dc in each stitch across.
- Change to white yarn at the end of the row.
- Turn your work.
5. Stripe Repetition:
- Repeat Rows 1–3 using white yarn for 3 rows, then switch back to black yarn for 3 rows.
- Continue alternating 3-row stripes (black and white) until the blanket reaches the desired length.
Border
1. Round 1: Single Crochet Border
- Using black yarn, work 1 sc in each stitch across all edges of the blanket.
- For corners, work 3 sc in the same stitch to prevent puckering.
- Join with a sl st to the first sc.
2. Round 2: Puff Stitch Edge
- Chain 2, then work a puff stitch in every other stitch around the blanket for a textured border.
- For corners, work 3 puff stitches in the same corner stitch.
Finishing:
- Fasten off and weave in all loose ends using the tapestry needle.
- Lightly block the blanket to even out the stitches and achieve the perfect shape.
Tips for Success:
- Consistency in Tension: Maintain the same tension throughout to keep the blanket even.
- Color Changes: Always switch colors on the last yarn-over of the last stitch of a row for seamless transitions.
- Adjusting Size: To make the blanket wider or narrower, adjust the foundation chain in multiples of 6. For length, add or reduce the number of stripe repetitions.

