Crochet the Sweetest Baby Blanket: Free Sherbet Granny Throw Pattern!
There’s something truly special about wrapping a little one in a handmade blanket. It’s a hug you can give, even when you’re not there! If you’re looking for the perfect project—one that’s simple, stunning, and oh-so-satisfying—you’ve found it.
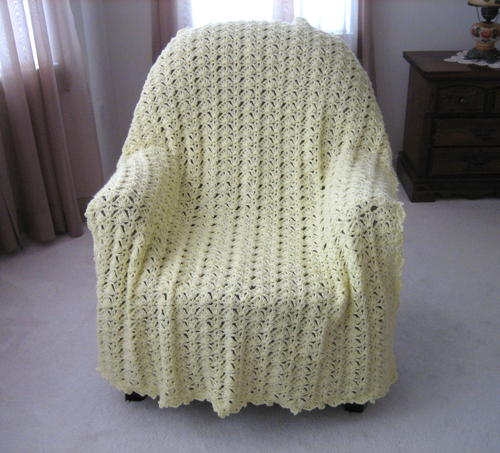
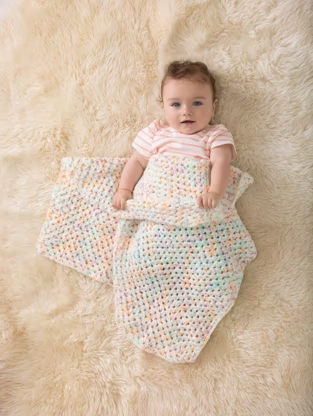
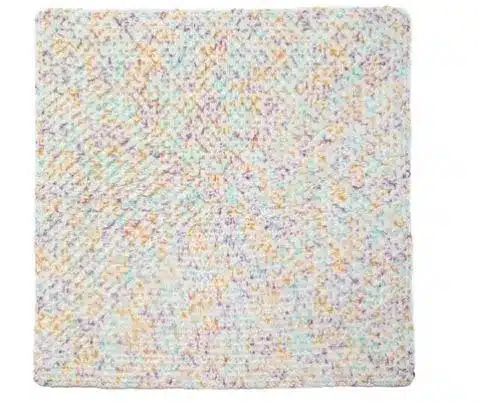
Today, we’re diving into the Sherbet Granny Baby Throw from Lion Brand. This pattern creates a beautiful, classic granny square blanket that looks like a delicious swirl of pastel sherbet. The best part? The yarn does all the beautiful color changes for you!
This pattern is rated “Easy,” making it perfect for confident beginners ready for their first blanket or seasoned crocheters looking for a relaxing, meditative project. Let’s get our hooks ready!
Why You’ll Adore This Pattern
- So, So Easy: It uses basic stitches in a repetitive pattern. Once you get the hang of it, you can crochet while watching your favorite show.
- No Ends to Weave! Okay, almost none. Because we’re using a self-striping yarn, you get that gorgeous, multi-color look without ever having to change colors. You’ll only have two ends to weave in: one at the start and one at the end!
- Grows Super Fast: The granny square design works up quickly, so you’ll have a beautiful blanket in no time.
- Perfectly Giftable: The finished blanket is a cuddly 28×28 inches, the ideal size for a stroller, car seat, or tummy time.
Gather Your Supplies
Here’s what you’ll need to create your own Sherbet Granny Throw.
- Yarn: 2 skeins of Lion Brand® Ice Cream® Yarn in ‘Sprinkles – Sherbert’. This 100% acrylic yarn is incredibly soft and does all the colorwork for you.
- Crochet Hook: Size I-9 (5.5 mm)
- Finishing Tool: A large-eyed blunt needle (or tapestry needle) for weaving in those two little ends.
Before You Begin: The Know-How
Let’s cover a few key details before we start crocheting.
Finished Size: Approximately 28 x 28 inches (71 x 71 cm).
Abbreviations (US Terms):
- beg = beginning
- ch = chain
- dc = double crochet
- rep = repeat
- rnd(s) = round(s)
- sl st = slip stitch
- sp = space
- st(s) = stitch(es)
Gauge: The first 4 rounds should measure about 4 x 4 inches.
- What is gauge? It’s a measure of how tight or loose your stitches are. For a blanket, gauge isn’t as critical as for a fitted sweater, but checking it ensures your blanket will be the size intended and you won’t run out of yarn.
A Very Important Tip: Turn Your Work!
This pattern instructs you to turn your work after each round. Why? This simple trick prevents the classic granny square “twist” or “swirl.” By turning, you alternate the direction of your stitches, keeping your blanket perfectly square!
The Pattern: Let’s Get Crocheting!
Ready? Let’s make a blanket!
To Start:
Chain 4, then join with a slip stitch to the first chain to form a ring.
Round 1: The Foundation
Ch 3 (this counts as your first dc). Work 2 dc into the ring. Then, (ch 1, 3 dc in ring) three times. To finish the round, ch 1 and join with a sl st to the top of your beginning ch-3.
- Checkpoint: You should have a tiny square with four clusters of 3-dc and four ch-1 spaces. These ch-1 spaces are your new corners!
Round 2: Building the Corners
Turn your work. This is important! Slip stitch into the first ch-1 space.
Now, make your first corner: (ch 3, 2 dc, ch 1, 3 dc) all in that same space.
Move to the next corner space and work (3 dc, ch 1, 3 dc).
Repeat this in the next two corner spaces. Join with a sl st to the top of the beg ch-3.
- Checkpoint: Your square is now bigger! You have eight 3-dc clusters in total (two on each side).
Round 3: Adding the Sides
Turn your work. Slip stitch into the first space between the 3-dc clusters.
Work (ch 3, 2 dc) in that same space. This is your first “side” cluster.
In the next corner ch-1 space, work a corner: (3 dc, ch 1, 3 dc).
Now, work a “side” cluster of 3 dc in the space between the next two clusters.
Repeat from * to * two more times.
To finish, work a corner (3 dc, ch 1, 3 dc) in the last corner space. Join with a sl st to the top of the beg ch-3.
- Checkpoint: You should now have twelve 3-dc clusters. Each side has one cluster between the corners.
Round 4: Growing the Square
Turn your work. Slip stitch into the first space between clusters.
Work (ch 3, 2 dc) in that same space. Work 3 dc in the next space along the side.
In the corner ch-1 space, work a corner: (3 dc, ch 1, 3 dc).
Now, work 3 dc in each of the next two spaces along the side. Then work a corner (3 dc, ch 1, 3 dc) in the corner space.
Repeat from * to * two more times.
To finish the round, work 3 dc in the last space between clusters. Join with a sl st to the top of the beg ch-3.
- Checkpoint: You should have sixteen 3-dc clusters. Each side now has two clusters between the corners. See the pattern?
Round 5 & Beyond: The Repeat Round!
This is the round you’ll repeat to grow your blanket to its final size. The logic is simple:
- Turn your work.
- Slip stitch into the first space, then (ch 3, 2 dc) in that same space.
- Work one 3 dc cluster in each space along the side until you reach a corner.
- In the corner ch-1 space, work a corner cluster: (3 dc, ch 1, 3 dc).
- Repeat steps 3 and 4 for the remaining three sides.
- Join with a sl st to the top of your beginning ch-3.
Keep repeating Round 5 until your blanket is the size you want, or until you’ve used almost all of your yarn. Each round will add one more 3-dc cluster to each side.
Finishing Touches
Once your blanket is the perfect size, fasten off your yarn, leaving a 6-inch tail.
Using your large-eyed blunt needle, carefully weave in the starting tail and the ending tail. Trim any excess yarn.
And that’s it! Step back and admire your gorgeous, cuddly creation. You’ve made a beautiful heirloom that’s sure to be cherished.
We would love to see your finished Sherbet Granny Throw! Share a picture on social media and tag us so we can celebrate with you. Happy crocheting