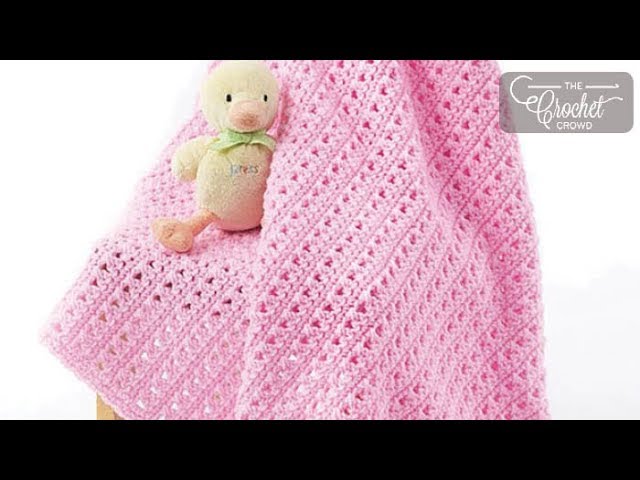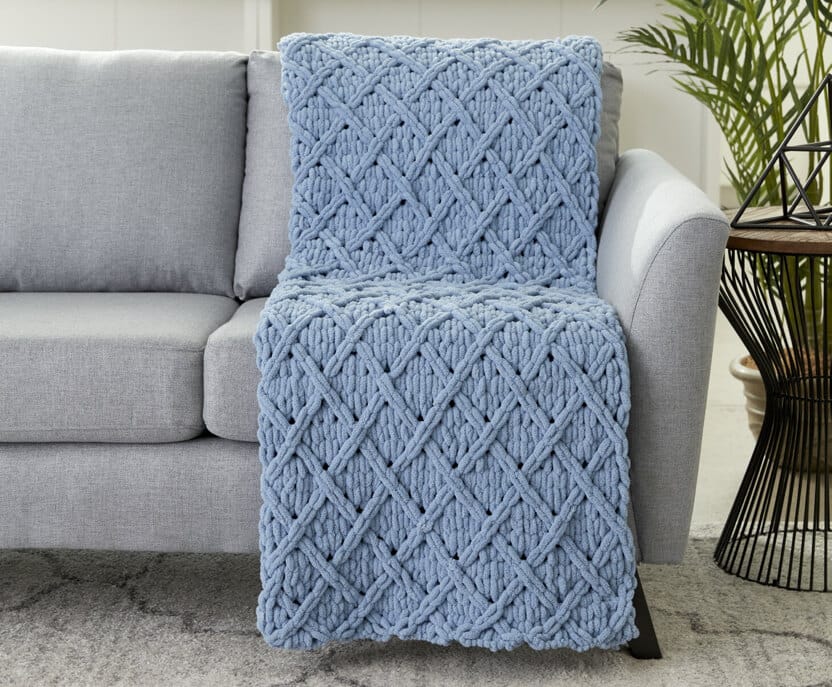
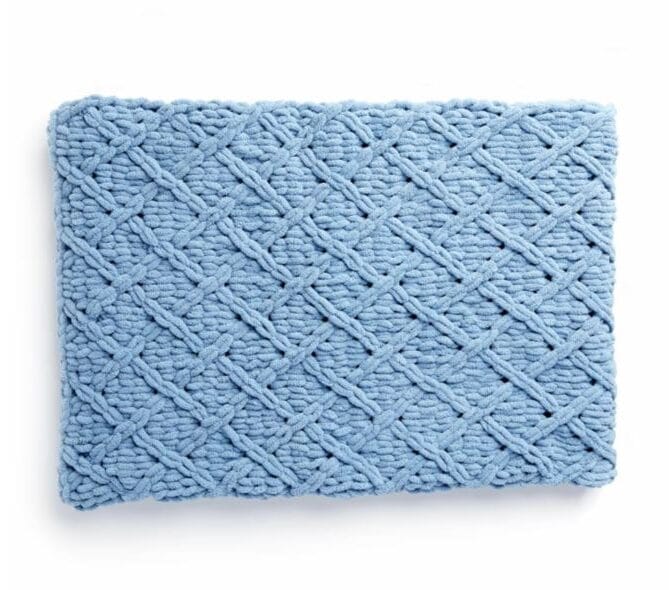
EZ Diamond Lattice Blanket: A Stunning Crochet Project for Cozy Comfort
Welcome, crochet lovers! If you’re looking for a stunning yet relaxing project to sink your hooks into, the EZ Diamond Lattice Blanket is just the thing. This elegant blanket features a mesmerizing diamond lattice pattern that adds texture and sophistication to any room.
Designed for experienced crocheters, this pattern uses Bernat® Alize® Blanket-EZ™ yarn, a super bulky and soft yarn that works up quickly. The result? A plush, cozy blanket perfect for snuggling under during chilly evenings.
Whether you’re making this as a gift or treating yourself, this blanket is sure to impress. Let’s dive in!
Table of Contents
Materials
Before we begin, gather your supplies:
- Yarn: Bernat® Alize® Blanket-EZ™ (6.4 oz/180 g; 18 yds/16 m per ball) in Country Blue (37018) – 7 balls
- Hook: Size U.S. N/15 (10 mm) crochet hook (or size needed to match gauge)
- Scissors & Yarn Needle (for weaving in ends)
Finished Size: Approximately 56″ (142 cm) wide x 60″ (152.5 cm) long
Abbreviations & Notes
Stitch Abbreviations
- Pull loop up (PLU): Pull the working yarn loop up through a stitch from behind.
- Cross (CR): Move one stitch in front of another (direction specified in pattern).
Important Notes:
✔ Right side facing at all times – No turning!
✔ Working yarn is always held behind stitches.
✔ Count stitches carefully to maintain the diamond lattice pattern.
Step-by-Step Instructions
Foundation Row
- Count 68 loops for the foundation row.
Row 1 (Right to Left)
- Pull the 69th loop (from working yarn) up through the 68th loop (last loop of foundation row) from behind to create a knit stitch.
- Pull next loop up through the next foundation loop.
- Repeat:
- Cross 2nd loop in front of the 1st loop (to the right).
- PLU through next loop.
- PLU through next loop.
- Cross next loop in front of the 2nd loop (to the left).
- PLU through next loop.
- PLU through next loop.
- PLU twice through next loops.
- Continue to end of row. (68 stitches total.)
Row 2 (Left to Right)
- PLU through the last stitch of the previous row.
- Repeat:
- Cross 2nd stitch over next stitch (to the left).
- PLU through 2nd stitch.
- PLU through 1st stitch.
- PLU twice through next loops.
- Cross next stitch in front of the 2nd stitch (to the right).
- PLU through 1st stitch.
- PLU through 2nd stitch.
- End with PLU through last loop.
Rows 3–10: Forming the Diamond Lattice
Follow the pattern for Rows 3–10, alternating directions and crossing stitches to create the diamond effect.
- Rows 5–10 are the repeating pattern.
- Continue until the blanket reaches 60″ (152.5 cm), ending on a Row 5.
Video Tutorial
Bind Off
- Pull 2nd stitch through 1st stitch, then 3rd through 2nd, and so on.
- Cut yarn, leaving a tail to weave in securely.
Final Thoughts & Call to Action
Congratulations! You’ve just created a gorgeous EZ Diamond Lattice Blanket—perfect for gifting or keeping for yourself.