Increase Stitch Crochet: Your Ultimate Guide to Flawless Fabric Growth!
Master the Increase Stitch Crochet: Your Ultimate Step-by-Step Guide
Are you ready to take your crochet projects to the next level? Whether you’re crafting charming amigurumi, designing custom garments, or simply looking to expand your fabric, knowing how to **increase stitch crochet** is a fundamental skill that unlocks a world of creative possibilities. This guide will walk you through the process, ensuring you master this essential technique with ease.
Why Mastering the Increase Stitch Crochet is Essential
Just like adding stitches in knitting, the ability to **increase stitch crochet** allows you to expand your work, shaping it to create curves, wider sections, or new dimensions. Without increases, your crochet pieces would only grow in length or remain flat. It’s the secret sauce behind crafting dynamic shapes, from the roundness of a toy’s head to the expanding width of a shawl.
Understanding the Basic Increase Stitch Crochet: The Single Crochet Increase (SC Inc)
At its core, a simple **increase stitch crochet** means working two stitches into the very same stitch or “hole.” This adds more stitches to your row or round, causing your fabric to widen. We’ll focus on the single crochet increase (often abbreviated as “inc” or “2 sc in same st”) as it’s the most common and a perfect starting point.
Part 1: Making Your First Single Crochet (SC) Stitch
To perform an **increase stitch crochet**, you first need to complete one standard single crochet stitch. Follow these steps:
- Find Your Spot: Insert your hook into the next available stitch (or “hole”) where you intend to start your increase.
- Tip: When your hook is correctly inserted, you should see three loops or strands of yarn on your hook, including the working loop. Your hook tip should be facing you, positioned in front of the working yarn.
- Yarn Over (YO): Bring your hook down, below, and behind the working yarn, grabbing it with your hook.
- Pull Through First Loop(s): Pull that grabbed yarn through just the first two loops that were on your hook. You should now have two loops remaining on your hook.
- Yarn Over (YO) Again: Ensure your hook’s tip is still facing you and is in front of the working yarn. Yarn over once more by bringing your hook below and behind the working yarn.
- Pull Through Both Loops: Pull this newly grabbed yarn through both loops currently on your hook. You should now have only one loop left on your hook.
Congratulations! You’ve successfully completed one single crochet stitch – the first half of your **increase stitch crochet**.
Part 2: The Key to a Perfect Increase Stitch Crochet – Finding the Same Hole
The magic of an **increase stitch crochet** happens when you work a second stitch into the *exact same hole* as your first. But how do you find that precise spot again?
- Look at Your Hook: Observe the loop that’s currently on your hook.
- Trace Back: This loop essentially “grows” out of two other loops below it, which form the top of your newly made single crochet stitch.
- Find the Target Hole: The loop that is physically closer to your yarn hand (the one you just came out of) also traces back into the original hole you just worked in. This is the **same hole** you used for your first single crochet, and it’s precisely where you need to insert your hook for the next step of your **increase stitch crochet**.
Part 3: Completing Your Second Single Crochet (in the same hole)
With your first single crochet complete and the same hole identified, you’re now ready to finish your **increase stitch crochet** by working another SC into that *exact same spot*:
- Insert Hook: Place your hook into that **same hole** from the front to the back of your piece. Again, it should look like you have three loops or strands of yarn on your hook, with the hook’s tip facing you and in front of the working yarn.
- Yarn Over (YO): Bring your hook below and behind the working yarn.
- Pull Through First Loop(s): Pull that yarn through just the first two loops on your hook. You should now have two loops on your hook.
- Yarn Over (YO) Again: Ensure your hook is in front of the working yarn with its tip facing you. Yarn over again by bringing your hook below and behind the working yarn.
- Pull Through Both Loops: Pull that yarn through both loops on the hook. You should now have only one loop left on the hook.
Success! You’ve successfully made two single crochet stitches in the same hole, officially creating an **increase stitch crochet**! Your fabric will now be wider at this point.
Visual Aid: Watch the Increase Stitch Crochet in Action!
Sometimes, seeing is believing! To truly visualize the process and ensure you’re getting every movement right, watch this helpful demonstration on how to **increase stitch crochet**:

Pro Tips for a Seamless Increase Stitch Crochet
- Maintain Even Tension: Consistent tension is key for neat increases that blend seamlessly into your fabric. Practice to get a feel for how tightly or loosely you should hold your yarn.
- Use Stitch Markers: Especially when working in rounds or on complex patterns, a stitch marker can help you identify your first stitch in an increase, ensuring you don’t miss or add extra stitches.
- Practice Makes Perfect: Don’t get discouraged if your first few increases look a bit lumpy. Keep practicing! The more you do it, the more natural and invisible your **increase stitch crochet** will become.
- Understand Pattern Language: Patterns often use abbreviations like “inc,” “sc inc,” or “2 sc in next st” to indicate where you need to **increase stitch crochet**.
Common Applications of the Increase Stitch Crochet
The **increase stitch crochet** is a cornerstone for many types of projects:
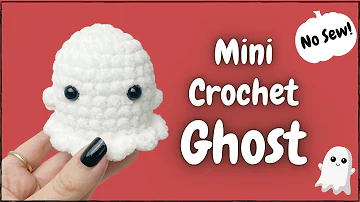
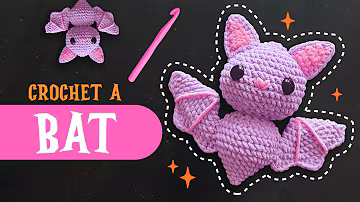
- Amigurumi: Essential for shaping heads, bodies, and limbs of stuffed toys, creating their adorable curves.
- Garments: Used to add width for sleeves, busts, or the flare of a skirt.
- Blankets & Shawls: Often employed to expand triangular or circular patterns, or simply to make a straight-edged blanket wider.
- Hats: Increases are vital in the crown of a hat to create the desired shape and fit.
Beyond the Single Crochet Increase
While this guide has focused on how to **increase stitch crochet** using the single crochet technique, it’s worth noting that you can also increase with other stitches, like double crochet (dc inc) or half double crochet (hdc inc). For amigurumi or projects where a very neat look is desired, you might encounter the “invisible increase” (inv inc), which is a slightly modified way to **increase stitch crochet** that minimizes gaps.
Conclusion: Unlock Your Creativity with the Increase Stitch Crochet
Mastering the **increase stitch crochet** is a fundamental step in becoming a more versatile and confident crocheter. It opens up endless design possibilities, allowing you to create truly unique and shapely pieces. Take your time, follow the steps, and don’t hesitate to rewatch the video. With a little practice, you’ll be increasing stitches like a pro, ready to tackle any crochet challenge that comes your way!