
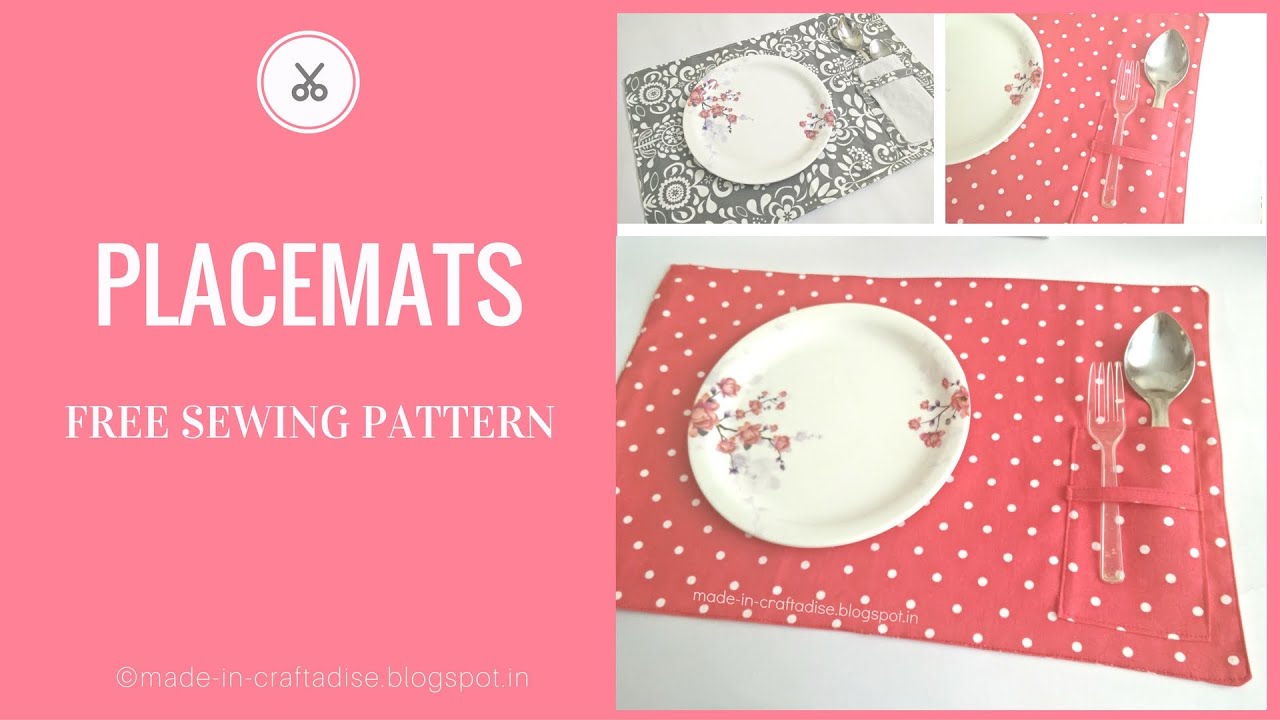
FREE Pattern: Sew Easy DIY Fabric Placemats with Pockets!
DIY Fabric Placemats: Sew Easy Placemats with Pocket using a Free Sewing Pattern!
Welcome, fellow crafters! Are you looking for a fun, functional, and surprisingly simple sewing project to elevate your dining experience or add a handmade touch to your home decor? Look no further! In this comprehensive guide, we’re going to show you exactly how to create stunning DIY Fabric Placemats, complete with a clever pocket for utensils or napkins. Best of all, we’re providing you with all the insights you need to Sew Easy Placemats with pocket, essentially a free sewing pattern you can follow along with.
These custom placemats are not only practical, helping to keep your table organized, but they also offer a fantastic opportunity to express your personal style through fabric choices. Whether you’re a seasoned sewing enthusiast or just starting out, this project is designed to be accessible and rewarding. Let’s get stitching!
Why Sew Your Own Placemats?
- Personalization: Choose fabrics that perfectly match your kitchen, dining room, or special occasions.
- Functionality: The built-in pocket keeps cutlery and napkins neatly tucked away.
- Budget-Friendly: Often more economical than buying ready-made placemats.
- Skill Building: A great project for practicing basic sewing techniques like straight seams, turning corners, and topstitching.
What You’ll Need to Sew These Easy Placemats:
Gathering your materials is the first step to creating your beautiful DIY Fabric Placemats.
- Approximately 1 meter (or about 1 yard) of your chosen main fabric.
- Coordinating fabric for the pocket (can be the same as the main fabric or a contrasting one).
- Matching thread.
- Sewing machine.
- Fabric scissors or rotary cutter and mat.
- Pins or fabric clips.
- Iron and ironing board.
- Measuring tape or ruler.
- Seam ripper (just in case!).
Step-by-Step Guide to Your DIY Fabric Placemats with Pocket
Let’s dive into the sewing! We’ll break down how to sew easy placemats with pocket into manageable steps.
1. Cut Your Fabric Pieces
For each placemat, you’ll need two main fabric pieces of your desired placemat size. You’ll also need fabric for the pocket and the decorative band. The video demonstrates using two main pieces for one placemat, so plan accordingly for multiple placemats. Ensure your cuts are precise for the best results!
2. Prepare the Pocket Piece
Take your pocket fabric piece. To give it a clean finish, sew around all four sides of the pocket with a half-inch seam allowance. This creates a neat, finished edge for your pocket.
3. Create the Decorative Bands
The bands add a professional touch to your DIY Fabric Placemats. Take each band piece and:
- Fold it lengthwise in half and press to form a crease.
- Open it up and fold both raw edges towards the center crease, pressing firmly.
- Fold it in half again along the original crease, enclosing the raw edges. You now have a neat band.
- Take your band to the sewing machine and sew both long sides with a quarter-inch seam allowance. Start with the open edge first. Remember to backstitch at the beginning and end of each seam to secure your threads. This technique ensures a polished, even look for your band. Repeat for all four band pieces.
4. Assemble the Main Placemat Panel
This is where your placemat truly comes to life:
- Place your two main fabric pieces right sides facing each other.
- Sew all the way around the edges with a half-inch seam allowance. Crucially, leave an unstitched gap of about 2 to 2.5 inches along one of the longer sides. This gap will be used for turning the placemat right side out.
- Start and end your stitching with a backstitch. When you reach the corners, leave the needle down, lift the presser foot, pivot the fabric, lower the presser foot, and continue sewing. This creates sharp, neat corners without breaking your stitching flow.
- Once sewn, trim the corners (be careful not to cut your stitches!) and gently poke them out from the inside to ensure they are crisp when turned.
- Turn the placemat right side out through the unstitched gap. Press the entire placemat flat, making sure the raw edges of the opening are tucked neatly inside, aligning with the sewn seam.
- For a beautifully finished and durable placemat, topstitch all the way around the placemat with a quarter-inch seam allowance. This not only closes the unstitched gap but also gives the placemat a professional, crisp edge. Remember to backstitch at the start and end.
5. Attach the Pocket and Band
Now for the smart pocket feature that makes these DIY Fabric Placemats so unique:
- Take your prepared pocket and position it at one corner of your placemat, typically the bottom right corner. Ensure it’s straight and evenly spaced.
- Next, place one of your prepared bands. The video suggests placing it about 1 to 1.5 inches down from the top edge of the pocket. This creates a loop to hold a napkin or other item.
- Pin both the pocket and the band securely in place. Pinning the band can be a bit tricky, so take your time or hold it in place as you sew.
- Sew the pocket and the band firmly onto the placemat. Reinforce the stitching at the corners of the pocket and where the band is attached for durability.
Watch the Full Tutorial: Sew Easy Placemats with Pocket!
Sometimes, seeing is believing! For a visual walkthrough of every step, check out the detailed video tutorial from Maen Profed:
This video beautifully complements our written free sewing pattern, making sure you grasp every detail of creating your own DIY Fabric Placemats. [1, 2, 3, 5, 7]
Your Custom Placemats Are Ready!
Congratulations! You’ve successfully created beautiful and functional DIY Fabric Placemats. These easy placemats with pocket are perfect for organizing your table setting, whether it’s for everyday meals or special occasions. Imagine your forks, spoons, and knives neatly tucked into the pocket, and a napkin elegantly held by the band. It’s an instant upgrade to any meal!
Ready to get started on your own set of DIY Fabric Placemats? Download our insights as your free sewing pattern guide and share your creations with us! Don’t forget to subscribe to the Maen Profed YouTube channel for more amazing crafty videos.
Happy sewing!
