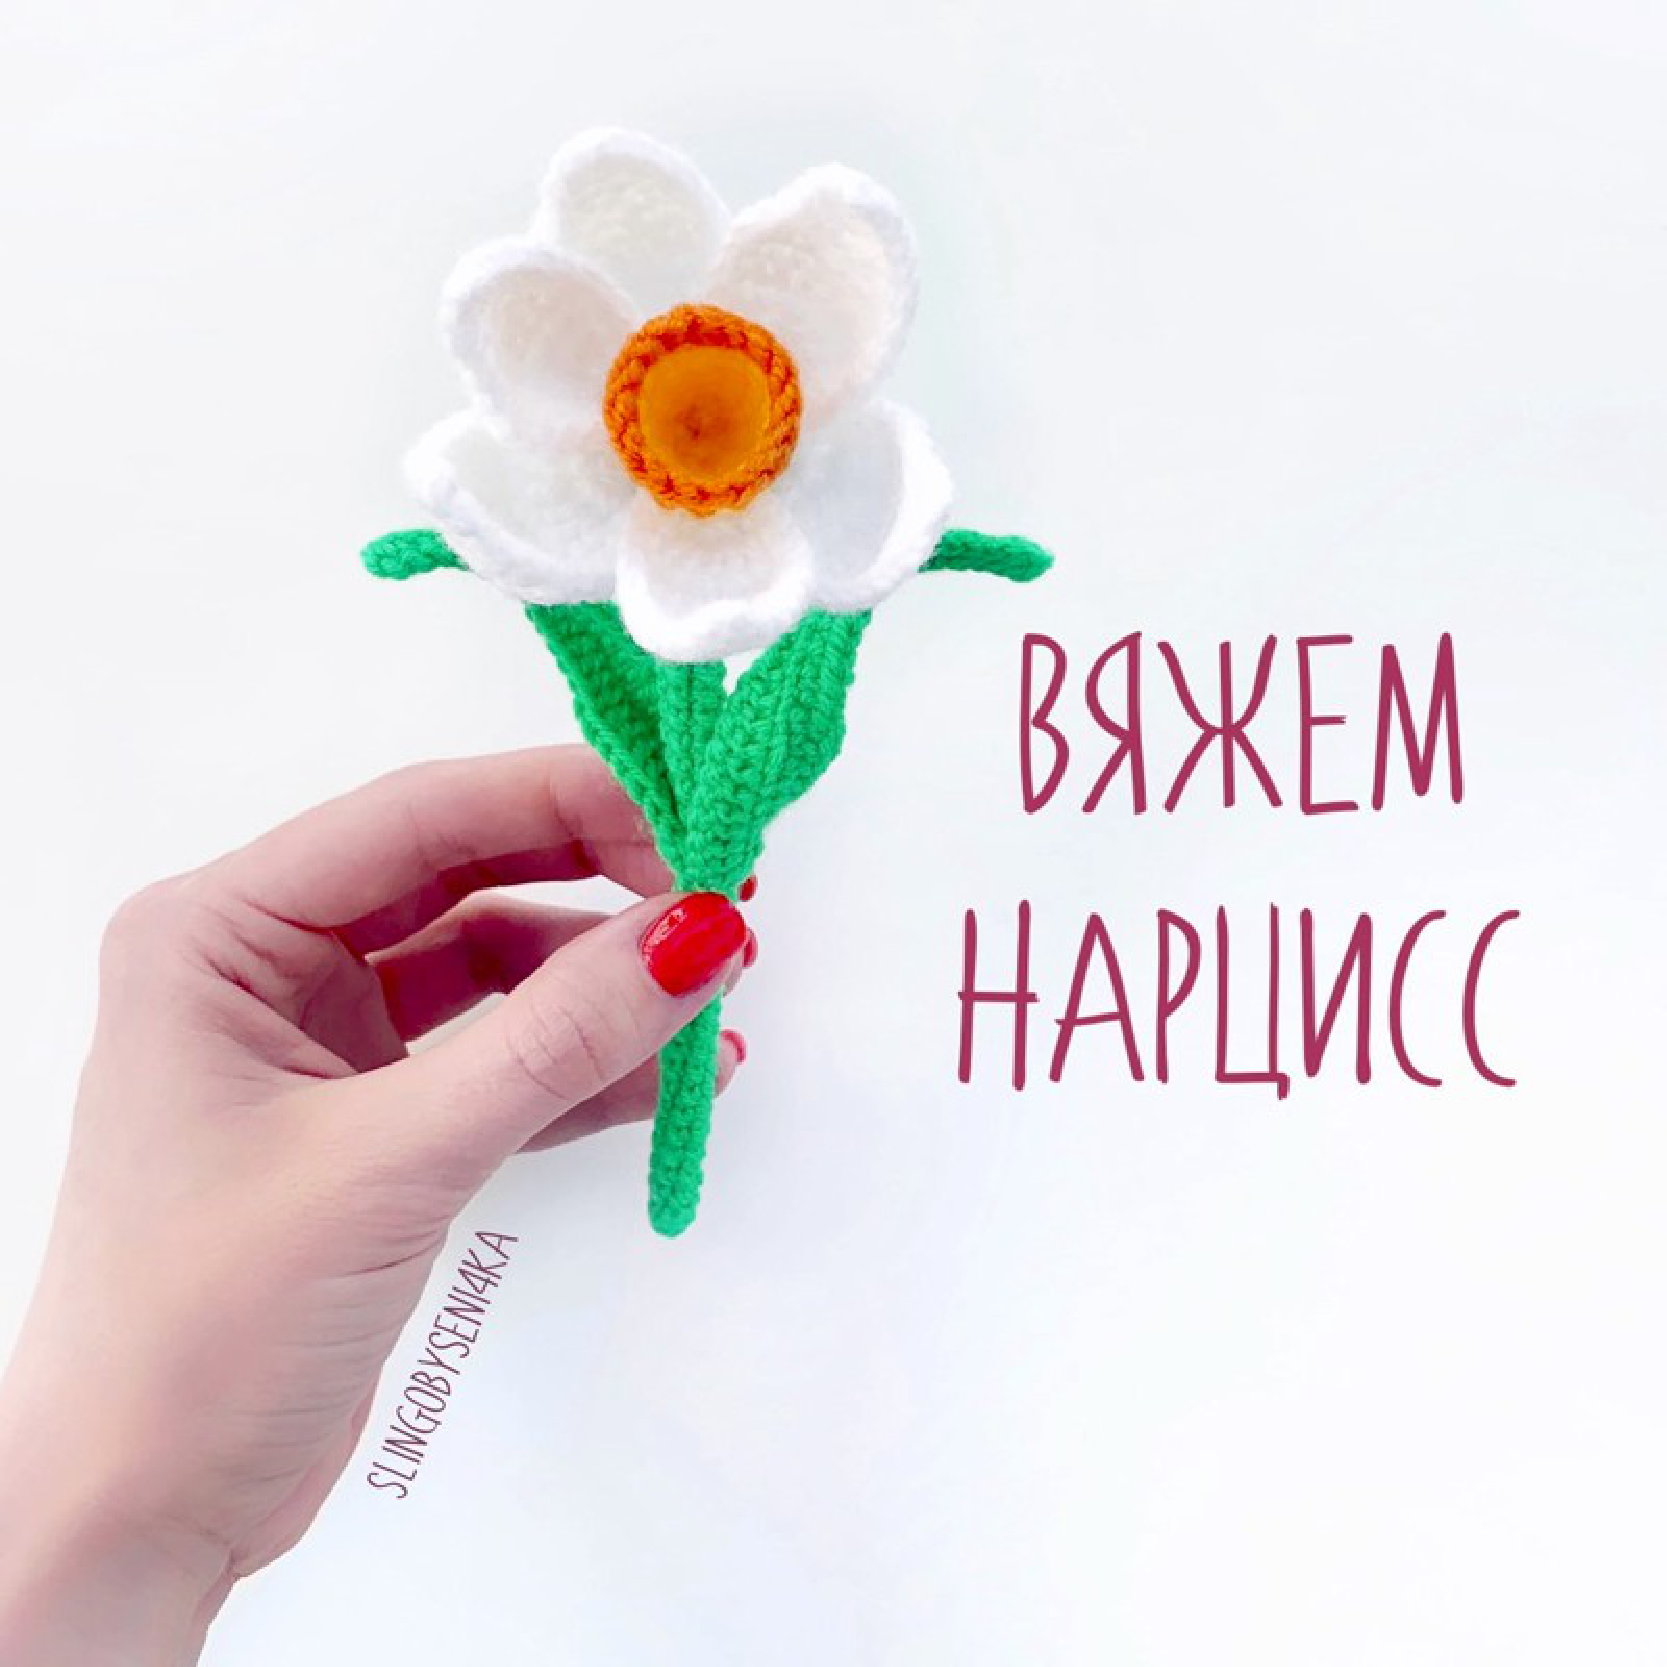
Bloom Now: Easy Crochet Daffodil Pattern
Welcome, fellow crocheters! Brighten up your home and celebrate the arrival of spring with this beautiful and easy-to-follow crochet daffodil pattern. These charming flowers are perfect for creating a bouquet that never wilts, decorating your space, or giving as a heartfelt handmade gift. Let’s pick up our hooks and bring these sunny blooms to life!
Materials
- Yarn: Worsted weight yarn in Yellow (for petals), Orange or a darker Yellow (for the core), and Green (for the stem and leaves).
- Crochet Hook: Size appropriate for your yarn (e.g., 3.5mm or 4mm).
- Fiberfill/Stuffing: For the base of the stem.
- Pipe Cleaner or Floral Wire: To give the stem stability (one green pipe cleaner per stem).
- Yarn Needle: For weaving in ends and assembly.
- Scissors.
Abbreviations (US Crochet Terms)
- ch: chain
- st: stitch
- sl st: slip stitch
- sc: single crochet
- hdc: half double crochet
- dc: double crochet
- inc: increase (work 2 sc in the same stitch)
- dec: decrease (work 2 sc together)
- (…) x…: repeat the instructions in the parentheses the given number of times.
- […]: total stitch count for the round/row.
Crochet Daffodil Pattern
Part 1: The Core (Flower Trumpet)
Pro Tip: Before you begin, leave a long starting tail. You’ll use this later to help assemble the flower.
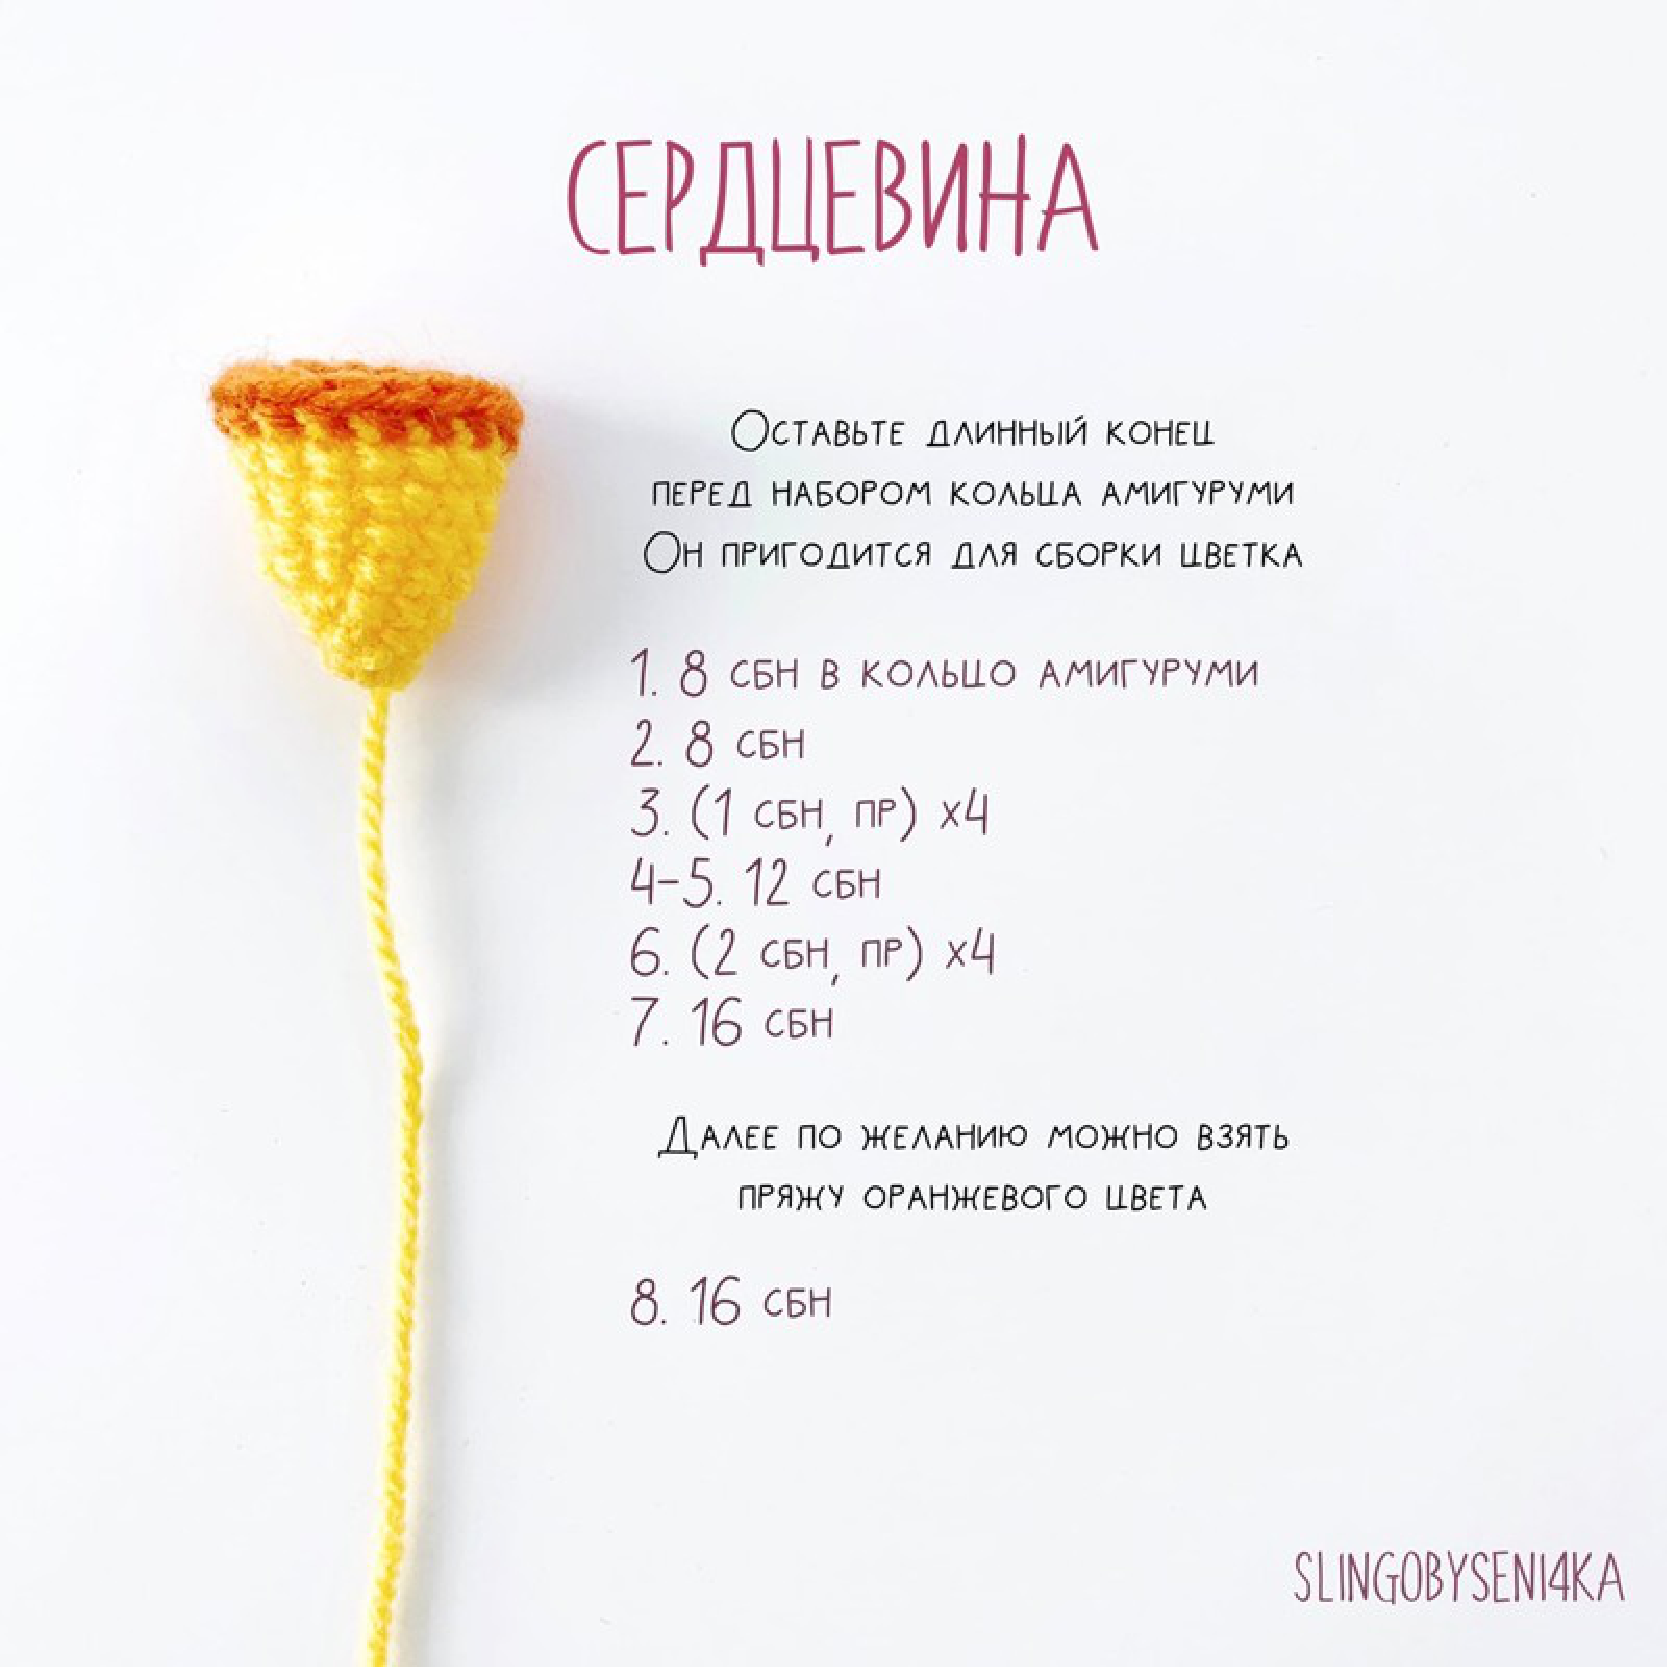
Using your Orange or dark Yellow yarn…
- Round 1: Create a magic ring and work 8 sc into it. [8]
- Round 2: 1 sc in each st around. [8]
- Round 3: (1 sc, inc) x 4. [12]
- Round 4-5: 1 sc in each st around (2 rounds). [12]
- Round 6: (2 sc, inc) x 4. [16]
- Round 7: 1 sc in each st around. [16]
- Round 8 (Optional): For a ruffled edge, you can switch to a brighter Orange or Yellow yarn and work 1 sc in each st around. [16]
Fasten off, leaving a tail for sewing if desired, though the starting tail is primarily for assembly.
Part 2: The Petals (Make 6)
The petals are worked in turning rows to create their distinct shape. You will need to make six identical petals.
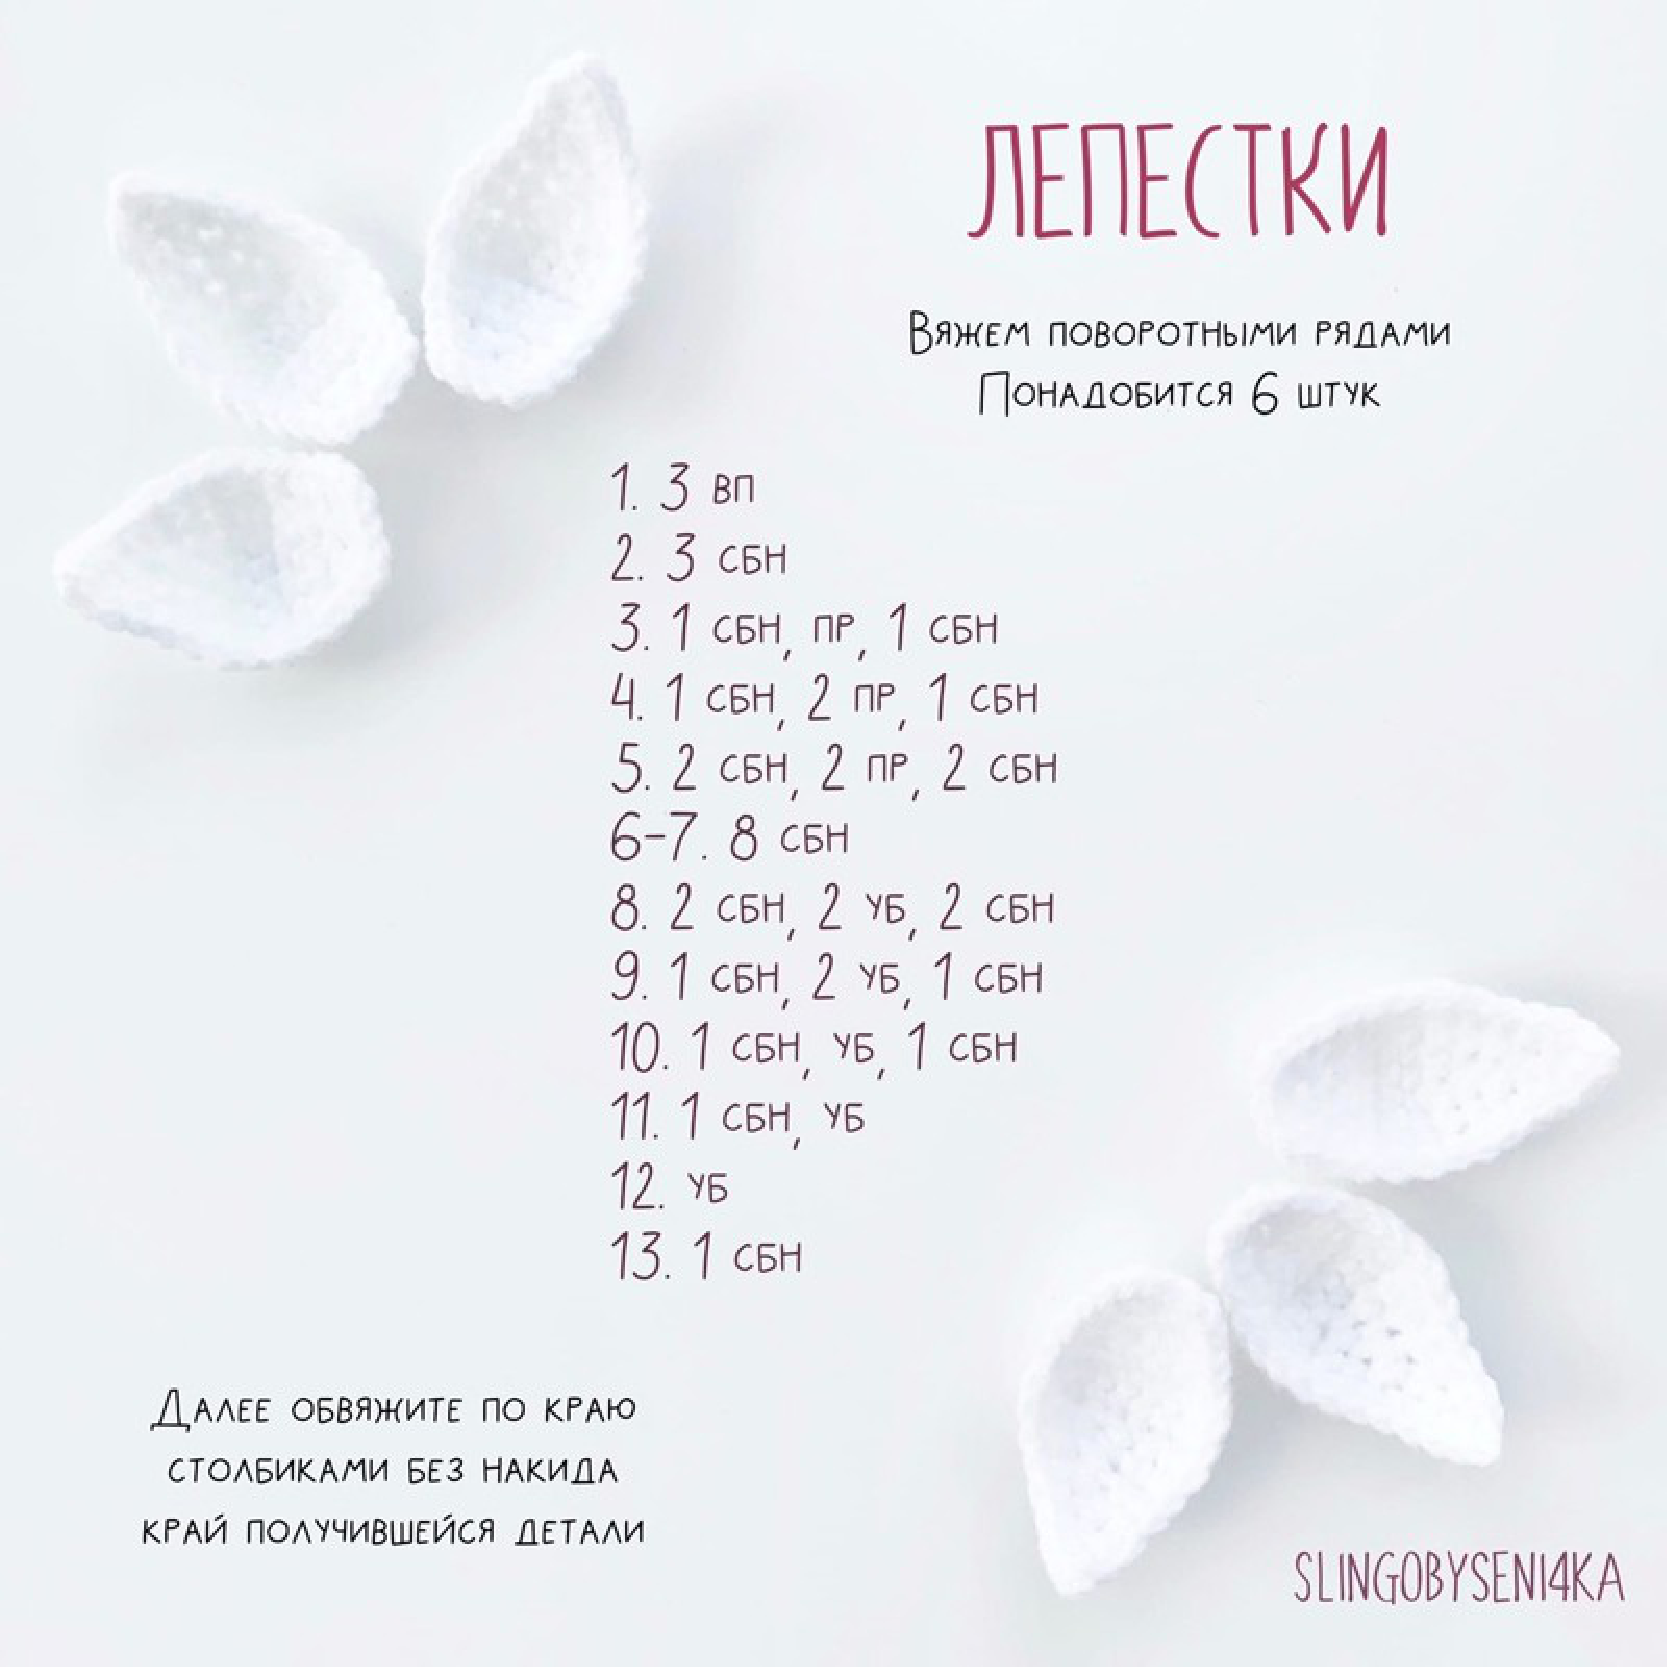
Using your Yellow yarn…
- Row 1: Ch 3. Starting in the 2nd ch from the hook, work 2 sc. Ch 1, turn. [2]
- Row 2: Work 1 sc in each st. Ch 1, turn. [2] (Note: The original pattern seems to imply starting with 3 sc from 3 ch, which is unusual. This version starts with 2 sc from 3 ch for a standard foundation).
- Row 3: 1 sc, inc, 1 sc. Ch 1, turn. [4]
- Row 4: 1 sc, 2 inc, 1 sc. Ch 1, turn. [6]
- Row 5: 2 sc, 2 inc, 2 sc. Ch 1, turn. [8]
- Row 6-7: 1 sc in each st across. Ch 1, turn. [8]
- Row 8: 2 sc, 2 dec, 2 sc. Ch 1, turn. [6]
- Row 9: 1 sc, 2 dec, 1 sc. Ch 1, turn. [4]
- Row 10: 1 sc, dec, 1 sc. Ch 1, turn. [3]
- Row 11: 1 sc, dec. Ch 1, turn. [2]
- Row 12: dec. Ch 1, turn. [1]
- Row 13: 1 sc. [1]
Do not fasten off. Ch 1 and work sc stitches evenly around the entire edge of the petal to give it a clean, finished look. Fasten off, leaving a long tail for sewing.
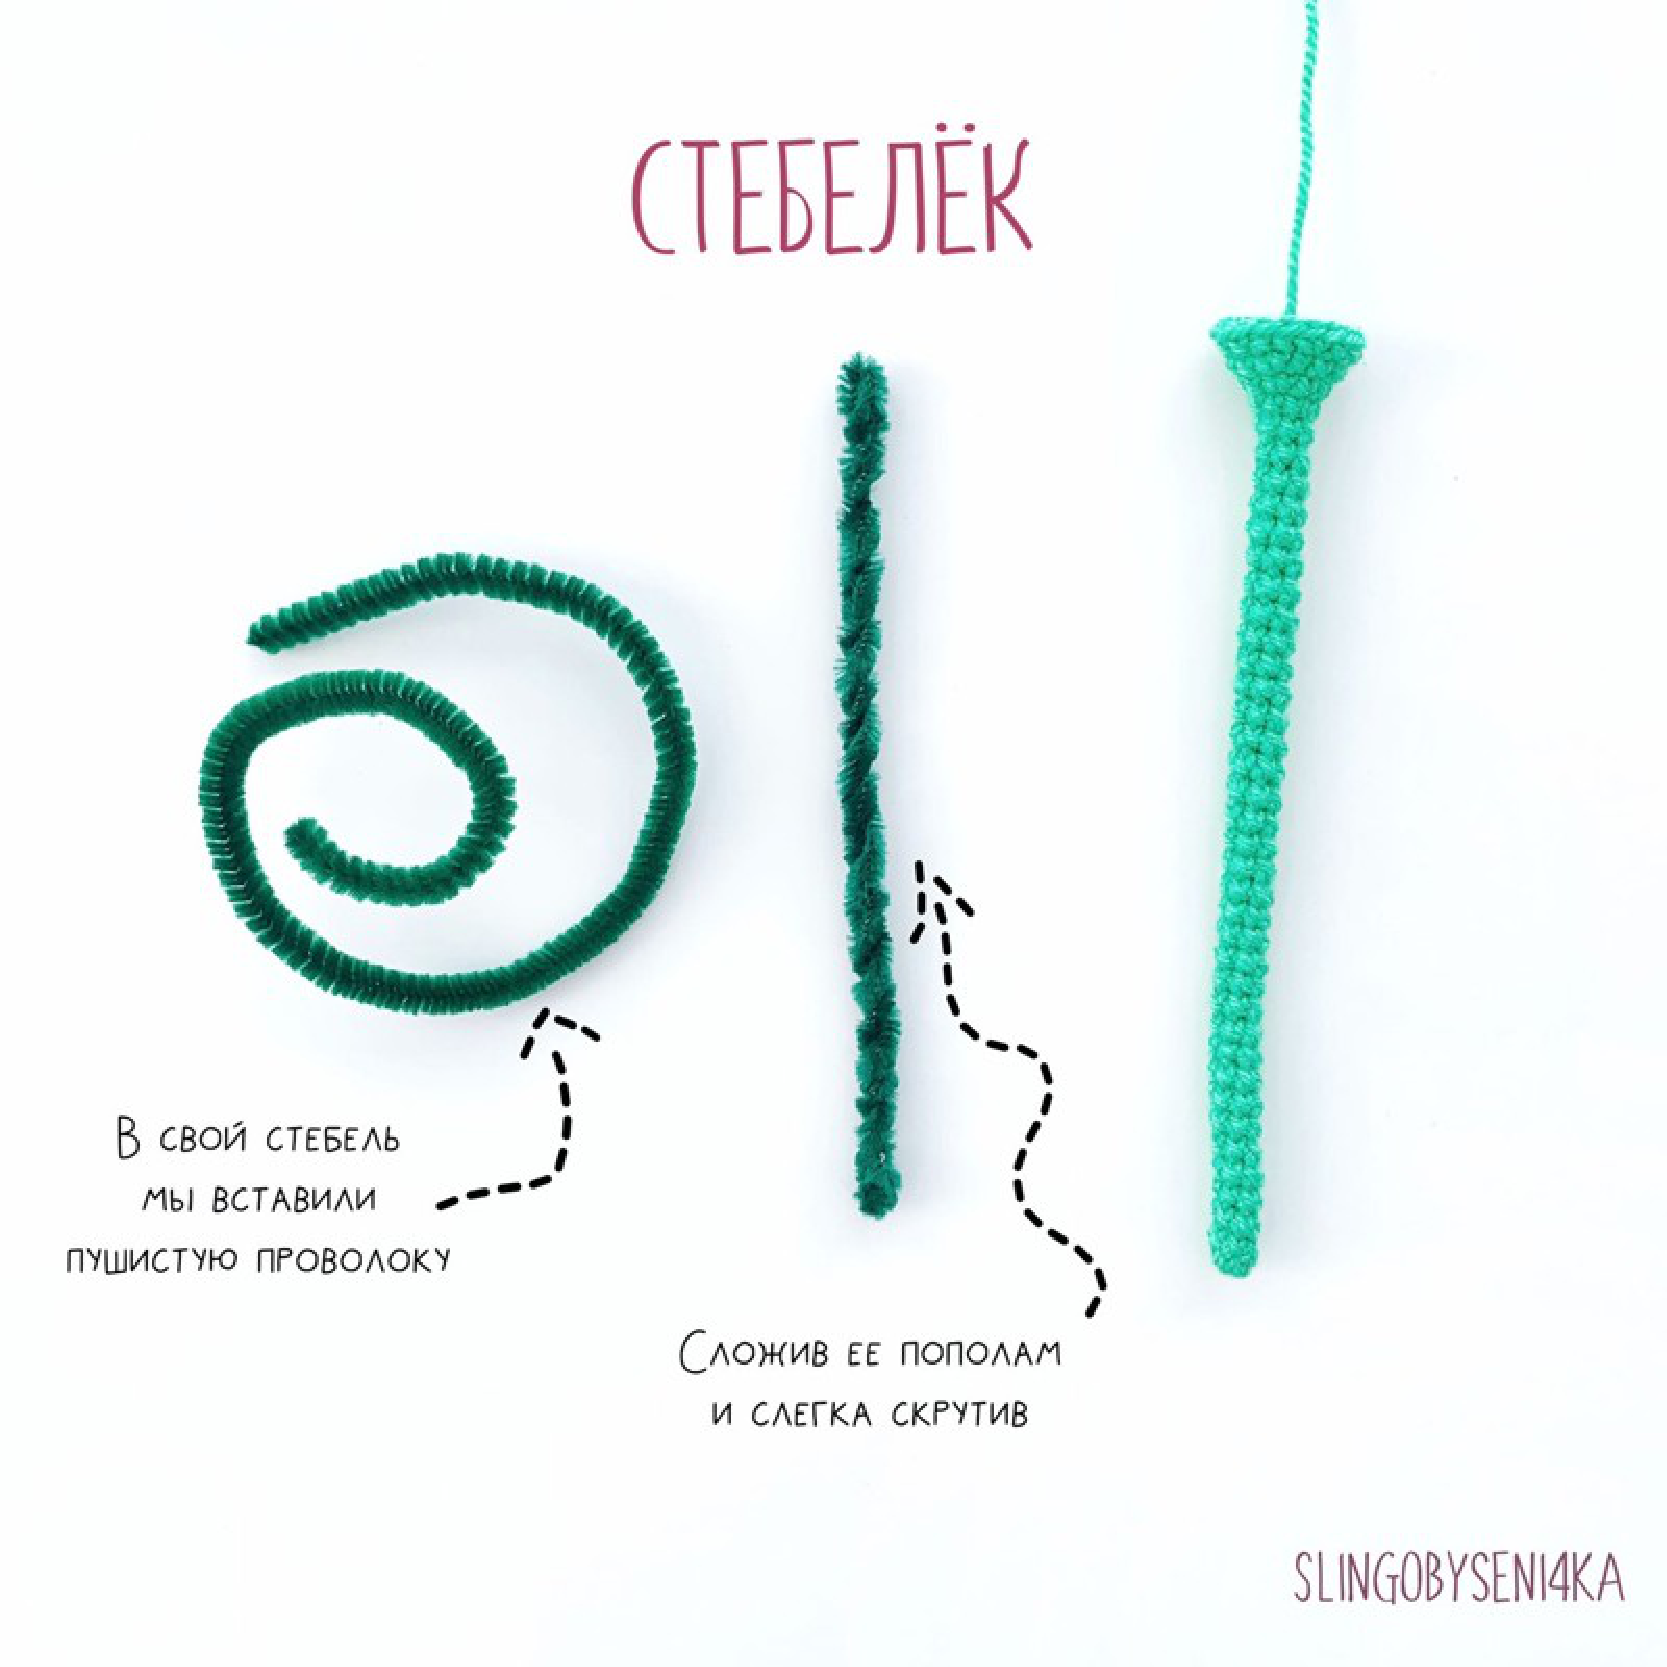
Part 3: The Stem
The stem is worked in a continuous spiral from the bottom up.
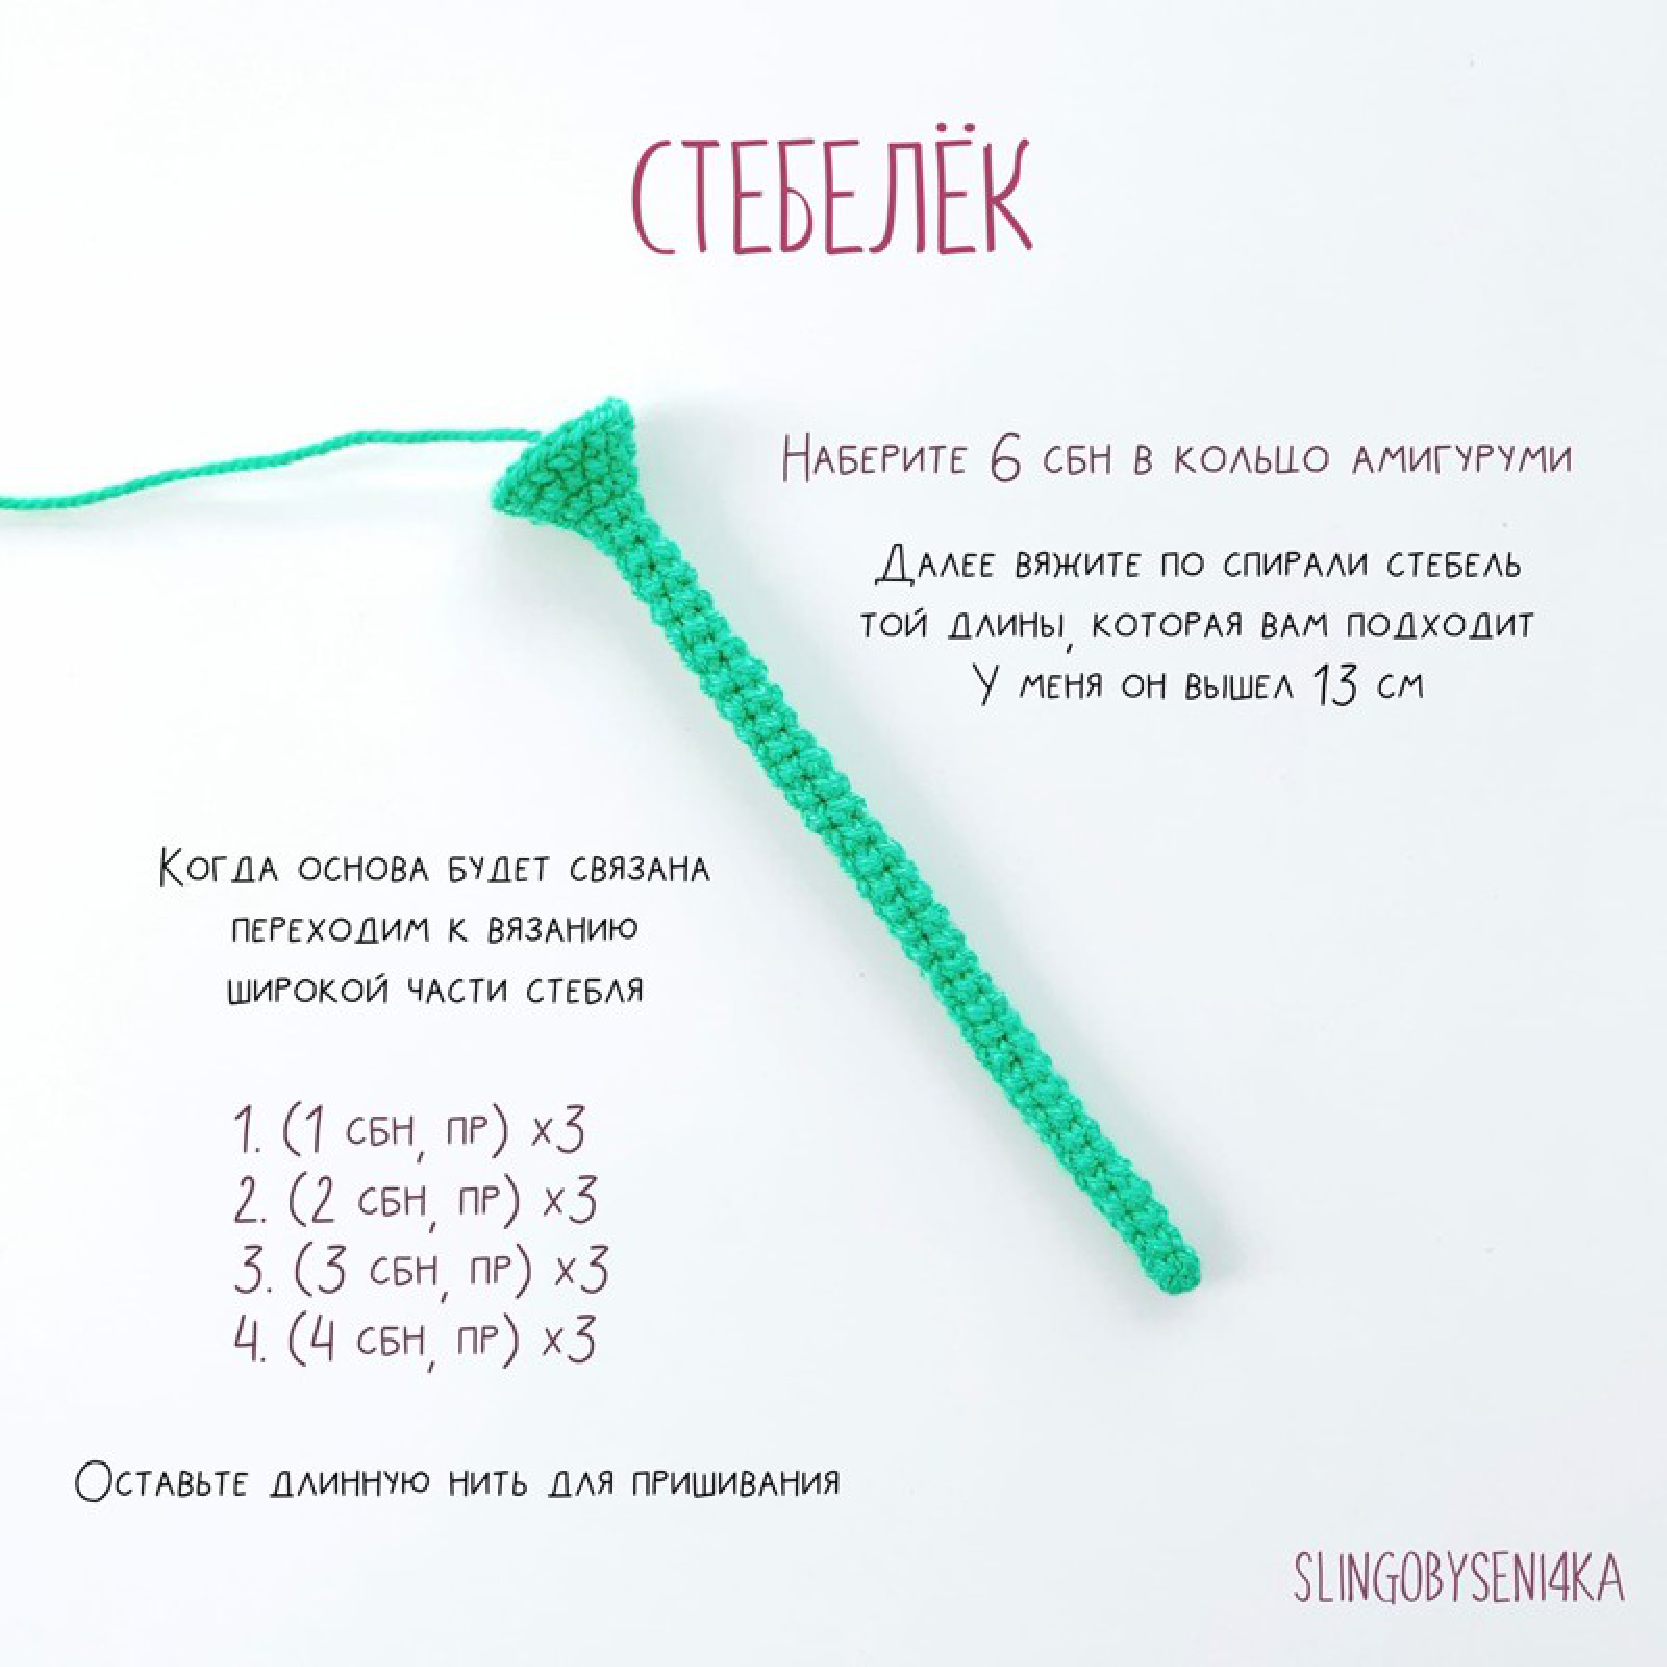
Using your Green yarn…
- Round 1: Create a magic ring and work 6 sc into it. [6]
- Next Rounds: Work 1 sc in each st around in a continuous spiral until your stem reaches your desired length (approx. 13 cm / 5 inches is a good starting point).
Now, we will create the wider base that connects to the flower.
- Base Round 1: (1 sc, inc) x 3. [9]
- Base Round 2: (2 sc, inc) x 3. [12]
- Base Round 3: (3 sc, inc) x 3. [15]
- Base Round 4: (4 sc, inc) x 3. [18]
Before finishing, insert your pipe cleaner or floral wire. Fold the pipe cleaner in half, twist it slightly, and guide it down into the stem. Add a small amount of fiberfill to the wider base to give it shape.
Fasten off, leaving a very long tail for sewing the stem to the flower base.
Part 4: The Leaves (Make 2 or more)
These leaves are worked on both sides of a starting foundation chain.
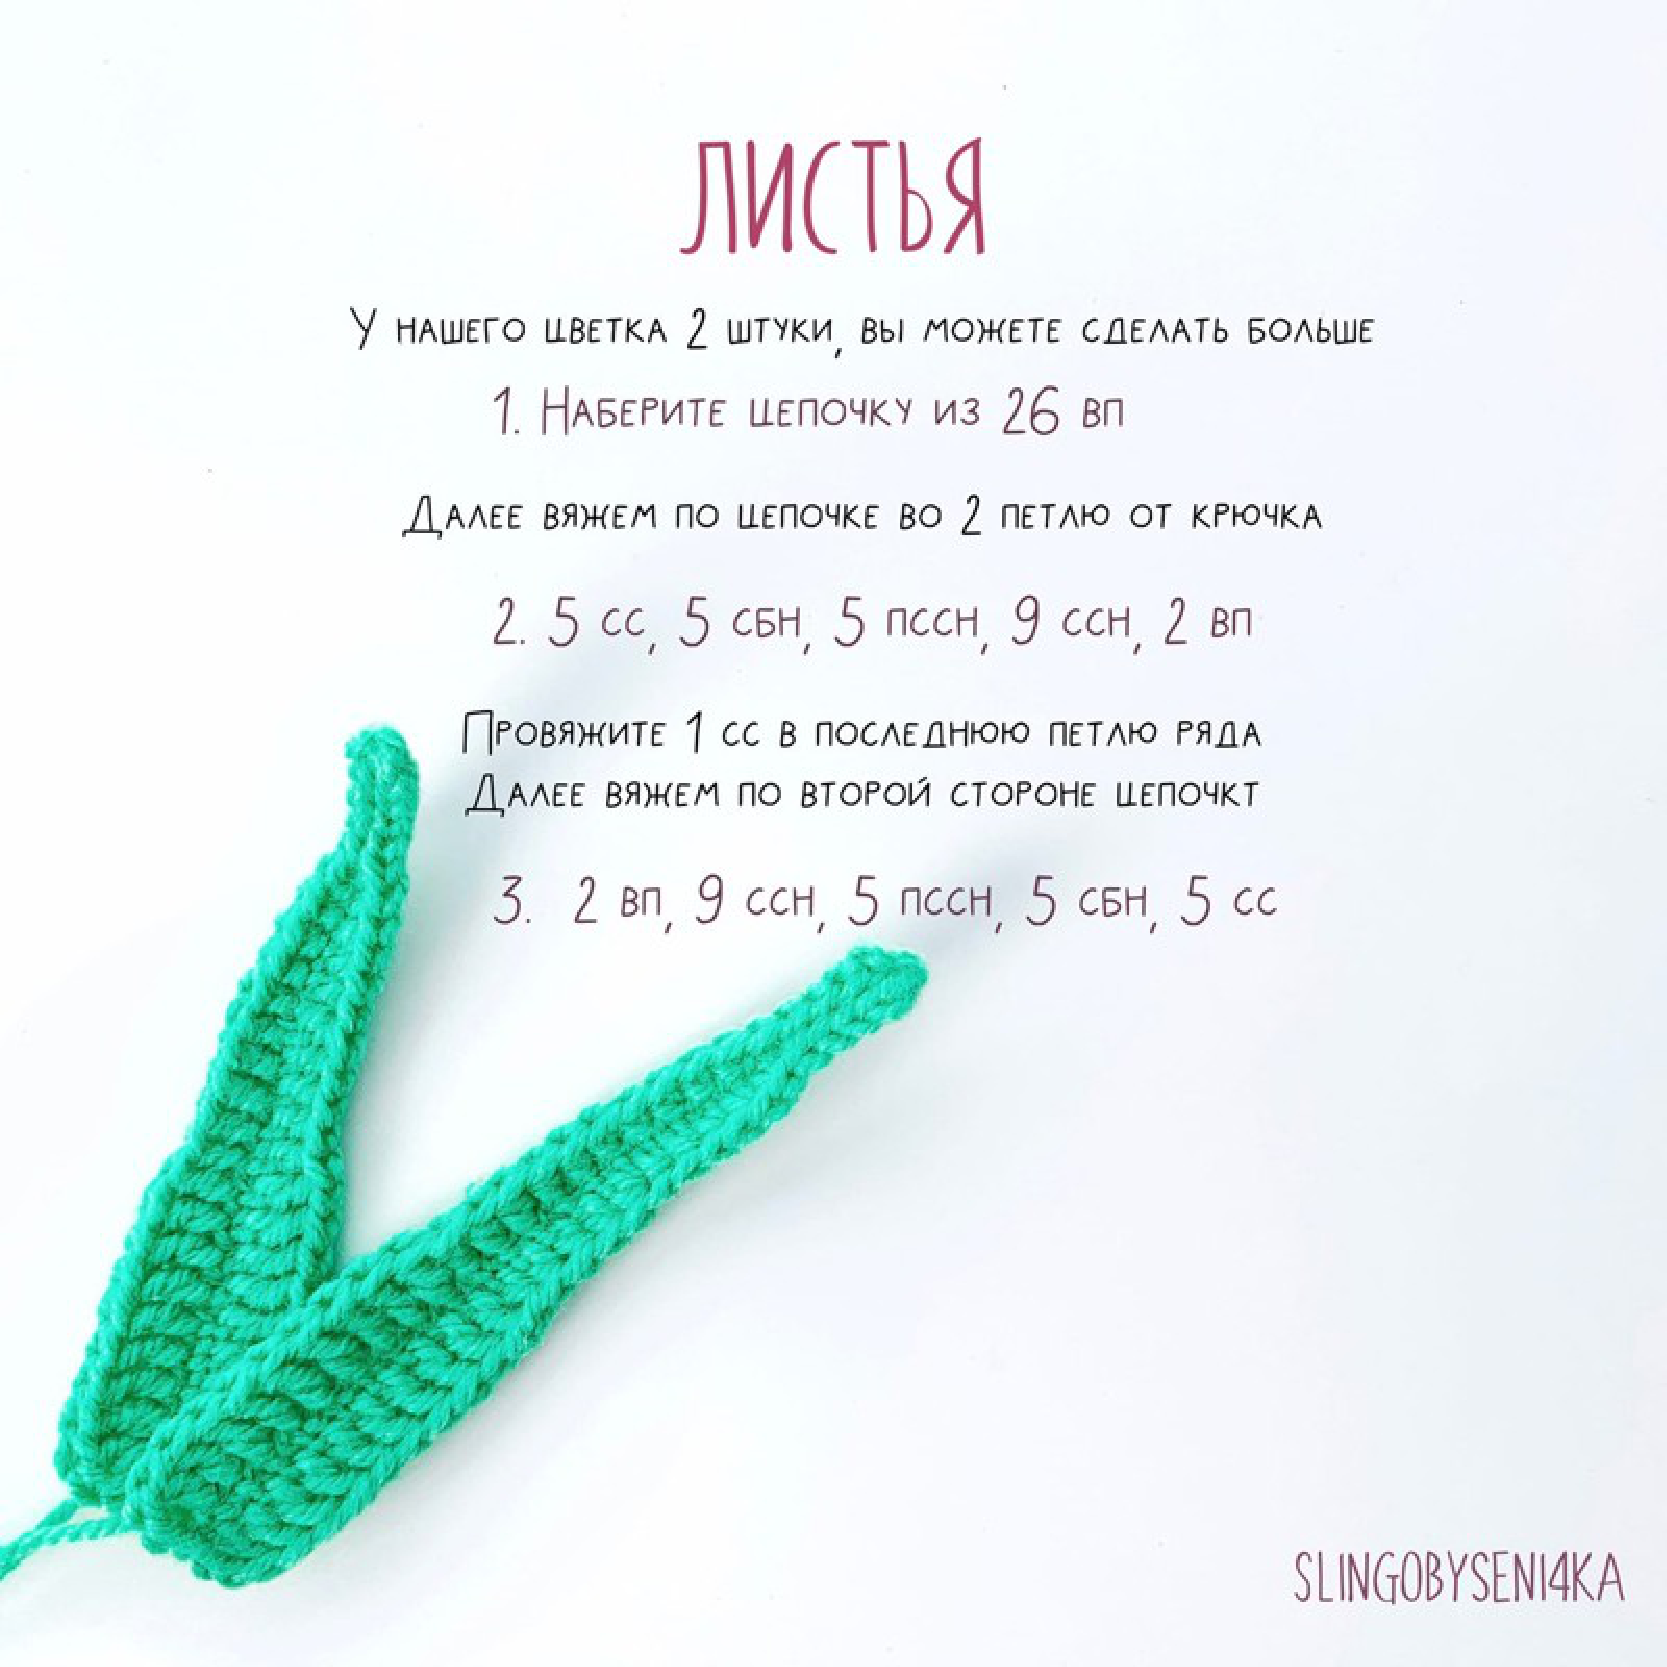
Using your Green yarn…
- Step 1: Ch 26.
- Step 2 (First side of chain): Starting in the 2nd ch from the hook, work the following stitches down the chain: 5 sl st, 5 sc, 5 hdc, 9 dc. At the last stitch, ch 2 and make 1 sl st in that same final stitch to create the leaf tip.
- Step 3 (Second side of chain): Now, working along the opposite side of the foundation chain: Ch 2, then work 9 dc, 5 hdc, 5 sc, 5 sl st.
Fasten off, leaving a long tail for sewing.
Assembly
It’s time to bring all the pieces together to form your beautiful daffodil!
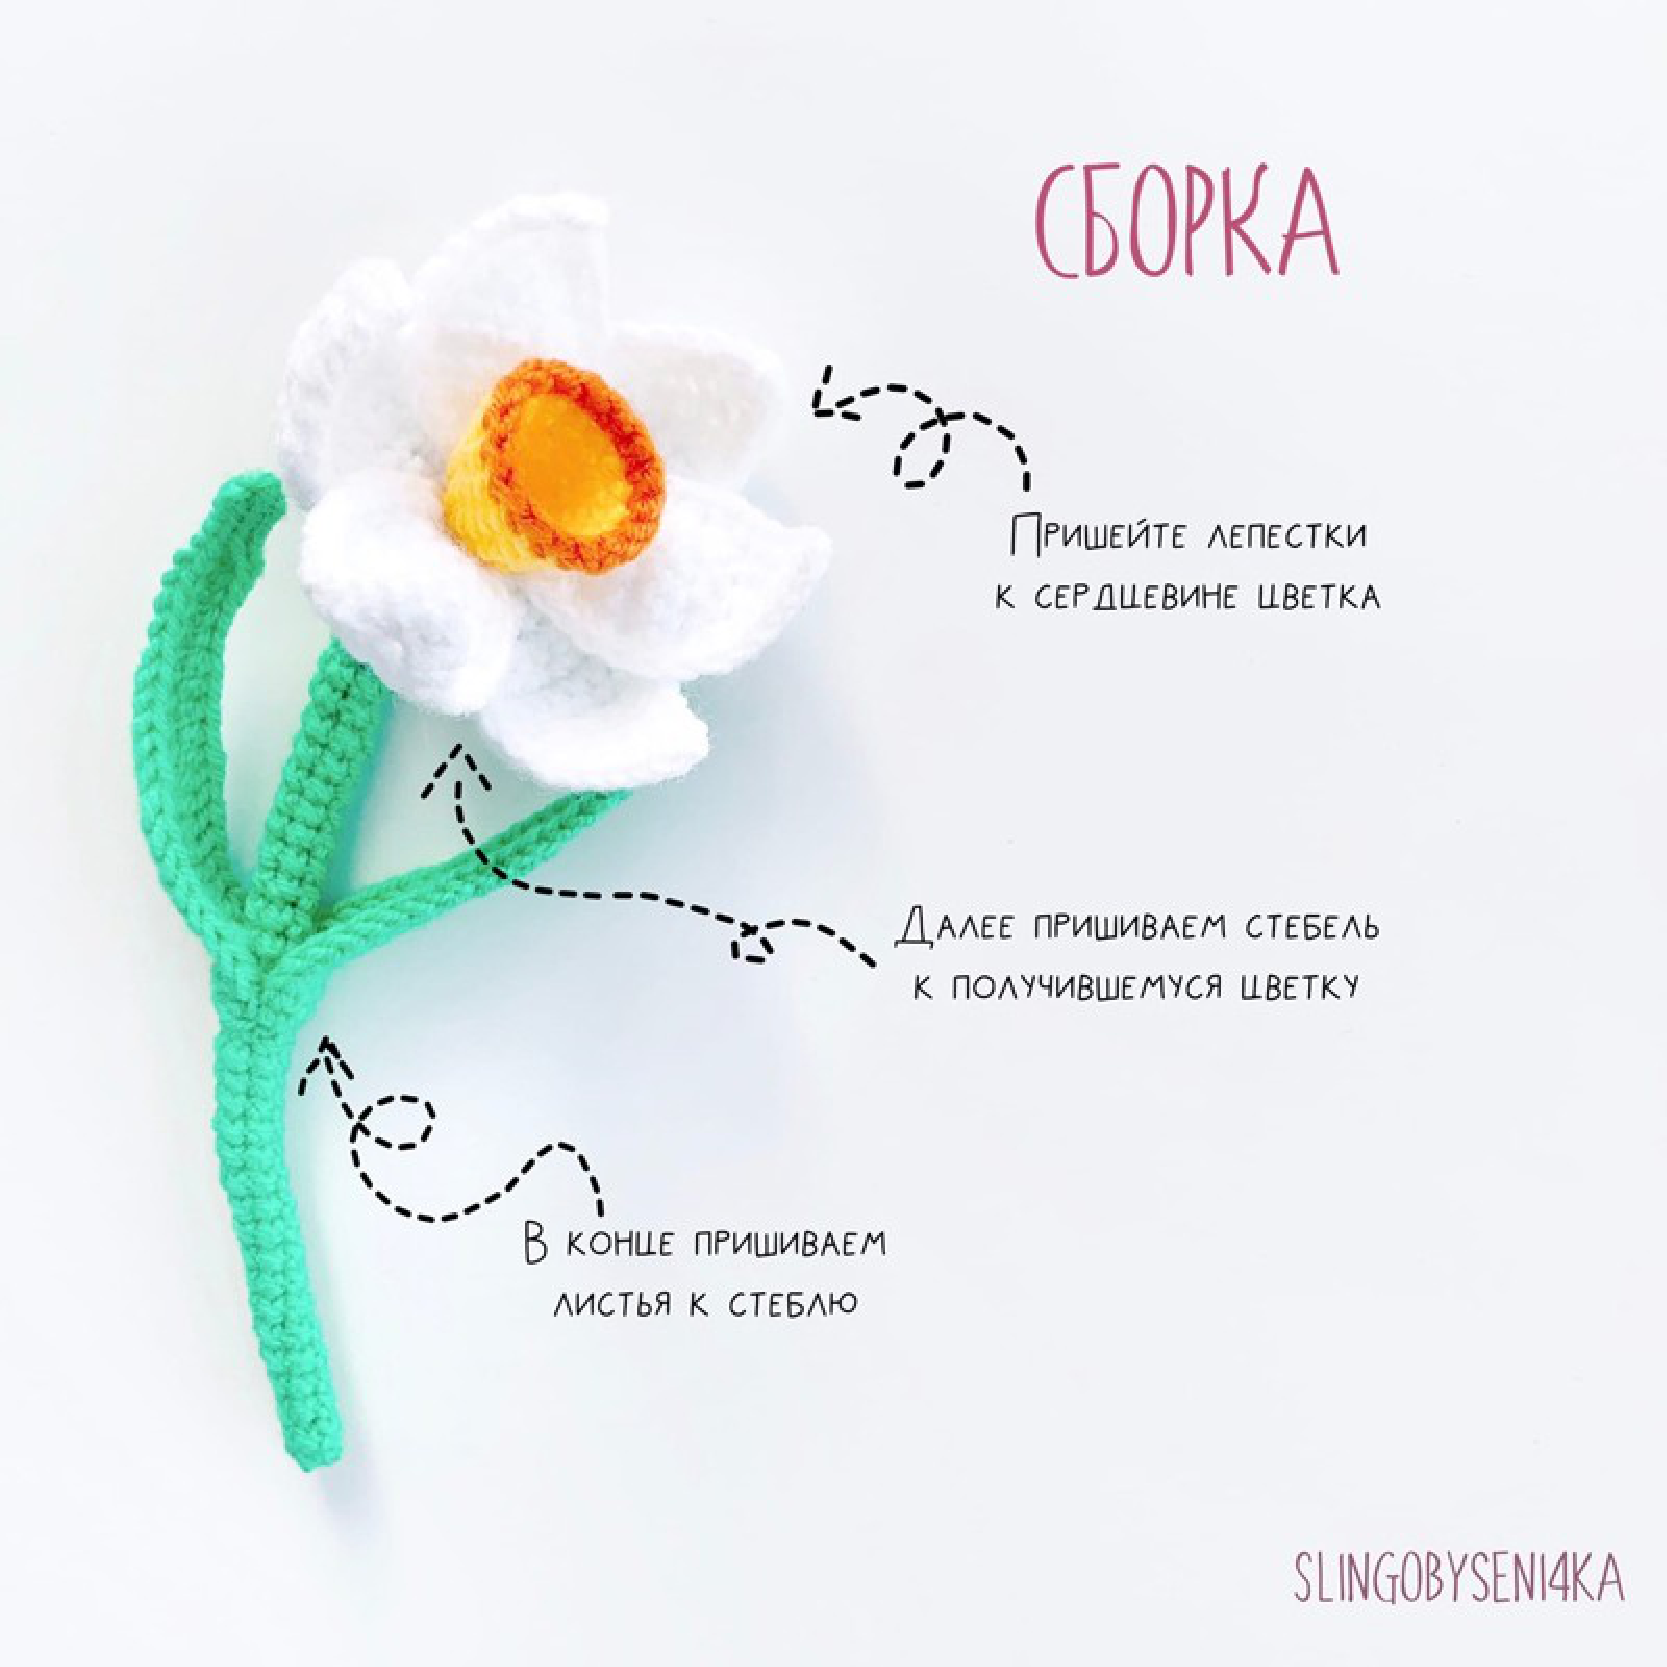
- Attach Petals to Core: Arrange the 6 petals evenly around the base of the orange core (trumpet). Use the long tails from the petals to sew them securely to the bottom rounds of the core.
- Attach the Stem: Use the long green tail from the stem to sew the wide base of the stem to the underside of the petals, covering the sewed areas. Make sure it’s centered and secure.
- Attach the Leaves: Using their long tails, sew the leaves to the base of the stem, positioning them as you like. You can wrap the tails around the stem to secure them firmly.
Weave in any remaining ends, and your crochet daffodil is complete! We hope you enjoyed this pattern. Share your finished flowers with us in the comments below!