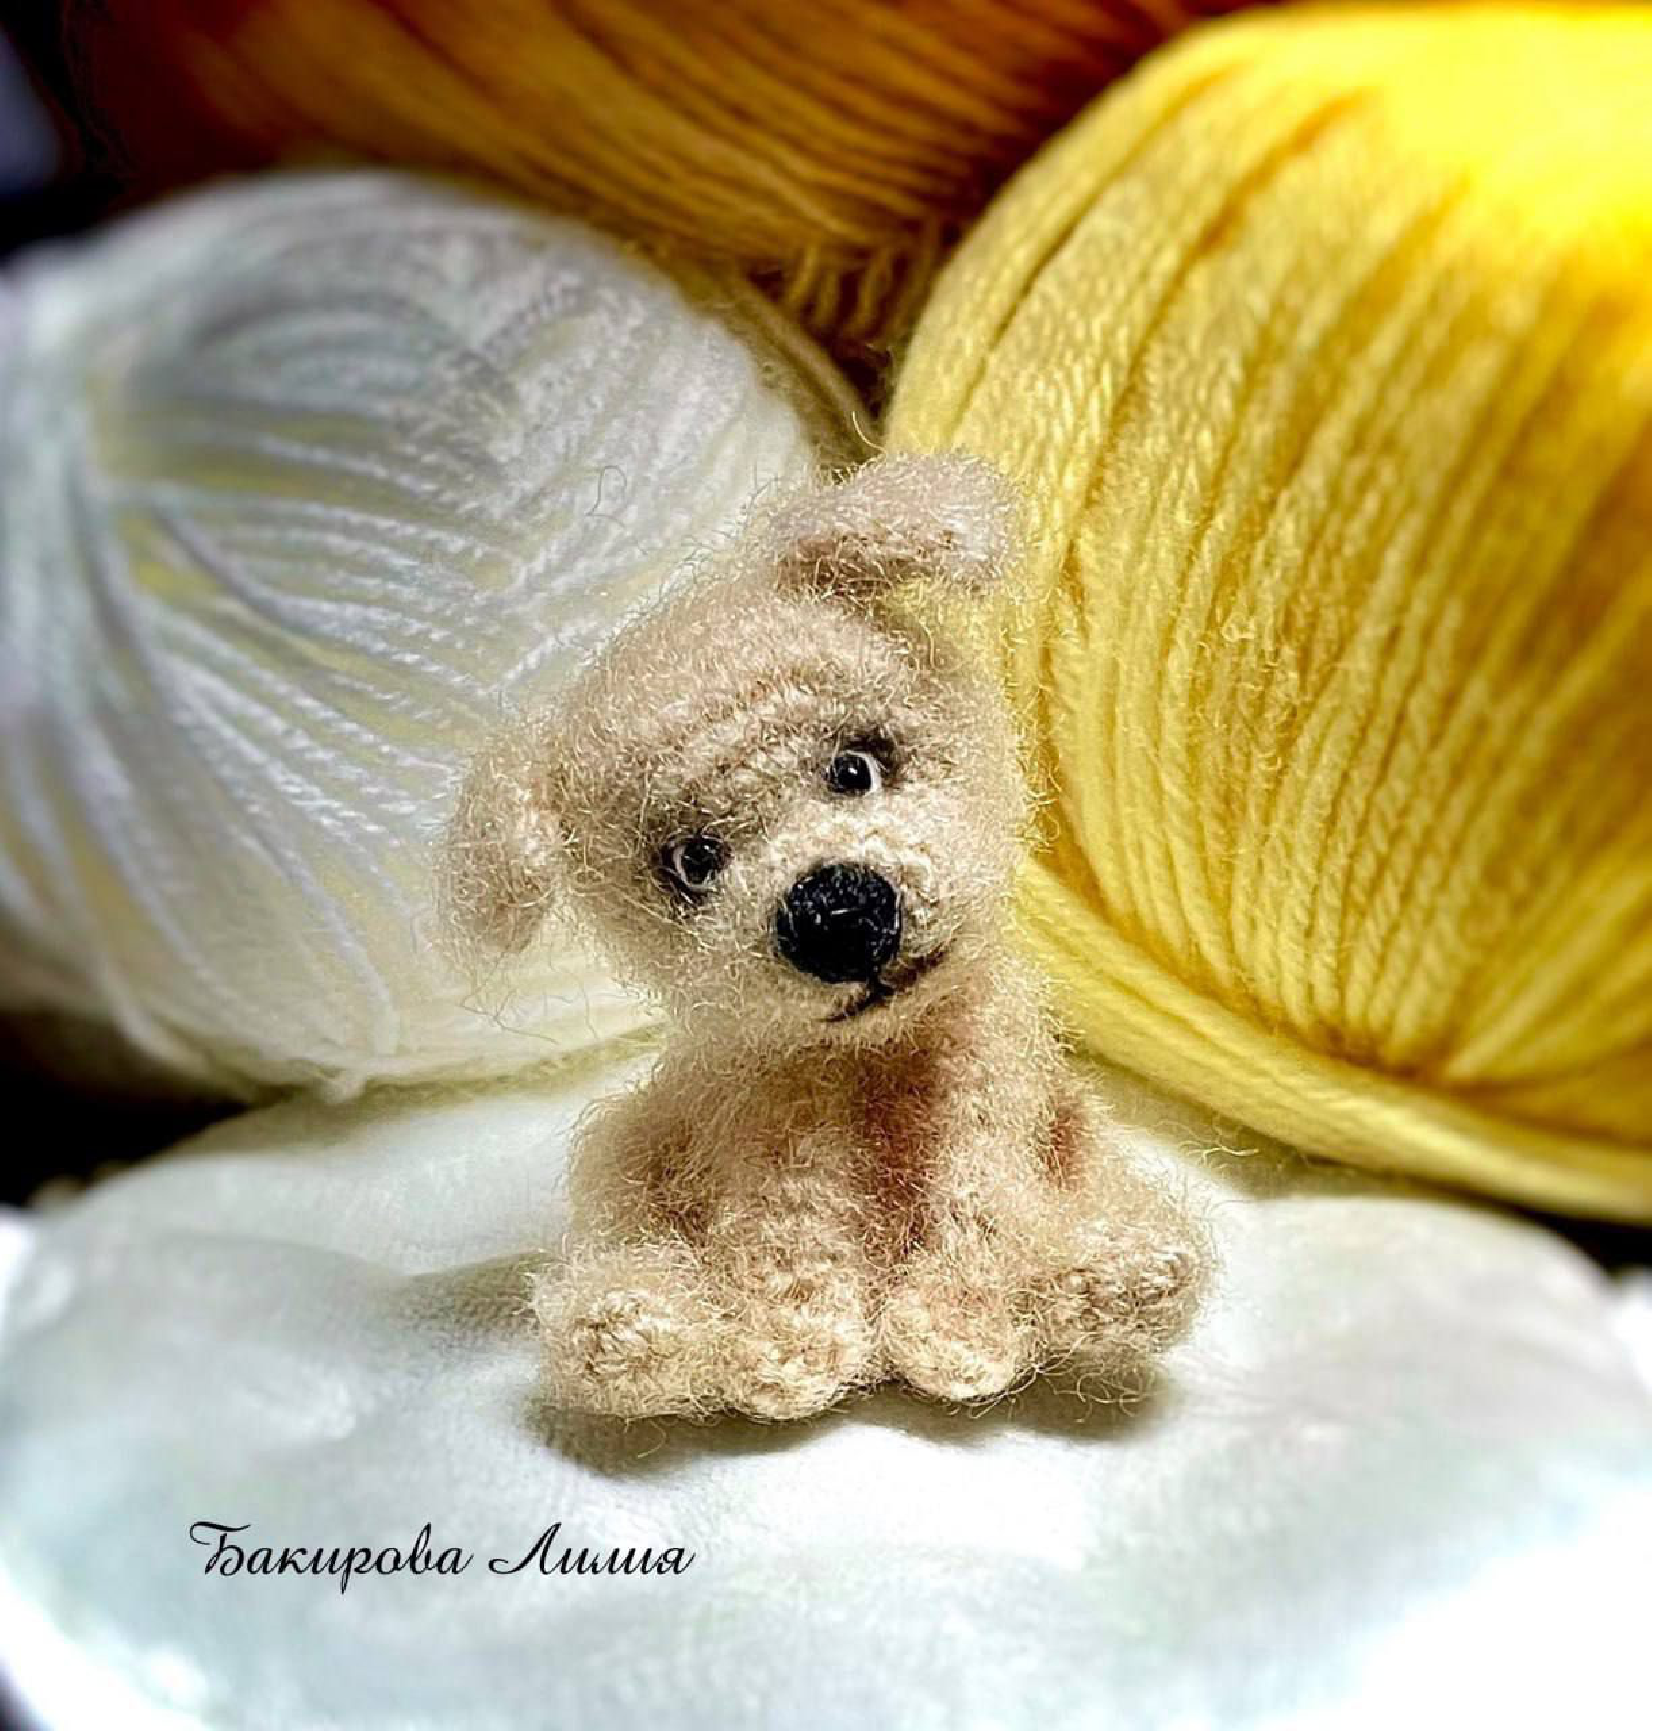
Adorable Dachshund Puppy Free Crochet Pattern
Get ready to crochet the cutest little dachshund puppy! This free pattern, originally based on a master class by Oksana Yakutovich and detailed by Lilia Bakirova, will guide you through creating your own miniature companion. Perfect for amigurumi lovers, this detailed guide makes it easy to follow along.
Pattern by Lilia Bakirova, based on a free master class by Oksana Yakutovich (@ox_yakutovich).
Materials You’ll Need
- Yarn: Alize Angora Gold yarn, beige color (or similar fine yarn suitable for amigurumi)
- Hook: 1.4 mm crochet hook (adjust hook size based on your yarn and desired tension to achieve your preferred size)
- Stuffing: Filler like holofiber, sintepuh, or polyester fiberfill
- Eyes: Black round beads, 2.5 mm
- Needle: A darning or tapestry needle for sewing parts and shaping the face
- Embroidery Thread: Thin black thread for embroidering the nose, and white thread for eye detailing (optional)
- Toning: Dry pastel for adding subtle shading and blush (optional, but highly recommended for detail)
- Optional for a Tiny Puppy: For an approximately 4 cm tall puppy, use a 0.5 mm hook and Gamma sewing threads 205/2 (183m), crocheted with two strands.
Abbreviations
- MR: Magic Ring (also known as an adjustable ring or magic circle)
- sc: Single Crochet
- inc: Increase (make 2 single crochet stitches in the same stitch)
- dec: Decrease (single crochet 2 stitches together)
- ch: Chain
- rnd: Round
- ( )*: Repeat instructions in parentheses the specified number of times
- (X): Indicates the total number of stitches you should have at the end of the round
Let’s Get Started! Crochet the Parts
Head
The head is worked in continuous rounds.
- Rnd 1: Start with 6 sc in a MR (6)
- Rnd 2: 6 inc (make 2 sc in each stitch around) (12)
- Rnd 3: 4 sc, 1 inc, 2 sc, 1 inc, 4 sc (14)
- Rnd 4: 14 sc (14)
- Rnd 5: 5 sc, 4 inc (make 4 increases consecutively), 5 sc (18)
- Rnd 6: (2 sc, 1 inc) * 6 times (24)
- Rnd 7: (3 sc, 1 inc) * 6 times (30)
- Rnd 8: 30 sc (30)
- Rnd 9: 30 sc (30)
- Rnd 10: (3 sc, 1 dec) * 6 times (24)
- Rnd 11: (2 sc, 1 dec) * 6 times (18)
- Rnd 12: (1 sc, 1 dec) * 6 times (12)
- Rnd 13: 6 dec (decrease 6 times consecutively) (6)
- Rnd 14: Pull the remaining hole closed tightly with your darning needle, fasten off, and cut the thread.
Body
The body is worked in continuous rounds. Stuff the body firmly as you go.
- Rnd 1: 6 sc in a MR (6)
- Rnd 2: 6 inc (12)
- Rnd 3: (1 sc, 1 inc) * 6 times (18)
- Rnd 4: (2 sc, 1 inc) * 6 times (24)
- Rnd 5: 24 sc (24)
- Rnd 6: 24 sc (24)
- Rnd 7: (2 sc, 1 dec) * 6 times (18)
- Rnd 8: 18 sc (18)
- Rnd 9: 18 sc (18)
- Rnd 10: (1 sc, 1 dec) * 6 times (12)
- Rnd 11: 12 sc (12)
- Rnd 12: 12 sc (12)
Fasten off and cut the thread, leaving a long tail for sewing the body to the head later.
Front Paws (Make 2)
These are worked in continuous rounds.
- Rnd 1: 8 sc in a MR (8)
- Rnd 2: 8 sc (8)
- Rnd 3: 2 dec, 4 sc (6)
- Rnd 4-6: Work 6 sc in each round for these 3 rounds (6)
Fasten off, leaving a long tail. Fold the paw flat and sew the opening closed with a darning needle using a whip stitch.
Back Paws (Make 2)
These are worked in continuous rounds. Stuff lightly as you go.
- Rnd 1: 8 sc in a MR (8)
- Rnd 2: 8 sc (8)
- Rnd 3: 8 sc (8). At this point, add a little bit of stuffing into the “toe” section of the paw.
- Rnd 4: 2 dec, 4 sc (6)
- Rnd 5: 6 sc (6)
- Rnd 6: 6 inc (12)
- Rnd 7: 12 sc (12)
- Rnd 8: Make one decrease in the front center of the leg (this creates a subtle knee shape). You will have 11 sc remaining (11).
- Rnd 9: Make two decreases: one at the front of the leg and another at the back of the leg. (9). Add a little more stuffing to shape.
- Rnd 10: Make 4 decreases. Pull the remaining hole closed, fasten off, and cut the thread.
Ears (Make 2)
The ears are worked in rows.
- Row 1: Chain 5. Make sure to leave a long starting thread tail (approximately 10-15 cm).
- Row 2: Starting from the 2nd chain from the hook, make 4 sc. Turn your work. (4)
- Row 3: Ch 1, 4 sc. Turn your work. (4)
- Row 4: Ch 1, 4 sc. (4)
Fasten off. Leave the working thread tail the same length as the beginning tail you left (10-15 cm). Tie these two long thread ends together with a simple knot. These tails will be used to neatly sew the ear to the head.
Tail
The tail is worked in rows.
- Row 1: Chain 6. Turn your work.
- Row 2: Starting from the 2nd chain from the hook, make 5 sc. (5)
Fasten off and cut thread, leaving a long tail for sewing.
Assembly: Bringing Your Puppy to Life!
Now comes the fun part – assembling all your crocheted pieces into an adorable dachshund puppy!
- Cinch the Muzzle: Using your darning needle and a length of yarn, gently cinch or sculpt the muzzle area on the head to give it more definition.
- Attach Eyes: Sew on the 2.5 mm black bead eyes. Place them carefully around Round 5 of the head. Use white thread to embroider tiny highlights or detailing on the eyes if you wish.
- Embroider Nose: Using thin black embroidery thread, embroider a small triangular or oval nose onto the muzzle.
- Attach Head to Body: Using the long tail left on the body, securely sew the head to the body. Ensure the head is stuffed firmly before completely closing the seam.
- Attach Back Paws: Sew the two back paws to the sides of the body, positioning them so the puppy can “sit” naturally.
- Attach Front Paws: Sew the two front paws to the front of the body, approximately 2 stitches apart, giving them a natural stance.
- Attach Ears and Tail: Using the long tails you left, sew the ears to the sides of the head and the tail to the back of the body.
- Toning and Brushing: Use dry pastel to add subtle shading and contours to your puppy, enhancing its features. Pay special attention to brushing the chest area where the front paws are sewn. This helps to hide the seams and add a soft, furry texture.
Congratulations! Your adorable amigurumi dachshund puppy is now complete!
Happy Crocheting!
This pattern is intended for personal use only. If you share your wonderful creations online, please remember to credit Lilia Bakirova and Oksana Yakutovich for the pattern.