Crochet This Adorable No-Sew Plush Beaver in Under an Hour! (Free Pattern)
Adorable No-Sew Crochet Plush Beaver Pattern
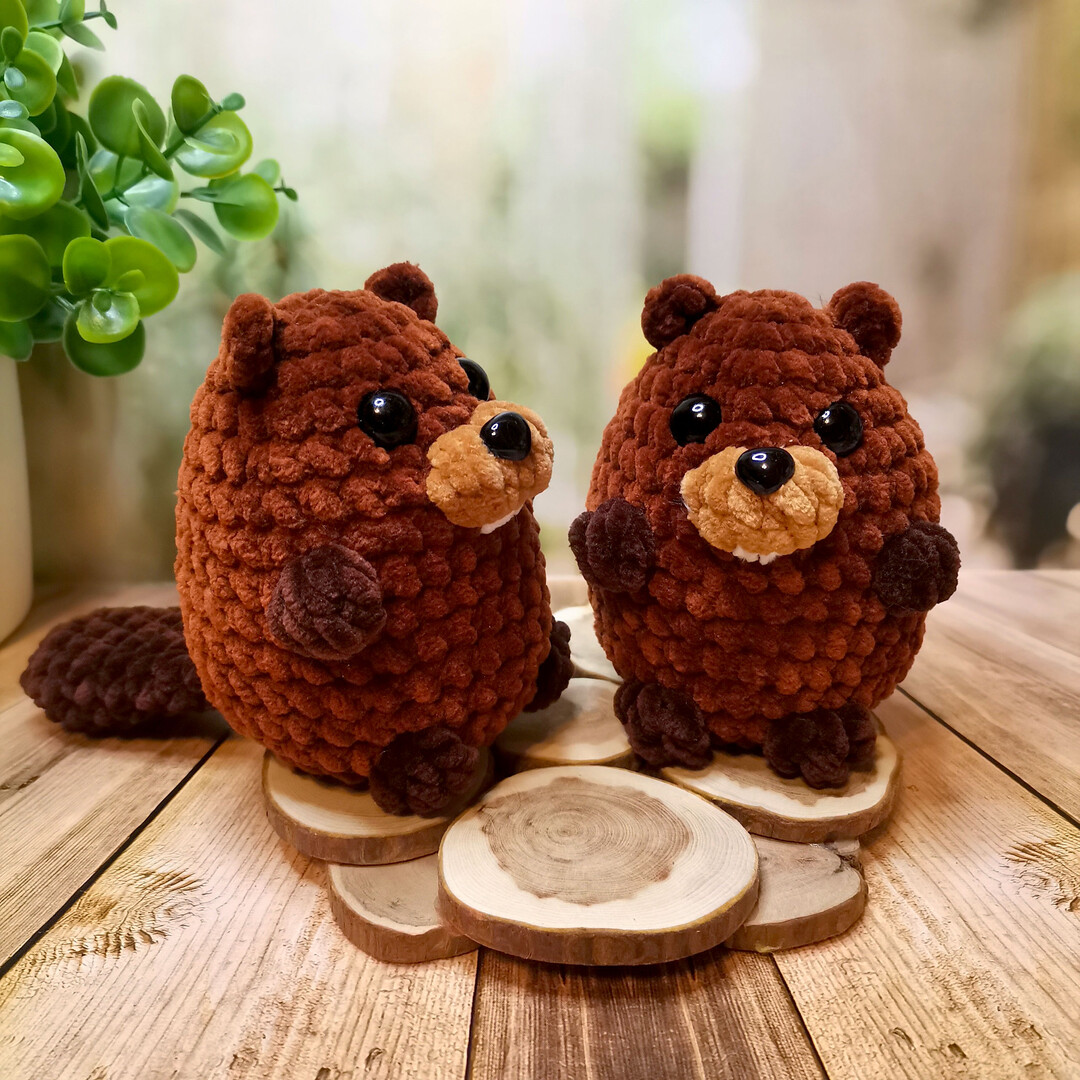
Create your own pocket-sized plush beaver companion! At just 4 inches tall, this fast, no-sew amigurumi pattern is perfect for craft fairs, autumn gifts, and quick weekend crafting sessions.
Are you looking for an adorable, quick-to-make crochet project that requires almost zero sewing? This plush beaver pattern is exactly what you need! Worked from the top down in a single piece, the arms, legs, and muzzle are crocheted directly into the body as you go. The tail is crocheted separately and joined seamlessly, and the ears are worked straight onto the finished head. It’s fast, incredibly satisfying, and wonderfully squishy!
Why You’ll Love This Pattern
- No-Sew Design: Save time and hassle! No tedious sewing or alignment of limbs required.
- Quick & Easy: Takes under an hour to complete, making it ideal for market prep and stocking stuffers.
- Super Soft Texture: Made with chunky chenille yarn for ultimate huggability.
Materials You Will Need
- Yarn: Super Bulky / Chenille plush yarn (100g / 120m / approx. 131 yards per skein)
- Main Color (MC): Warm Brown (e.g., Wolans Bunny Baby No. 60 or Bernat Blanket / Premier Parfait Chunky)
- Contrast Color 1 (CC1): Cream/Beige for the muzzle (e.g., Wolans Bunny Baby No. 18)
- Contrast Color 2 (CC2): Dark Brown for the tail and limbs (e.g., YarnArt Dolce No. 775)
- Hook: Size G/6 (4.0 mm) crochet hook
- Eyes: 10mm or 12mm safety eyes
- Nose: 10mm x 11mm safety or glue-on craft nose
- Other Tools: Fiberfill stuffing, tapestry needle, white embroidery thread for teeth, scissors, and a stitch marker.
Stitch Guide & Abbreviations (US Terms)
- MR = Magic Ring
- ch = Chain
- sc = Single Crochet
- inc = Increase (2 single crochets in one stitch)
- dec = Decrease (invisible single crochet decrease recommended)
- hdc = Half Double Crochet
- tr = Treble Crochet
- sl st = Slip Stitch
- Muzzle Stitch (CC1): 4-dc bobble stitch (Yarn over, insert hook, pull up a loop, yarn over, pull through 2 loops. Repeat 4 times in the same stitch. Yarn over, pull through all 5 loops on hook).
- Arm Stitch (CC2): 4-dc bobble stitch (using the dark brown yarn).
- Leg Stitch (CC2): 3-tr bobble stitch (Yarn over twice, insert hook, pull up a loop, yarn over, pull through 2 loops, yarn over, pull through 2 loops. Repeat 3 times in the same stitch. Yarn over, pull through all 4 loops on hook).
Step-by-Step Crochet Instructions
1. The Tail (Make 1)
Use Dark Brown yarn (CC2). Do not stuff the tail.
- Round 1: 7 sc in MR (7)
- Round 2: 7 inc (14)
- Rounds 3-4: 14 sc (14) – 2 rounds
- Round 5: (dec, 5 sc) * 2 (12)
- Round 6: 12 sc (12)
- Round 7: (dec, 4 sc) * 2 (10)
- Round 8: 10 sc (10)
- Round 9: (dec, 3 sc) * 2 (8)
Fold the tail flat, aligning the opening. Crochet the two opposite edges together with 4 sc to close the tail. Fasten off and set aside; we will crochet this directly into the body later!
2. The Body & Head
The body is worked from the top of the head down to the base in one continuous piece. Use Main Color (MC) unless specified otherwise.
- Round 1: 6 sc in MR (6)
- Round 2: 6 inc (12)
- Round 3: (1 sc, inc) * 6 (18)
- Round 4: (2 sc, inc) * 6 (24)
- Round 5: 24 sc (24)
- Round 6: (3 sc, inc) * 6 (30)
- Round 7: 14 sc, [Muzzle Stitch in CC1] * 2, switch back to MC, 14 sc (30)
Note: The muzzle consists of two fluffy cream-colored bobbles side by side. - Round 8: 30 sc (30)
- Round 9: 1 sc, inc, 8 sc, Arm (4-dc bobble in CC2), 8 sc, Arm (4-dc bobble in CC2), 8 sc, inc, 1 sc (32)
- Rounds 10-13: 32 sc (32) – 4 rounds
- Round 14: 2 sc, dec, 9 sc, Leg (3-tr bobble in CC2), 4 sc, Leg (3-tr bobble in CC2), 9 sc, dec, 2 sc. To finish the round, crochet the next 2 sc through both the body and the first 2 stitches of the tail. (30)
- Round 15: Crochet the next 2 sc through both the body and the remaining 2 stitches of the tail, 1 sc, dec, (3 sc, dec) * 5 (24)
- Round 16: 12 dec (12)
Stuff the beaver body firmly with fiberfill before closing the last round.
- Round 17: 6 dec (6)
Fasten off, weave the tail through the remaining front loops, pull tight to close, and hide the yarn end inside the body.
3. Crocheting the Ears
Ears are worked directly onto the head using the Main Color (MC). Hold the beaver facing you.
- Attach your yarn with a slip stitch to the 4th round of the head on the right side.
- Chain 3.
- Work 1 hdc in the 3rd chain from the hook.
- Slip stitch back down into the 3rd round of the head to finish the ear.
- Fasten off, cut yarn, and pull both yarn tails inside the head to secure.
- Repeat the steps on the left side of the head, ensuring the ears are placed symmetrically.
Finishing Touches
Now, let’s bring your sweet little beaver to life with some simple face embroidery details!
- The Nose: Attach your safety or glue-on craft nose right in the middle of the two cream muzzle bobbles.
- The Teeth: Using white embroidery thread or thin white yarn, make a few vertical stitches directly underneath the nose, overlapping the muzzle slightly, to create his signature beaver buck teeth.
Your adorable plush beaver is complete and ready to cuddle!