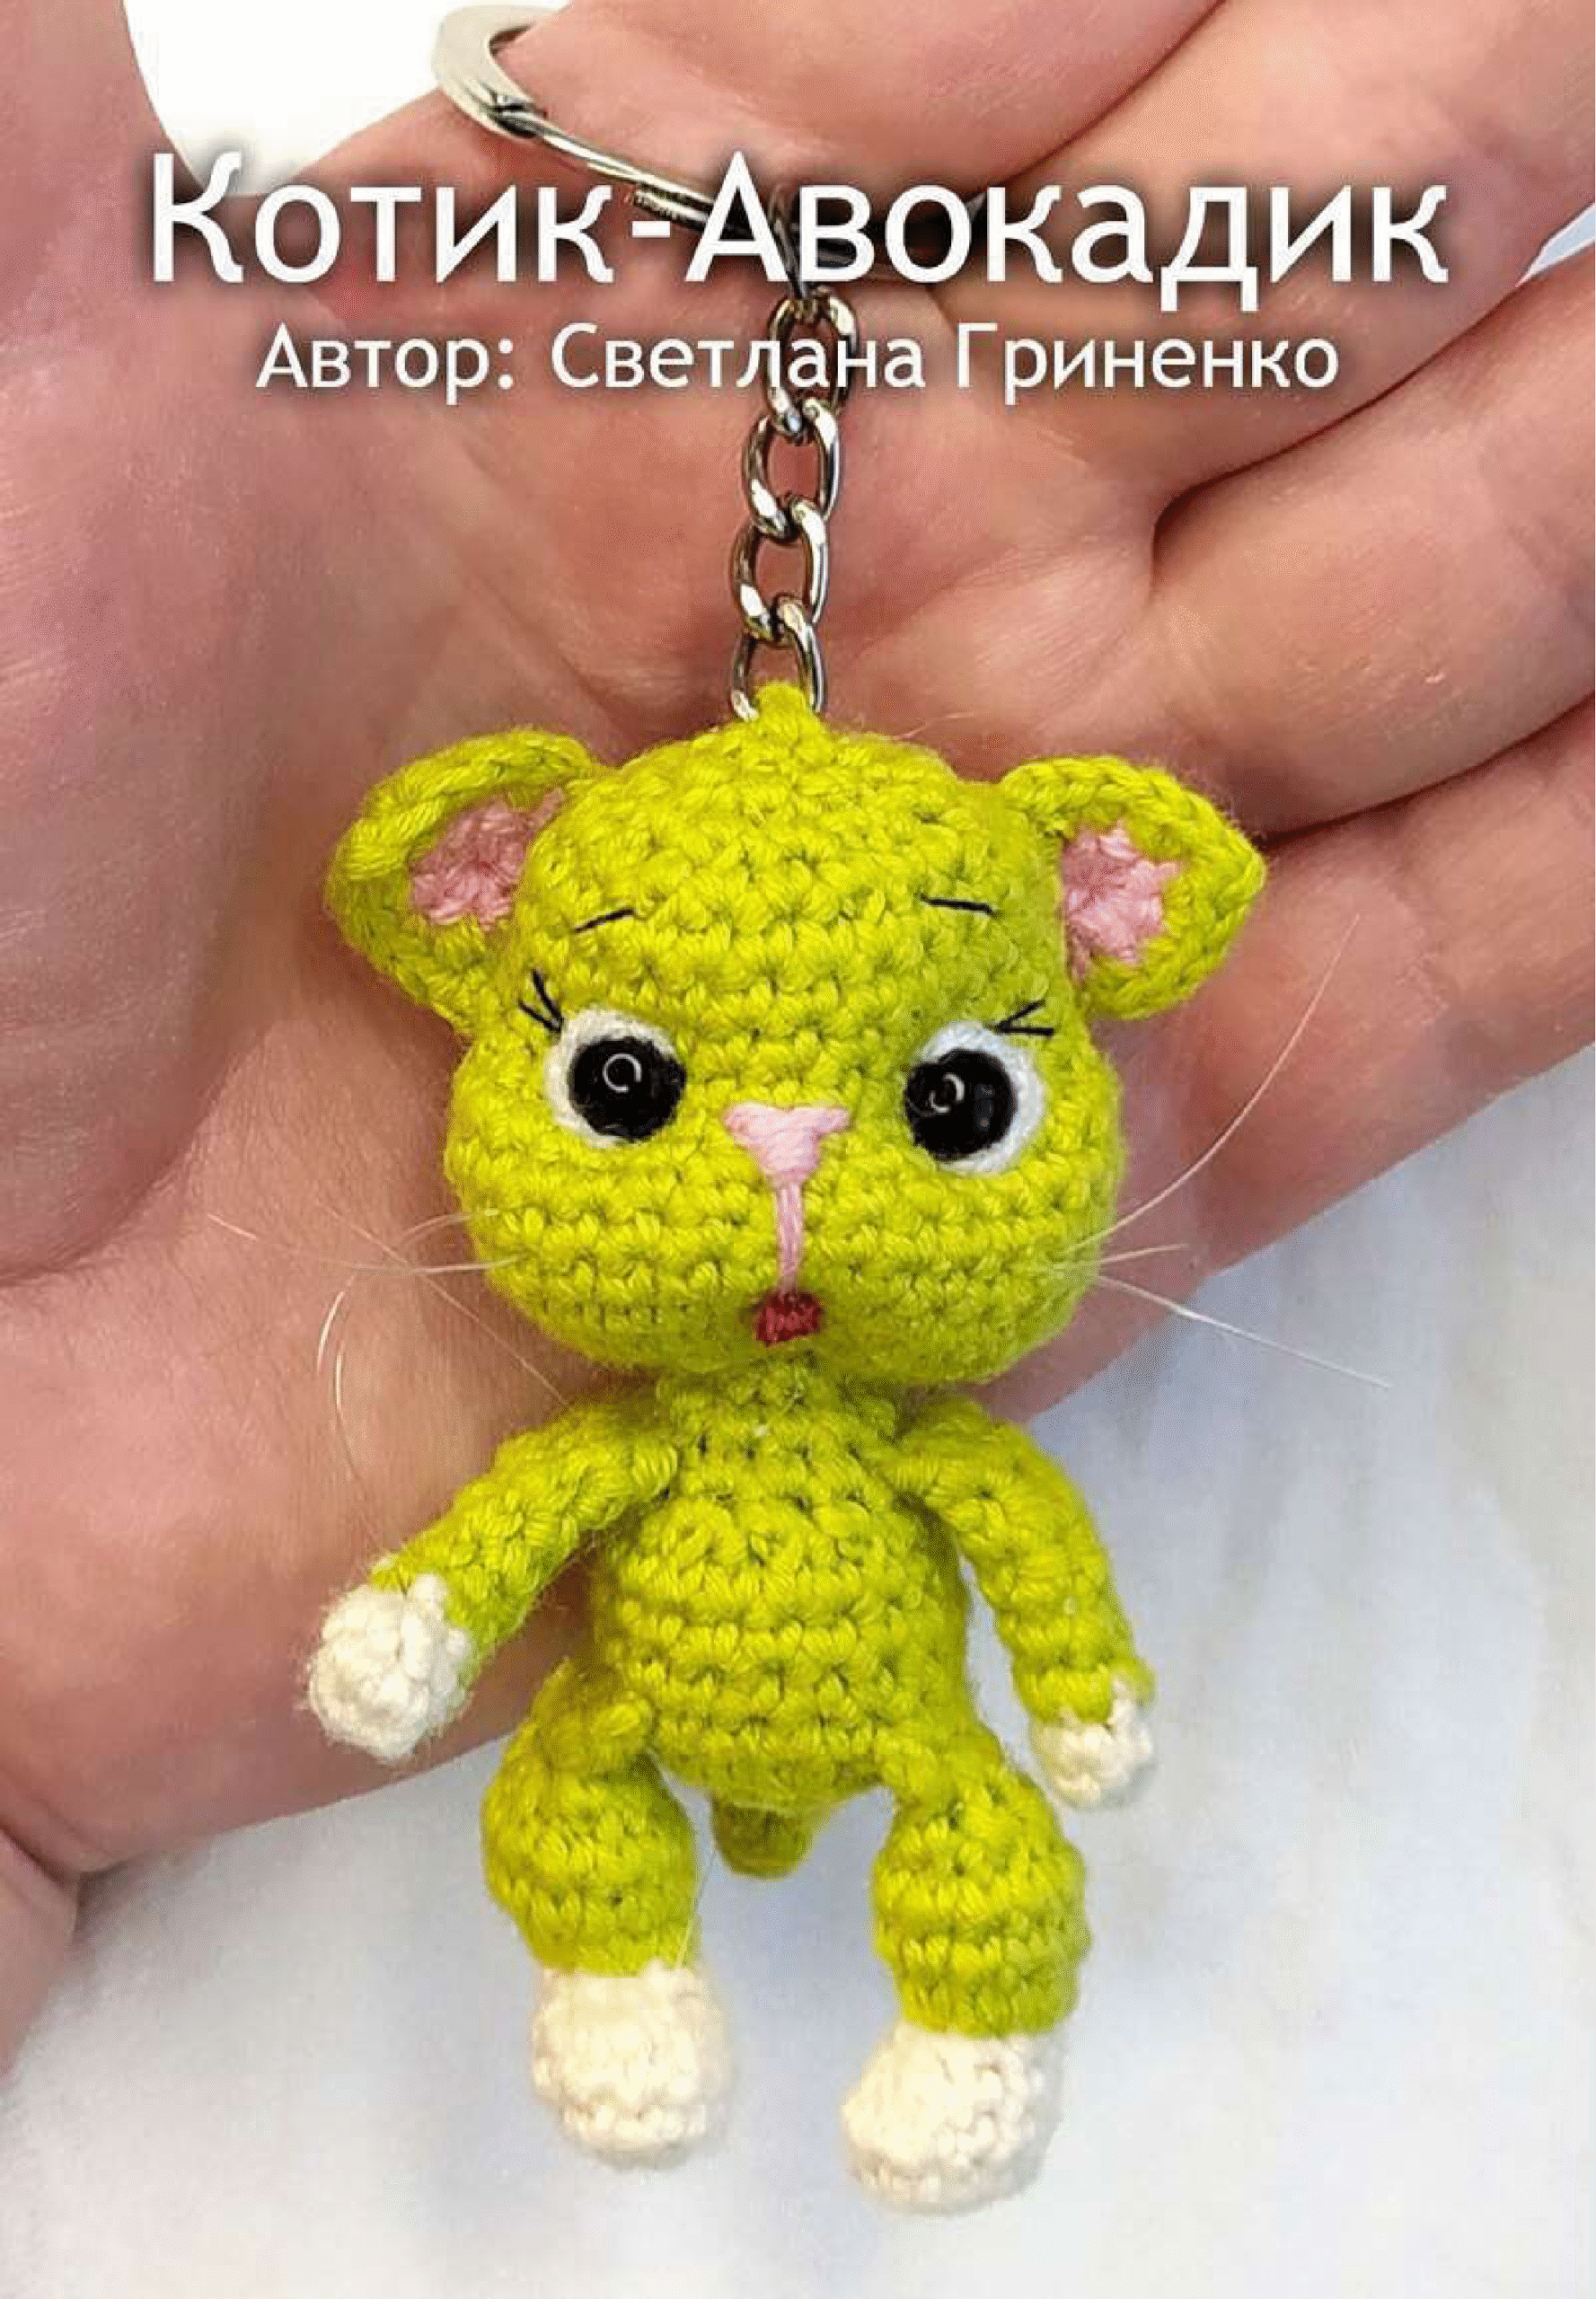
Crochet Adorable Avocado Cat Amigurumi!
Get ready to crochet the cutest little Avocado Cat! This detailed pattern, originally by Svetlana Grinenko, will guide you through creating an adorable amigurumi friend. Follow these easy-to-understand steps and watch your Avocado Cat come to life!
Materials
- Yarn in Light Milky color (for paws)
- Yarn in Pistachio color (for upper paws, ears, and main body/head)
- Yarn in Green color (for lower paws, tail, and body)
- Yarn in Pink color (for ears and tongue embroidery)
- Crochet hook (size not specified, generally 2.0-3.0mm for amigurumi with desired yarn weight)
- Safety eyes (size not specified, typically 6-8mm)
- Stuffing (polyester fiberfill)
- Tapestry needle (for sewing and hiding ends)
- Black sewing thread (for eyebrows/eyelashes)
- Scissors
- Stitch markers
- Pins (for shaping and placement)
Abbreviations
- ch: chain
- sc: single crochet
- inc: increase (2 sc in one stitch)
- dec: decrease (single crochet two stitches together – sc2tog)
- hdc: half double crochet
- sl st: slip stitch
- MR: magic ring (or magic circle)
- dc dec: double crochet decrease (often dc2tog or a specific decrease for 3 stitches here)
- picot: decorative stitch (ch 1, sl st into the top of the last stitch made)
- *…* x N: Repeat instructions in asterisks N times
- (…): Stitch count at the end of the round/row
Let’s Get Started!
Upper Paws (Make 2)
Using Light Milky color yarn:
- Round 1: Chain 2. Make 1 sc in the 2nd chain from the hook, then 3 sc into the same chain. Working on the other side of the starting chain, make 2 sc into the last chain. (6 stitches)
- Round 2: Sc in each of the 6 stitches around. (6)
Switch to Pistachio color yarn. Cut the light milky yarn.
- Rounds 3-4: Sc in each of the 6 stitches around for 2 rows. (6)
- Rounds 5-6: 2 sc, 2 hdc, 2 sc. Repeat for 2 rows. (6)
- Round 7: Sc in each of the 6 stitches around. (6)
Important: Do not stuff the paws.
Fold the paw flat and crochet 3 sc through both edges to close. Fasten off, leaving a tail for sewing. Hide the yarn ends.

Lower Paws (Make 2)
Using Light Milky color yarn:
- Round 1: Chain 2. Make 1 sc in the 2nd chain from the hook, then 3 sc into the same chain. Working on the other side of the starting chain, make 2 sc into the last chain. (6 stitches)
- Round 2: Inc in each of the 6 stitches around. (12)
- Round 3: Sc in each of the 12 stitches around. Finish with a sl st. (12)
- Round 4: 3 sc, then make 3 decreases (dec) consecutively, 3 sc. (9)
- Round 5: 3 sc, then make a dc decrease (interpret as sc3tog to reduce 3 stitches into 1), 3 sc. (6)
Switch to Green color yarn.
Note: The shaping of the lower paws differs slightly for left and right.
For the Left Paw:
- Round 6: 4 inc, 3 sc. (11)
- Rounds 7-8: Sc in each of the 11 stitches around for 2 rows. (11)
- Round 9: 4 dec, 3 sc. (7)
For the Right Paw:
- Round 6: 3 sc, 4 inc. (11)
- Rounds 7-8: Sc in each of the 11 stitches around for 2 rows. (11)
- Round 9: 3 sc, 4 dec. (7)
Stuff the legs firmly.
Fold the paw flat and crochet 4 sc through both edges to close. Fasten off, leaving a long tail for sewing. Hide the yarn ends.

Tail
Using Green color yarn:
- Round 1: 5 sc in a MR. (5)
- Rounds 2-6: Sc in each of the 5 stitches around for 5 rows. (5)
Do not stuff the tail.
Fold the piece flat and crochet 2 sc through both edges to close. Fasten off, leaving a tail for attaching.

Body
Using Green color yarn:
- Round 1: 6 sc in a MR. (6)
- Round 2: 6 inc. (12)
- Round 3: (1 sc, inc)* 6. (18)
At this stage, we will crochet the lower paws into the body.
- Round 4: 3 sc, then crochet 4 sc together with the right lower paw (crochet through both the body and paw stitches), 4 sc, then crochet 4 sc together with the left lower paw, 3 sc. (18)

In Round 5, we will crochet the tail into the body.
- Round 5: 17 sc, then crochet 2 sc together with the tail (crochet through both the body and tail stitches). (18)
Place a stitch marker at the beginning of the next round.

- Rounds 6-7: Sc in each of the 18 stitches around for 2 rows. (18)
- Round 8: 5 sc, 3 dec (decrease in the middle front), 5 sc, 1 dec. (14)
Next, we will crochet the upper paws into the body.
- Round 9: 2 sc, then crochet 3 sc together with the right upper paw, 4 sc, then crochet 3 sc together with the left upper paw, 2 sc. (14)
Important! The paws should be strictly positioned on the sides of the body.
- Round 10: 3 sc, dec, 3 sc, dec, 4 sc. (12)
- Round 11: (2 sc, dec)* 3. (9)
Stuff the body firmly.
Head
Continue directly from the body with Green color yarn:
- Round 12: 9 inc. (18)
- Round 13: (2 sc, inc)* 6. (24)
- Round 14: 5 sc, 3 inc (increases on the side), 9 sc, 3 inc (increases on the other side), 4 sc. (30)
Important! The increases should be strictly on the sides to shape the head.
- Rounds 15-18: Sc in each of the 30 stitches around for 4 rows. (30)
After Round 18, crochet a slip stitch to finish the round.
- Round 19: 5 sc, 3 dec (decreases on the side), 8 sc, 3 dec (decreases on the other side), 5 sc. (24)
Important! The decreases should be strictly on the sides.
- Rounds 20-23: Sc in each of the 24 stitches around for 4 rows. (24)
- Round 24: (2 sc, dec)* 6. (18)
- Round 25: (1 sc, dec)* 6. (12)
- Round 26: 6 dec. (6)
Stuff the head firmly. The opening in the head will be closed after shaping the muzzle.

Muzzle Shaping
This section uses pins and a needle with yarn to create indentations for the eyes, neck, nose, and mouth.
Refer to the photos for exact pin placement. You will need a long tapestry needle and a strong piece of yarn (preferably the body yarn or similar color) for shaping.
- Place pins for the indentations:
- Point 1 (Neck): Between rounds 11 and 12 (at the base of the head/top of the body).
- Points 3 & 3 (Eyes): Between rounds 20 and 21, approximately centered on the face.
- Point 2: As shown in the photo for the neck indentation.

- Insert your needle into Point 1 (Neck) and bring it out at Point 2 as shown in the photo.
- Move one stitch to the left from Point 2 (as indicated by the arrow) and bring the needle back out at Point 1.

- Gently pull the threads tight to create an indentation for the neck, then tie them securely.
- From Point 1 (Neck), bring the needle out at Point 3 (first eye spot).

- Move one stitch to the right from Point 3 and bring the needle back out at Point 1.
- Gently pull the threads tight to create an indentation for the eye, then tie them securely.

- Glue the safety eyes into the created indentations.
- Mark the spots for the nose and mouth indentations with pins:
- Nose: Between rows 20-21.
- Mouth: Between rows 14-15.
- From Point 1 (Neck), bring the needle out at the mouth indentation spot.

- Lay the thread over the top (across the face) and insert the needle at the mouth indentation spot, bringing it out at the nose spot.
- Pull the thread tight to create the mouth and nose indentations.

- Again, pull the thread over the top to the mouth spot and then bring the needle out at the crown of the head (the top of the open hole).
- Bring the second end of the thread (from where you started at Point 1) up to the crown of the head as well. Tie both thread ends securely and cut.

- Insert 3 strands of pink mouline (embroidery) thread with a needle into the open hole of the head and bring it out at the mouth indentation spot.
- From the mouth, bring the thread out to the side in the nose area.

- Insert the needle from the other side of the nose area and bring it out at the spot indicated by the arrow (to shape the other side of the nose).
- Embroider the nose as shown in the photo, creating a small triangular or inverted “Y” shape.

Ears (Make 2)
We will crochet these in turning rows.
Using Pink color yarn:
- Row 1: 6 sc in a MR. (6)
Attach Pistachio color yarn and crochet over the ends to secure. Don’t cut the pink yarn yet if you want to use it for later embroidery.
- Row 2: Ch 1, turn. In the 1st stitch: inc, 1 sc, inc. Then make a picot (ch 1, sl st into the top of the stitch you just made). In the next stitch: inc, 1 sc, inc.

Hide the pink yarn end behind the ear using a needle. Leave the pistachio color yarn ends long for sewing the ears onto the head.

Finishing Touches
- With black sewing thread (using 1 strand), embroider the eyebrows and eyelashes onto your Avocado Cat’s face.
- With 3 strands of pink mouline (embroidery) thread, embroider a small tongue below the nose.
- Use pins to temporarily fix the ears in place on the head, adjusting their position until you’re happy. Then, sew them securely to the head using the long pistachio yarn tails you left.

Congratulations! You’ve successfully crocheted your adorable Avocado Cat! Enjoy your new little friend!