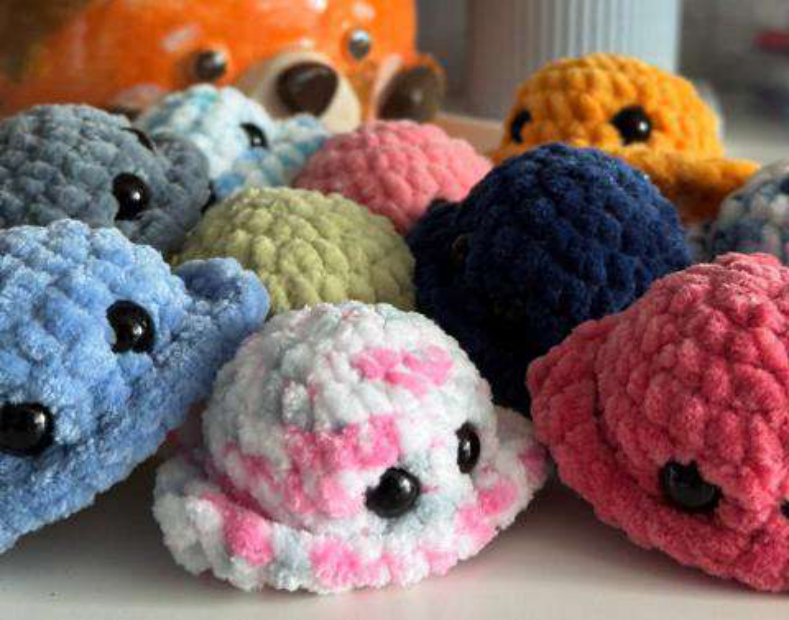
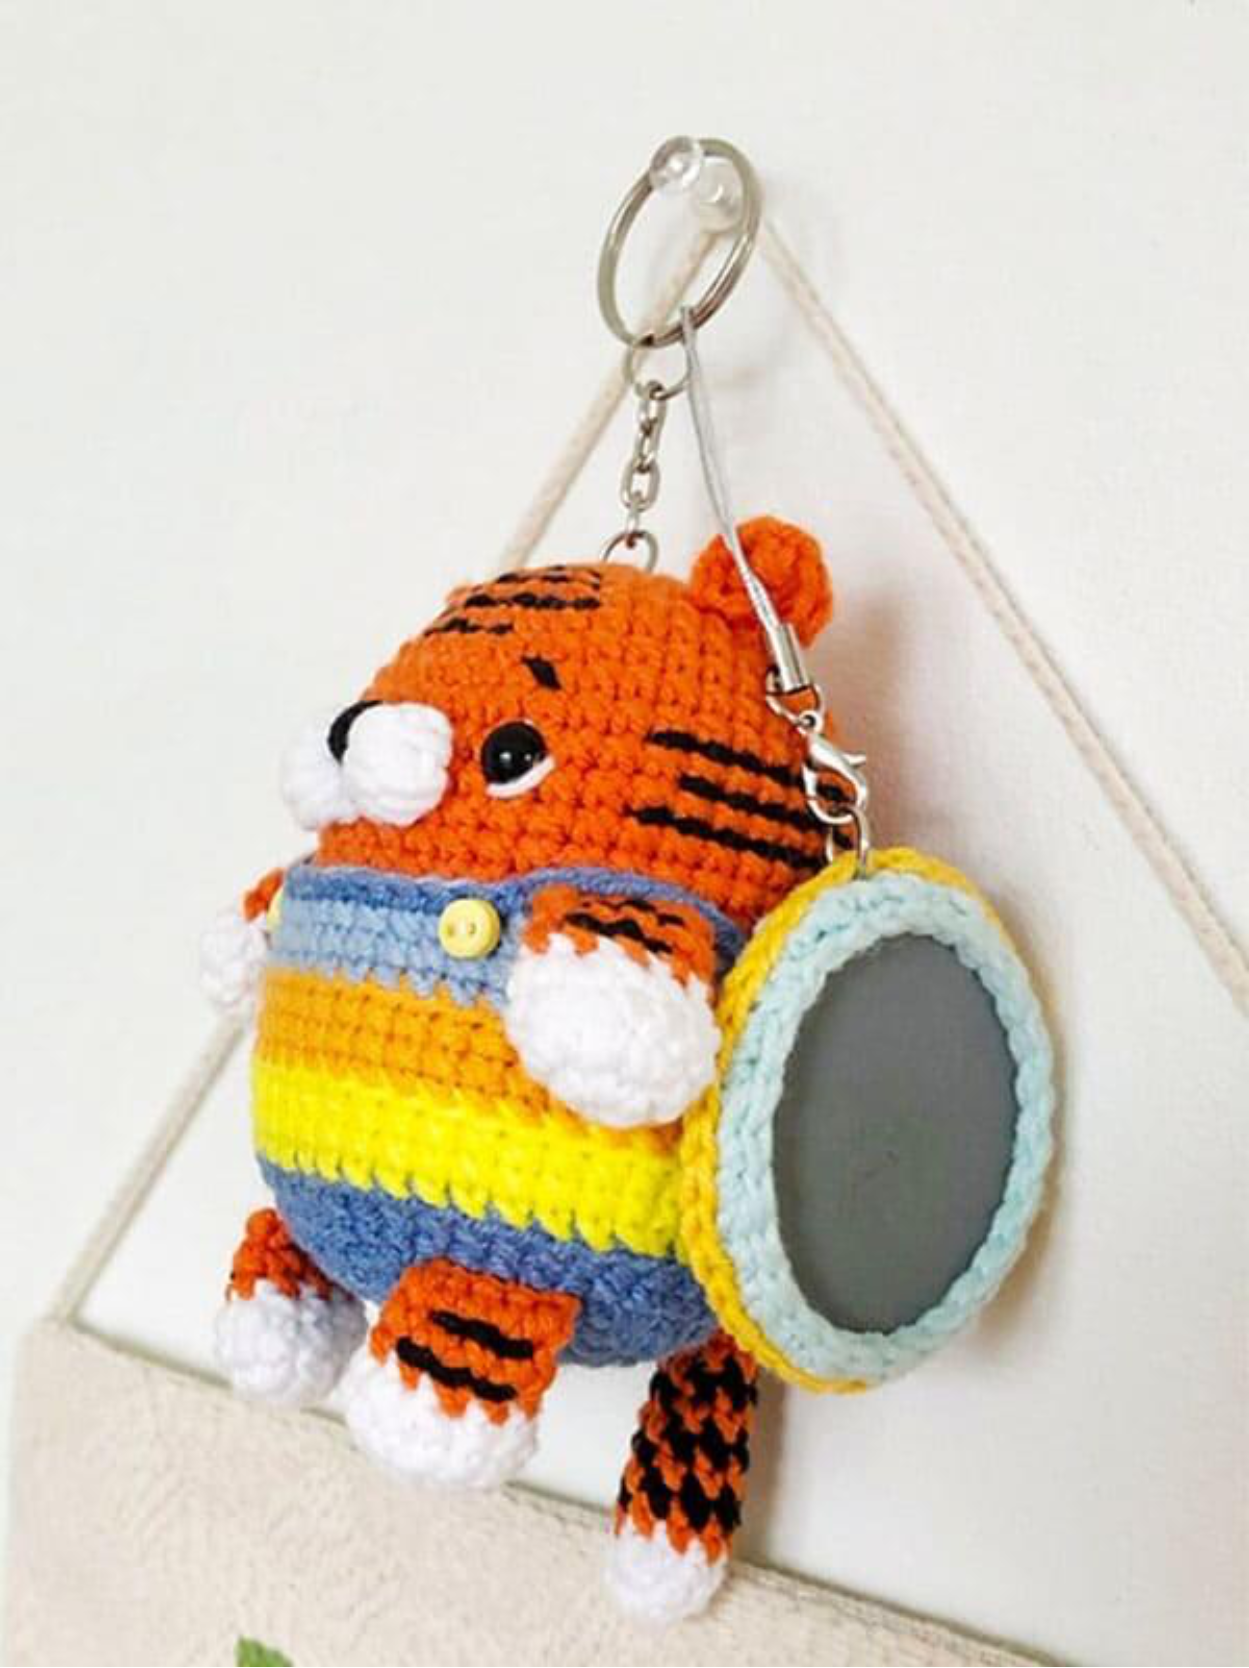
Roar-some Fun: Crochet Your Tiger Keychain!
Get ready to crochet the cutest little tiger keychain! This beginner-friendly amigurumi pattern will guide you step-by-step to create a charming companion for your keys, backpack, or simply as a delightful gift. Let’s gather our supplies and get started!
Materials and Tools
- Yarn: Cotton blend yarn Alize Cotton Gold (330 m / 100 g or 361 yds / 3.5 oz).
- Main Colors: Orange (Color 37), Black (Color 60), White (Color 55).
- For the Overalls: 4 matching colors, such as Emerald Green (Color 610), Turquoise (Color 522), Dark Yellow (Color 216), and Lemon Yellow (Color 187).
- Crochet Hook: 2 mm (US steel hook 4, UK 2½).
- Stuffing: Polyester fiberfill.
- Safety Eyes: 6 mm (0.24 in) diameter – 2 pieces.
- Tiny Buttons: 2 pieces.
- Tapestry Needle: With a large eye for weaving in ends and sewing.
- Embroidery Needle: For finer details.
- Hardware: Key ring, carabiner, cord, or hanging loop (your choice for the keychain).
- Reflecting Tape: Woven, 50 mm (2 in) wide and 10 cm (4 in) long.
- Cardboard or Plastic Lid: A small piece for the reflective button.
- Glue: For attaching the reflective tape.
Abbreviations Used
- (sc, in)… times: Repeat the instructions in the parenthesis the indicated number of times.
- AMR: Adjustable Magic Ring (also known as Magic Circle).
- blo: Work through the back loop only.
- ch: Chain stitch.
- dc: Double Crochet (US term), or Treble Crochet (UK term).
- dc5tog: 5 Double Crochets crocheted off together (meaning 5 stitches share one top, creating a cluster).
- dec: Decrease (crochet 2 stitches together, with separate bases and a shared top, reducing the stitch count by one).
- hdc: Half Double Crochet (US term), or Half Treble (UK term).
- inc: Increase (work 2 single crochet stitches into the same stitch, increasing the stitch count by one).
- rep: Repeat.
- rnd(s): Round(s).
- sc: Single Crochet (US term), or Double Crochet (UK term).
- sl st: Slip Stitch.
- st(s): Stitch(es).
Numbers in parenthesis at the end of a round indicate the total stitch count after completing that round.
Finished Size and Construction Notes
Your finished tiger keychain will be approximately 9.5 cm (3.75 in) tall. This pattern is designed for beginners!
All parts of this toy are worked in continuous spiral rounds. We’ve minimized sewing by attaching the arms and legs as you crochet the body, and the ears are crocheted directly onto the head. The cute black stripes are embroidered on after the main parts are done.
Let’s Start Crocheting!
Paws (Make 4)
Begin with white yarn.
- Round 1: Work 6 single crochets into an Adjustable Magic Ring. (6 stitches)
- Round 2: Work 6 increases (2 single crochets in each stitch around). (12 stitches)
- Round 3: Work 1 single crochet into each stitch around. (12 stitches)
- Round 4: (Work 2 single crochets, then 1 decrease) and repeat this sequence 3 times. (9 stitches)
Change color to Orange yarn.
- Rounds 5-6: Work 1 single crochet into each stitch around for 2 rounds. (9 stitches)
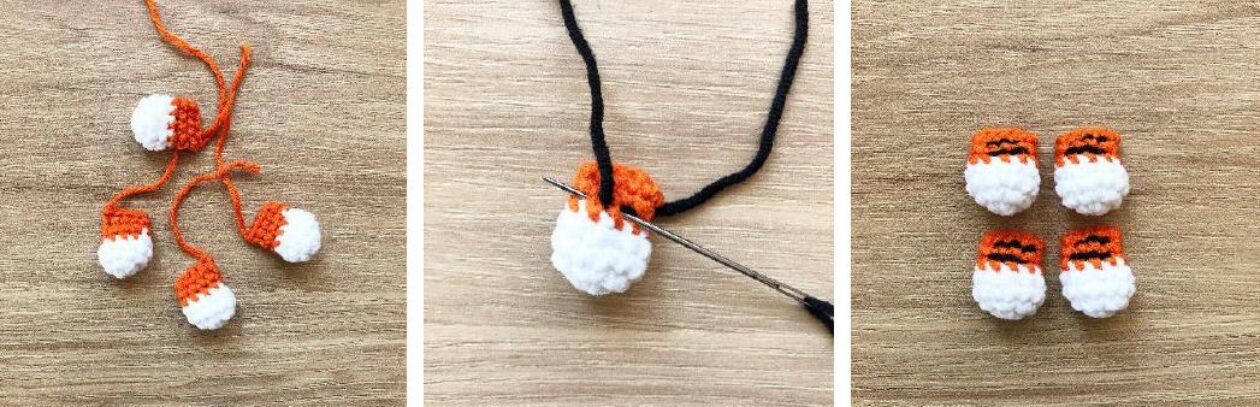
Finishing the Paws:
- Lightly stuff only the white part of the paw with fiberfill.
- Flatten the open edge of the paw and crochet it closed with 4 single crochets, working through both layers.
- Hide the yarn tails inside the paw.
- Using Black yarn and a tapestry needle, embroider two horizontal lines onto each paw using a running stitch, as shown in the photo.
Great job on the paws! Now, let’s crochet the tail.
Tail
Begin with white yarn.
- Round 1: Work 6 single crochets into an Adjustable Magic Ring. (6 stitches)
- Round 2: (Work 1 single crochet, then 1 increase) and repeat this sequence 3 times. (9 stitches)
- Round 3: Work 1 single crochet into each stitch around. (9 stitches)
From this point on, you will alternate between Black and Orange yarn for each round as listed:
- Round 4: (Orange) Work 1 single crochet into each stitch around. (9 stitches)
- Round 5: (Black) Work 1 single crochet into each stitch around. (9 stitches)
- Round 6: (Orange) Work 1 single crochet into each stitch around. (9 stitches)
- Round 7: (Black) Work 1 single crochet into each stitch around. (9 stitches)
- Round 8: (Orange) Work 1 single crochet into each stitch around. (9 stitches)
- Round 9: (Black) Work 1 single crochet into each stitch around. (9 stitches)
- Rounds 10-12: (Orange) Work 1 single crochet into each stitch around for 3 rounds. (9 stitches)
Finishing the Tail:
- Lightly stuff the tail with fiberfill.
- Flatten the open edge and crochet it closed with 4 single crochets, working through both layers.
- Cut the yarn, leaving a long tail for sewing the tail onto the body later.
Paws and tail are done! Now for the main part: the head and body.
Head and Body (Worked in One Piece from the Top Down)
Work in Orange yarn.
- Round 1: Work 6 single crochets into an Adjustable Magic Ring. (6 stitches)
- Round 2: Work 6 increases (2 single crochets in each stitch around). (12 stitches)
- Round 3: (Work 1 single crochet, then 1 increase) and repeat this sequence 6 times. (18 stitches)
- Round 4: (Work 2 single crochets, then 1 increase) and repeat this sequence 6 times. (24 stitches)
- Round 5: Chain 2, (work 3 single crochets, then 1 increase) and repeat this sequence 3 times. Chain 2, (work 3 single crochets, then 1 increase) and repeat this sequence 3 times. (30 stitches)
Important Note for Round 5: The chain 2 stitches do not count in your overall stitch count for the round. They are just a base for crocheting the ears into later. It’s a good idea to mark these chain 2 sections with a contrasting piece of yarn now, as they will be easier to find later!
- Round 6: (Work 4 single crochets, then 1 increase) and repeat this sequence 6 times. (36 stitches)
- Round 7: (Work 5 single crochets, then 1 increase) and repeat this sequence 6 times. (42 stitches)
- Rounds 8-13: Work 1 single crochet into each stitch around for 6 rounds. (42 stitches)
Attaching the Front Paws: In the next round, you’ll incorporate the front paws. You’ll leave 11 stitches between the paws. To prepare:
- Flatten the paws.
- Using the ear placement from Round 5 as a guide, find the approximate middle stitch on the front of the body.
- From this middle stitch, count 5 stitches to each side. These 11 stitches will be the space between your front paws.
- Round 14: Work 4 single crochets (through both layers of the body and the paw at the same time to attach the first paw), then work 11 single crochets, then work 4 single crochets (through both layers of the body and the paw at the same time to attach the second paw), then work 23 single crochets. (42 stitches)
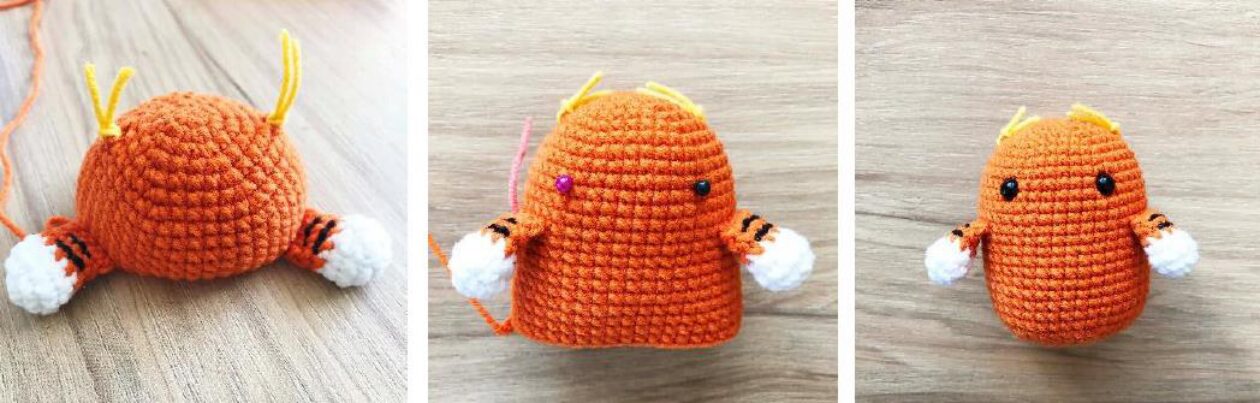
- Rounds 15-23: Work 1 single crochet into each stitch around for 9 rounds. (42 stitches)
Inserting Safety Eyes: Insert the 6mm safety eyes between Rounds 10 and 11, leaving 8 stitches between the eyes. Secure the backs. Begin stuffing the head and body firmly with fiberfill.
- Round 24: (Work 5 single crochets, then 1 decrease) and repeat this sequence 6 times. (36 stitches)
- Round 25: (Work 4 single crochets, then 1 decrease) and repeat this sequence 6 times. (30 stitches)
- Round 26: (Work 3 single crochets, then 1 decrease) and repeat this sequence 6 times. (24 stitches)
- Round 27: (Work 2 single crochets, then 1 decrease) and repeat this sequence 6 times. (18 stitches)
- Round 28: (Work 1 single crochet, then 1 decrease) and repeat this sequence 6 times. (12 stitches)
- Round 29: Work 6 decreases. (6 stitches)
Finishing the Body: Finish stuffing the body firmly. Cut the yarn, leaving a tail. Thread the tail onto your tapestry needle and cinch the remaining opening closed. Weave in and hide the yarn tail inside the body.
Ears (Make 2)
Using new Orange yarn, find the chain 2 arcs from Round 5 on the head.
- Insert your hook into the chain 2 arc.
- Chain 1.
- Work 1 single crochet into the arc.
- Work 1 half double crochet into the arc.
- Work 3 double crochets into the arc.
- Work 1 half double crochet into the arc.
- Work 1 single crochet into the arc.
- Chain 1.
- Cut the yarn and hide the tail inside the head.
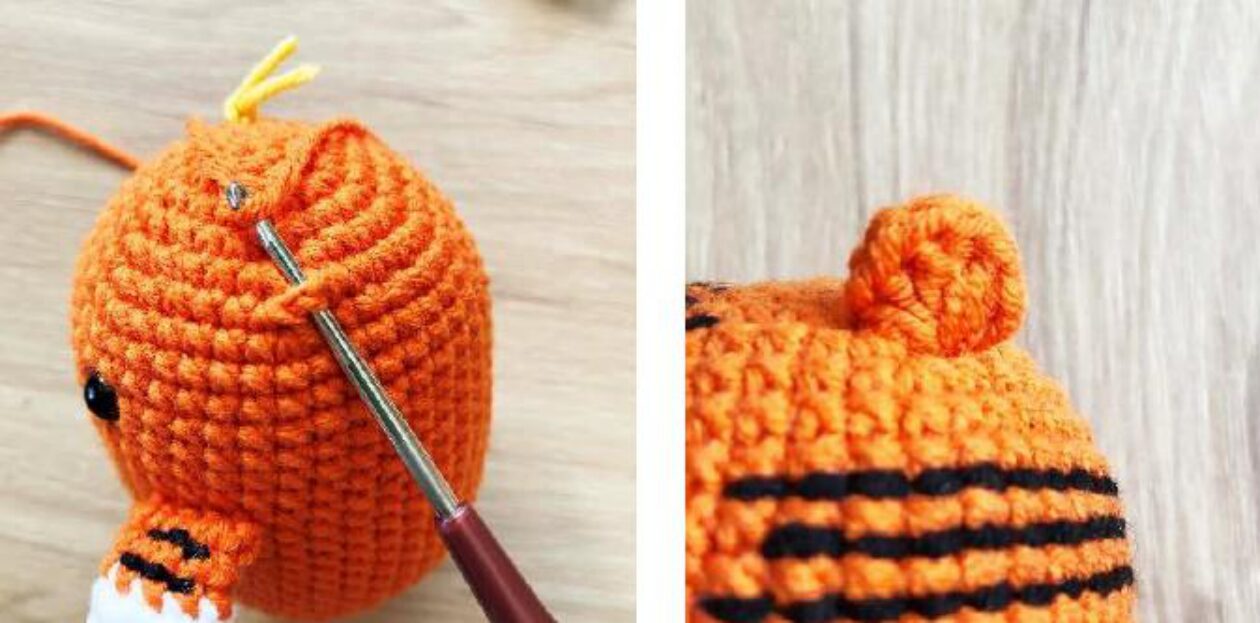
The ears give your tiger so much character! Next up, the fun, colorful overalls.
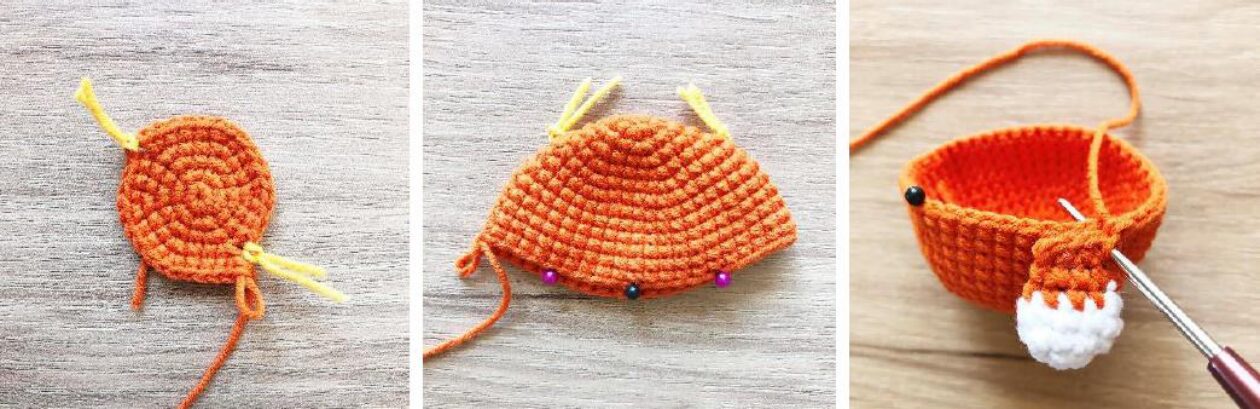
Overalls
You’ll use four different colors for the overalls, changing colors as noted below. Let’s start with Color 1 (e.g., Emerald Green).
- Round 1: Work 6 single crochets into an Adjustable Magic Ring. (6 stitches)
- Round 2: Work 6 increases. (12 stitches)
- Round 3: (Work 1 single crochet, then 1 increase) and repeat this sequence 6 times. (18 stitches)
- Round 4: (Work 2 single crochets, then 1 increase) and repeat this sequence 6 times. (24 stitches)
- Round 5: (Work 3 single crochets, then 1 increase) and repeat this sequence 6 times. (30 stitches)
- Round 6: (Work 4 single crochets, then 1 increase) and repeat this sequence 6 times. (36 stitches)
- Round 7: (Work 5 single crochets, then 1 increase) and repeat this sequence 6 times. (42 stitches)
Attaching the Back Paws: Similar to the front paws, you’ll incorporate the back paws in this round.
- Round 8: Work 12 single crochets, then work 4 single crochets (through both layers of the overall and the paw at the same time to attach the first back paw), then work 10 single crochets, then work 4 single crochets (through both layers of the overall and the paw at the same time to attach the second back paw), then work 12 single crochets. (42 stitches)
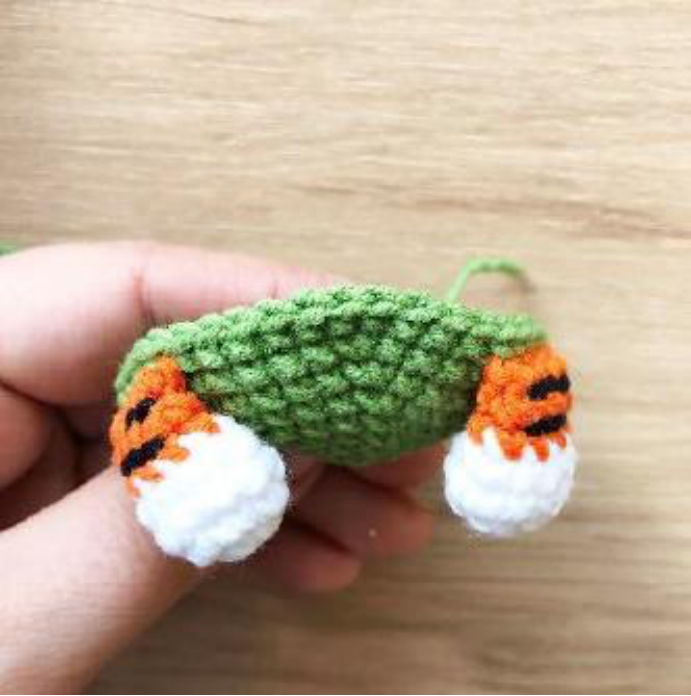
- Round 9: Work 1 single crochet into each stitch around. (42 stitches)
Change to Color 2 (e.g., Turquoise).
- Round 10: Work through the back loop only (blo) – (Work 13 single crochets, then 1 increase) and repeat this sequence 3 times. (45 stitches)
- Rounds 11-12: Work 1 single crochet into each stitch around for 2 rounds. (45 stitches)
Change to Color 3 (e.g., Dark Yellow).
- Round 13: Work through the back loop only (blo) – Work 1 single crochet into each stitch around. (45 stitches)
- Rounds 14-15: Work 1 single crochet into each stitch around for 2 rounds. (45 stitches)
Change to Color 4 (e.g., Lemon Yellow).
- Round 16: Work through the back loop only (blo) – Work 1 single crochet into each stitch around. (45 stitches)
- Rounds 17-18: Work 1 single crochet into each stitch around for 2 rounds. (45 stitches)
Cut the yarn, leaving a long tail for seaming the overalls to the body.
Muzzle
Work in White yarn.
- Into an Adjustable Magic Ring: (Chain 2, then work 5 double crochets together (dc5tog), then Chain 2) and repeat this sequence 2 times.
Cut the yarn, leaving a long tail for sewing the muzzle to the face.
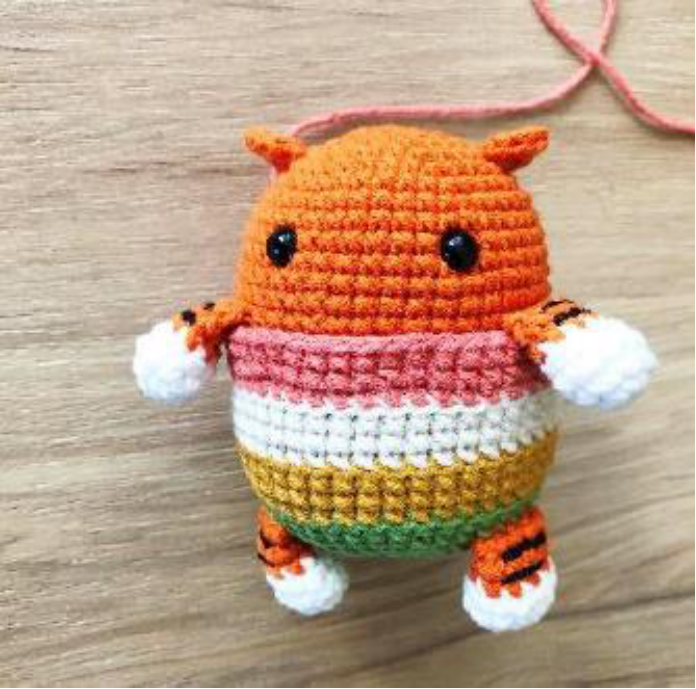
Assembly and Finishing
Attach Overalls: Place the finished overalls onto the tiger’s body. Sew them to the body in the next-to-last round of the body (Round 28). To create the straps, join new working yarn in Color 1 (the first color of your overalls) to the back of the last round of the overalls. Work 1 round of slip stitches, creating a strap of chain 6 over each of the two front paws. This will secure the overalls and make them look neat.

Embroider Face Details:
- Sew the muzzle to the face, centered between the eyes.
- Using the same strand of white yarn from the muzzle, embroider a short line outward from the outside corner of each safety eye, as shown in the picture.
- Using Black yarn and an embroidery needle, embroider the nose onto the muzzle and add small eyebrows above the eyes.
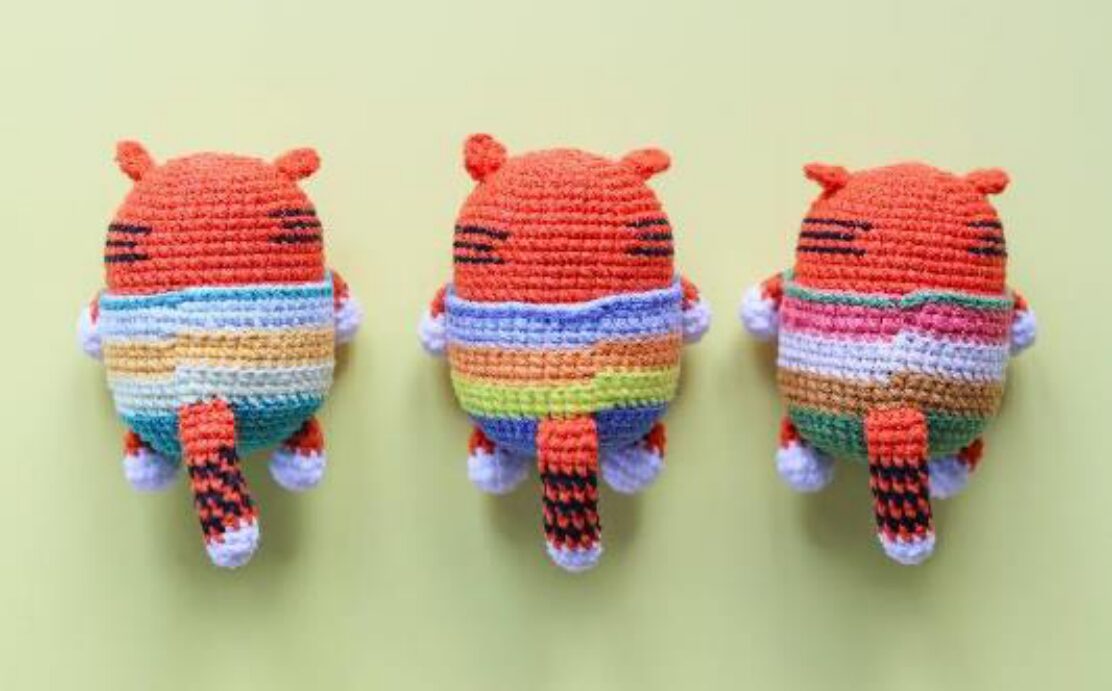
Embroider Tiger Stripes: With Black yarn, embroider lines onto the head in a running stitch to create the tiger’s signature stripes, following the example in the photo.
Sew on Buttons: Attach the two tiny buttons to the front of the overalls for a charming detail.
Attach Hardware: Attach your chosen keychain hardware (ring, carabiner, etc.) to the top of the tiger’s head or as desired.


To make your amigurumi toy even more stylish, you can make additional accessories!
Reflecting Button (Optional Accessory)
Making the Reflective Core:
- Cut a circle with a 5 cm (2 in) diameter from cardboard or plastic. This will be the backing.
- Cut another circle of the same size from the reflecting tape.
- Glue the reflective tape circle onto the cardboard or plastic backing circle.
Crocheted Frame for the Button:
Using a contrasting yarn color (e.g., Lemon Yellow or Emerald Green).
- Round 1: Work 6 single crochets into an Adjustable Magic Ring. (6 stitches)
- Round 2: Work 6 increases. (12 stitches)
- Round 3: (Work 1 single crochet, then 1 increase) and repeat this sequence 6 times. (18 stitches)
- Round 4: (Work 2 single crochets, then 1 increase) and repeat this sequence 6 times. (24 stitches)
- Round 5: (Work 3 single crochets, then 1 increase) and repeat this sequence 6 times. (30 stitches)
- Round 6: (Work 4 single crochets, then 1 increase) and repeat this sequence 6 times. (36 stitches)
- Round 7: (Work 5 single crochets, then 1 increase) and repeat this sequence 6 times. (42 stitches)
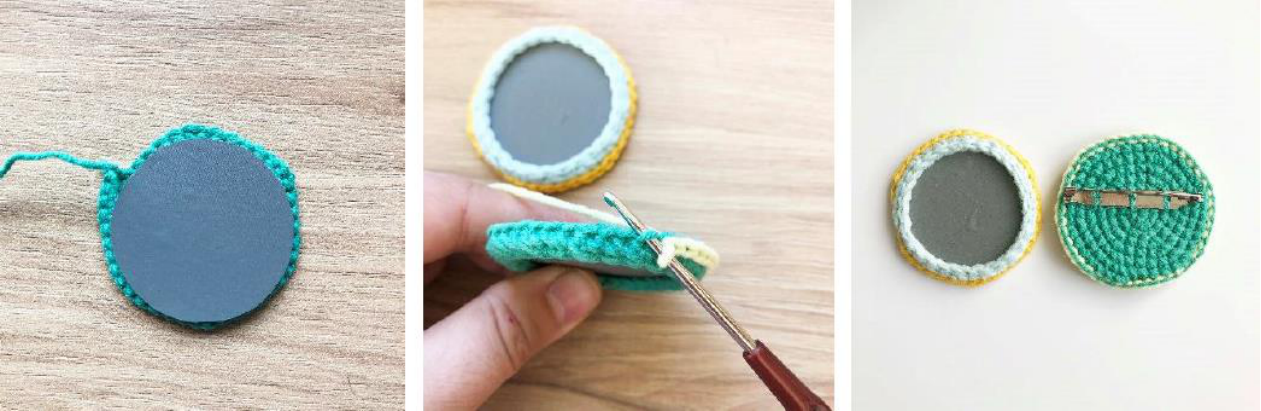
Assembling the Button:
- Fit the prepared reflective circle (with its backing) into the crocheted frame. If needed, trim the cardboard circle slightly smaller for a snug fit. Glue it securely into the frame.
- Round 8: Work through the back loop only (blo) – (Work 1 single crochet, then 1 decrease) and repeat this sequence 14 times. (28 stitches)
- Round 9: Work 1 slip stitch into each stitch around. (28 stitches)
- Cut the yarn and secure the end. Weave the tail in between the crocheted stitches.
- Using a contrasting color yarn, work slip stitches around the edge, going through the unused front loops of the stitches from Round 8.
- Cut the yarn and secure the end, weaving in the tail.
You can use this reflective piece as a standalone button for your backpack, or attach it to your new tiger keychain for extra visibility and style!
Congratulations! You have successfully completed your adorable amigurumi tiger keychain. We hope you enjoyed making it!