Crochet Your Own Cuddly Velvet Mouse: Free Chunky Amigurumi Pattern
Adorable Plush Amigurumi Mouse Crochet Pattern
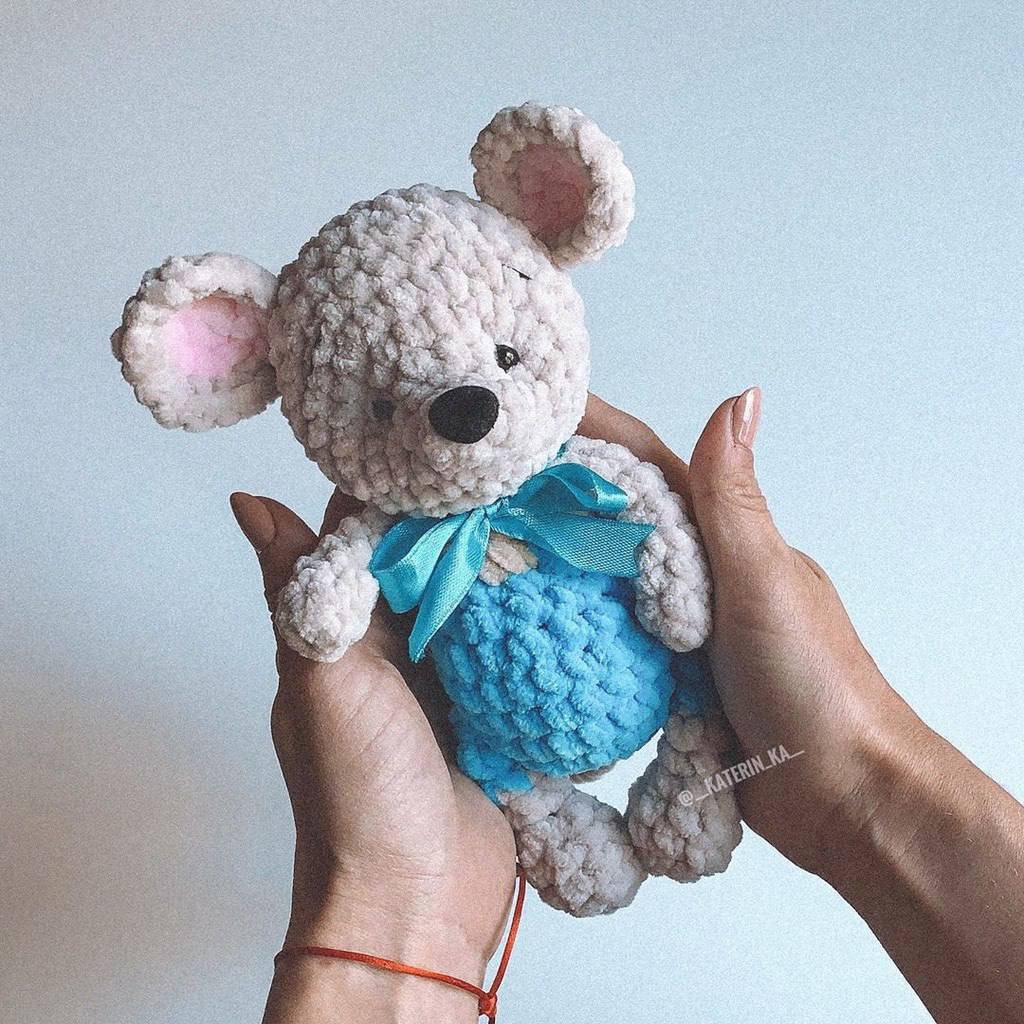
Create your own soft and cuddly plush mouse with this free step-by-step crochet pattern. Made with super bulky chenille yarn, this quick amigurumi project is perfect for beginners and experienced crocheters alike. Follow along to make a sweet plushie toy that makes a fantastic gift or craft fair best-seller!
Skill Level & Materials
Skill Level
Easy / Intermediate
Materials Needed
- Yarn: Super Bulky Velvet / Chenille Yarn (such as Himalaya Dolphin Baby or Bernat Velvet), approximately 0.5 skein (approx. 60–70 yards)
- Crochet Hook: 4.5 mm (US 7) hook
- Safety Eyes & Nose: 1 pair of safety eyes and 1 safety nose (or dark beads/embroidery)
- Embroidery Thread: Black or dark brown thread for eyebrows and face details
- Stuffing: Fiberfill stuffing
- Ribbon: Satin ribbon for embellishment
- Tools: Yarn needle, stitch marker, and scissors
Crochet Abbreviations (US Terms)
- MR: Magic Ring
- sc: single crochet
- inc: increase (2 sc in the same stitch)
- dec: decrease (sc 2 together)
- ch: chain
- sl st: slip stitch
- st(s): stitch(es)
- ( … ) * N: repeat instructions inside parentheses N times
Step-by-Step Pattern Instructions
Arms (Make 2)
Do not stuff the arms (or stuff only the bottom hand lightly).
- Round 1: 6 sc in MR (6)
- Round 2: (1 sc, inc) * 3 (9)
- Rounds 3–4: 9 sc (9) [2 rounds]
- Round 5: (1 sc, dec) * 3 (6)
- Rounds 6–9: 6 sc (6) [4 rounds]
Fold the top opening flat and crochet 3 sc through both layers to close. Fasten off and cut yarn.
Legs (Make 2)
Stuff feet lightly, leaving the top un-stuffed.
- Round 1: 6 sc in MR (6)
- Round 2: 6 inc (12)
- Rounds 3–4: 12 sc (12) [2 rounds]
- Round 5: 1 sc, 2 dec, 1 sc, 1 dec, 1 sc, 1 dec, 1 sc (8)
- Rounds 6–10: 8 sc (8) [5 rounds]
Fold the top opening flat and crochet 4 sc through both layers to close. Fasten off and cut yarn.
Body
Note: If you prefer, you can sew the legs onto the body at the end instead of joining them during Round 5.
- Round 1: 6 sc in MR (6)
- Round 2: 6 inc (12)
- Round 3: (1 sc, inc) * 6 (18)
- Round 4: (2 sc, inc) * 6 (24)
- Round 5: Joining the legs: 4 sc through first leg and body together, 7 sc, 4 sc through second leg and body together, 9 sc (24)
- Rounds 6–7: 24 sc (24) [2 rounds]
- Round 8: (2 sc, dec) * 6 (18)
- Round 9: 18 sc (18)
- Round 10: (4 sc, dec) * 3 (15)
- Round 11: Joining the arms: 1 sc, 3 sc through first arm and body together, 3 sc, 3 sc through second arm and body together, 5 sc (15)
Note: Make sure arms align symmetrically with the legs. Adjust stitch count by 1–2 stitches if needed. - Round 12: 15 sc (15)
Fasten off, leaving a long tail for sewing the head. Stuff the body firmly with fiberfill.
Head
- Round 1: 6 sc in MR (6)
- Round 2: (1 sc, inc) * 3 (9)
- Round 3: 9 sc (9)
- Round 4: (2 sc, inc) * 3 (12)
- Round 5: (1 sc, inc) * 6 (18)
- Round 6: (2 sc, inc) * 6 (24)
- Round 7: (3 sc, inc) * 6 (30)
- Round 8: (4 sc, inc) * 6 (36)
- Rounds 9–11: 36 sc (36) [3 rounds]
Insert safety eyes and safety nose between the appropriate rounds before narrowing. Stuff the head firmly as you go.
- Round 12: (4 sc, dec) * 6 (30)
- Round 13: (3 sc, dec) * 6 (24)
- Round 14: (2 sc, dec) * 6 (18)
- Round 15: (1 sc, dec) * 6 (12)
- Round 16: 6 dec (6)
Fasten off yarn, pull the opening tight, and weave in thread ends through the neck base (you can use this tail to sculpt face/eye indentations).
Ears (Make 2 Sets)
You will crochet 4 total pieces to make 2 layered ears (2 small inner pieces and 2 larger outer pieces).
Inner Ear Pieces (Make 2)
- Round 1: 6 sc in MR (6)
- Round 2: 6 inc (12)
Fasten off.
Outer Ear Pieces (Make 2)
- Round 1: 6 sc in MR (6)
- Round 2: 6 inc (12)
- Round 3: (1 sc, inc) * 5 (15)
Option: You can work Rounds 1–2 in pink yarn and switch to main gray yarn for Round 3 instead of making separate pieces.
Sew the smaller inner piece onto the larger outer piece for each ear.
Tail
- Attach main color yarn with a slip stitch directly onto the back of the body where the tail should sit.
- Chain 16 (or desired tail length).
- Turn and sl st in each chain stitch back to the body.
- Fasten off, tie a secure knot, and weave in the tail end inside the body.
Assembly & Final Touches
- Sew the head onto the stuffed body using the tail left on the body.
- Sew the assembled ears symmetrically onto the upper sides of the head.
- Perform eye sculpt/indentation using matching yarn to give the face depth.
- Using embroidery thread, embroider cute eyebrows above the eyes.
- Tie a satin ribbon nicely into a bow around the mouse’s neck.
Your plush amigurumi mouse is complete and ready to bring smiles!