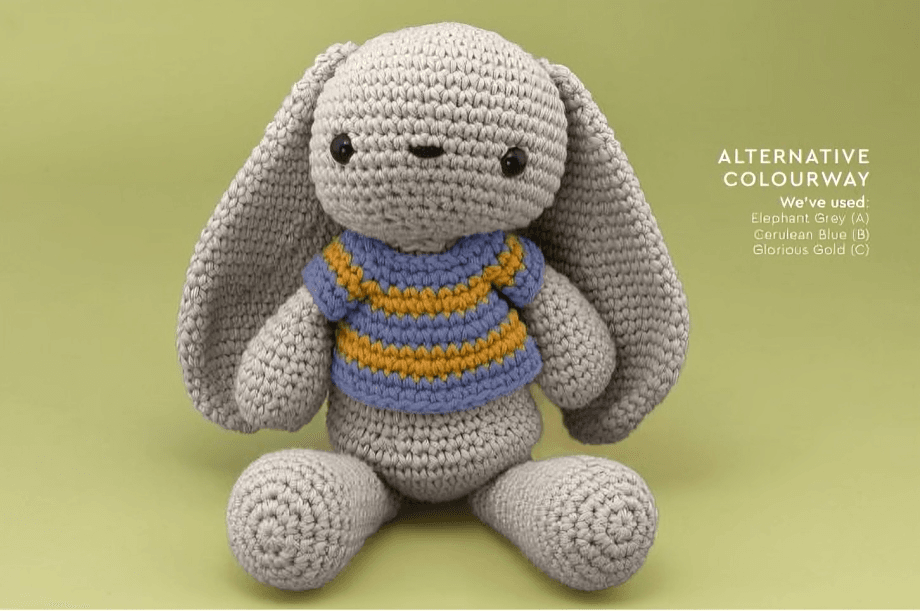
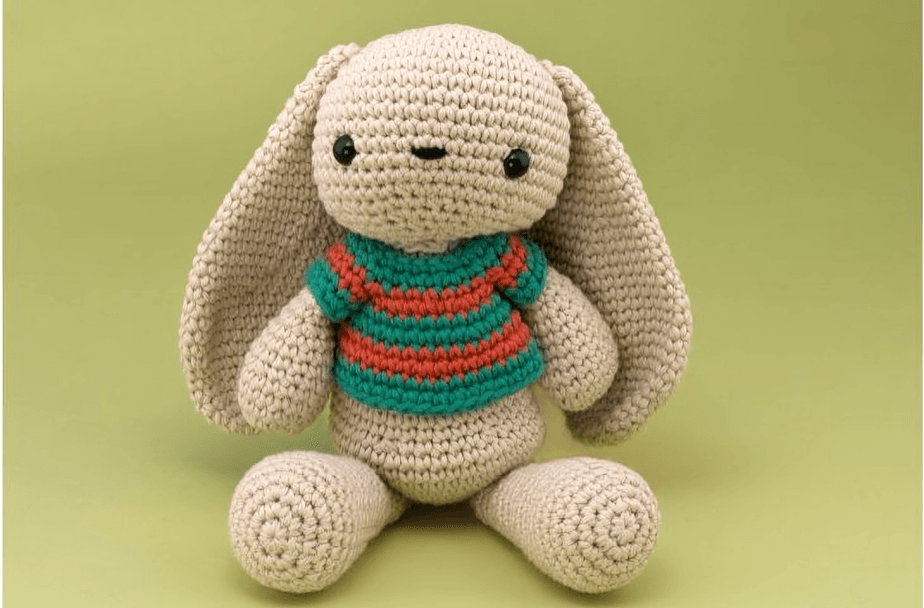
Mollie the Bunny: A Free and Adorable Crochet Pattern for Kids
Meet Mollie the Bunny, a charming and huggable crochet toy that’s perfect for kids or anyone who loves handmade plushies! This intermediate-level pattern uses soft Paintbox Yarns Cotton Aran for a durable and cuddly finish. Standing at approximately 12¼ inches (31 cm) tall, Mollie is just the right size for little hands to hold.
Whether you’re making this bunny as a gift, a nursery decoration, or a fun project to improve your crochet skills, Mollie’s sweet design and customizable colors make her a joy to create. Follow along as we break down every step in simple, beginner-friendly terms—no prior amigurumi experience needed!
Table of Contents
Materials Needed
Here’s what you’ll need to make your own Mollie the Bunny:
- Yarn:
- Vanilla Cream (A): 3 balls (50g each)
- Slate Green (B): 1 ball (50g)
- Vintage Pink (C): 1 ball (50g)
- Crochet Hook: US 7 (4.5mm)
- Safety Eyes: ½ inch (12mm)
- Toy Stuffing
- Scissors
- Yarn Needle
- Black Yarn (for the nose)
Tension (Gauge):
17 stitches and 19 rows = 4 inches (10 cm) square using a US 7 (4.5mm) hook.
Abbreviations
Here’s a quick guide to the crochet terms used in this pattern:
- ch: chain
- sc (dc): single crochet (double crochet in UK terms)
- sl st: slip stitch
- inc: increase (work 2 sc in the same stitch)
- dec: decrease (work 2 sc together)
- MR: magic ring
- st(s): stitch(es)
Step-by-Step Instructions
1. Head
(Using Yarn A – Vanilla Cream)
- Round 1: Make a magic ring, work 6 sc into it. Sl st to join. (6 sts)
- Round 2: 2 sc in each stitch around. (12 sts)
- Round 3: [1 sc, inc] around. (18 sts)
- Continue increasing following the pattern until Round 8 (48 sts).
- Rounds 9-16: Sc in each stitch around (no increases).
- Rounds 17-20: Begin decreasing to shape the head.
- Attach Safety Eyes: Place them between Rounds 14-15, 10 stitches apart.
- Make the Nose: Use black yarn to embroider a small nose between the eyes (2 stitches long).
- Stuff the head firmly before closing the final rounds.